
How to Access Missing Magnifier Tool When Marking Up iPhone Screenshots
The iPhone screenshot markup tool no longer offers magnifier tool. Here's how to access the missing magnifier tool on iPhone.
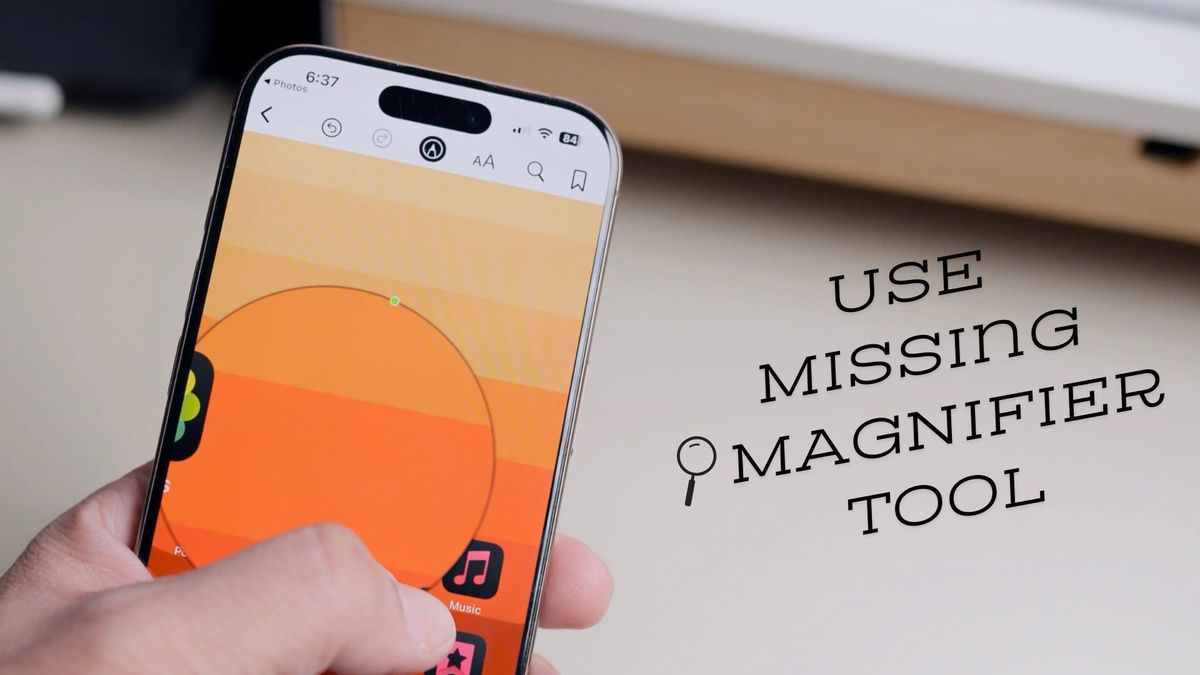
Long-term iPhone users know that the iPhone screenshot annotation toolset had a magnifier tool that let you magnify a part of a screenshot to draw attention to it. However, this magnifier tool is no longer accessible when marking up screenshots. But worry not, as there’s a hack that you can use to access the missing magnifier tool.
Access the missing magnifier markup tool for iPhone screenshots
1. First, press the Side Button and the Volume Up button to take a screenshot.
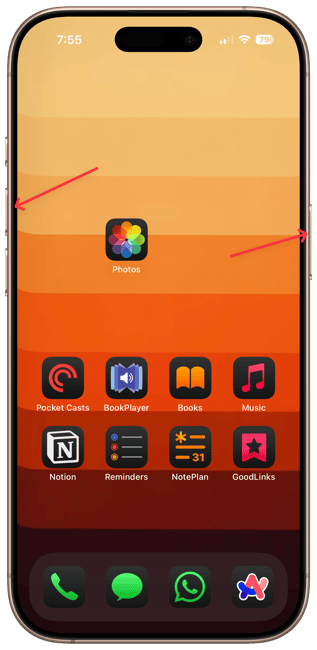
.2 Launch the Photos app and tap to open the screenshots. Now, tap on the Share button in the bottom-left corner.
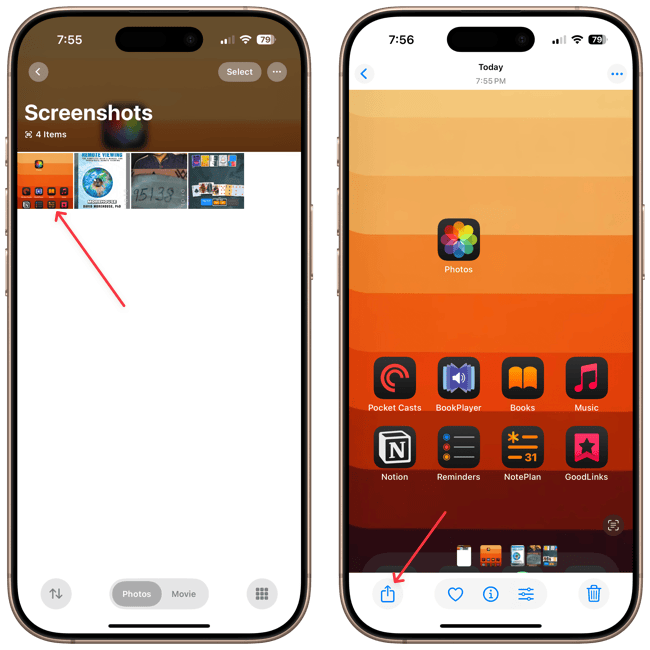
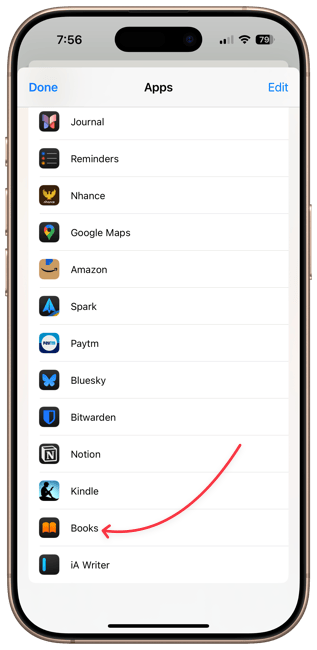
3. Scroll to the right in the quick share app suggestions list and tap the three-dot button.
4. Scroll to find the Books app and tap to share the screenshot. The screenshot will now open in the Books app on your iPhone.
5. Tap the markup tool at the top and then the plus (+) button at the bottom right corner.
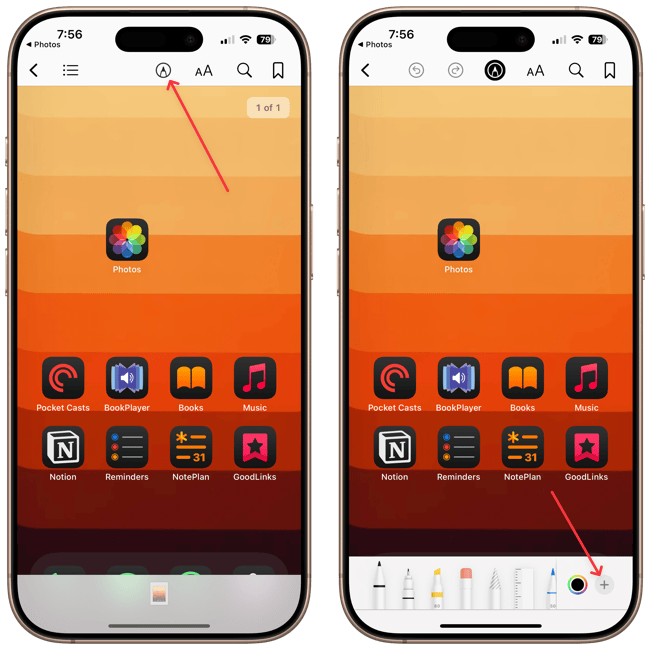
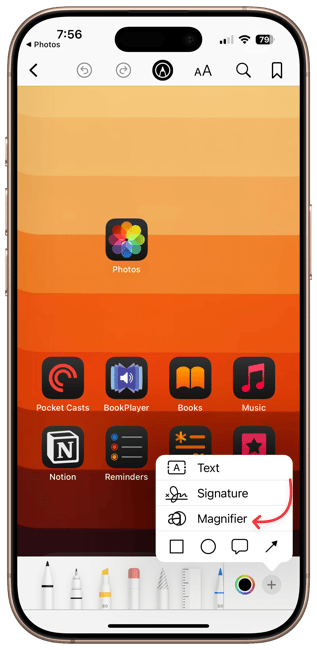
6. You will see the Magnifier tool is available. Tap to add it to the screenshot.
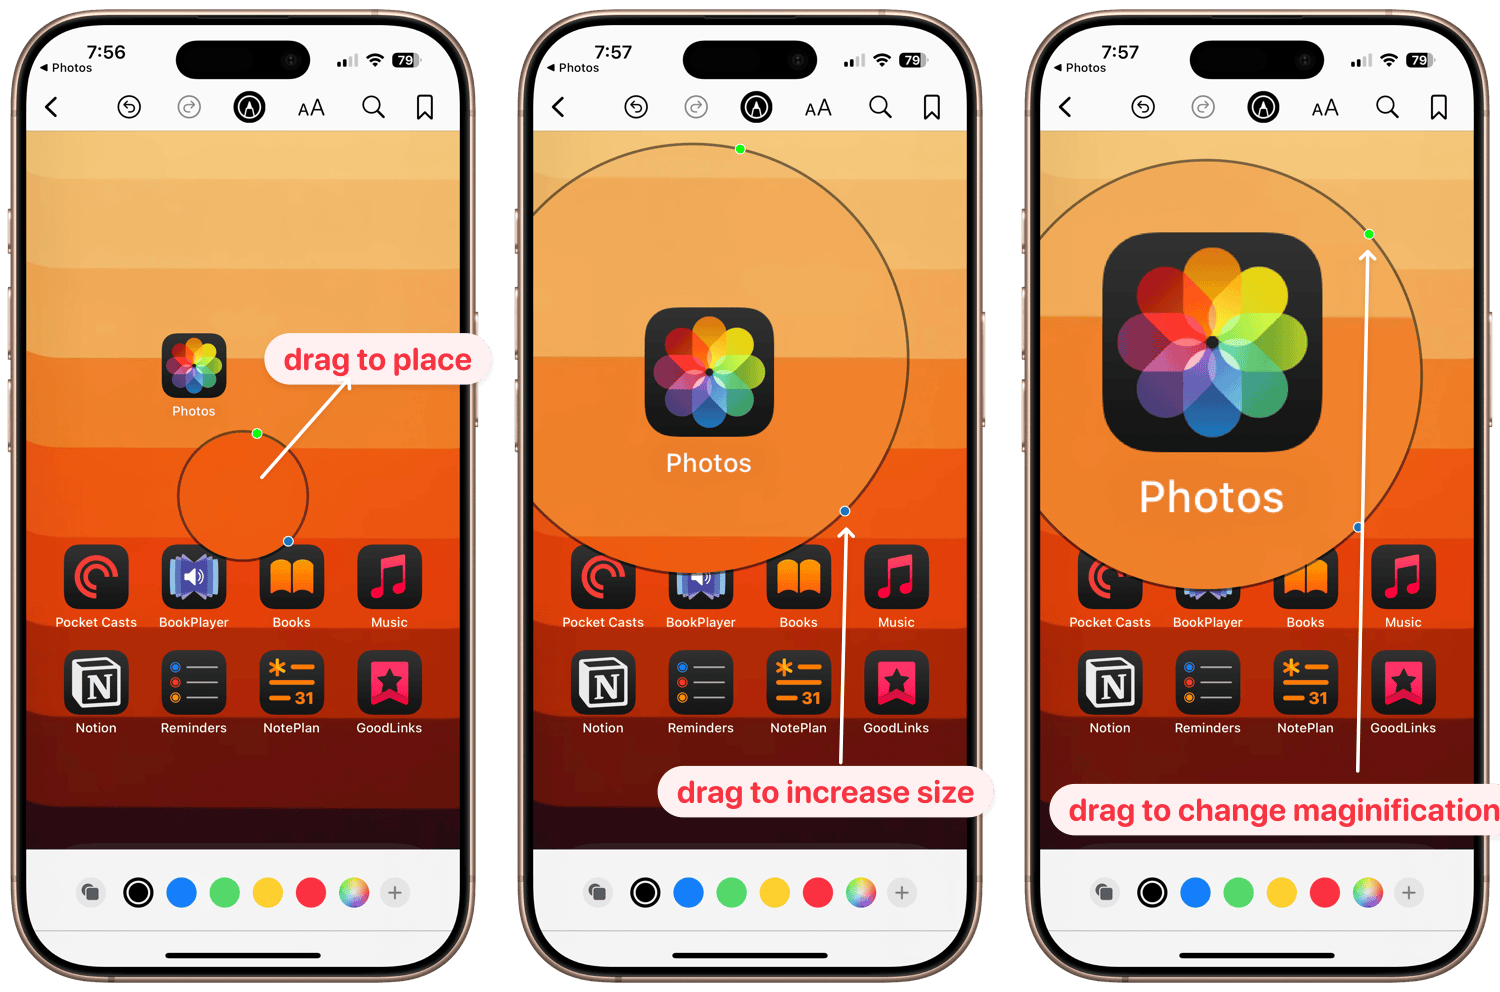
7. You can use your finger to drag and place it where you want, tap and drag on the blue dot to increase the tool size, and tap and drag on the green dot to increase or decrease the magnification.
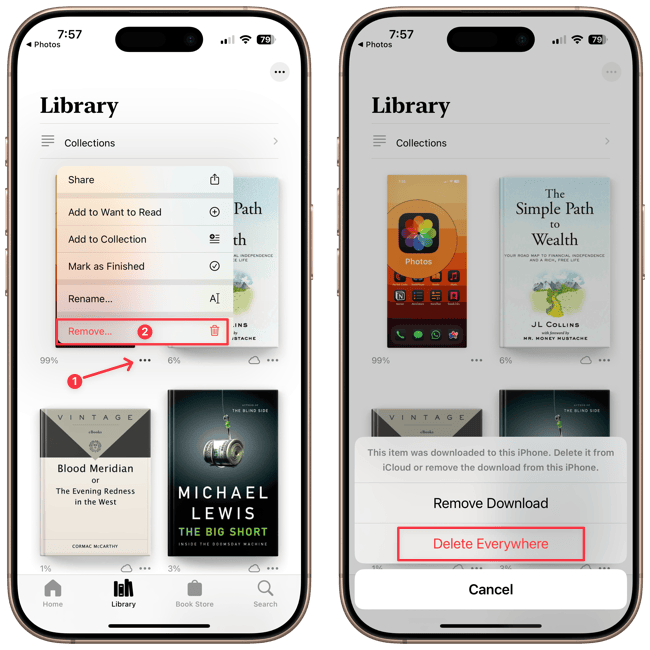
8. After you make the edits, tap the back arrow in the top-left corner. Now, tap the three-dot menu below the screenshot and use the Share button to copy, share, or save the screenshot.
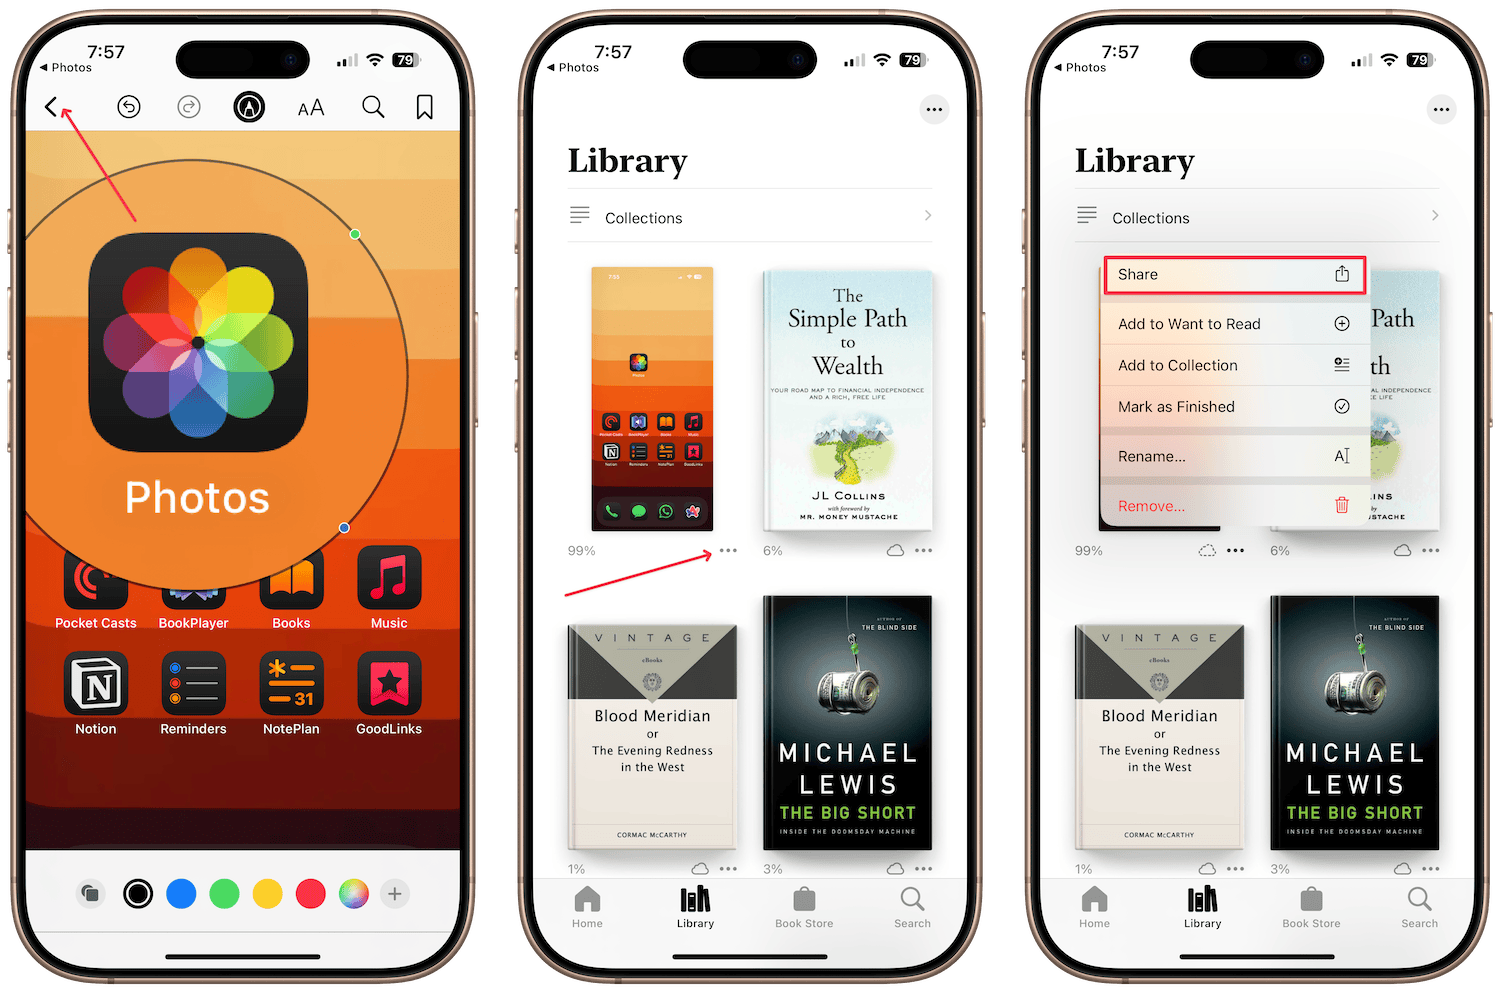
9. You can use the same three-dot menu to delete the screenshot from the Books app.
And that is how you can access the missing magnifier tool when marking up iPhone screenshots. Before you go, click here to learn how to take long scrolling screenshots on your iPhone.


