How to Password Protect Pages Document on Mac

Apple Pages app is a document editor that you get for free on your Mac. It’s a good writing app for anyone looking for a traditional word processor. I also love that Pages comes with several enhanced features such as document history, the ability to format ebooks, and more. One of those features is the ability to password-protect your Pages document. If you want to ensure that any sensitive information in a Pages document is safe from prying eyes, you can use this feature. Here is how to password protect Pages documents on Mac.
Password protect Pages document on Mac
Apple has made it easy to password protect your Pages document on Mac. You can enable a password in the Pages document with just a few clicks.
1. Launch the Pages app and open the document you want to lock with a password.
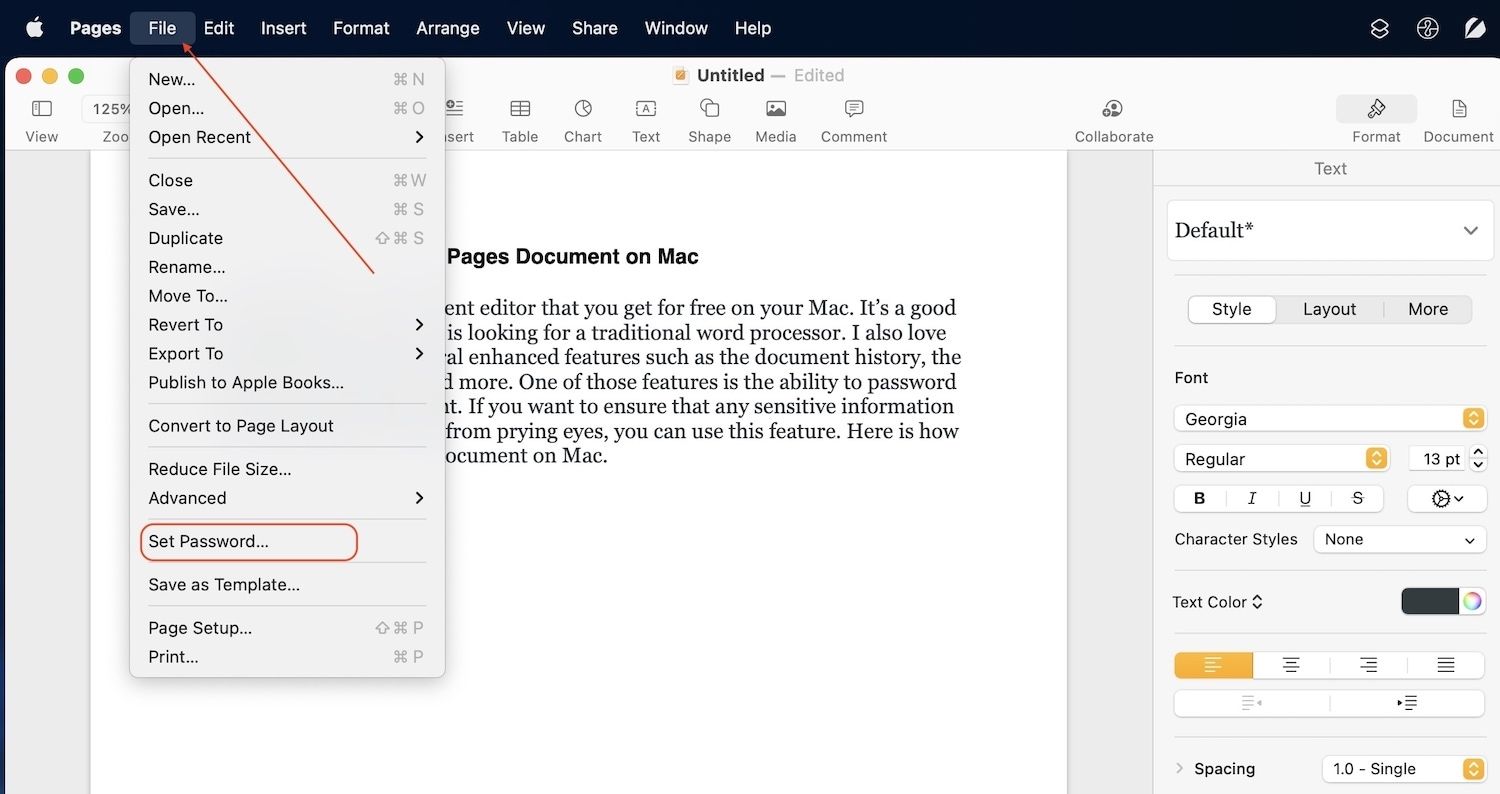
2. Go to the File menu and click on the Set Password option.
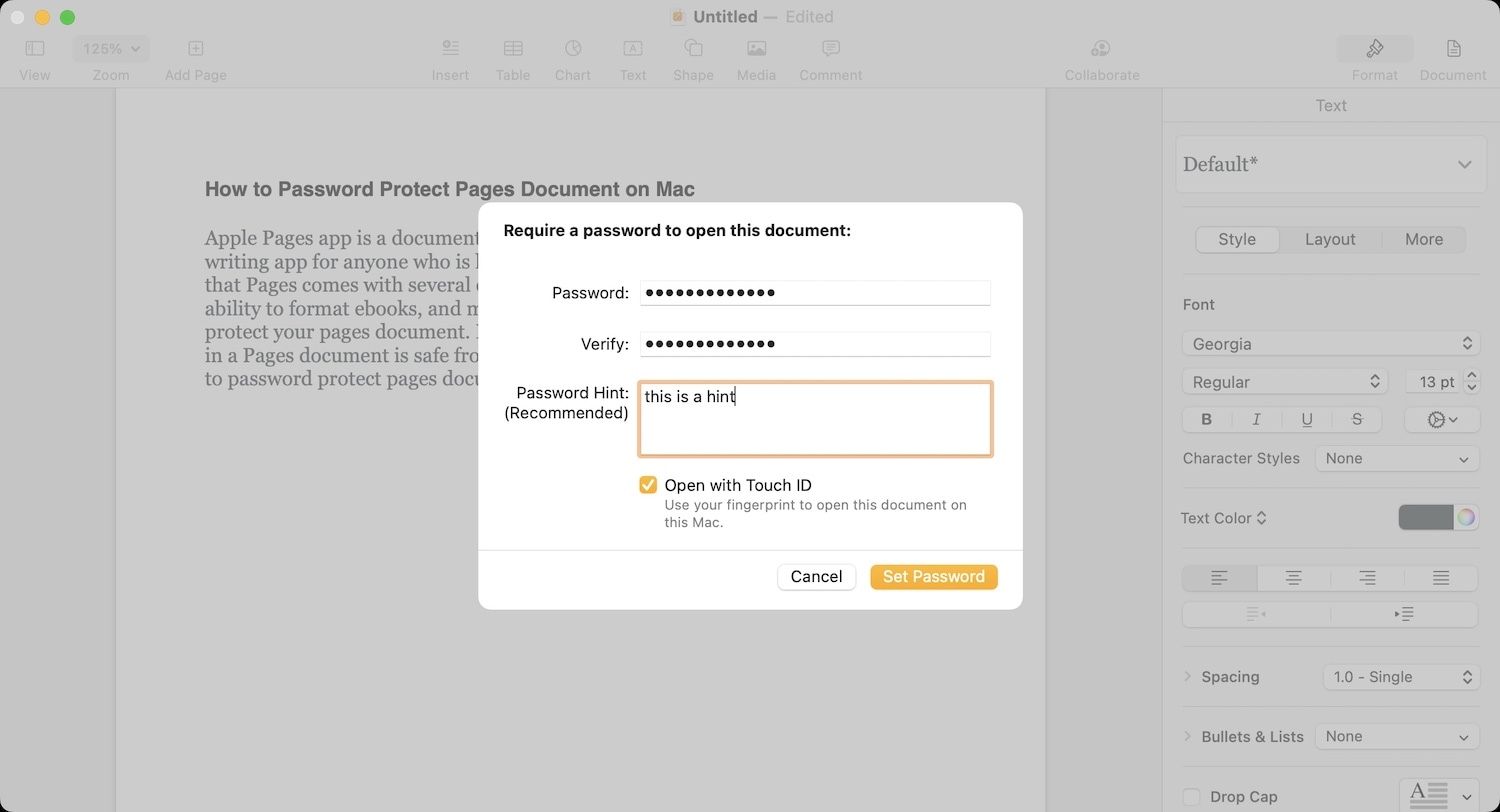
3. Enter the password in the first field and then verify with the same password. Add a hint if you forget passwords easily.
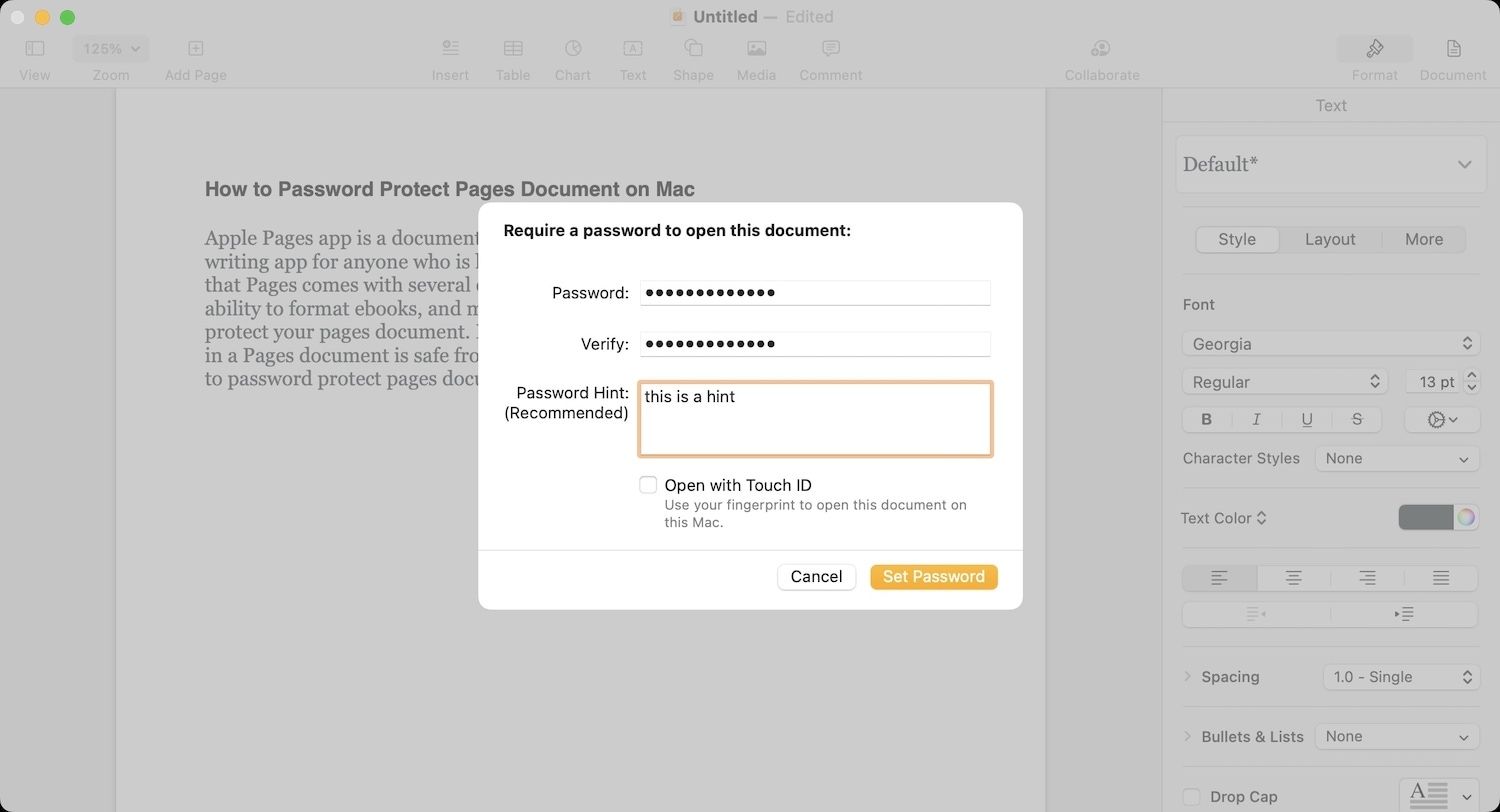
3. Keep the checkbox next to Open with Touch ID enabled if you want to use Touch ID to unlock this document. If not, disable the checkbox. Click on the Set Password button to add password protection.
How to unlock password protect pages document on Mac
To unlock a password-protected Pages document on Mac, double click on the document to open it. If you have turned on the Touch ID authentication, simply place your finger on the Touch ID to unlock and open the document.

If you have not enabled Touch ID, you will get a field to enter your password. Enter the document password and click on Ok to unlock and open the document.

How to recover a forgotten pages document password
If you have forgotten the Pages document password, worry not, as Apple keeps a copy of the password in the Keychain Access. You can recover the password as long as you remember the account password for your Mac.
1. Use Spotlight (CMD+Space) and search for Keychain Access. Hit enter to open the app.

2. Search for the iWork Document Password using the search bar in the top-right corner. If you see multiple entries, then check the file name of the Pages document. Since I didn’t name the file, it’s showing as Untitled for me.

3. Double-click on the correct document name and then enable the checkbox next to Show password.
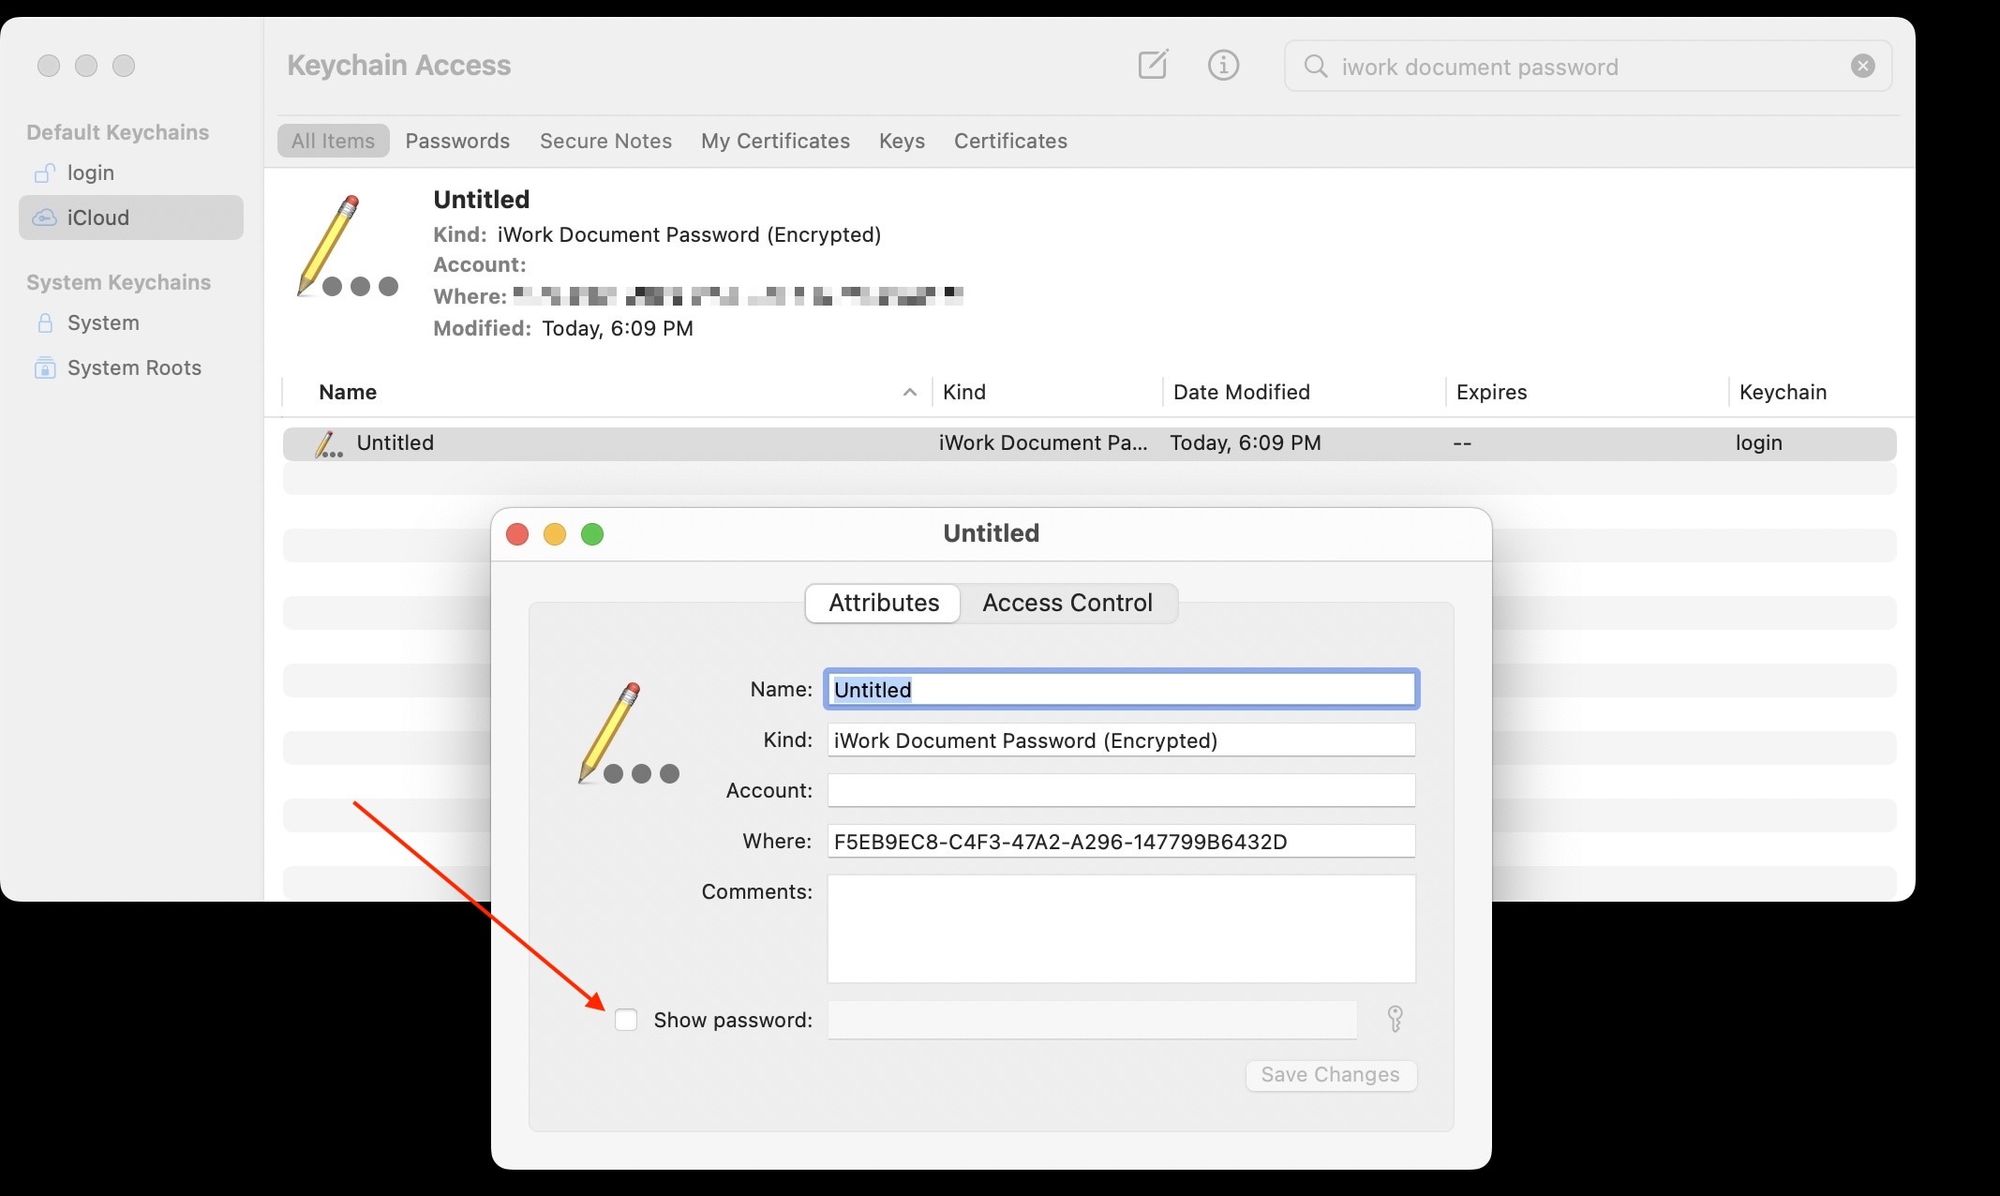
4. Enter your account password to unlock the Keychain Access and click on Allow.
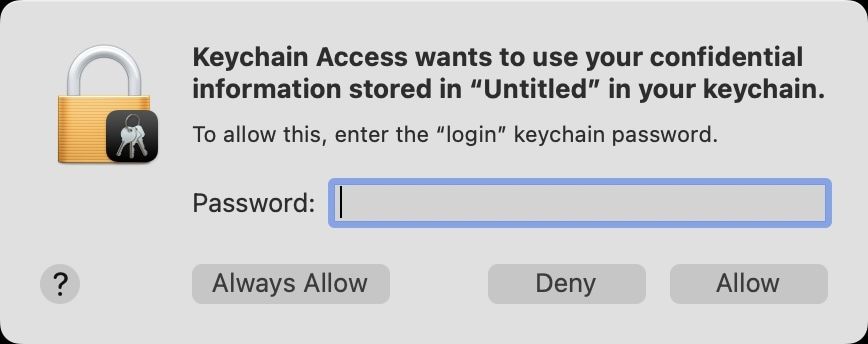
Now, the Keychain Access will show you the password, which you can use to unlock the Apple Pages document.
Guide to locking and unlocking Apple Pages document: final thoughts
Apple has made it easy to protect your data by allowing users to lock apps on iPhone, Apple Pages documents, Apple Notes, along with Keynote and Numbers documents. If you want to protect sensitive information, make sure to make use of this feature to password protect your documents. Also, make sure to follow us on Twitter to get notifications when new articles are published.


![Top 10 Mac mini and Mac Studio Accessories [2025]](/content/images/size/w750/2025/06/mac-studio-and-mac-mini-accessories.jpg)
Comments ()