
Siri Shortcuts Guide: Creating Your First Shortcut
I recently published an article detailing the basics of Siri Shortcuts for people who have no idea about this new feature which was released with iOS 12. In that article, I said that I am going to make an entire series on Siri Shortcuts as it has the power to change how we interact with, and use our iPhones. If you want to automate your iOS devices to get things done, and save time while doing it, you should follow this series. This is the second article in this series and here we will learn the basics of the Shortcuts app by creating our own first shortcut. So, if you are willing to invest time so that you can reap the benefits later, follow along as we go through this journey of creating our first shortcut:
Learning the Shortcuts App by Creating Our First Shortcut
Before we start creating our first shortcut, if you have not already done so, I suggest that you click on the link to read the first article in this series where I explained some of the basic UI elements of the Shortcuts app including shortcuts, actions, gallery, and library. Once you are familiar with the UI elements, proceed with the article:
Creating Your First Shortcut: What Will You Learn?
In this article, we will start with a simple shortcut which involves just a few actions. While creating this shortcut, you will learn the following things:
- Navigating the Actions panel to find the right actions
- Adding actions to create a shortcut
- Customizing a shortcut
- Adding Siri commands to Shortcut
- Accessing shortcut from Today View Widget
- Adding a shortcut to the home screen
Creating Your First Shortcut: Good Night Shortcut
As I said, we will be creating a very simple shortcut for this tutorial. However, it will be enough to teach you all the above-mentioned steps. We will be creating a shortcut which I like to call the “Good Night” shortcut. When executed, it will execute the following actions:
- Turn on do not disturb or DND mode
- Set Alarms
- Set brightness to minimum
- Set volume to maximum
- Set low power mode on
As you can see, the “Good Night” shortcut is executing five commands here. I used to manually perform these actions every night before I went to sleep. However, with this shortcut in place, now I can execute all these actions with a tap or my voice. So, let’s see how we can create it, shall we?
Creating the Good Night Shortcut
I hope that by now you have downloaded and installed the Shortcuts app. If by any chance you have not done so, click here to install it or just search for Shortcuts in the App Store.
- Launch the shortcut app and you will be greeted by the empty Library page with a big “Create Shortcut” button at the top. Tap on it and then you should see the dashboard where we will create the shortcut.
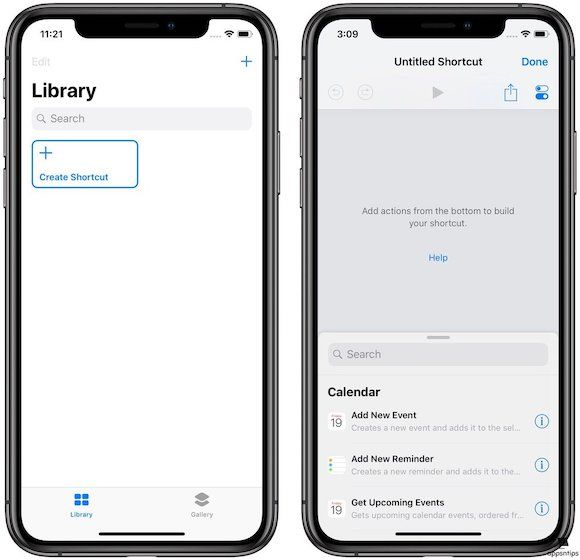
- As you can see, there are a lot of things going on here but don’t worry, we are going to go through everything step-by-step. If you read the first article, you will know that a shortcut is just a collection of actions. We also know that we are going to use five actions to create our “Good Night” shortcut. Now, all we need to do is add those actions to our shortcut dashboard.
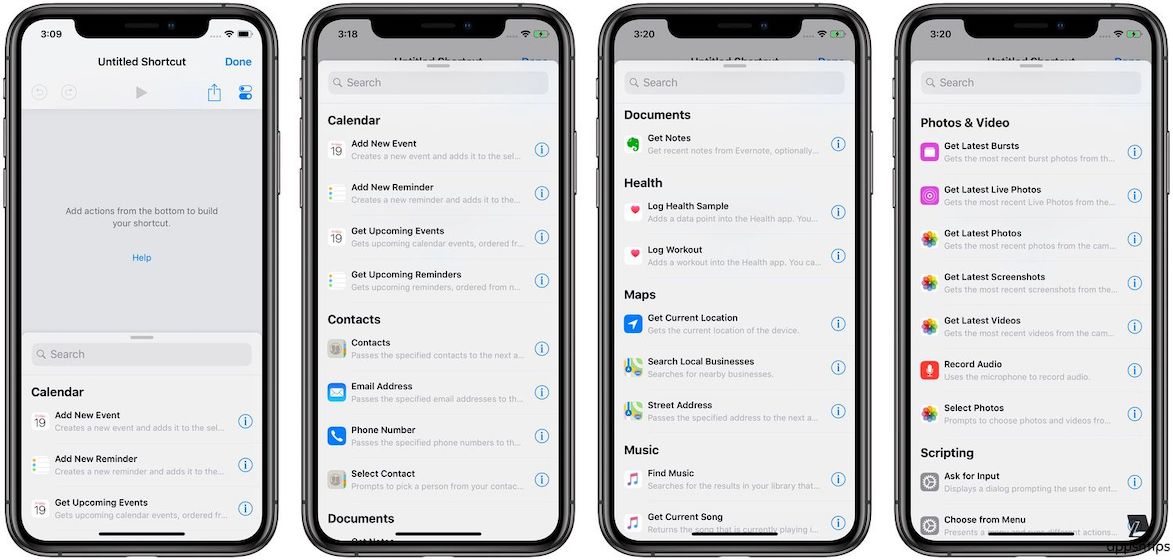
If you take a look at the dashboard, you will see that there’s a half-open page with a search bar at the top. That is the action panel which hosts all the actions that can be used. By default, it shows you the suggested actions which it things you are going to use the most. You can swipe up the page to see all the suggested actions if you want to.
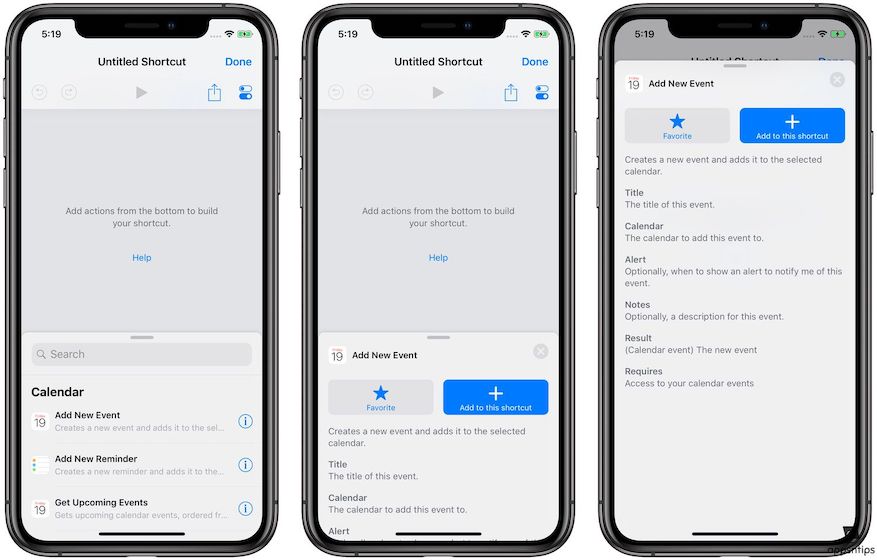
Note: Anatomy of An Action
Before we proceed further, I would like to explain actions in a little detail here. If you want to know what any action can do, just tap on the ⓘ button next to its name. Here, you can see the details about that particular cation and add it to your favorite if you know that you are going to use it often. When you are exploring the Shortcuts app to build your own shortcuts, you will find this information quite useful. Okay, let’s continue with our article.
- But we are not interested in suggested actions as we already know which actions we are going to use. To get to the actions you need, just tap on the search bar and it will reveal all the actions that Shortcuts app supports. There are more than 300 of them and the number is only increasing. You can also scroll down here to discover and play with these actions.
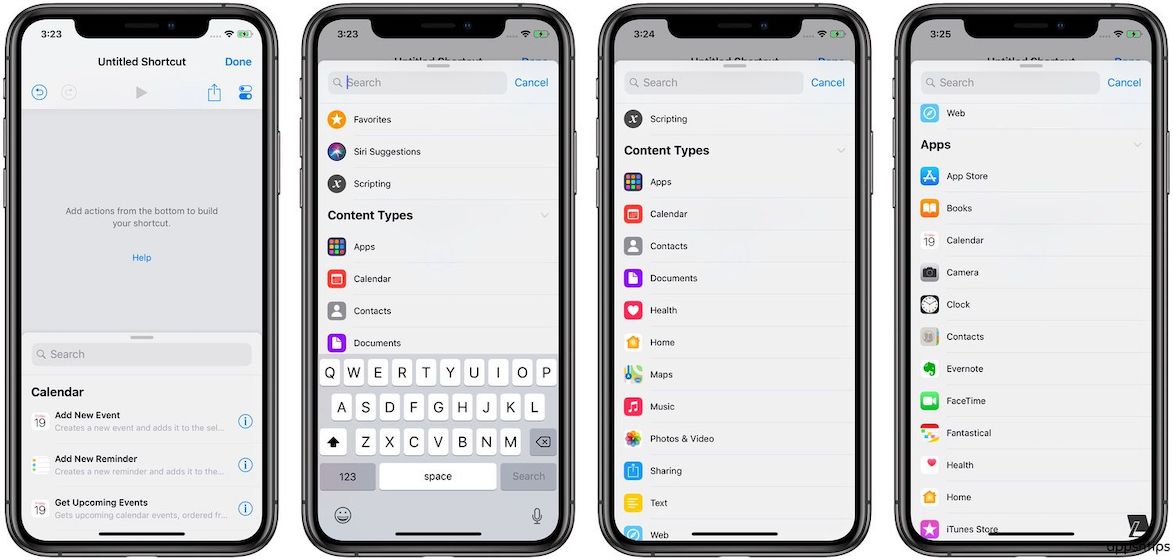
The actions are organized into two main categories; content types and apps. There’s also Favorites, Siri Suggestions, and Scripting. Scripting is a bit advanced so we will learn it in future articles and you already know about Siri Suggestions (first article). Favorites is pretty self-explanatory as it’s the place where your favorite marked actions can be found.
- We have two approaches to build our “Good Night” shortcut. We can either scour the actions panel to look for our actions or we can just search for them. Since we already have an idea about the actions we are going to use, let’s just search for it. Let’s start with the first action which is activating DND mode. As you can see, as I typed “Do not dis”, I was presented with the action I want to use. To add this action to our dashboard, we will just tap on it. Also, Since we want to turn it on, we will flick the switch on.

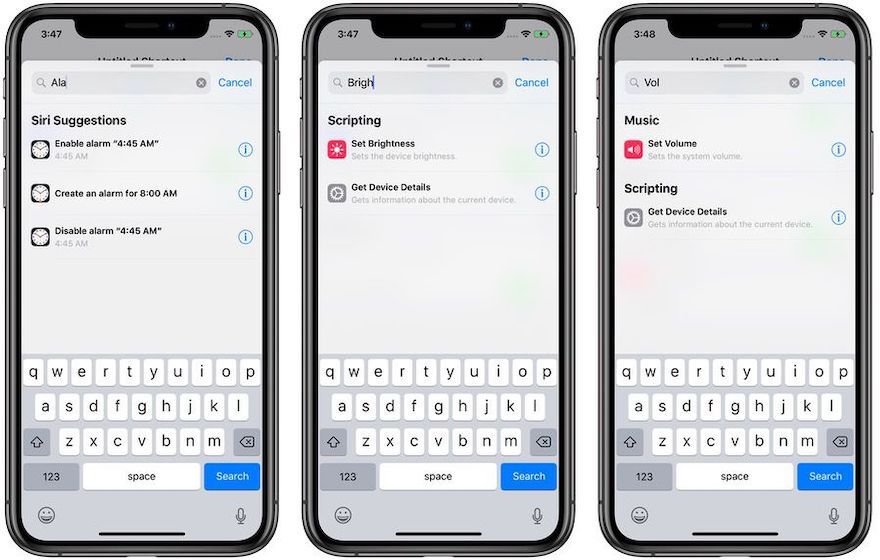
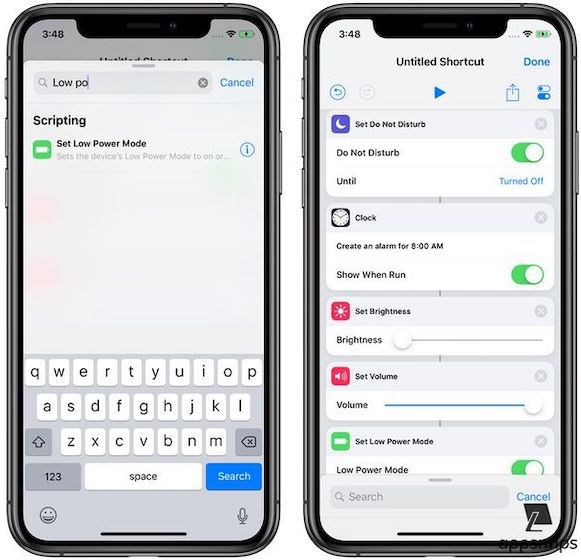
- Similarly, search for the other four actions and tap on them to add them to your shortcut dashboard (see picture below for more clarity). Now that we have added our actions, your shortcut should a lot like mine.
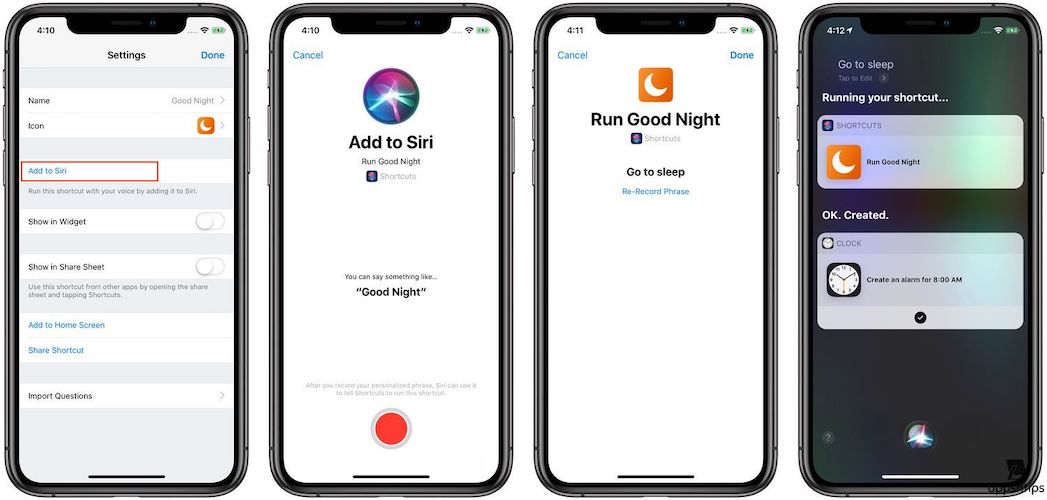
From here, if you want to make sure that your shortcut is running without a hitch, you can tap on the play button to check its results.
Note: Using Alarms Actions
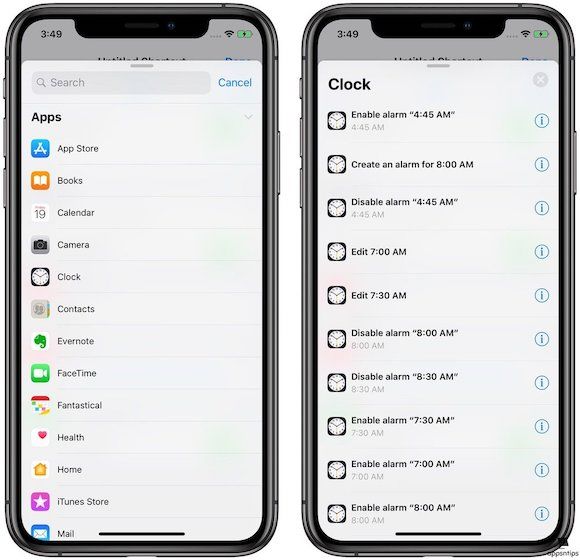
When searching for the alarms actions, all of you will find different timing options. This is because Shortcuts take into account all the alarms you have previously added and used and gives you options to either enable them, disable them, or create them. If you want to see the full list of alarm actions, tap on Clock which is housed in the App categories of the Action panel. This is just temporary, as, in the latest developer beta version of Shortcuts we gain the ability to set the time ourselves which will make this action much easier. I will update the article, as soon as that feature is available to the public. Till then, you will have to use this action as I showed.
Editing Shortcut and Adding it to Siri, Home Screen, and Today View Widget
Here, we will learn to edit our shortcut to differentiate it from other shortcuts that we have created. If you don’t edit your shortcut after creating it, by default, it will show as an untitled shortcut in your library and we don’t want that.
Editing a Shortcut
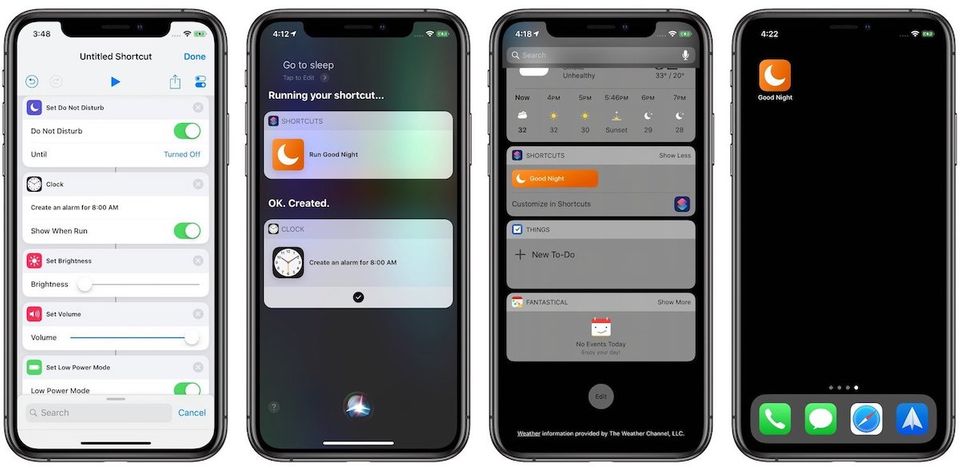
To edit a shortcut, tap on the three-dot menu. Here, as you can see, we have a ton of options. You can name it by tapping on the name field and change its icons and color by tapping on the Icon field. Let’s name it “Good Night” as we started with it and change its icon and color.
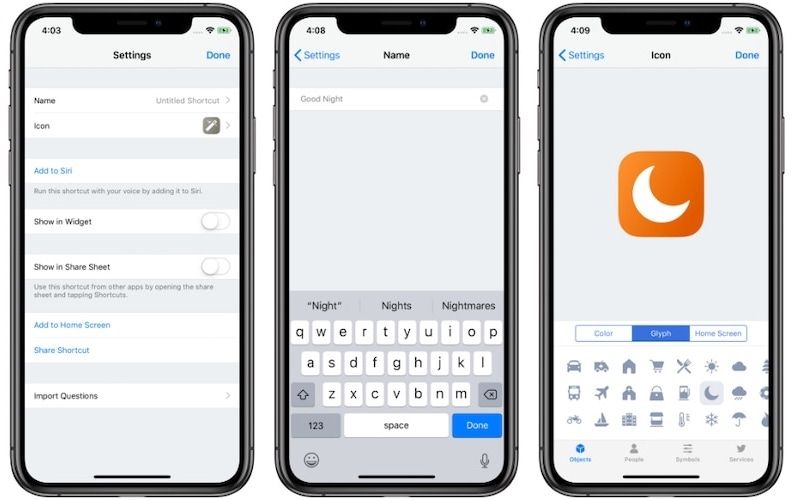
Adding the Siri Phrase to Shortcut
Now that we have renamed our shortcut and set an icon for it, we can get onto add a Siri Phrase. Tap on “Add to Siri” and then tap on the red button to record your phrase. I am using the phrase “Go to sleep” but you can use whatever you want. Once you have recorded your phrase, you can activate this shortcut by just repeating the same phrase to Siri as shown in the picture below.
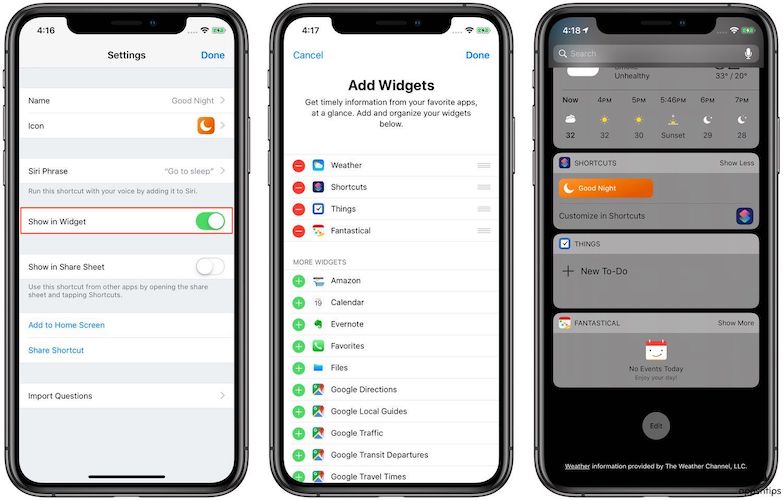
Showing Shortcut in Today View Widget
If you want the shortcut to be shown in the Today View widget just enable the “Show in Widget toggle”. Of course, you will need to add Shortcuts to your widget area. Once you have done that, it should show in your widget area.
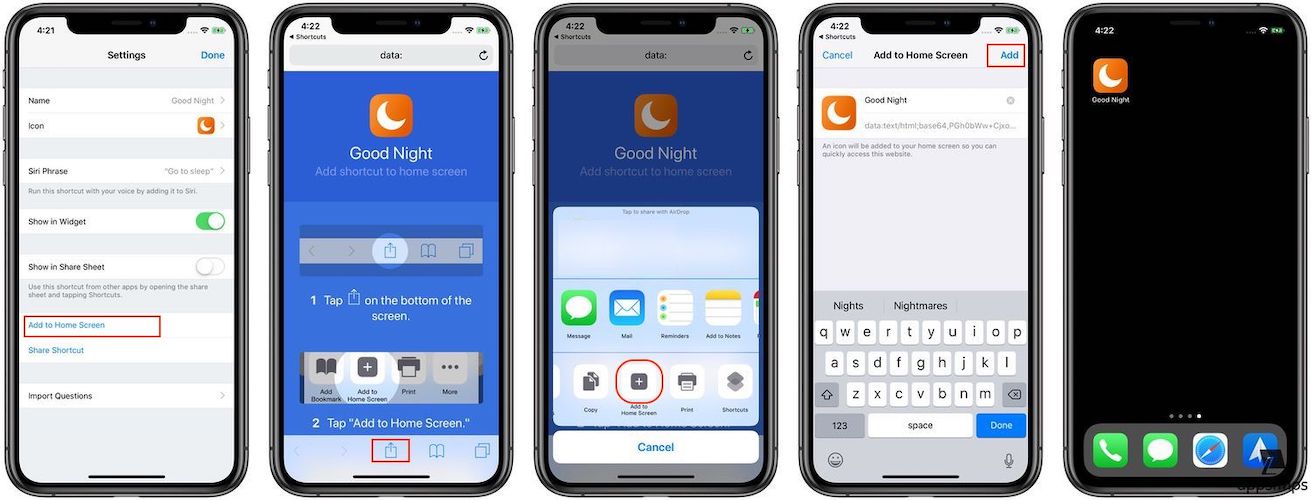
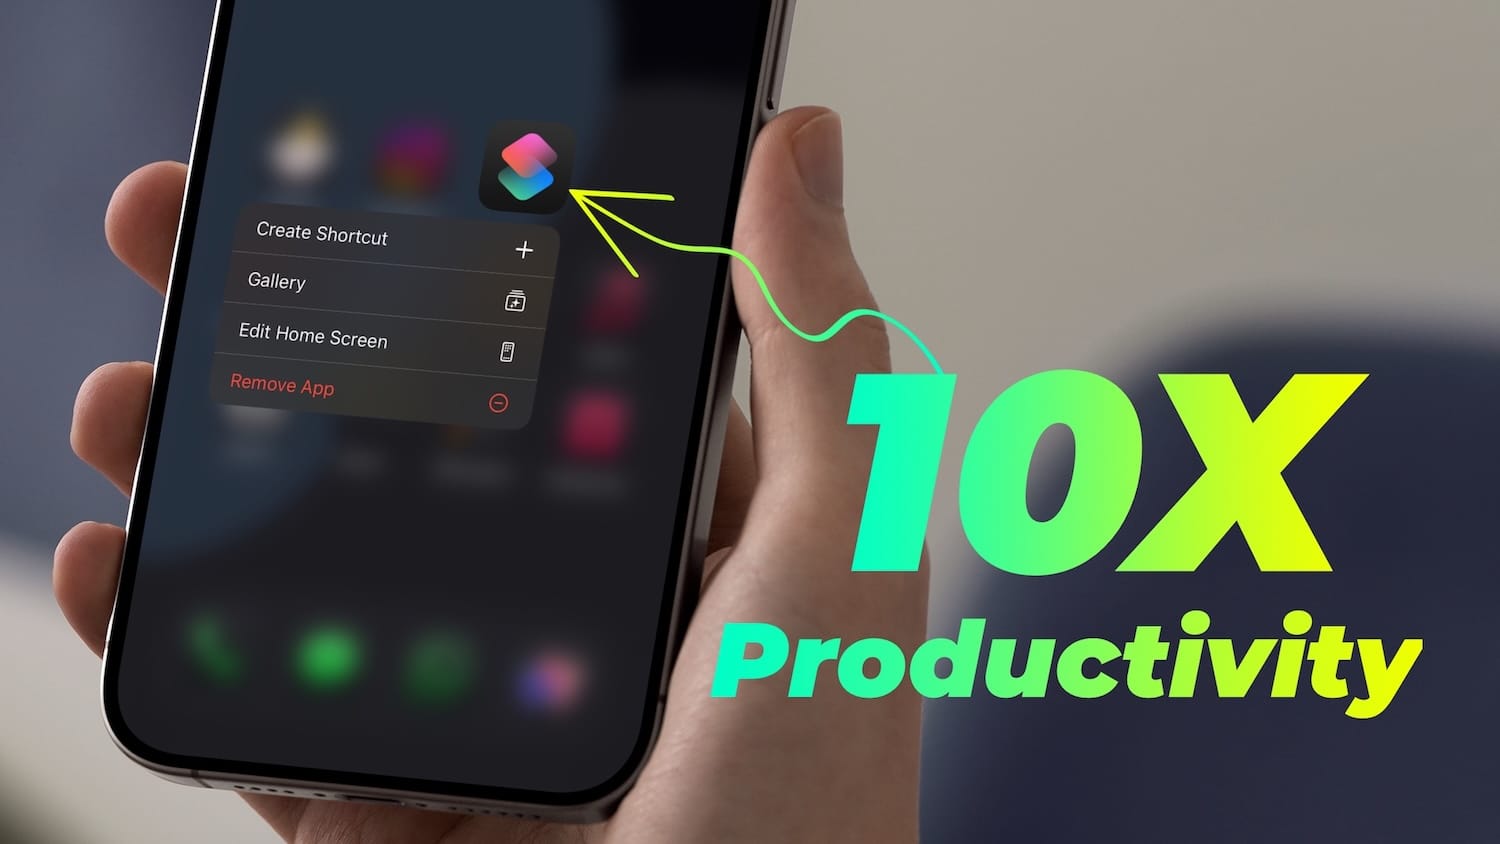
Adding Shortcut to Home Screen
It is pretty easy to add a shortcut to your Home Screen. Just tap on the “Add to Home Screen” option and it will show you how you can do that. Basically, you need to tap on the share button and then scroll to find the “Add to Home Screen” button. On the next page, just tap on the Add button to add it to your home screen.
Creating Your First Shortcut: Final Thoughts
I hope you enjoyed learning to create your first shortcut. This is one of the simplest shortcuts one can create using the Shortcuts app and we have not even scratched the surface. Still, you can see, this easy shortcut saves me a couple of seconds every night and makes that task so much easier. If you find this to be too simple, don’t worry, we will be progressing towards more complex and hard shortcuts as the time passes. Until then, comment below if you enjoyed this article or want to ask any question.


Comments ()