5 Quick Mac Tips That Will Save You Hours
Save time on macOS with 5 quick Mac tips that boost productivity, speed up workflows, and help you get more done in less time.

I have been a Mac user for over 10 years, and I still learn something new from time to time. In this guide, I will show you 5 quick Mac tips that will save you hours. No matter how long you have been a Mac user, I bet you will learn something new today.
My favorite time-saving macOS tips
Table of Contents
- 1. Keep files downloaded on iCloud
- 2. Perform quick image operations
- 3. Use Show Inspector
- 4. Utilize Mac Path Bar
- 5. Batch rename files
1. Keep files downloaded on iCloud
macOS has a handy feature that offloads unused iCloud Drive files to free up storage space on your Mac. However, this can become somewhat annoying if you have to download a file to work on it. And what if you don’t have an active internet connection?
This is where the iCloud Drive’s Keep Downloaded feature is handy. If there’s a file or folder that you want to keep permanently on your Mac, you can right-click it and select Keep Downloaded.
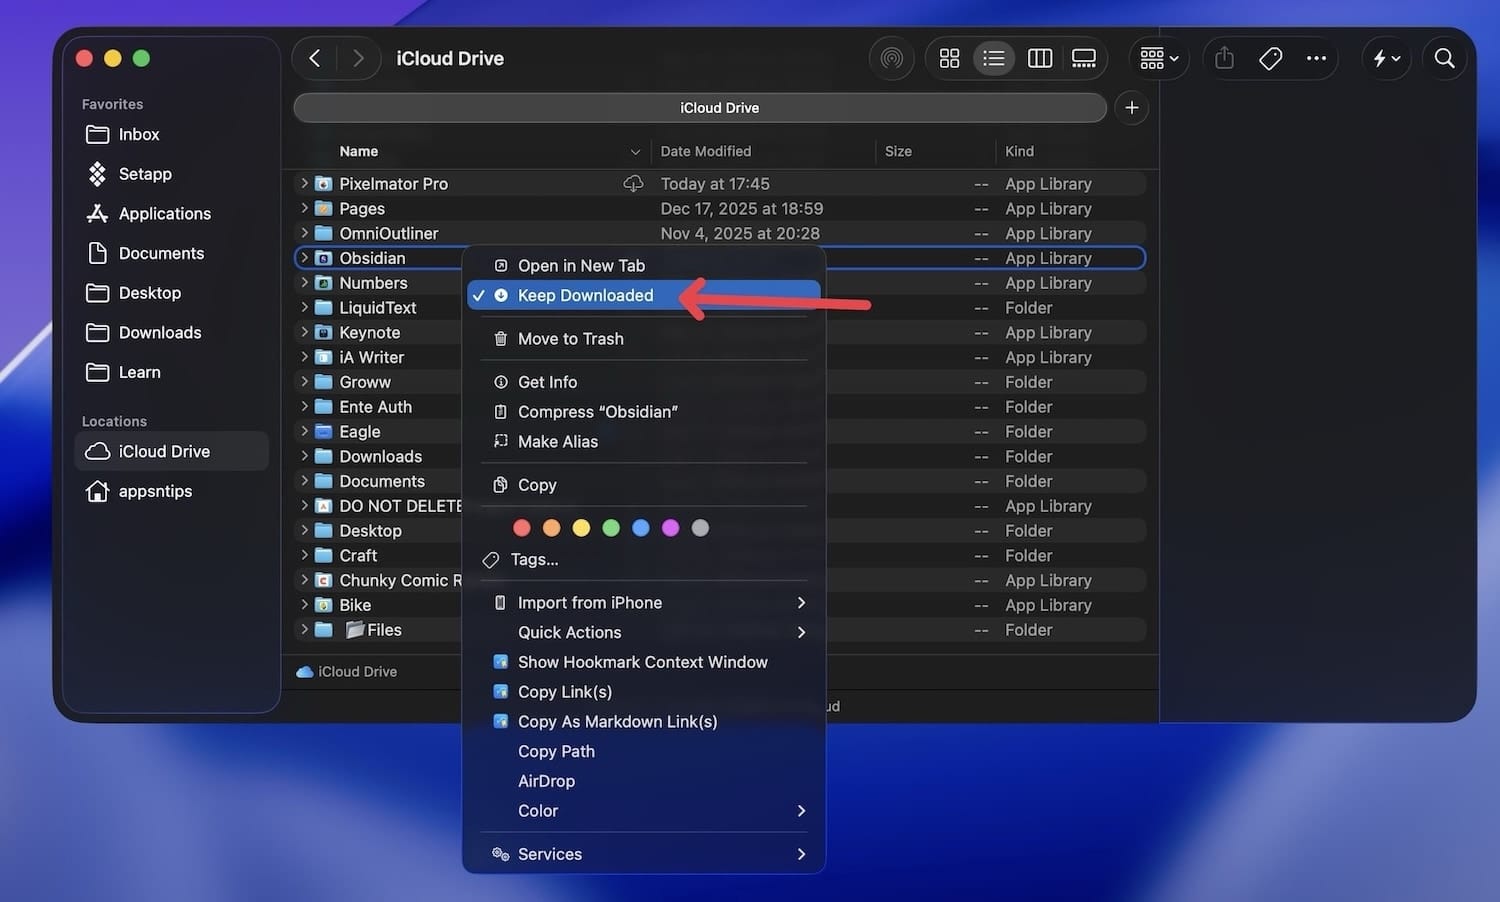
macOS will now keep these files downloaded on your Mac, saving you precious time.
2. Perform quick image operations
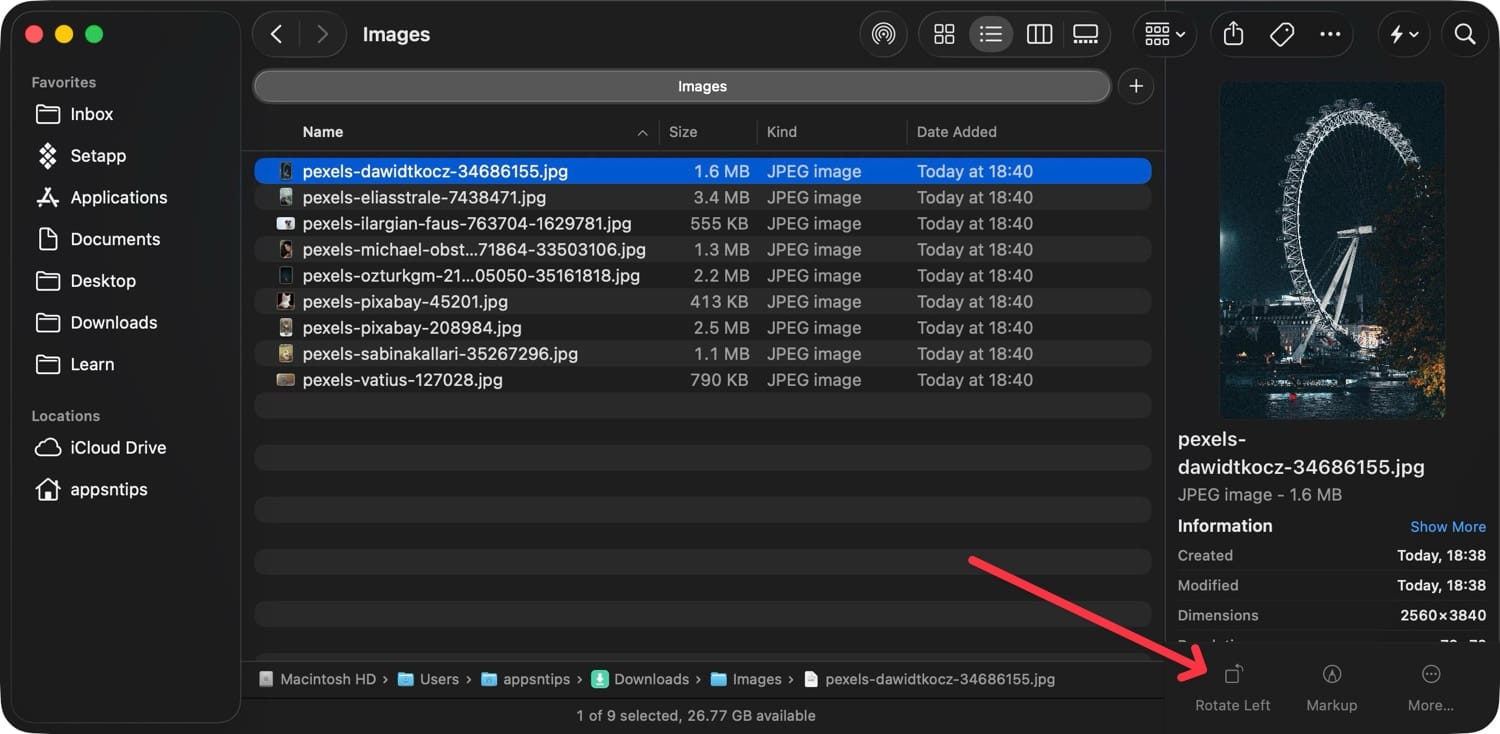
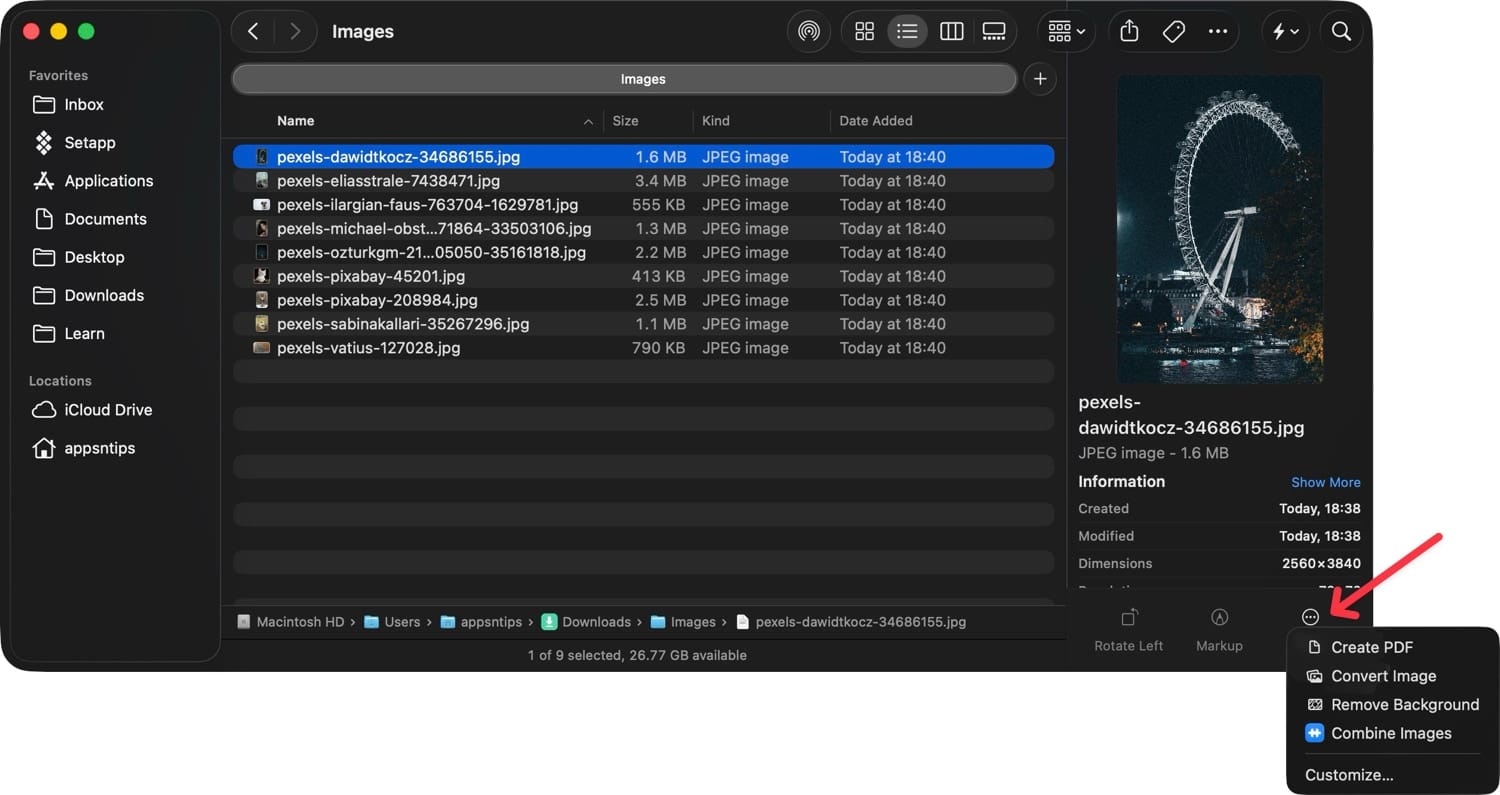
Many people don’t realize this, but macOS Finder includes built-in image tools that let you quickly rotate images, convert them to different formats, and even remove image backgrounds without using a photo editor.
You can access these features in two ways. With Finder open, select the photo you want to rotate or convert to a different format. If it’s not already open, hit the keyboard shortcut Command+Shift+P (⌘⇧P) to open the preview window or go to the View menu and and click on Show Preview.

From here, you can use the rotate left button to rotate the image.
To access other tools, click the three-dot menu. You can create a PDF from an image, convert the file format, or even remove the background.
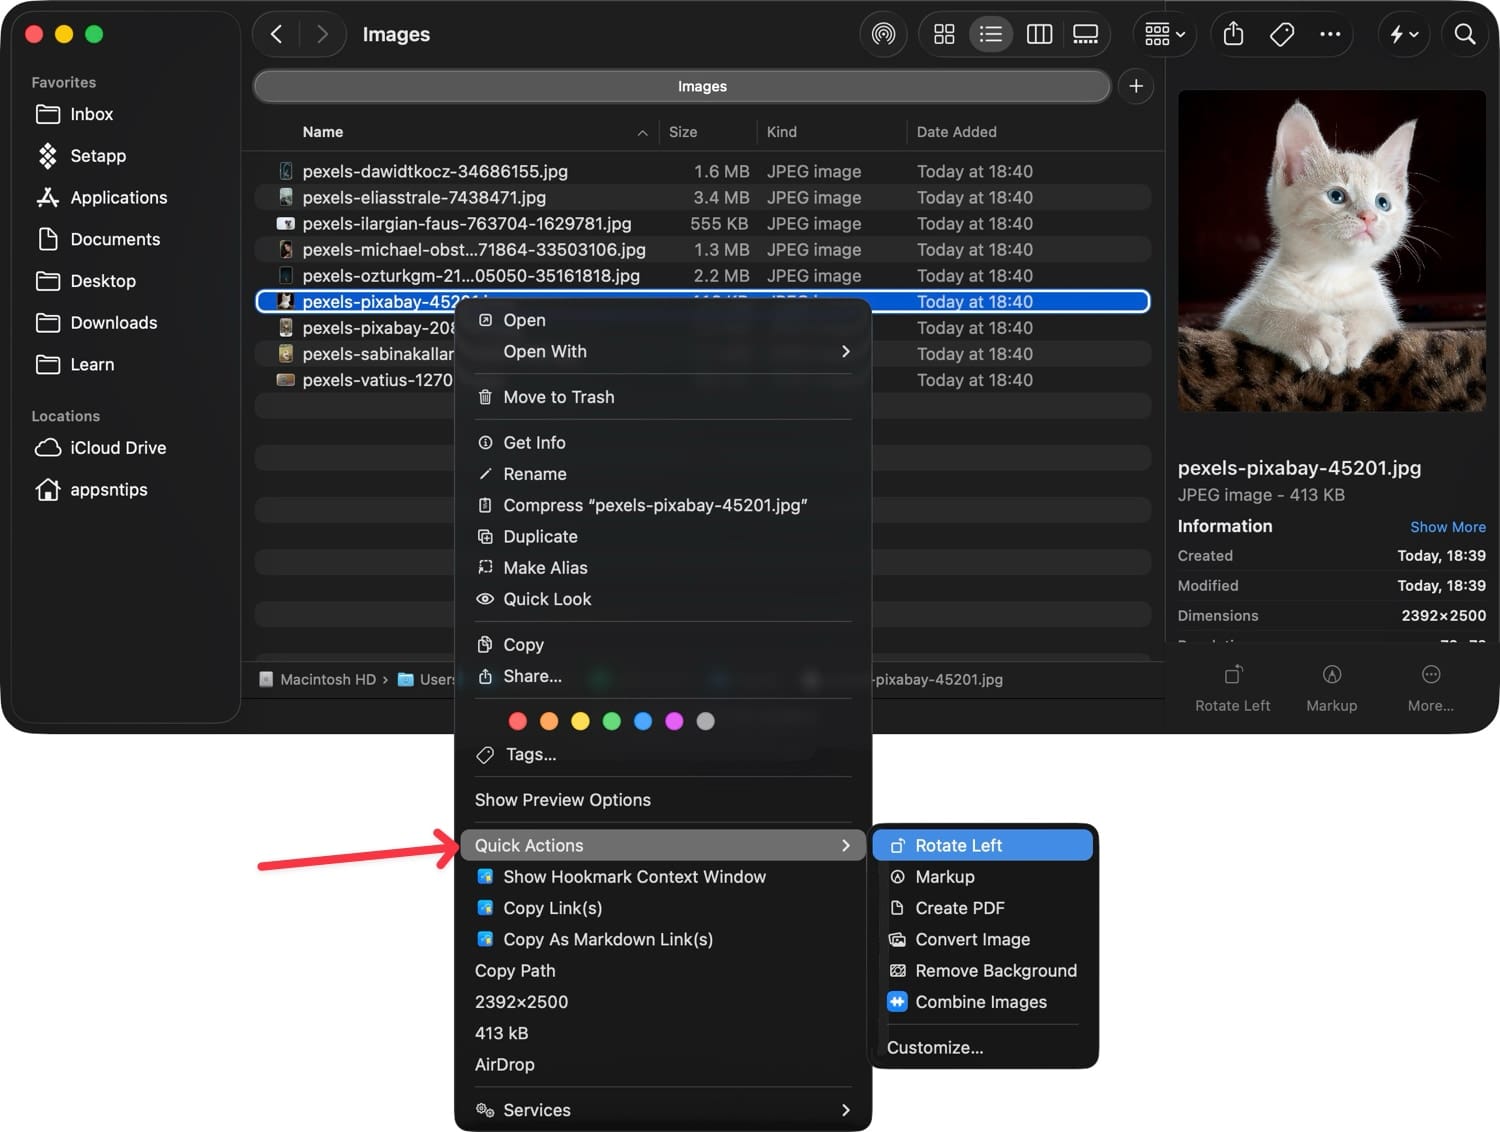
You can also access the same image operation options by the right-clicking or control-clicking on the image and using the Quick Actions menu.
3. Use Show Inspector
The Get Info button you can access by right-clicking on a file or using the Command+I (⌘I) keyboard shortcut, is an excellent way to get information about a file.

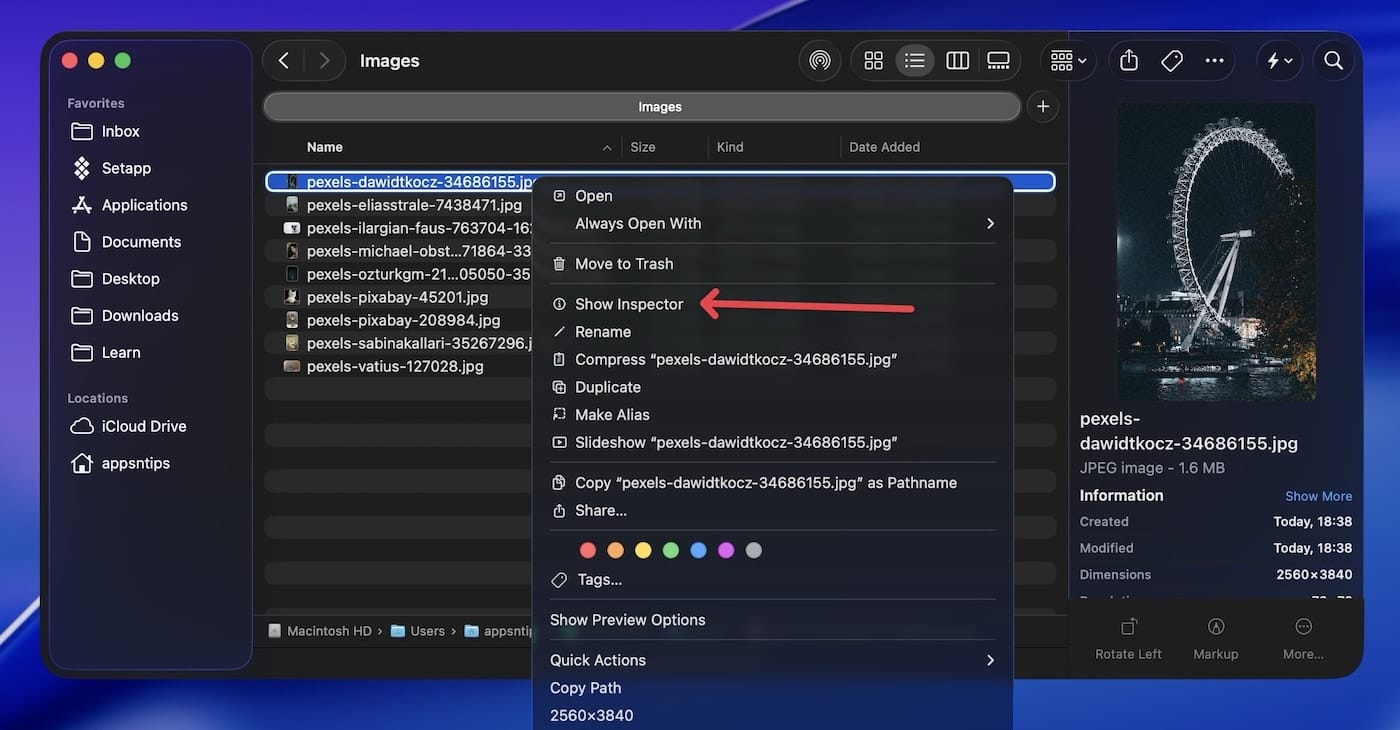
For example, using the Get Info button, I can check an image’s size, creation date, dimensions, and more. However, there’s a hidden and even more powerful Show Inspector tool that not many people realize.

Hold down the Option (⌥) key while right-clicking and you will see that the Get Info button has changed to Show Inspector. Alternatively, you can use the keyboard shortcut ⌘⌥I.
At first glance, you will see that using the Show Inspector button reveals all the same information. But notice what happens when I click on a different file; it switches the displayed information to the currently selected file.
This allows me to quickly see the information of multiple files without opening and closing multiple Get Info windows.
Also, notice what happens when I select multiple files. It shows the combined size of all the selected files, allowing me to quickly see the total storage these files are taking up on my Mac.
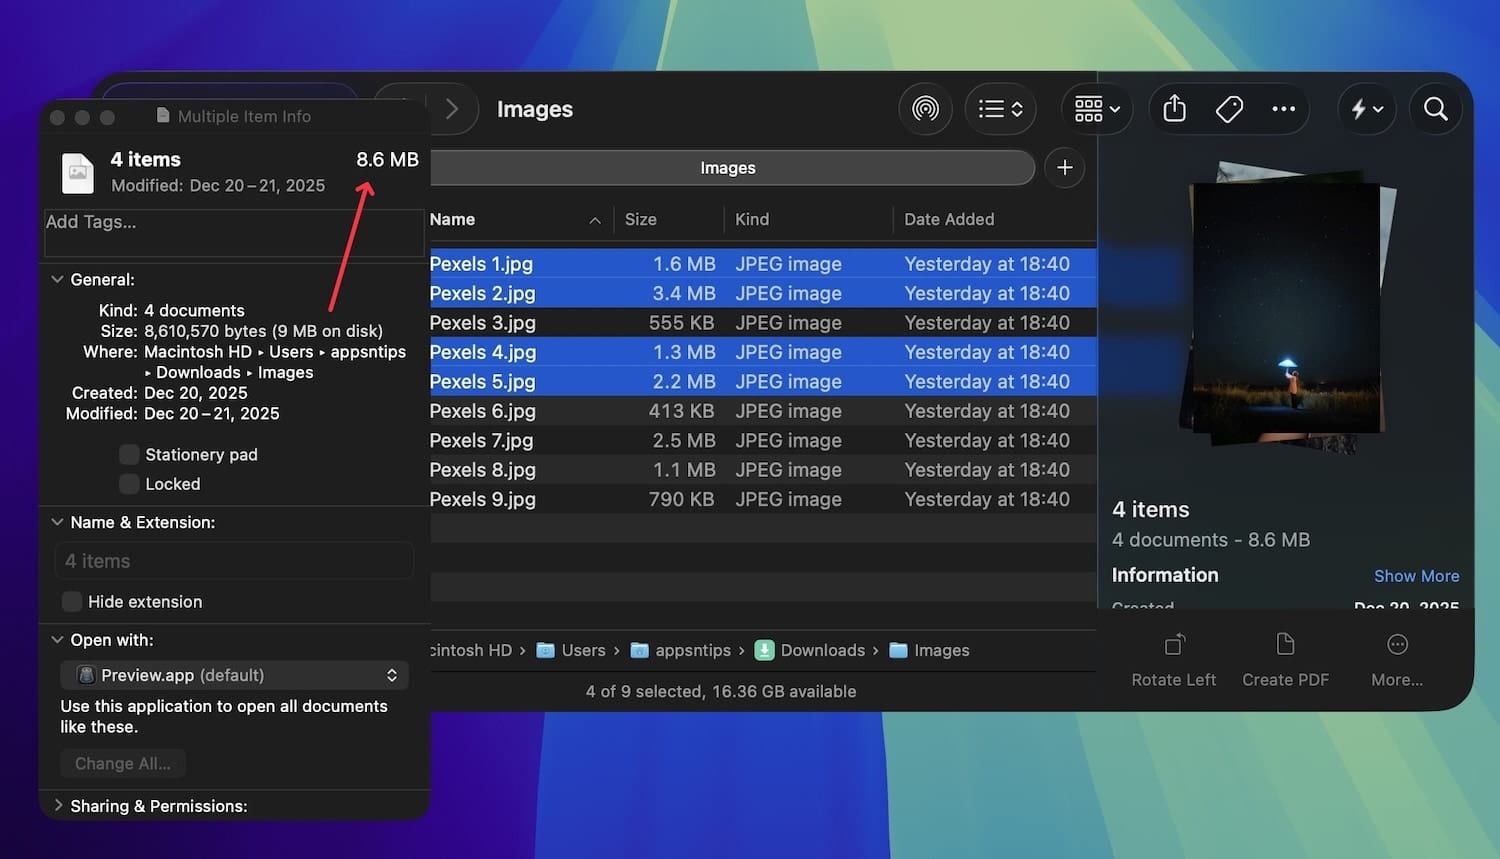
So, if you are dealing with multiple files, always use Show Inspector instead of Get Info, and you will save a lot of time.
4. Utilize Mac Path Bar
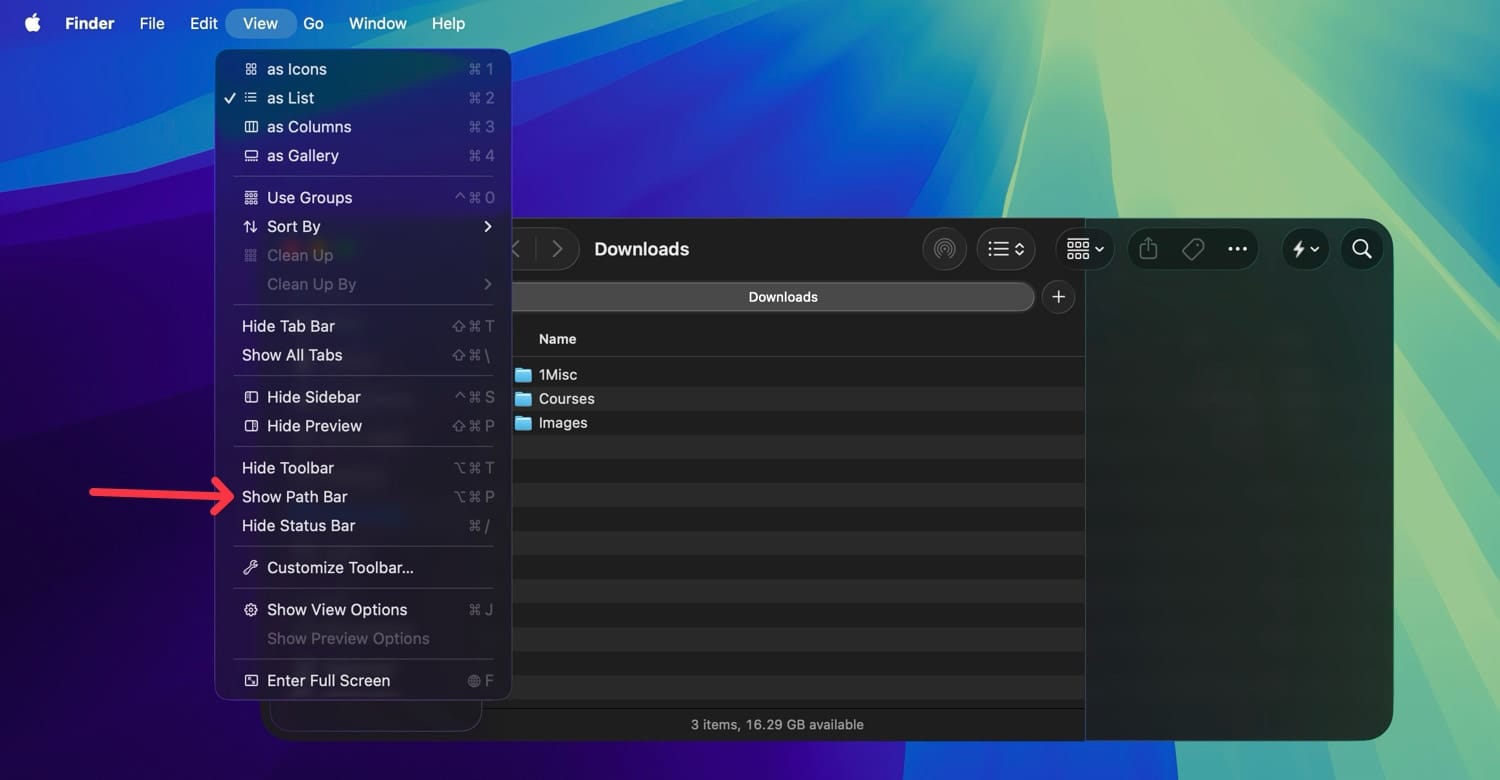
By default, the Finder window doesn’t show a path bar. You can enable it by going to View → Show Path Bar or using the keyboard shortcut Command+Option+P ( ⌘⌥P). If you didn’t know about this feature, you are ahead.
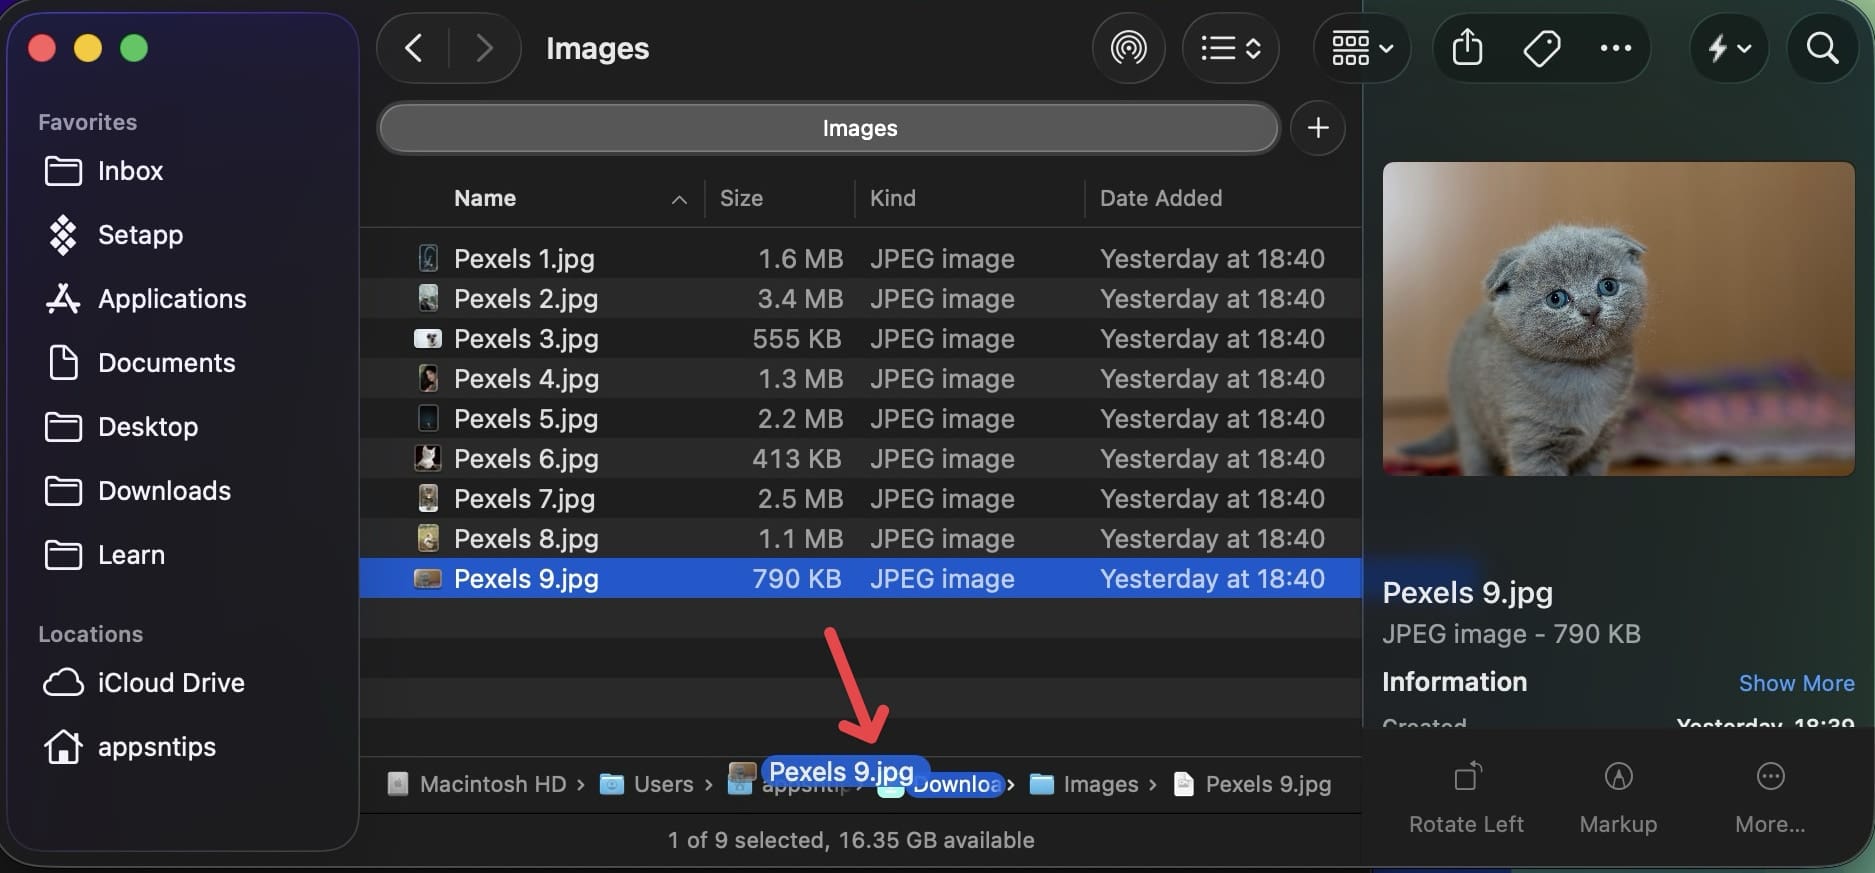
But if you do know it, here are some tips that will help you save some time. Firstly, you can click on any of the folders in the Path Bar to quickly open the folder.
Another benefit of Path Bar is for moving files. Say you want to move a file or folder a level up. Simply drag and drop the file on the folder name you want to move to, and it will move that file.
No more opening multiple Finder windows or unnecessary copying and pasting.
5. Batch rename files
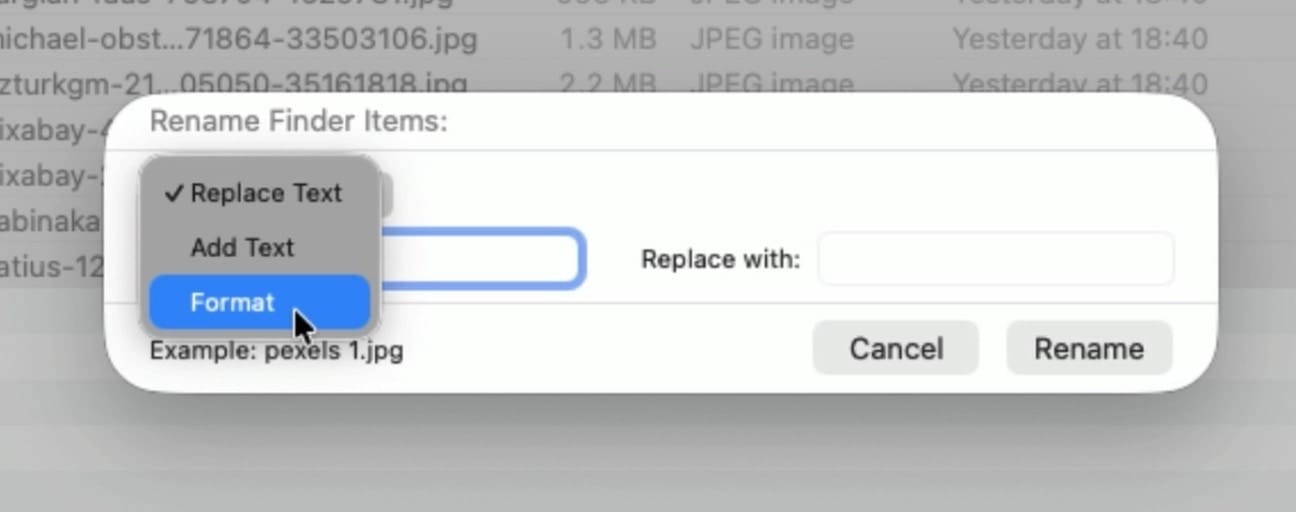
Renaming files individually is a chore and a waste of time. Thankfully, the Finder has a built-in batch rename feature that can save you hours. Simply select all the files you want to rename, right-click on it, and choose the Rename option.

Here, you can format the entire name or add or replace text in the file names.
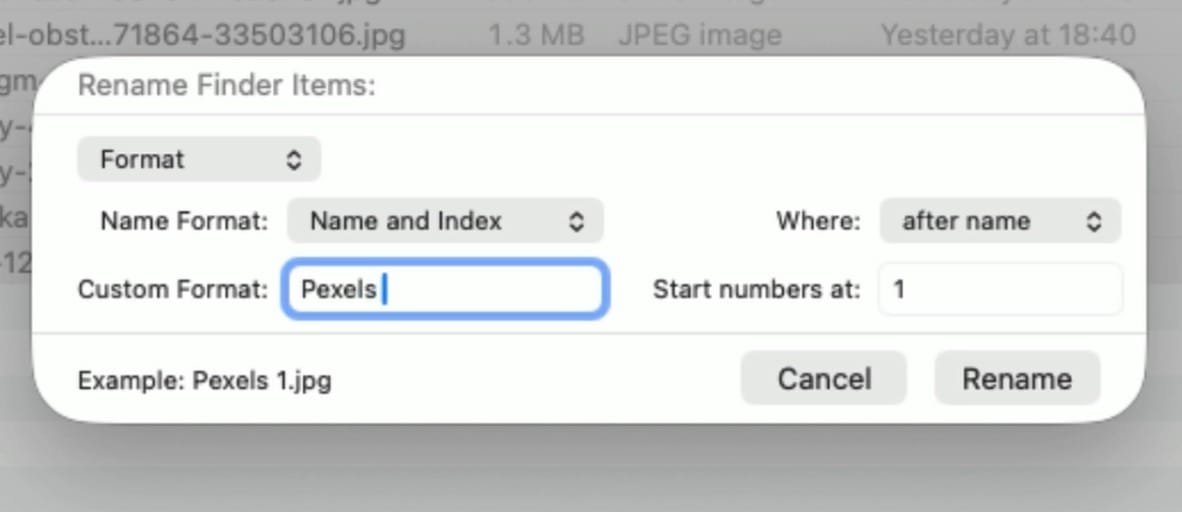
I use it mostly for renaming my screenshots and use the Format function to rename them with numbering.
Once you get the hang of this feature, you can batch rename files in a jiffy and save precious time you would have otherwise wasted naming files individually.
Quick Mac tips to save you hours
That ends our guide of quick Mac tips that will save you hours. If you liked this guide, click here to learn 15 more macOS tips that will supercharge your Mac experience.