Supernote Nomad A6X2 Unboxing, Set Up, and First Impressions
Unboxing the Supernote Nomad Crystal Edition. First look at the design, packaging, and what makes this e-ink notebook unique before full setup and impressions.
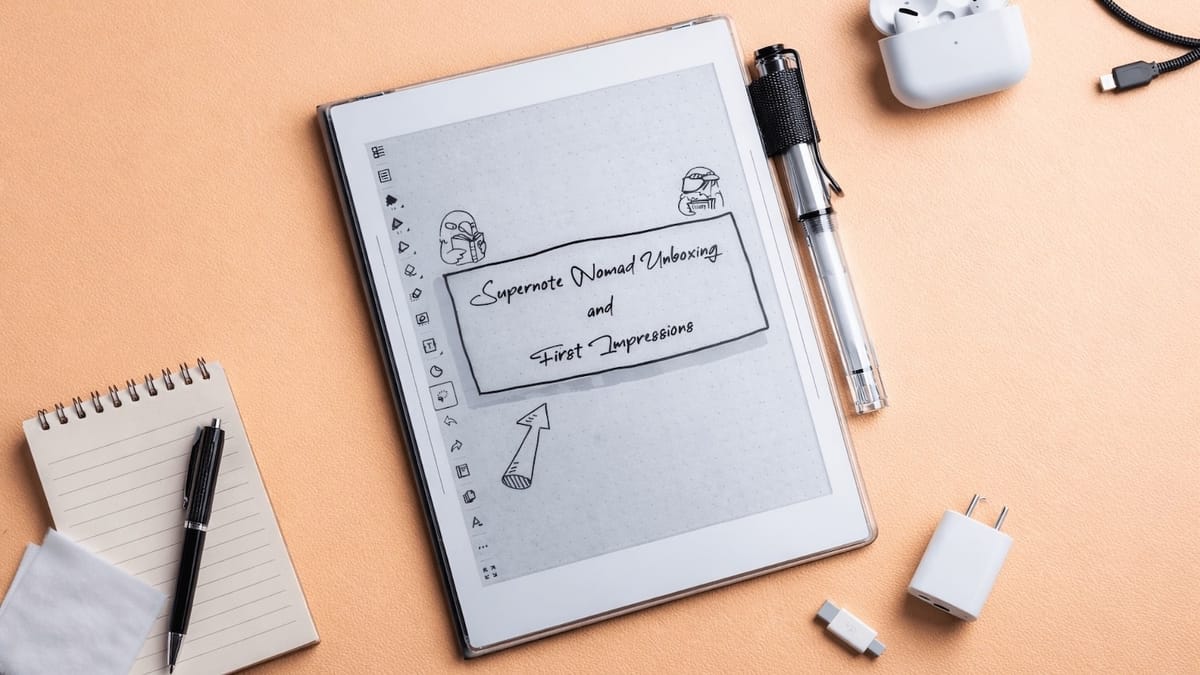
After months of deliberation, I finally ordered the Supernote Nomad. It arrived in early December, and I’m thrilled with my purchase. I’m still gathering my thoughts for a detailed review, but for now, I want to share my unboxing and first setup experience with the Supernote Nomad. Let’s dive in.
Supernote Nomad Unboxing
With the Supernote Nomad, I also got the Canvas Folio and the Supernote Lamy Safari Pen. In this article, I will focus on the Nomad itself. If you would like us to conduct a deep dive into the accessories, please let us know in the comments.
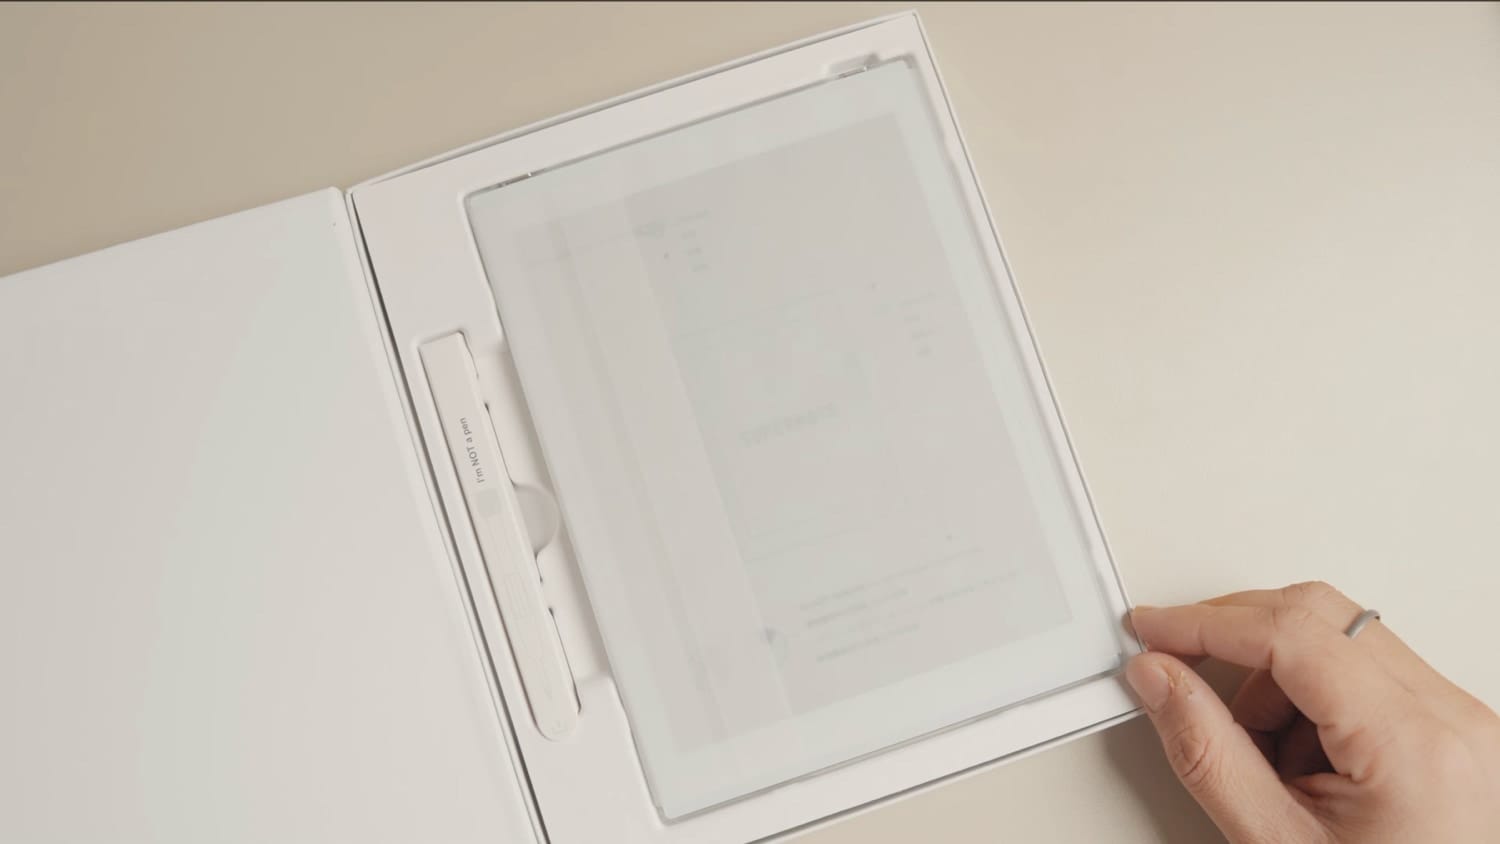
The Supernote Nomad comes in two editions: White and Crystal. I purchased the Crystal edition, as I fell in love with its transparent back. The device comes in a premium box, with a plastic pull tab.
Open the cover, and the Supernote Nomad greets you front and center, wrapped in a translucent paper material. I will not lie, I fell in love with the device as soon as I got my hands on it.
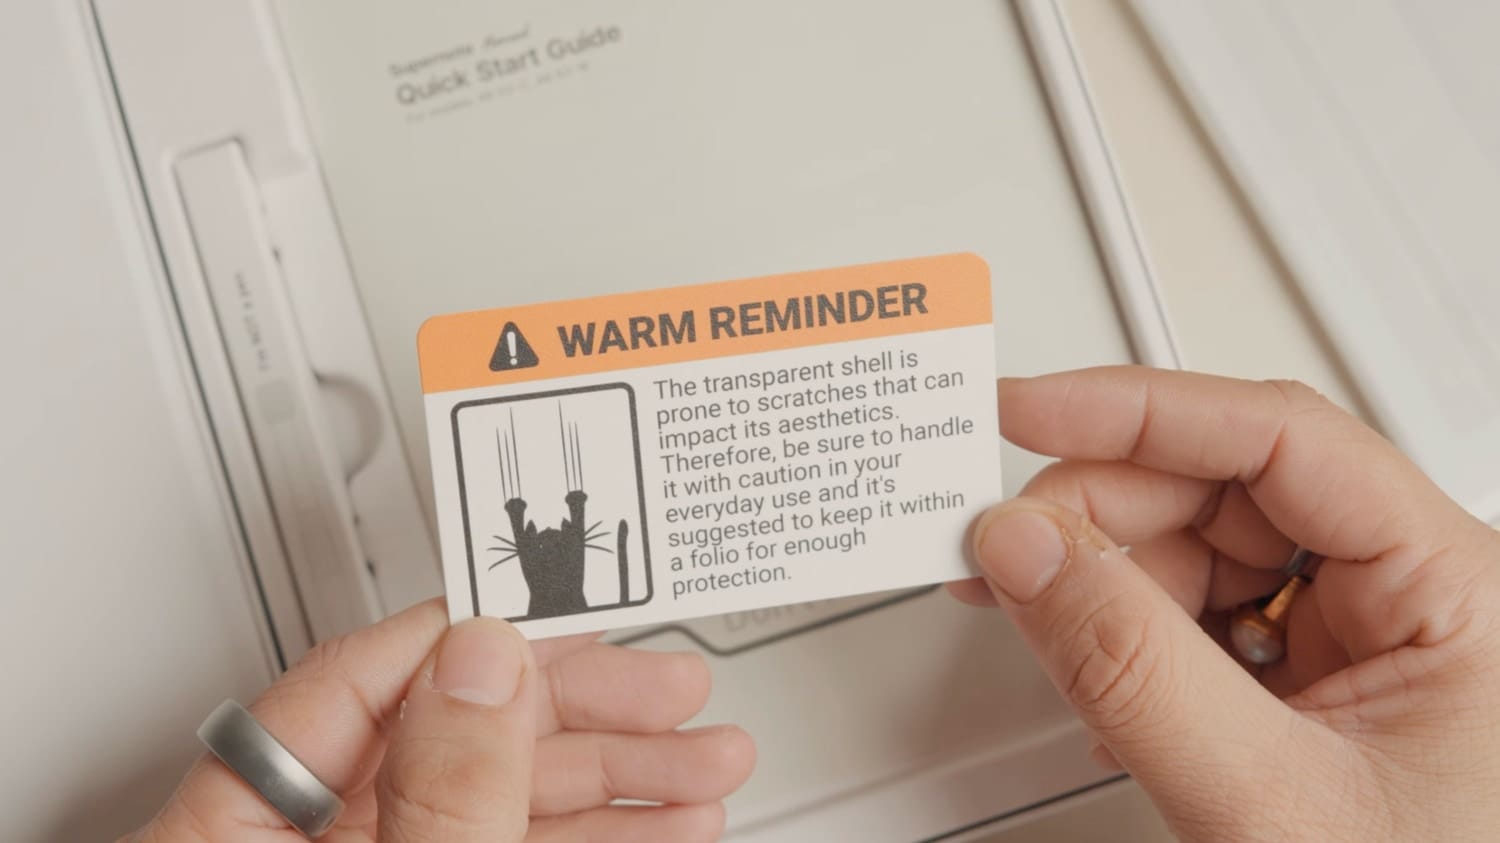
Below the device, there’s a card that warns about the transparent shell being prone to scratches. I have never seen a company include such a warning in the box, no matter how scratch-prone their device is, so I appreciate the warning.
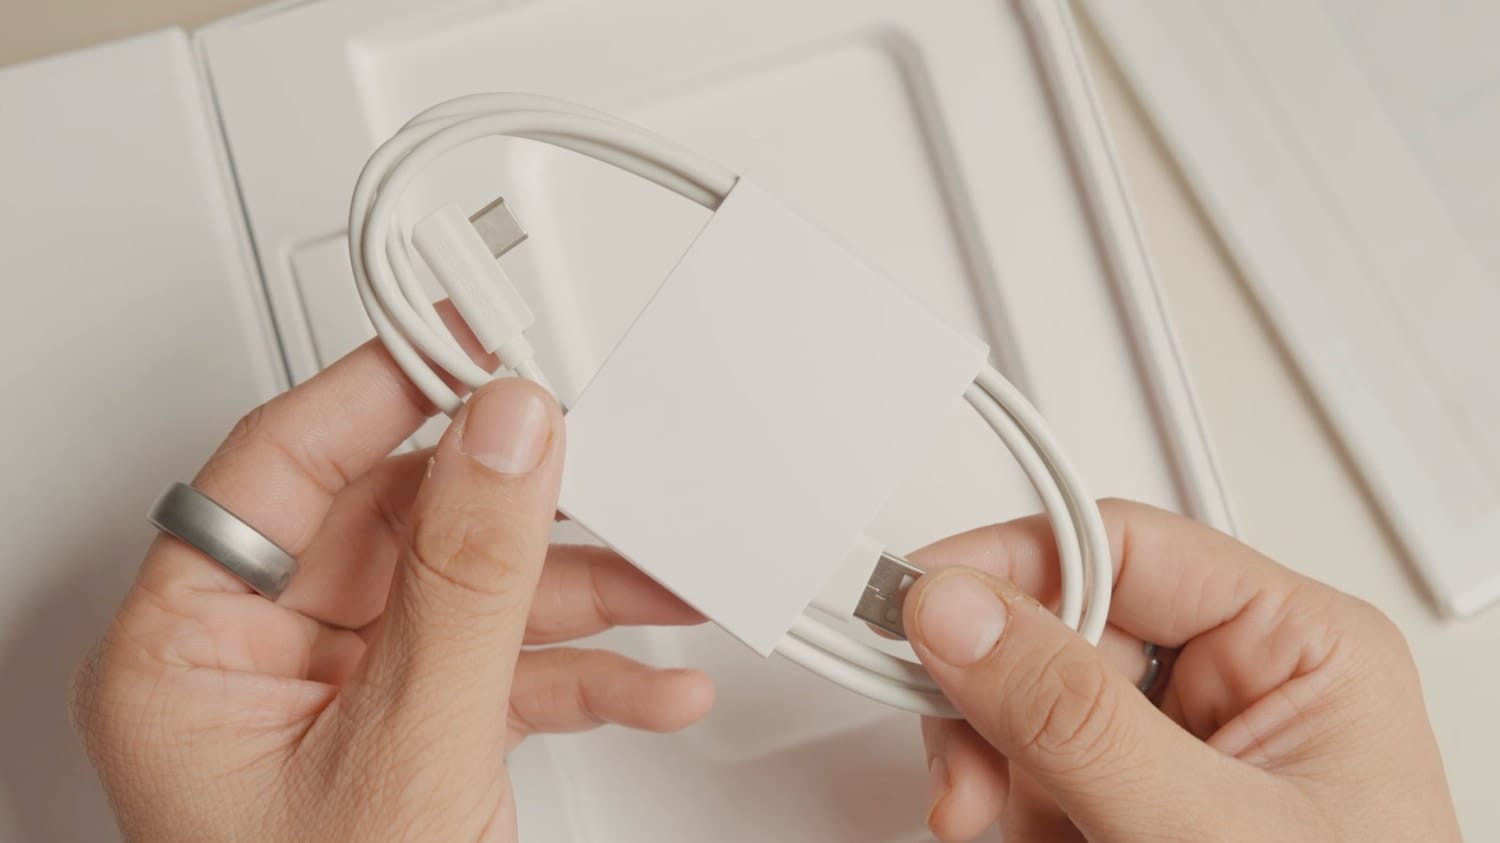
Apart from the device itself, the package includes a quick start guide, instructions for removing the transparent back plate, and a USB-A to USB-C charging cable.
I have mixed feelings about this cable. I appreciate the right-angle connector, which makes the device easier to use while charging, but I dislike the USB-A end and would have preferred USB-C connectors on both ends.
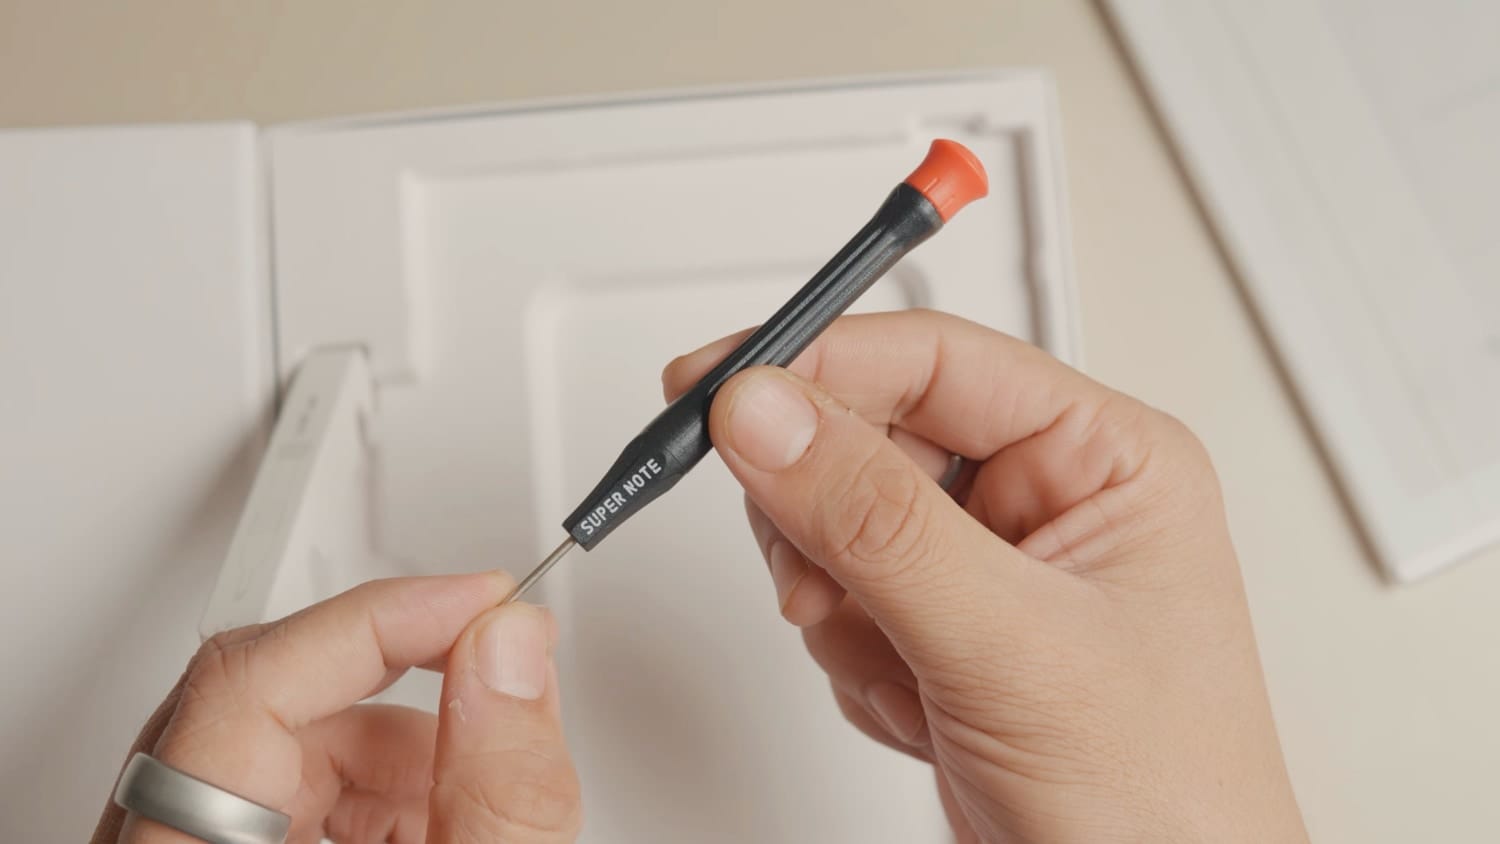
If you purchase the Crystal edition, the box also includes a screwdriver that you can use to unscrew the back panel. The screwdriver is well-built and feels good in the hand.
If you enjoy what we write...
Supernote Nomad first look
Now let’s remove the paper cover and get our first look at the device. The front of the device cleverly displays the position of the charging port and power button. There’s also a warning not to remove the protective film covering the display.
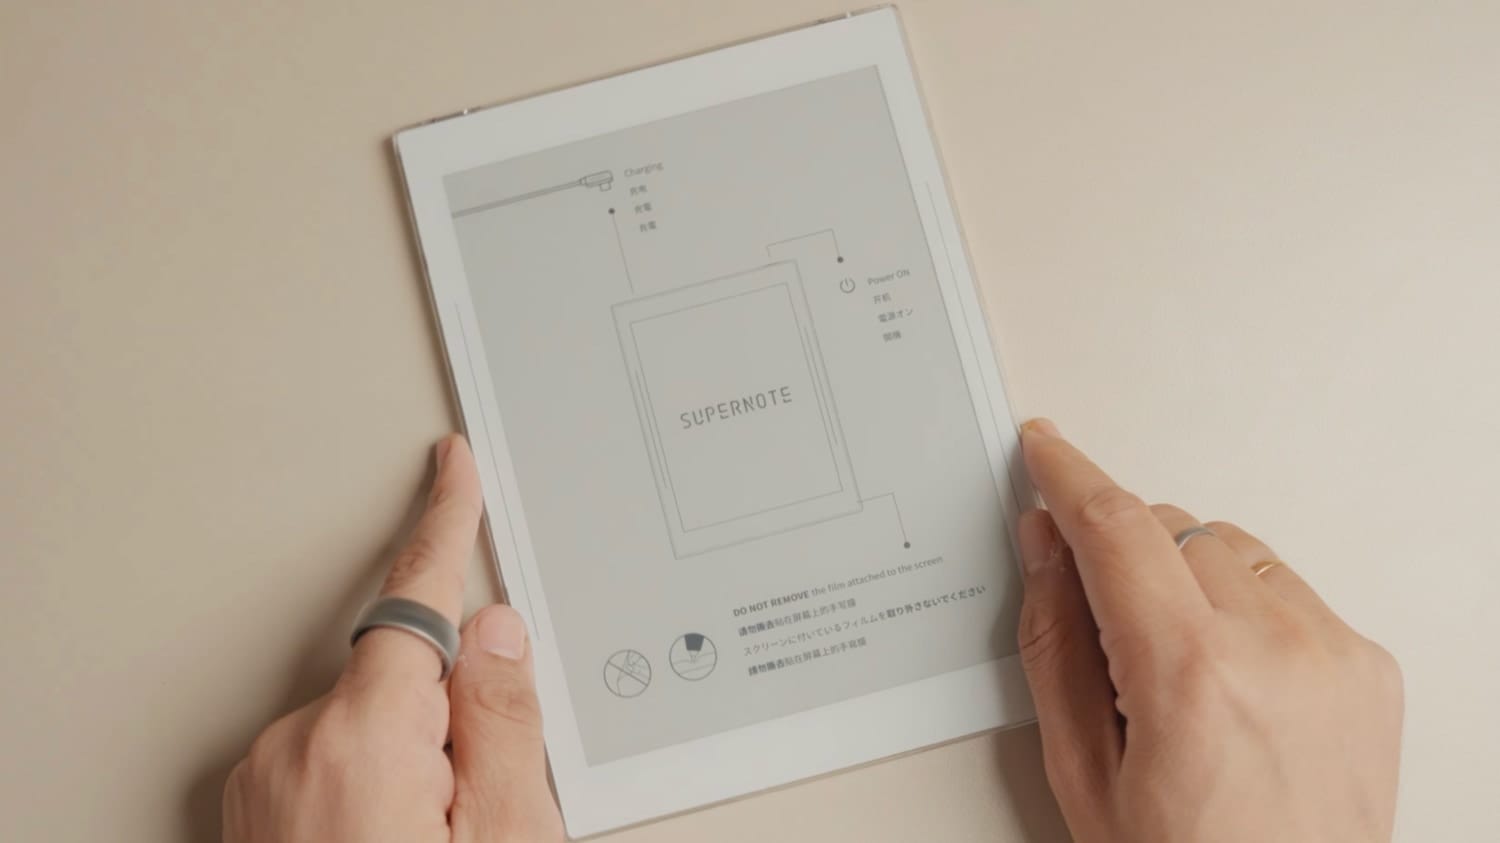
It’s the FeelWrite 2 self-recovery soft film, which is what delivers the natural handwriting experience. So be sure not to remove it.
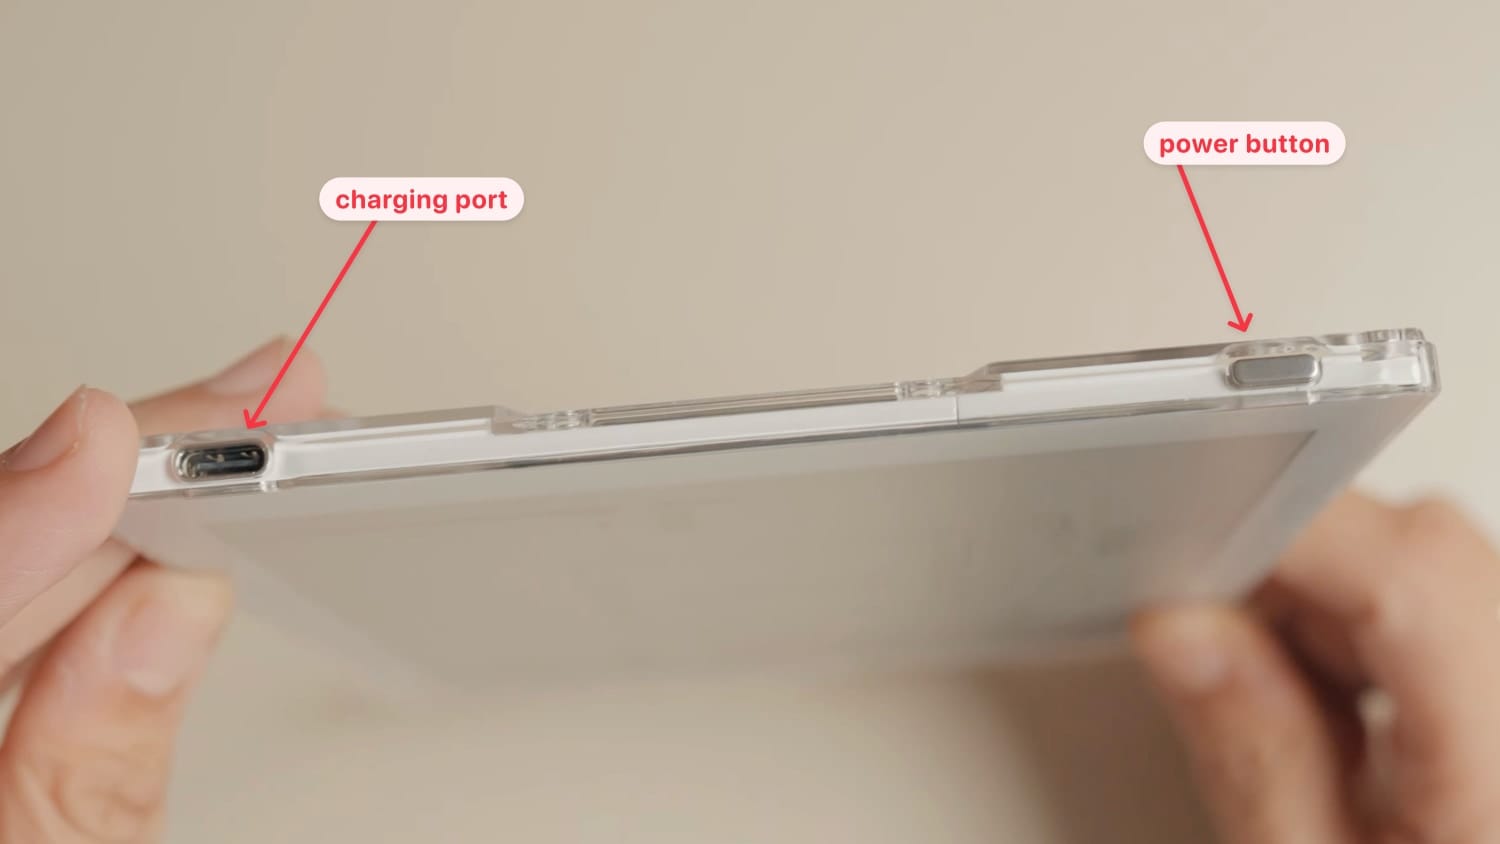
Taking a look around the device, you get the charging port at the top-left and the power button at the top-right.
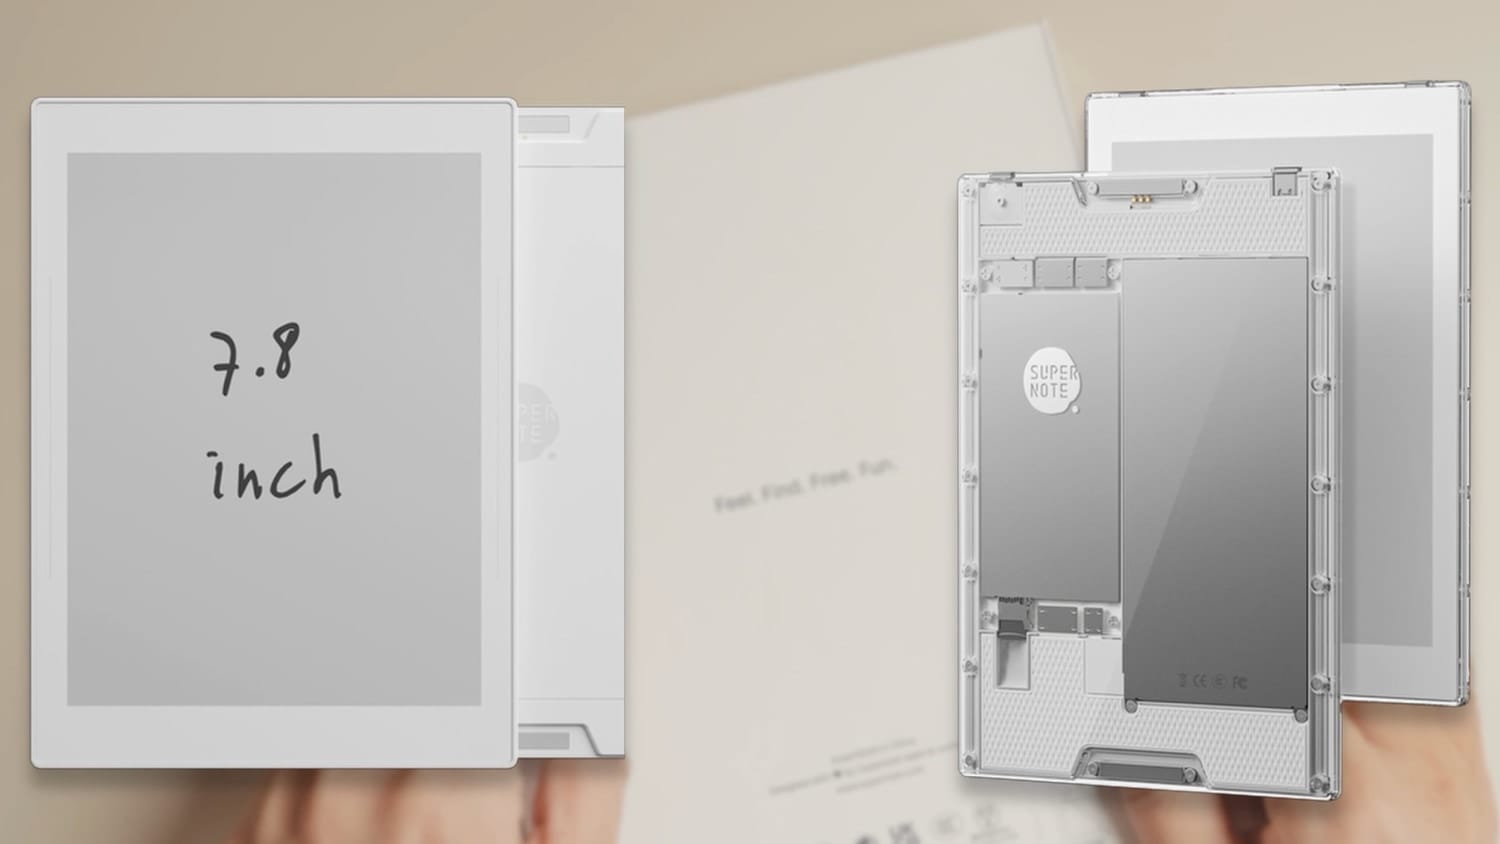
As mentioned, the Crystal edition features a transparent back that allows the internals to be visible.You can see the screws around the border. You can remove these screws with the included screwdriver to get access to the internals and the microSD port.
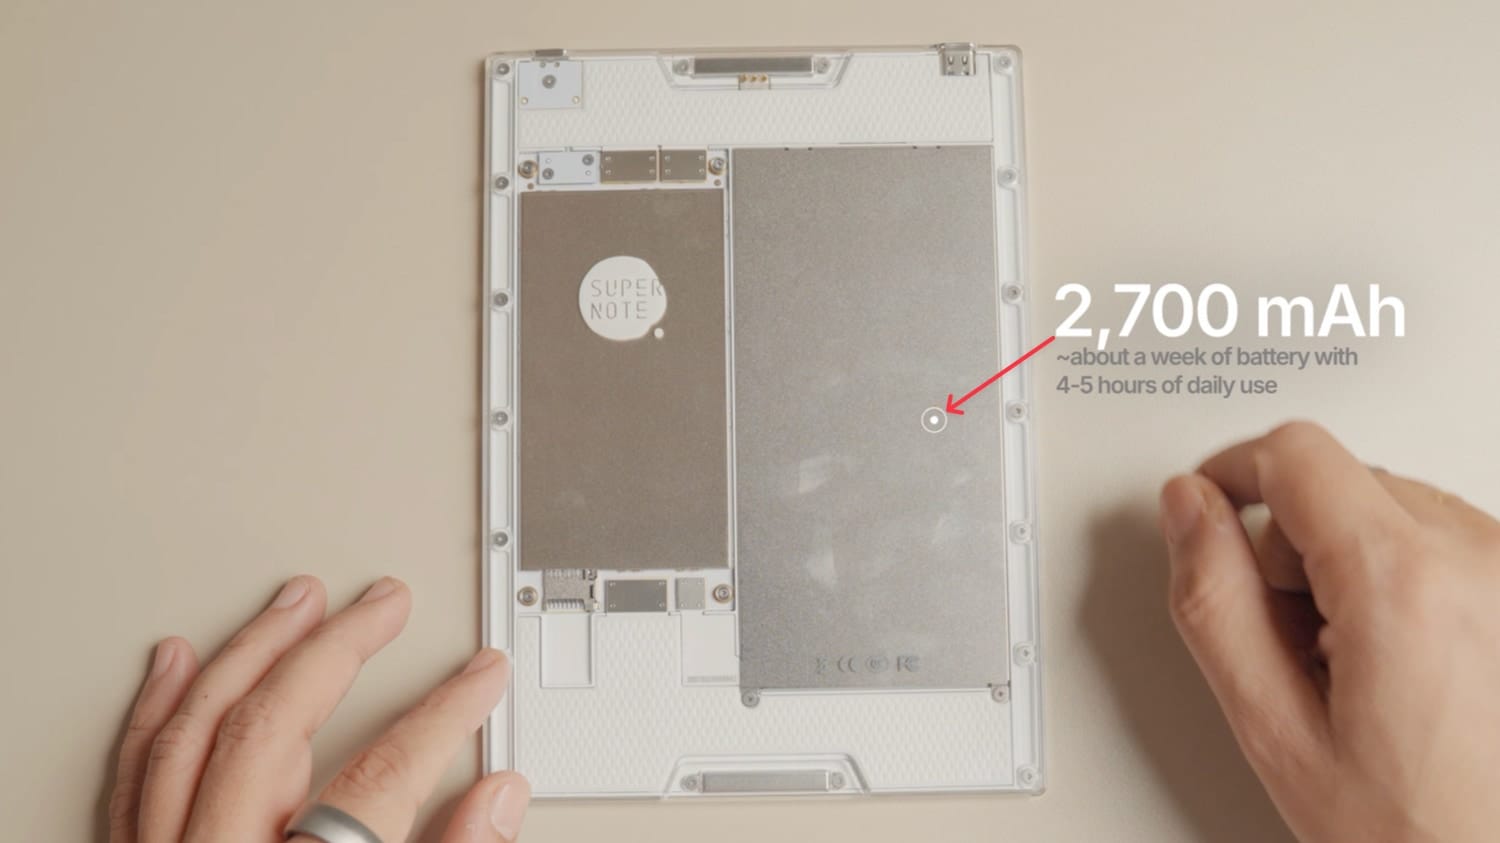
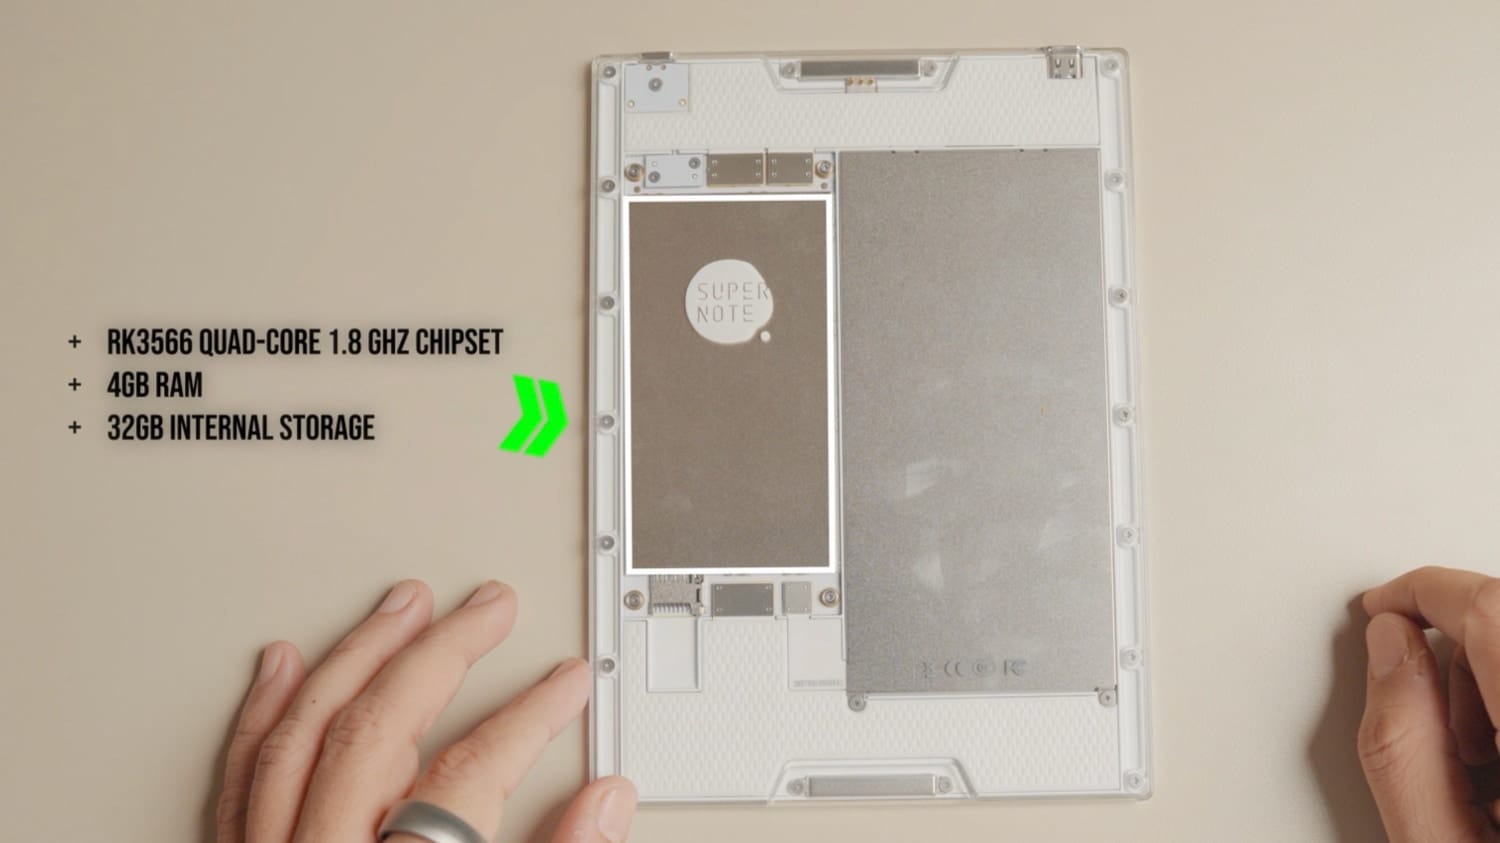
To the right is the 2700 mAh battery, which provides about a week of battery life with 4-5 hours of daily usage. To the left is the motherboard. It features the RK3566 Quad-Core 1.8 GHz processor with 4GB of RAM and 32GB of internal storage.
One exceptional thing about the Supernote Nomad is that it’s an upgradable device. You can replace the battery and even upgrade the motherboard with new internals when Supernote releases an upgrade. This upgradability was one of the reasons I settled on Supernote Nomad over other e-ink devices.
Overall, the device looks super cool with its transparent back. And although the Crystal edition costs $30 more than the regular white version, I am happy that I paid the extra dollars to get this one.
Supernote Nomad first set up
Now that we have unboxed the device, let’s turn it on and go through the setup process. To do that, press and hold the power button until the device starts booting up. It takes a few seconds to boot up, so wait a bit.
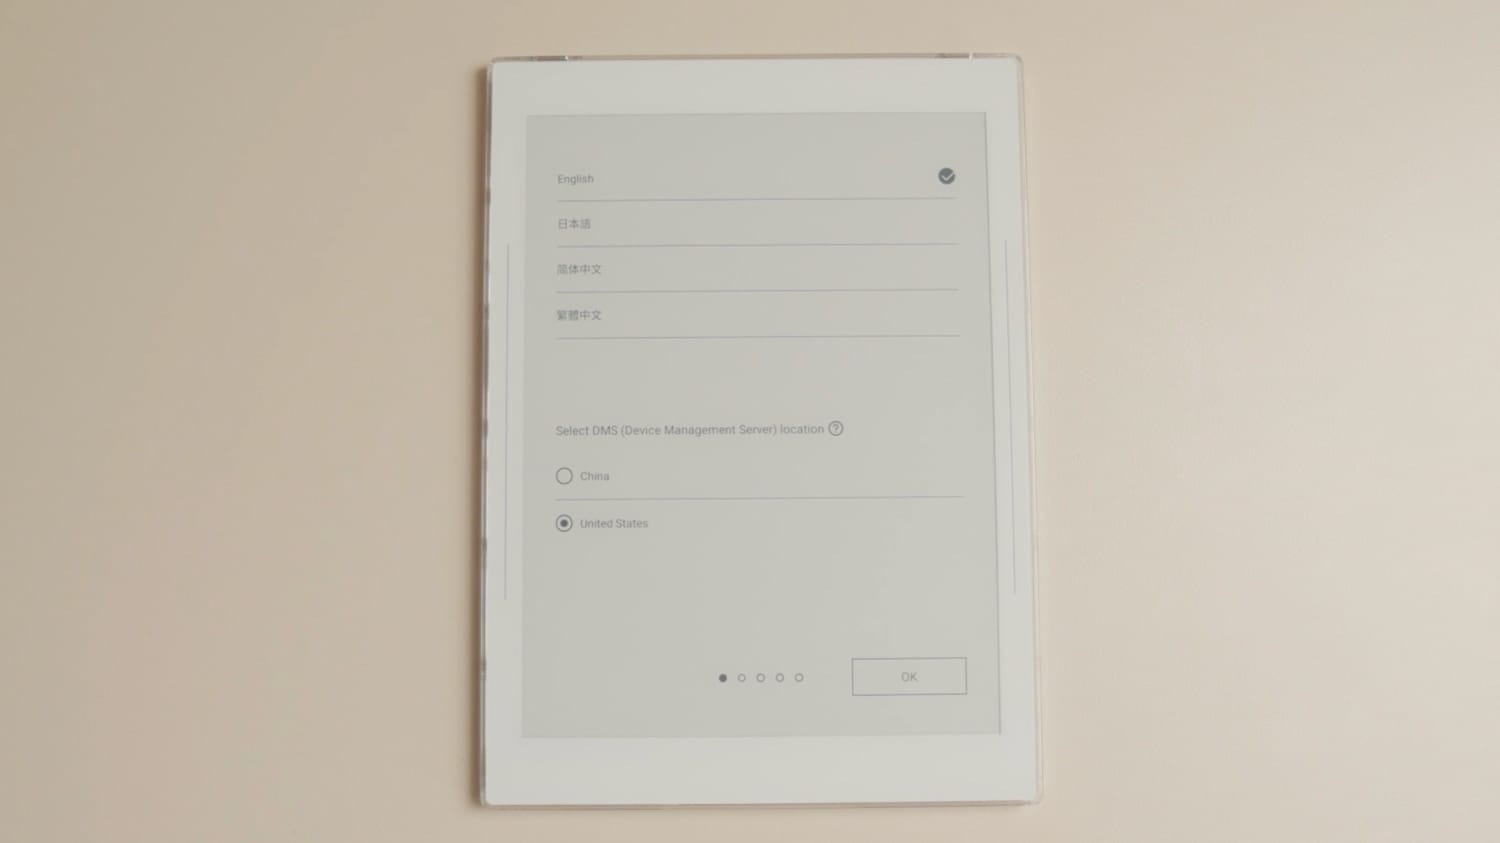
First, we select the language and the region. I will select English and the United States.
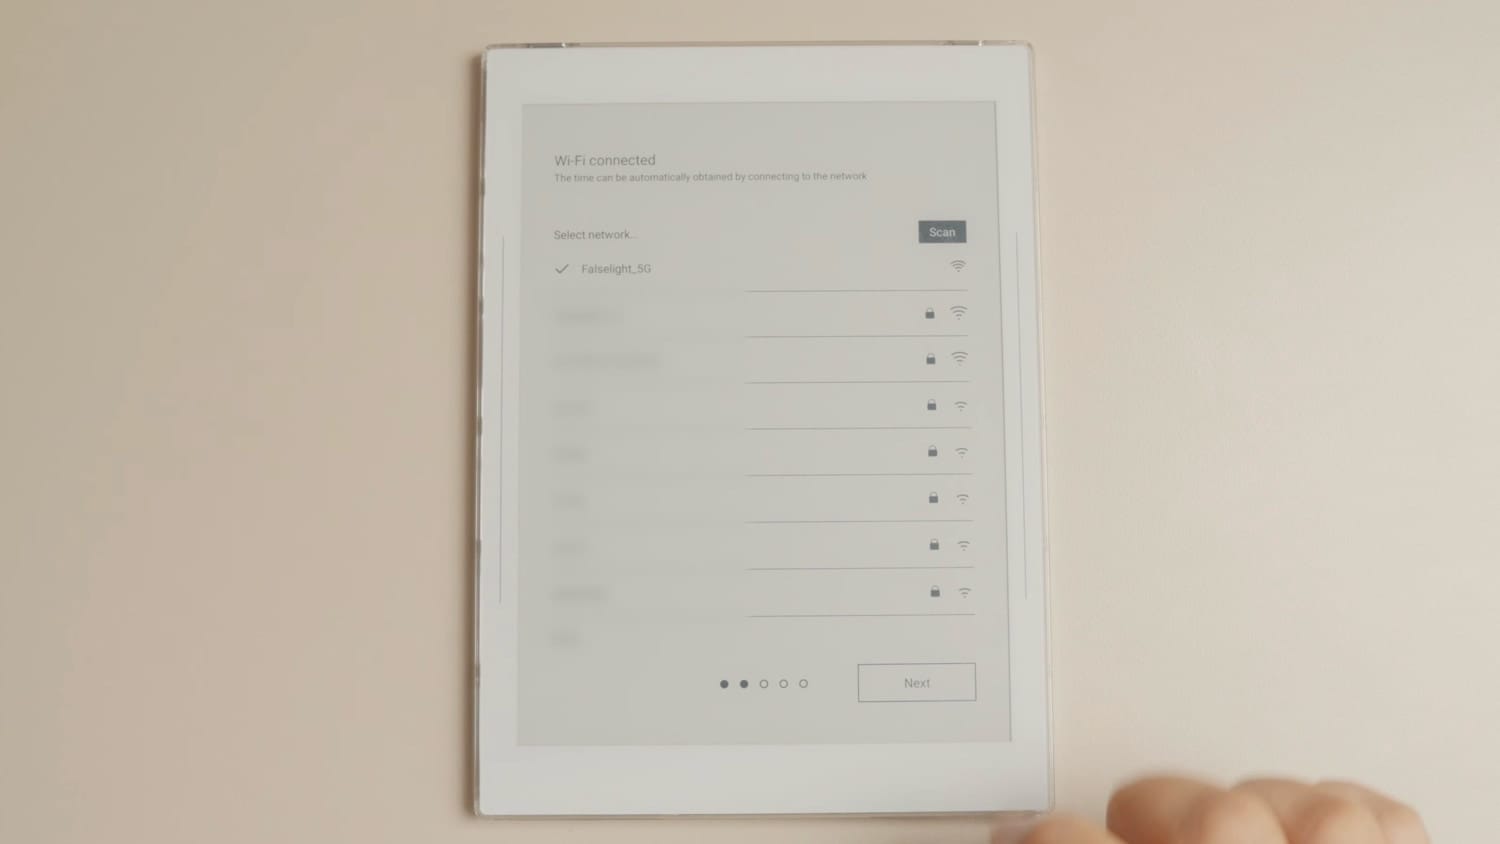
Now, you can connect to your Wi-Fi or skip this step if you want to use your Supernote offline. One big benefit of Supernote Nomad is that you can use it completely offline and connect it to your computer to transfer files and update. I am happy with online sync, so I will connect to my Wi-Fi.
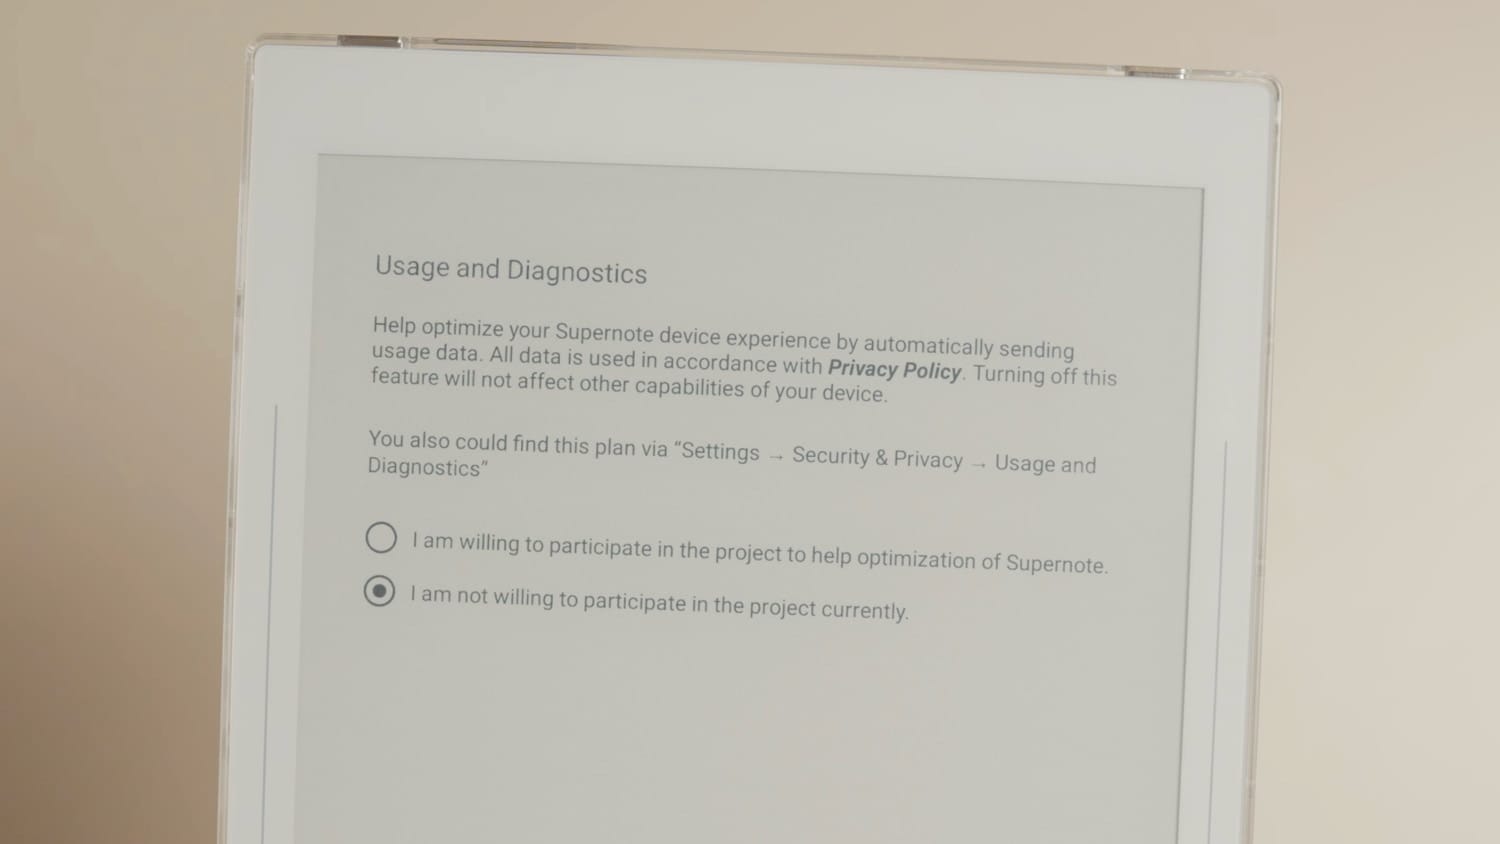
On the next page, you can set the time and date formats and select your time zone. Now you can choose whether you want to share your Usage and Diagnostics data with Supernote. I like that it’s set to No by default. It means the company is not using dark patterns to get you to share your data.
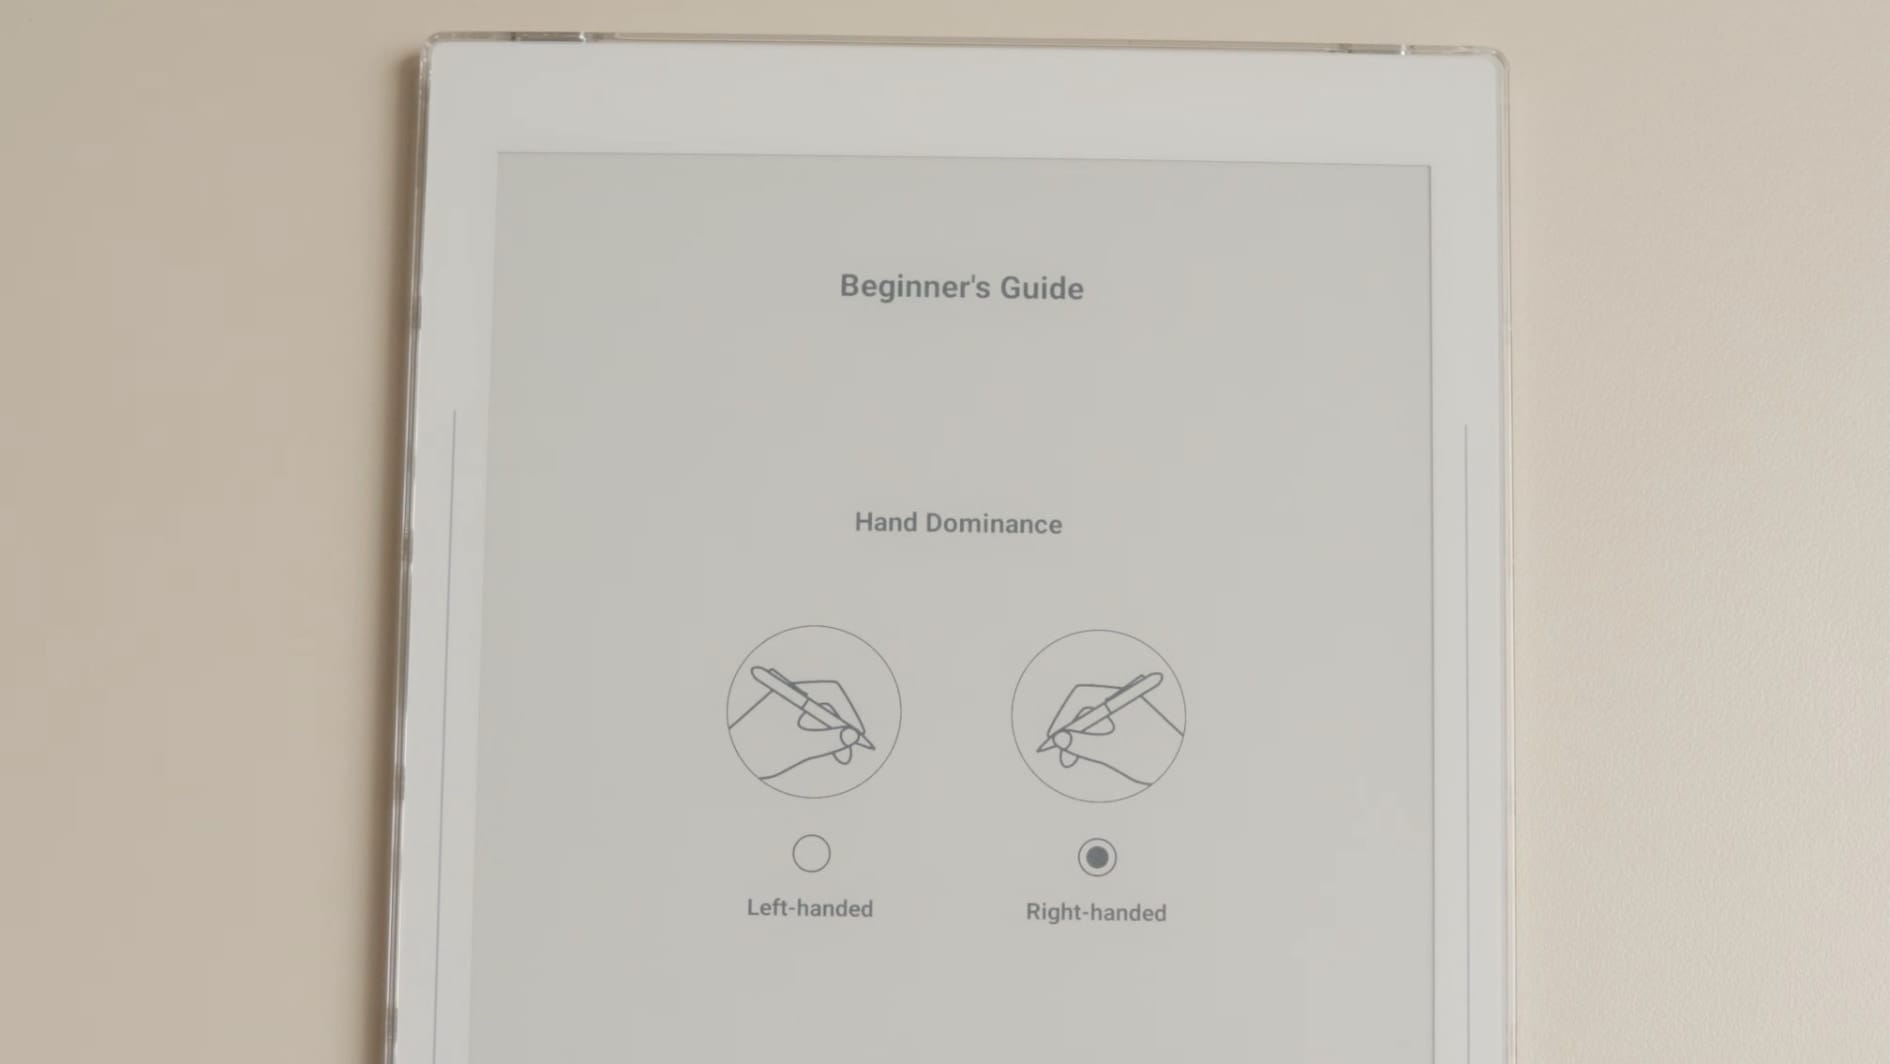
Now, we get to the tutorial section. First, we have to select whether we are right-handed or left-handed.
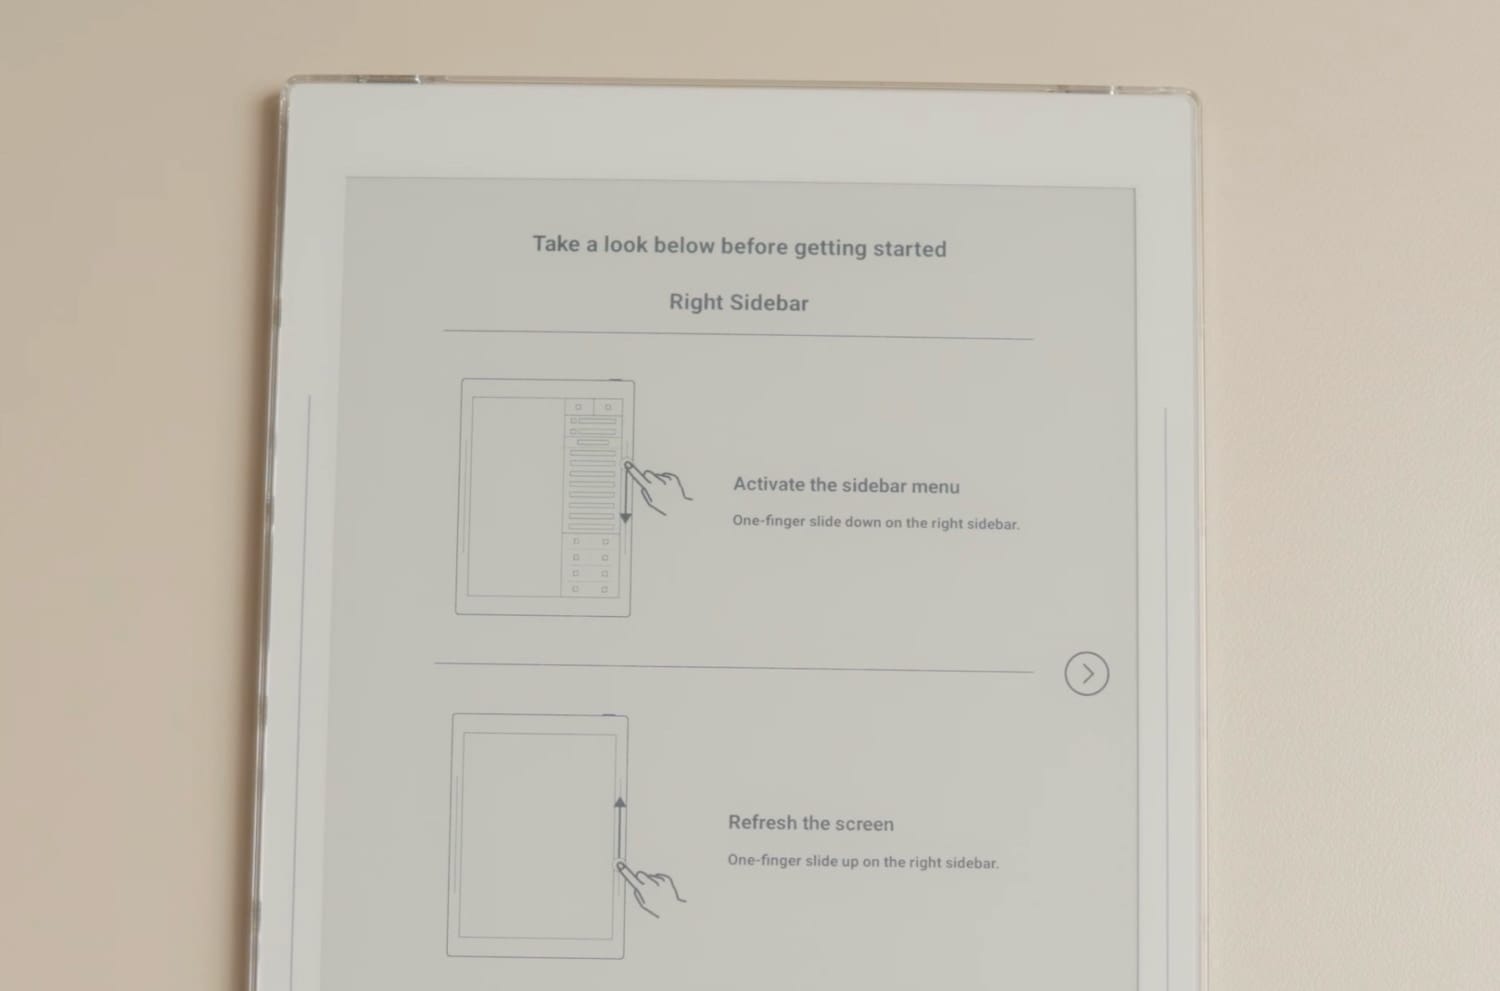
Supernote has two touch-sensitive sidebars. Swiping down on the right sidebar opens the sidebar menu, which effectively serves as Supernote’s home page, and swiping up refreshes the screen and reduces ghosting.
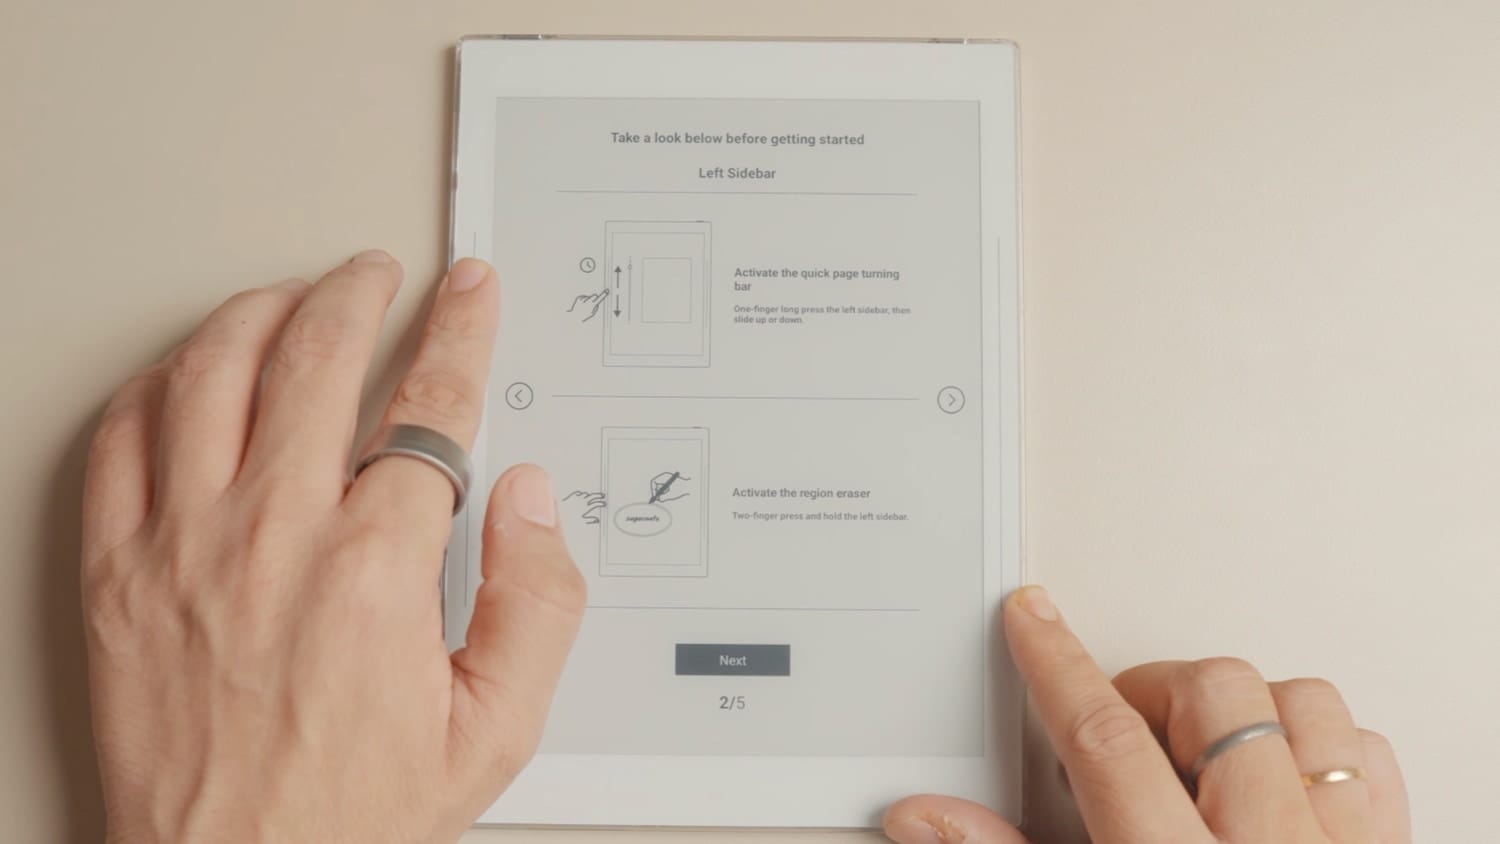
The left sidebar also has multiple functions. You can hold and swipe to access the quick page-turning menu. Touch and hold with two fingers to activate the eraser, and swipe up and down with a finger to undo and redo.
Supernote Nomad: features walkthrough
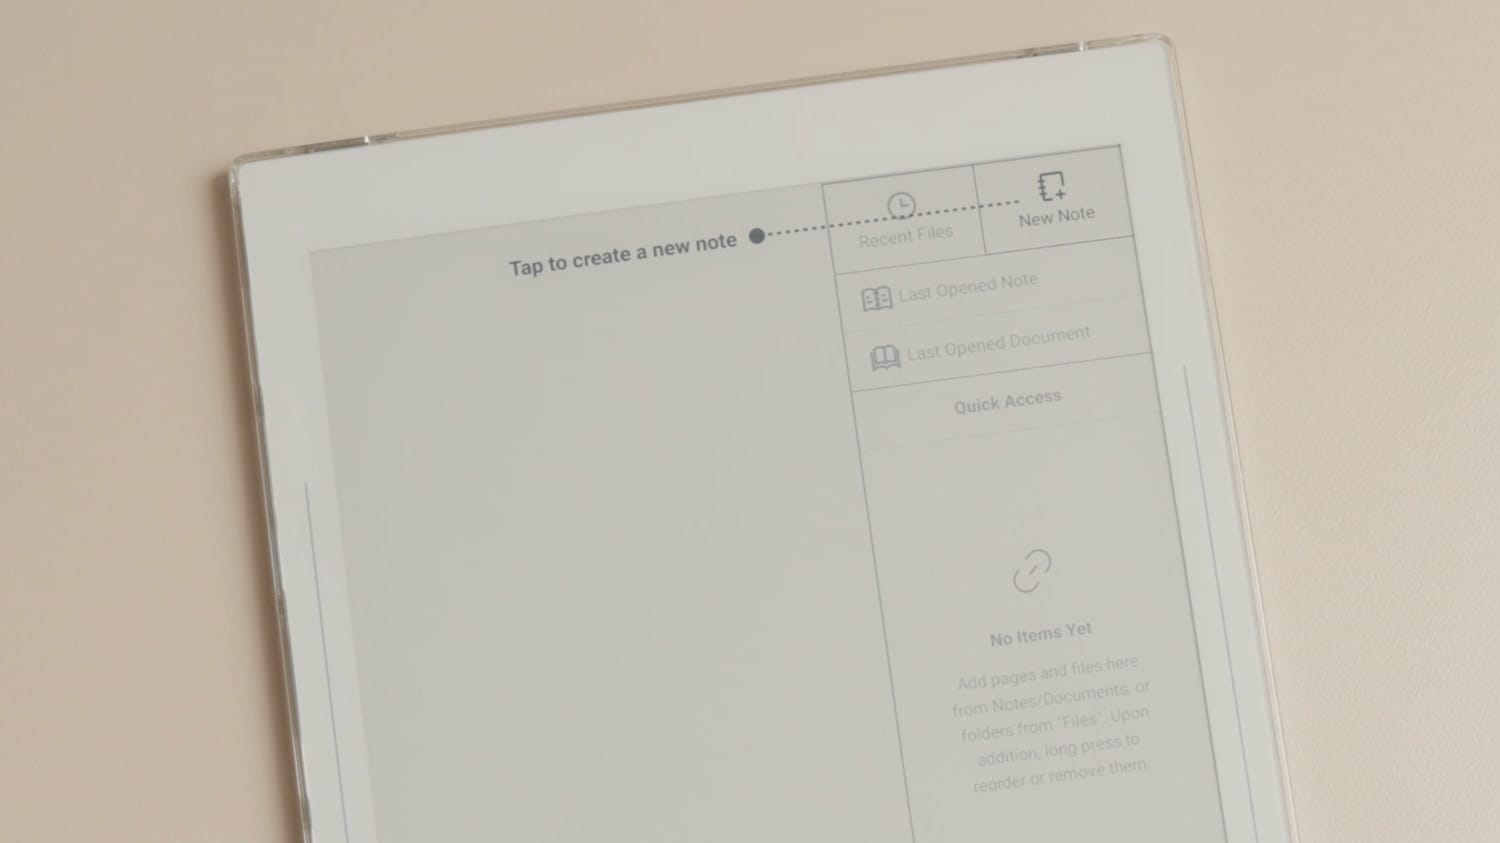
In the setup process, the Supernote will guide you through its basic features. Notice how swiping down on the right sidebar opens the quick start menu. Here, we can tap the New Note button to create a new note.
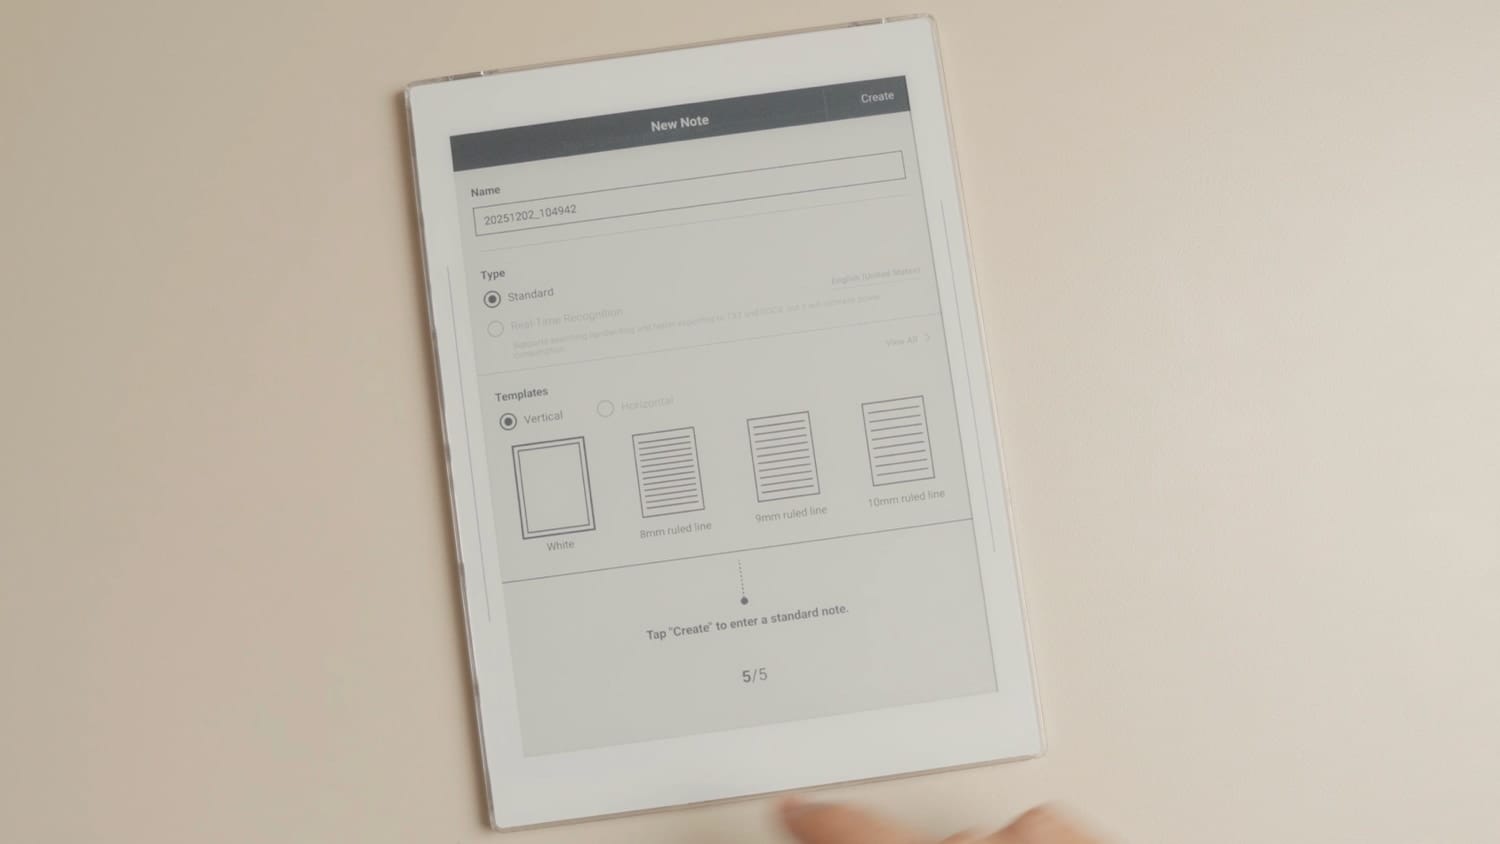
On the note creation page, you can change the name, select the note type, and apply a page template. I will just hit the Create button to create the note.
When you create a note, you will get a guided tour of all the tools in the note. You can skip this if you are already familiar with it. I will go through it so you can get an idea of all the note-taking tools this device offers.
As you can see, the Supernote Nomad’s notes app offers several tools. You get three different pen types, eraser tools, and a lasso selection tool. It also supports layers, the ability to use templates, a notebook cover, and more.
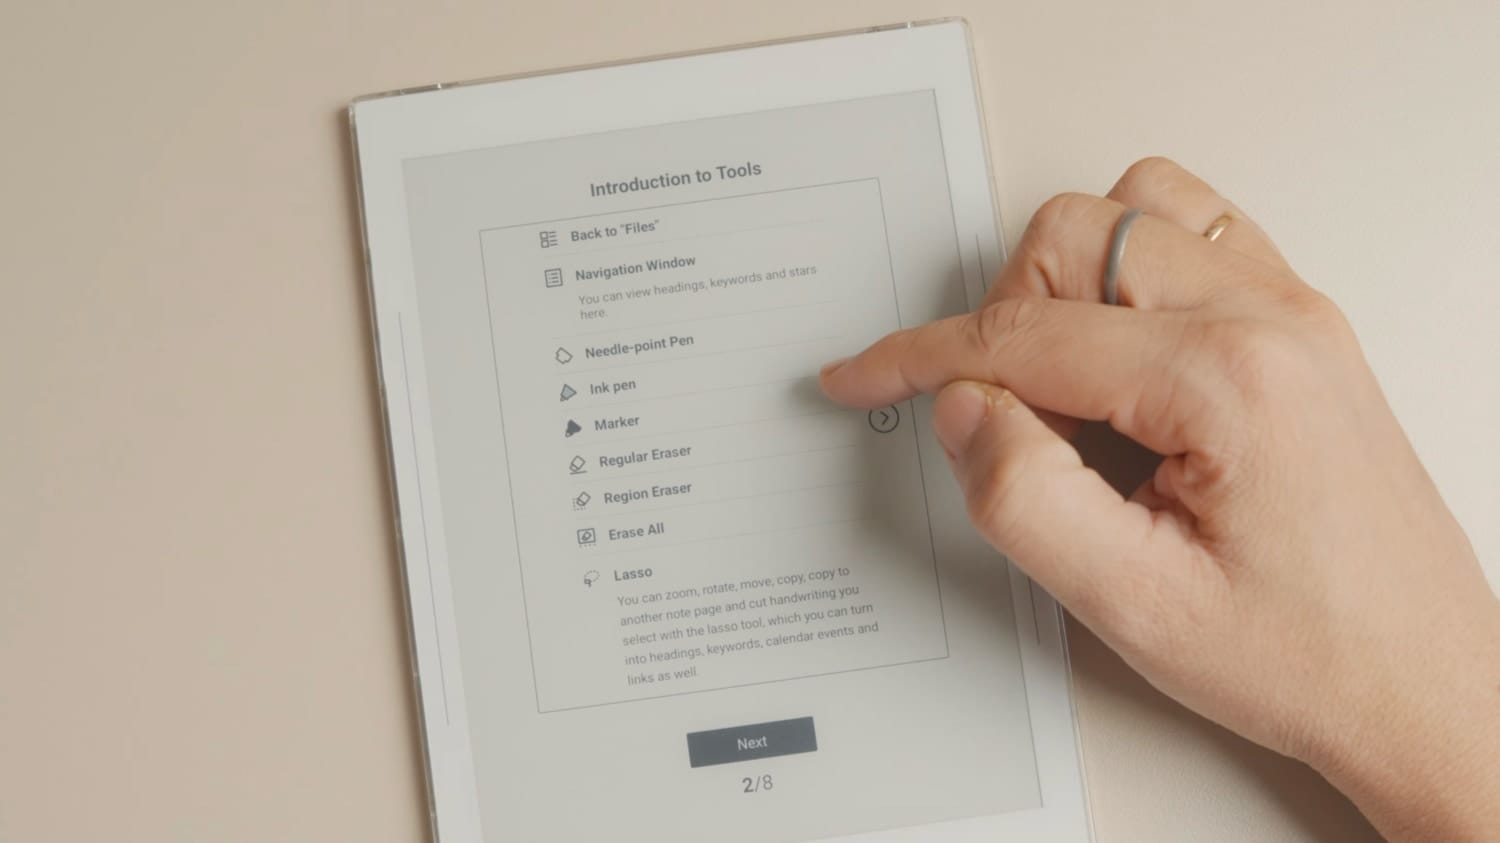
You can double-tap with two fingers to hide and unhide the toolbar, double-tap with a single finger at the bottom to hide and unhide the page number and notebook title, and press and hold on the toolbar to move it or use it as a floating bar.
I will also show how the folder structure works in Supernote. To access your files, swipe down on the right sidebar to open the Quick Start menu and tap the Files icon. You will see six folders.
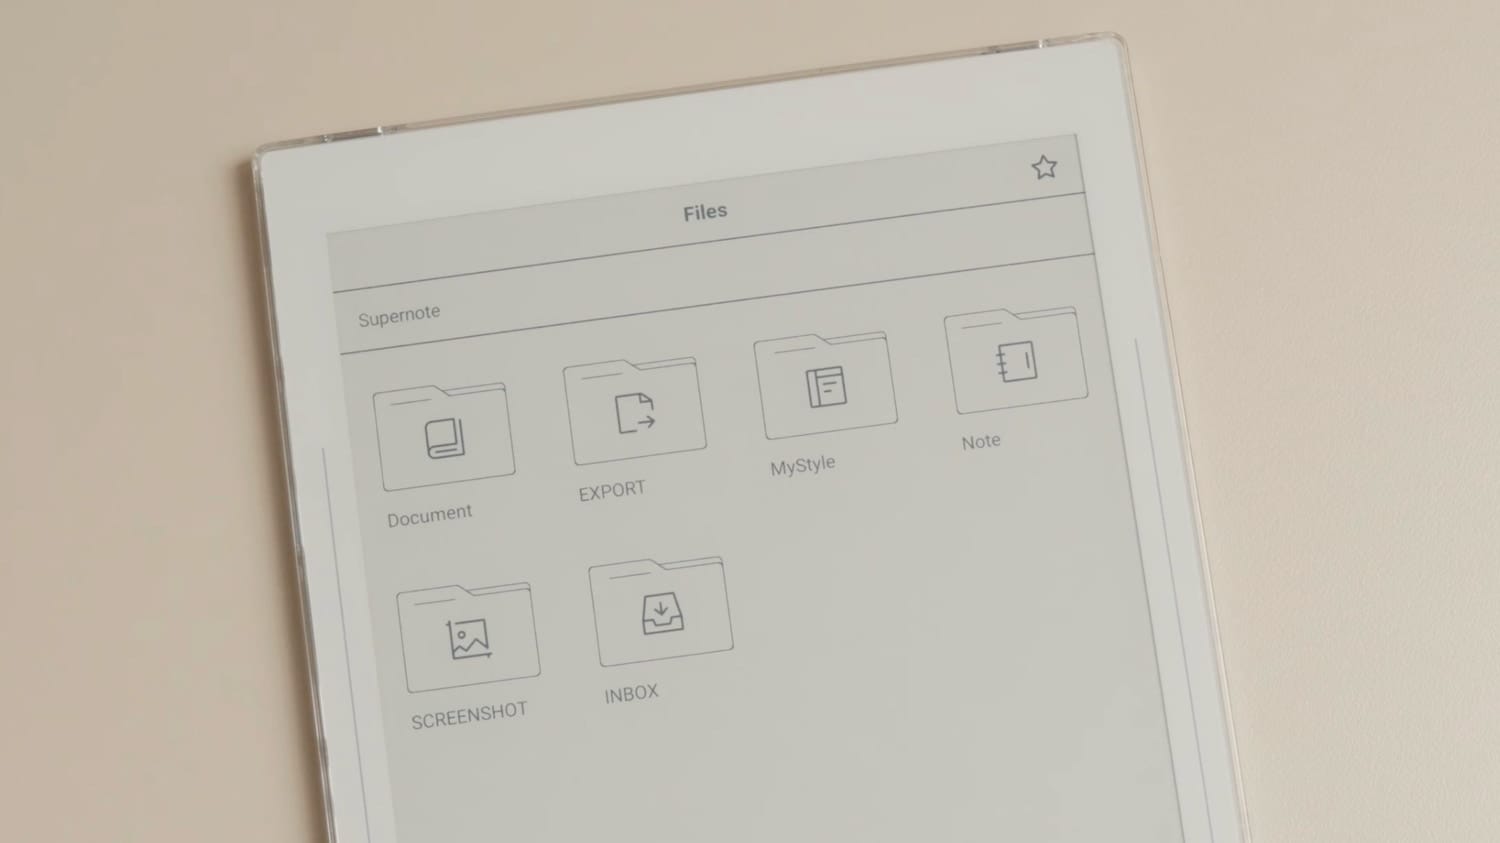
- Documents – Stores all your PDFs, ePubs, and other document files.
- Export – Contains all notes and files you’ve exported from the device.
- MyStyle – Used for saving your notes, custom templates, and notebook covers.
- Notes – Holds all your handwritten and digital notes.
- Screenshot – Stores every screenshot captured on the device.
- Inbox – Saves email attachments when you sync your email with Supernote.
Supernote nomad: initial impressions
That’s our first look at the Supernote Nomad. My initial impressions when I unboxed the device about three weeks back were overwhelmingly positive. The device feels premium, perfectly weighted and balanced, and delightful to use.
I will be publishing more articles soon, including the reasons I chose this device over other e-ink options, a closer look at its cover and pen, and more. If you’d like to read these guides, sign up and become a free member.