
Top Mac Settings to Change to Enhance Your Experience
Improve your Mac experience with these top Mac settings changes. Enhance Finder, customize display settings, change default opening apps, and more.
macOS is filled with hidden features and tricks that can enhance your Mac experience. We have covered the best Mac tips and tricks in a previous article, which you can read to learn more about your Mac. In today’s guide, we will focus on the top Mac settings you should change to improve your Mac.
Mac settings you should change to enhance your experience
The best thing about a Mac is that it doesn’t require much setup. Even if you are new to the Mac, you can start working on it without much preamble. That said, there are several settings that you can change to enhance your Mac experience.
- Make Finder usable
- Customize display settings
- Change the default opening app for files
- Fix Hot Corners
- Enhance your Safari browsing experience
- Show battery percentage and optimize battery charging
- Create a custom folder icon
- Type to Siri
- Disable click wallpaper to display desktop
Make Finder usable
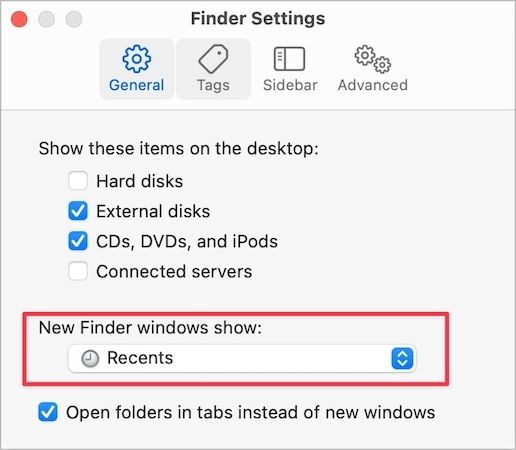
In its default configuration, Finder is not that much useful. That’s why, the first thing we do on a new Mac is to customize it to make it better. When you open the Finder app, you will see that it opens the Recents folder menu. For me, this is more or less useless. So, we changed it to the Downloads folder.

To customize this behavior, use the Finder menu to open settings, and under the New Finder windows show setting, select the folder you want to open. We have set it to Downloads as that’s the folder we use the most. You can set it to any folder you want.
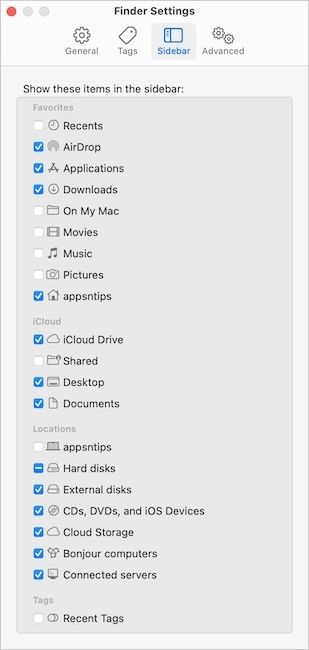
While in the Finder settings, click on the Sidebar tab. You can select which folders you want to see in Finder’s sidebar. We disabled the Recents, Picture, and Movies folders and removed the Recent Tags section as we don’t use them.
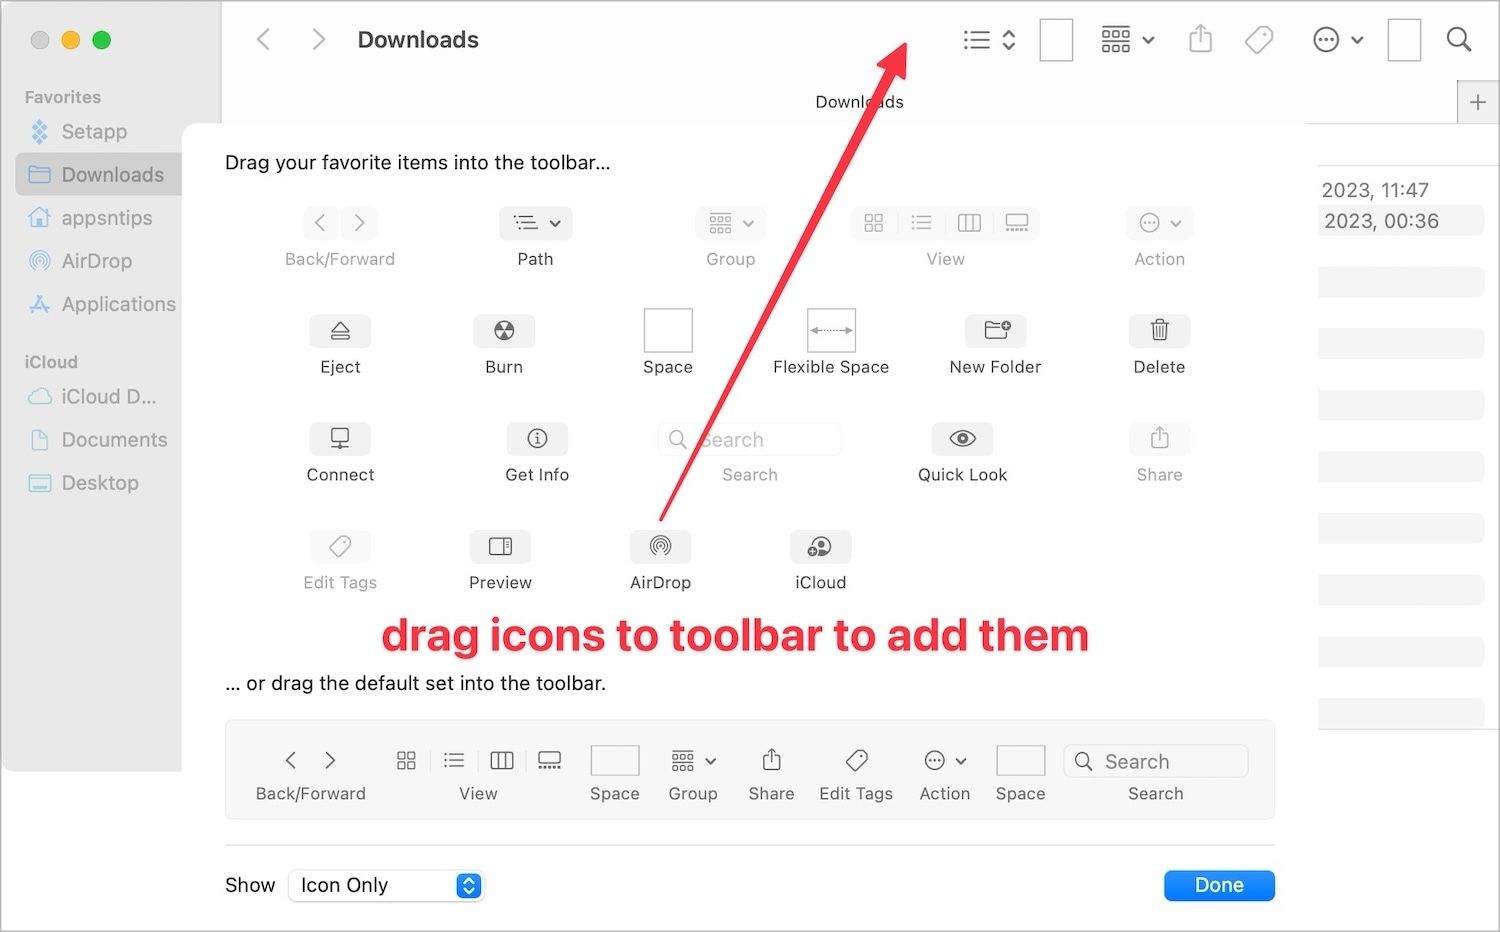
The final thing we customize in Finder is the toolbar at the top. To customize the toolbar, right-click or control-click on the toolbar and choose the Customize toolbar… option.
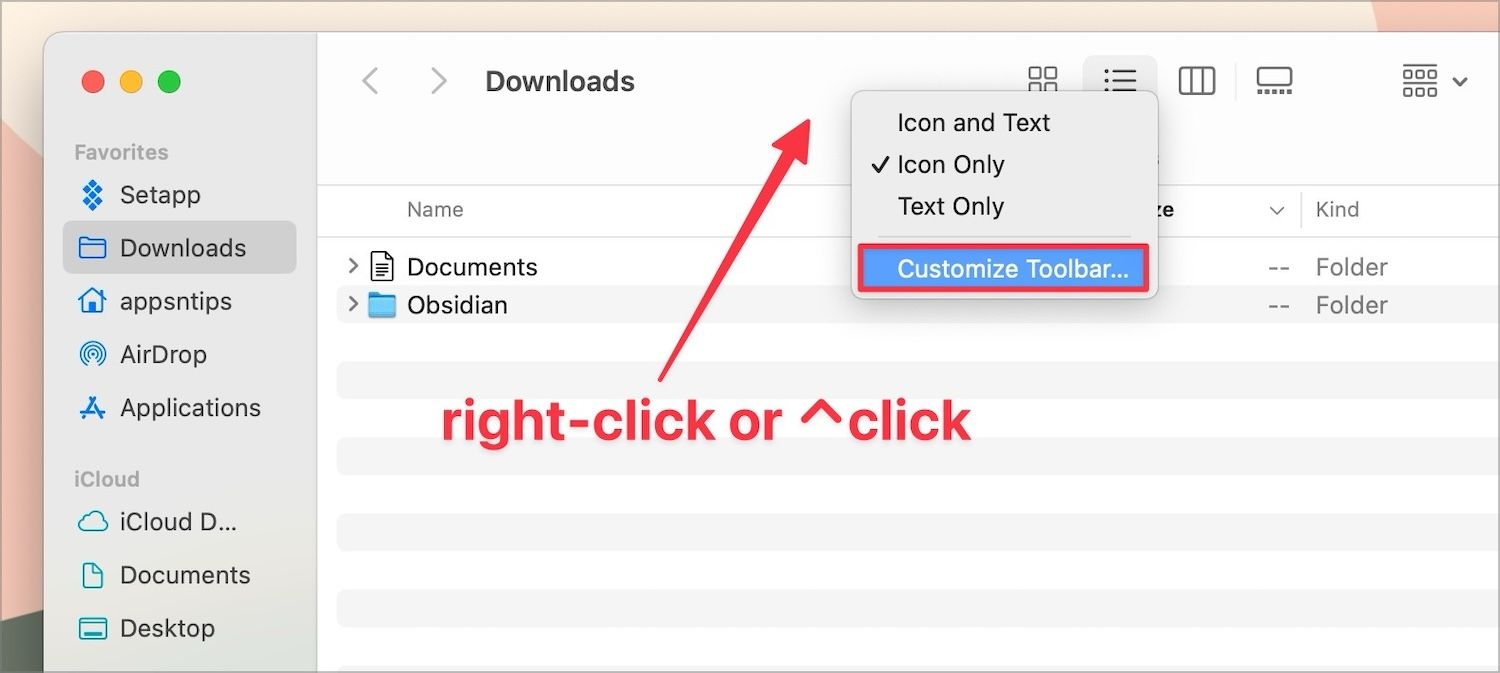
We added the AirDrop action to the toolbar as it allows us to send files via AirDrop with just a click. All you need to do is select the file you want to send and click the AirDrop icon to open the AirDrop menu.
Customize display settings
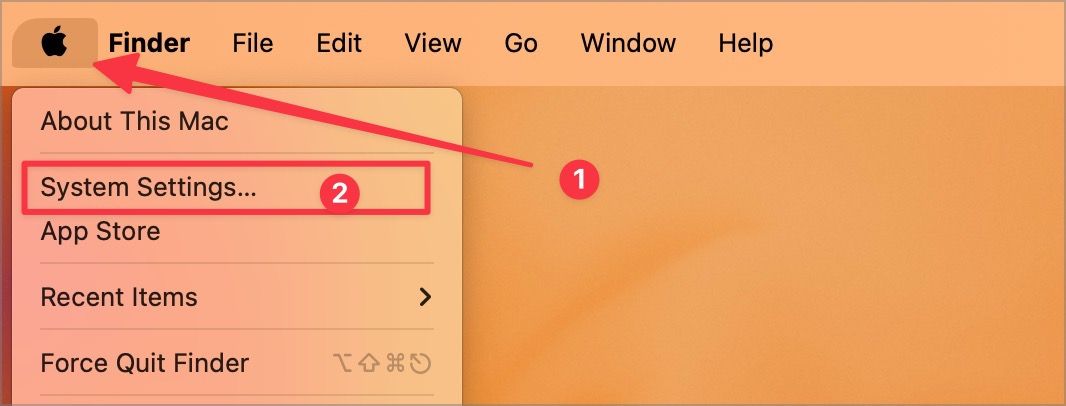
The next thing we change is the display settings on the Mac. To open the Display settings on your Mac, click on the Menu in the top-right corner and choose the System Settings option. System Settings is where you can modify all the OS-level settings, and we will use it a lot in this guide.
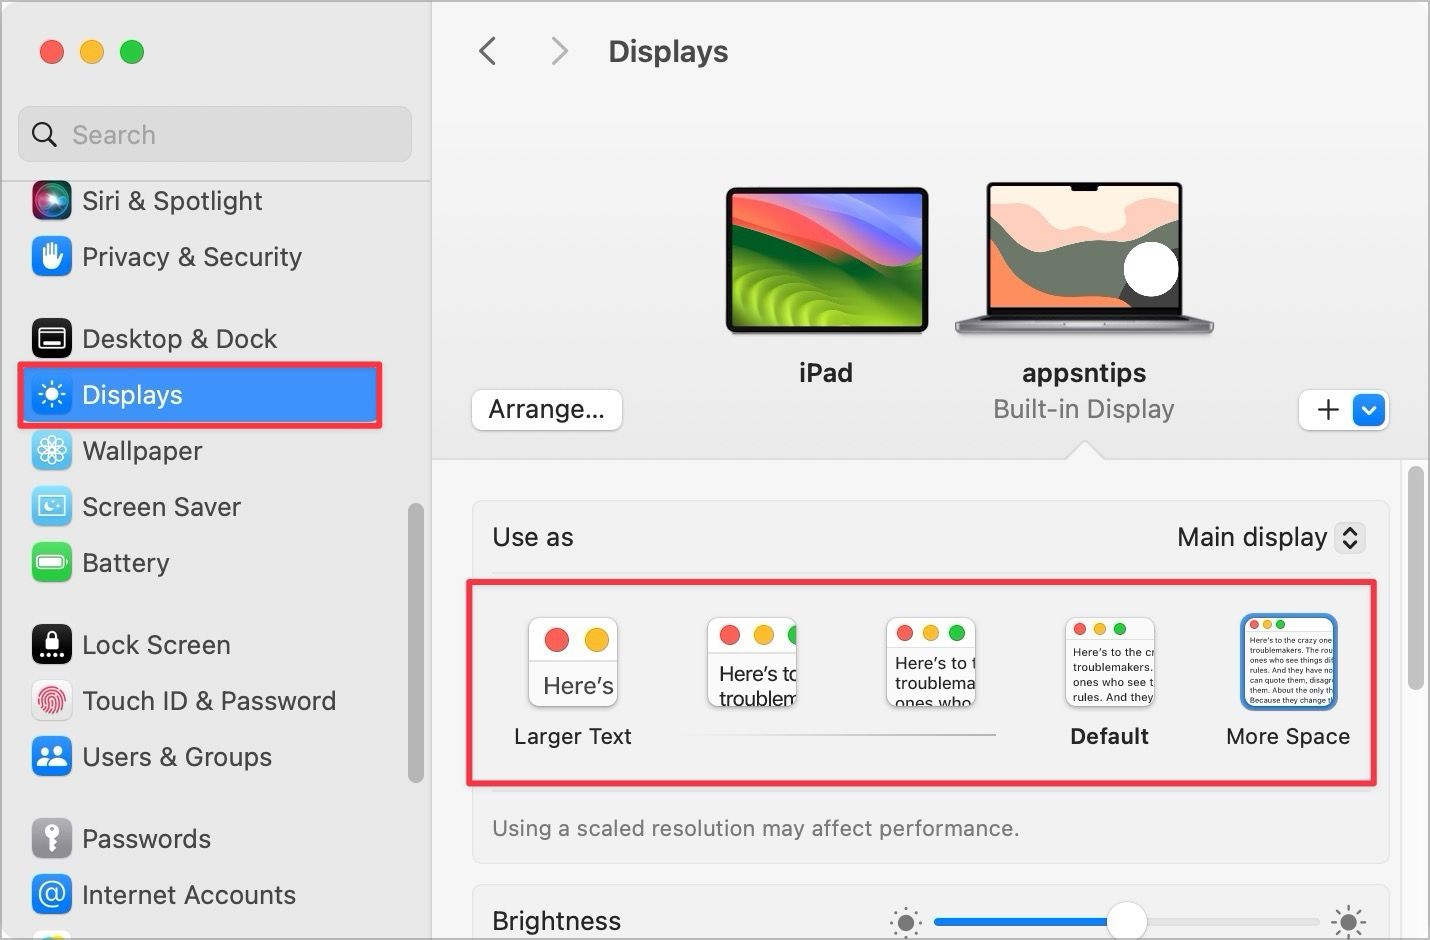
In the System Settings window, scroll down the left sidebar and click to select the Displays settings. Here, the first thing we do is to pick the More Space display scaling option. It scales the display and reduces the size of UI elements, giving you more space to work with. If you have poor eyesight, this is where you can increase the text size.
Another thing we disable here is the Automatic Brightness setting, as it's quite frustrating. We enjoy watching video content with lights off, and macOS automatically reduces the brightness when it senses low ambient lighting, so we have to keep increasing the brightness every few minutes. To stop this madness, I keep the automatic brightness turned off.
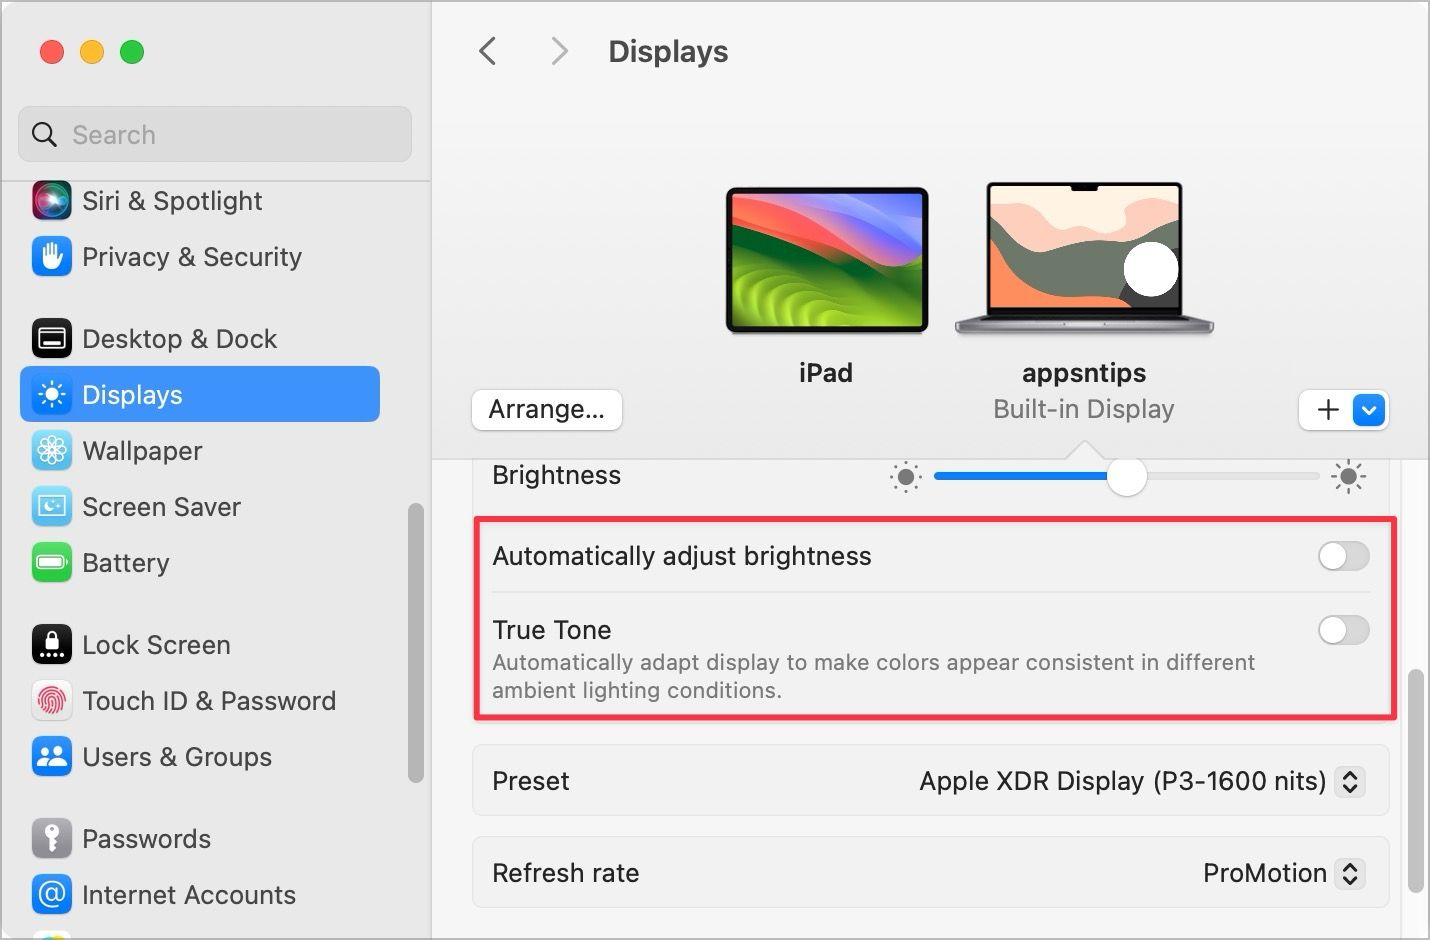
If you work with photos and videos like I do, we recommend turning off True Tone. The True Tone feature uses advanced multichannel sensors to adjust the color of the display to make it more natural. However, if you do image or video editing, it’s better to turn it off to see true-to-life colors.
The final display setting we change is in the Appearance settings page. In the Appearance settings, disable the toggle for Allow wallpaper tinting in windows to get true-to-life colors. If you have just switched from Windows, we recommend selecting the Always option for the Show scroll bars setting.
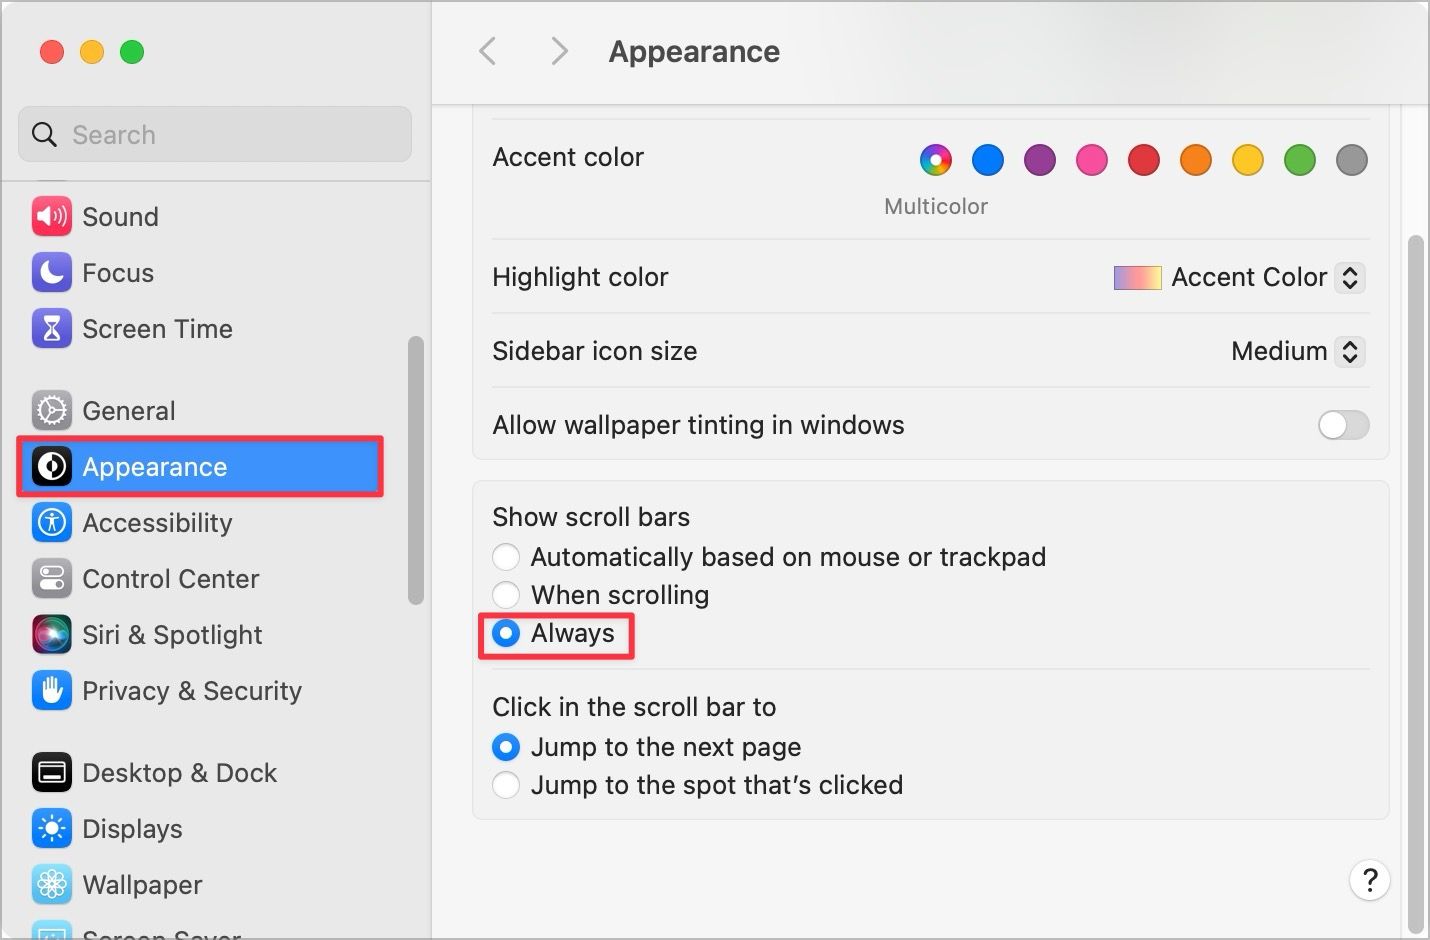
It ensures that the scroll bars are always visible, allowing you to easily click and drag scroll bars in longer documents and web pages. By the way, if you have just switched from Windows, you should definitely watch our video below.
Change the default opening app for files
The next thing to change in macOS is the default opening apps for files. While you can do this for any file type, the one you should definitely change is for music files. By default, macOS opens any audio file in the Music app, and the experience is not good.
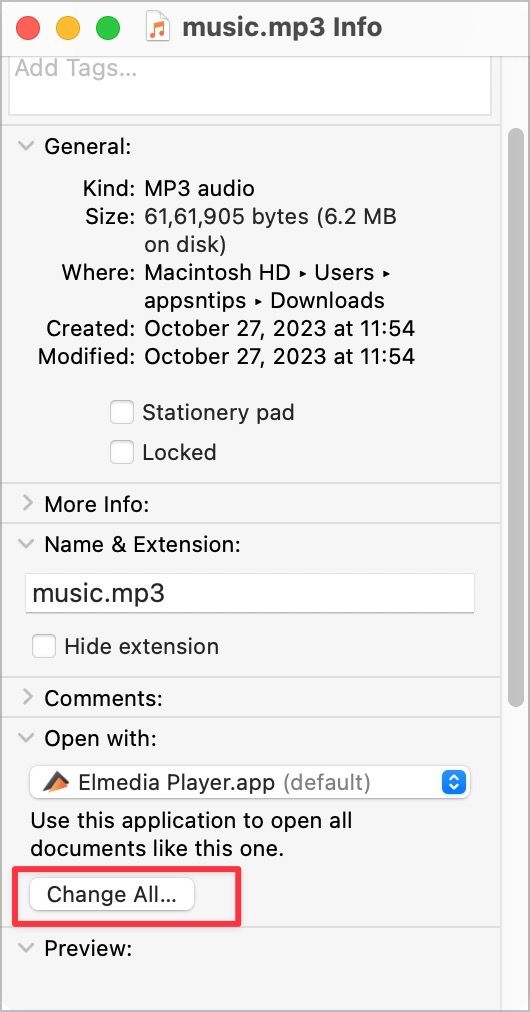
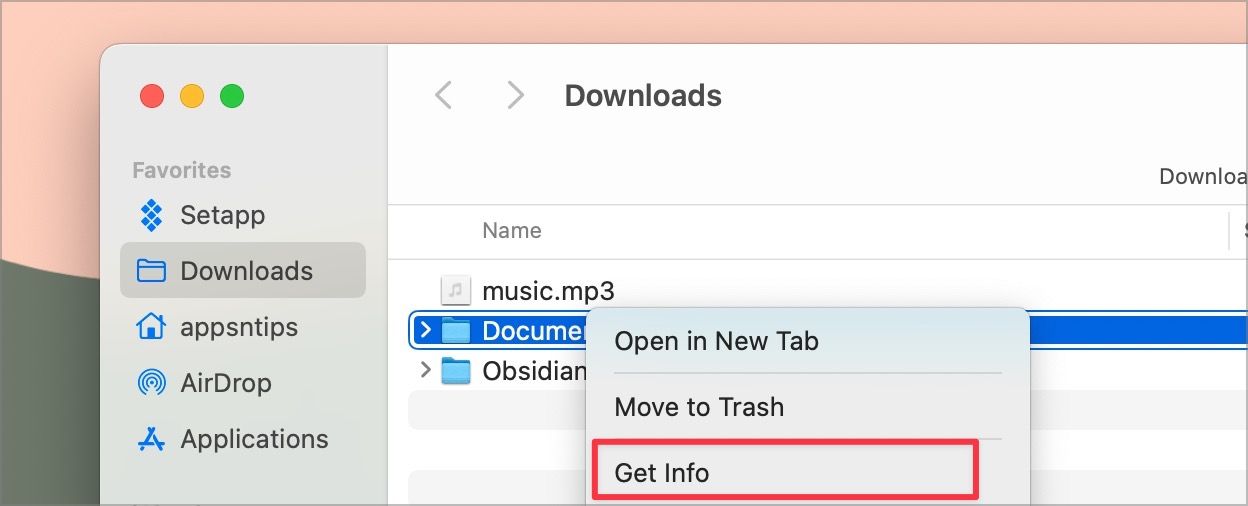
If you use a third-party music app, we recommend setting it as the default app. To set a default app for a file, select the file and hit the ⌘i keyboard shortcut. You can also right-click on the file and choose the Get Info option.
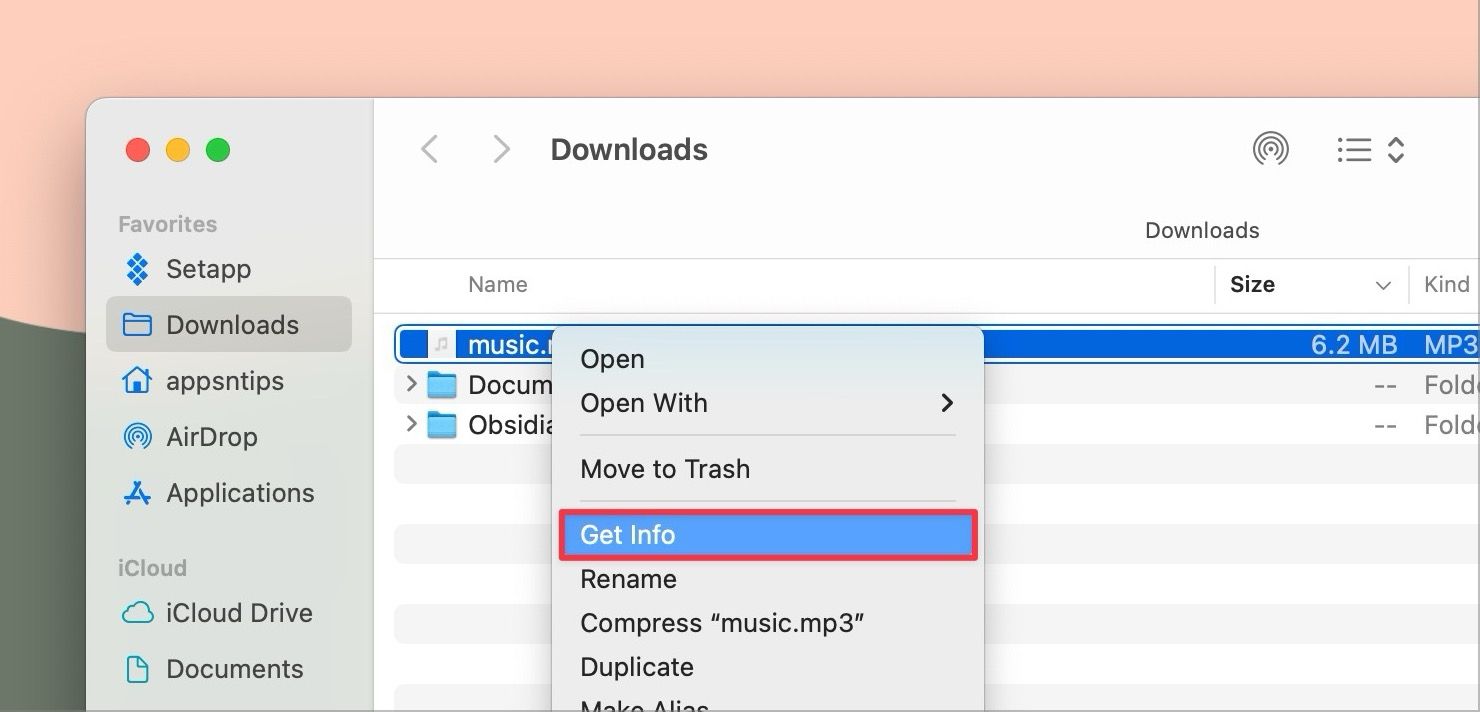
Now look for the Open with option and use the dropdown menu to choose the app.
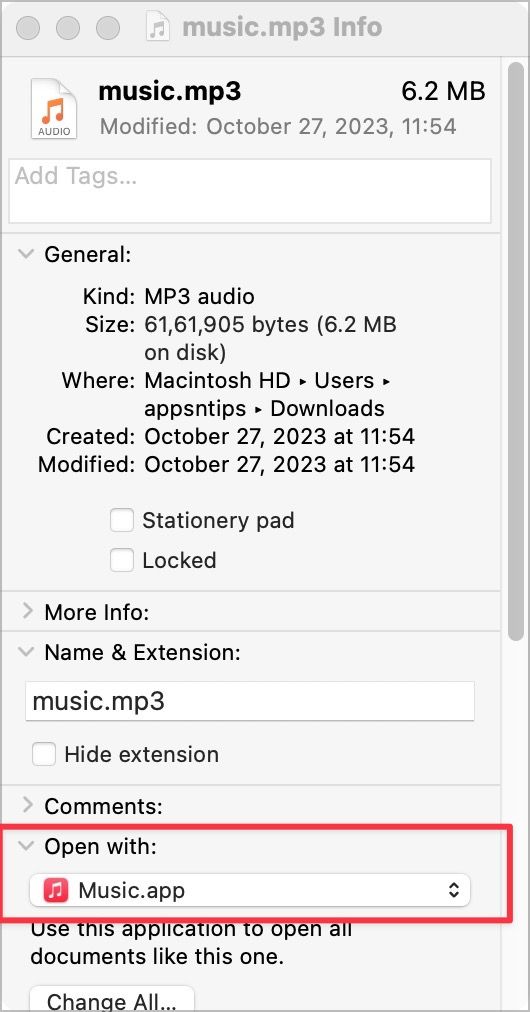
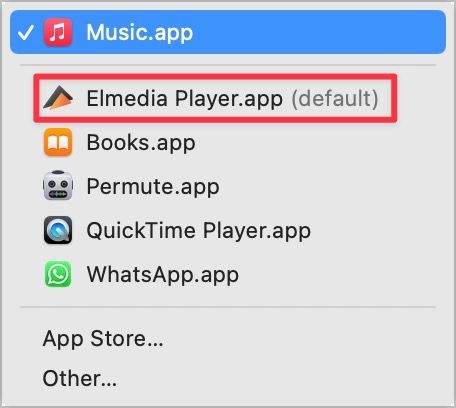
Finally, click the Change All… button to change the default app. You can do this for all file types. Remember the changes effect not based on file type but file extension.
For example, if you have audio files in MP3 and MP4 formats, you will have to change the default app for both these formats separately.
Fix Hot Corners
Hot Corners is one of our favorite software features of macOS, but it’s broken in its default configuration. Even if you haven’t used this feature before, you have experienced its irritating behavior when you move the cursor to the bottom-right corner of the screen. By default, it opens a Quick Note, which is useful on the iPhone but almost useless on the Mac.
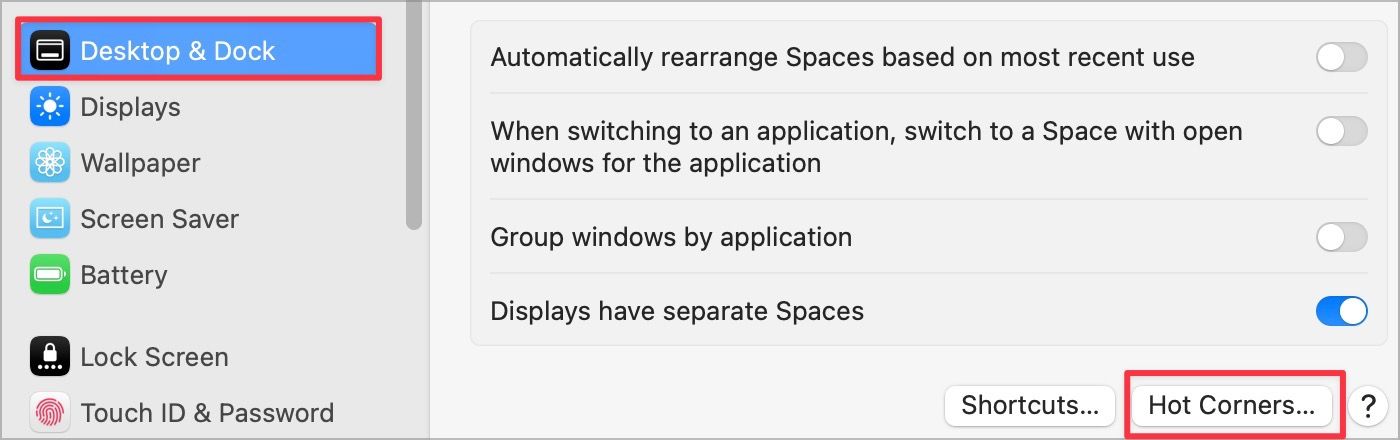
To fix this mess, we will not only change what happens when you move your cursor to the corners but also ensure that you don’t trigger the action accidentally. Again, open the System Settings app and this time go to the Desktop & Dock settings. Now scroll down the right sidebar and click the Hot Corners… button.
As you can see, you can see separate actions for each of the corners of the display. I only use the bottom left and right corner and set them to Put Display to Sleep and Lock Screen actions. To ensure that you don’t accidentally trigger these actions, hold down a modifier key before choosing the action.
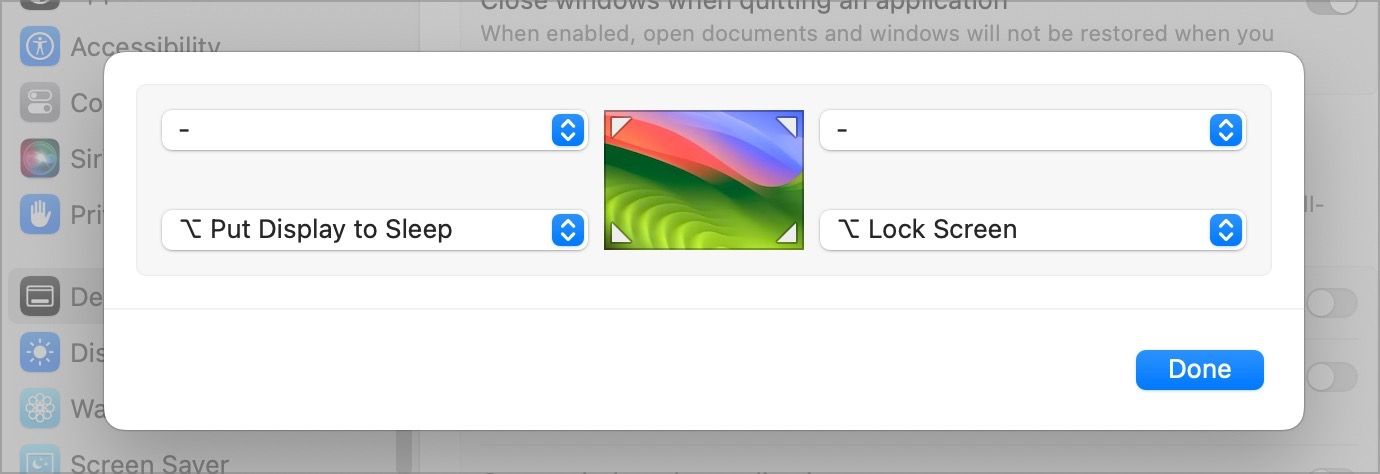
As you can see, when I hold down the ⌥ key, its symbol appears next to the action. You can also choose the ⌘, ⇧, or ⌃ keys if you want. Now, when you want to trigger hot corners, you need to hold the modifier key. This ensures that you don’t accidentally activate hot corners on your Mac.
Enhance your Safari browsing experience
Safari is the default browser on Mac, and we love it. If not for the excellent Arc Browser, it would have been our default browser. That said, thanks to its super-fast load times and low resource usage, resulting in longer battery life, we believe it should remain the default browser for most users.
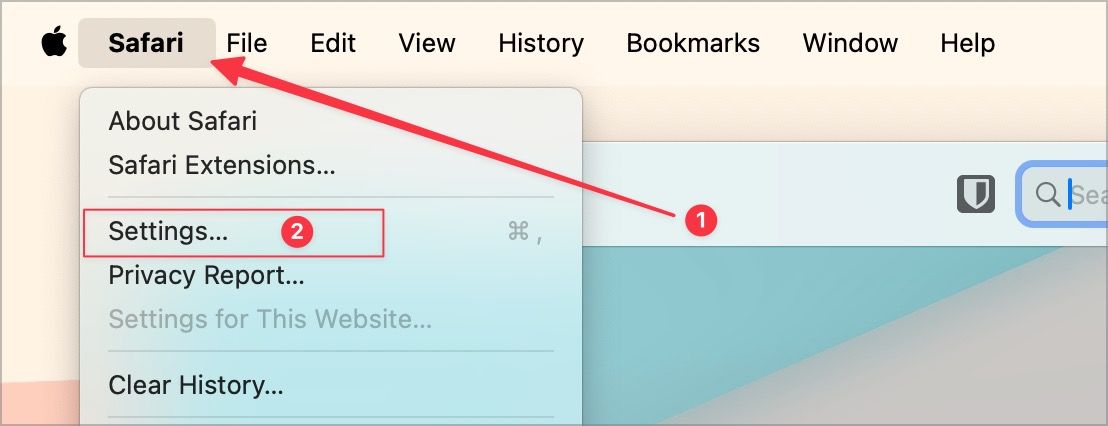
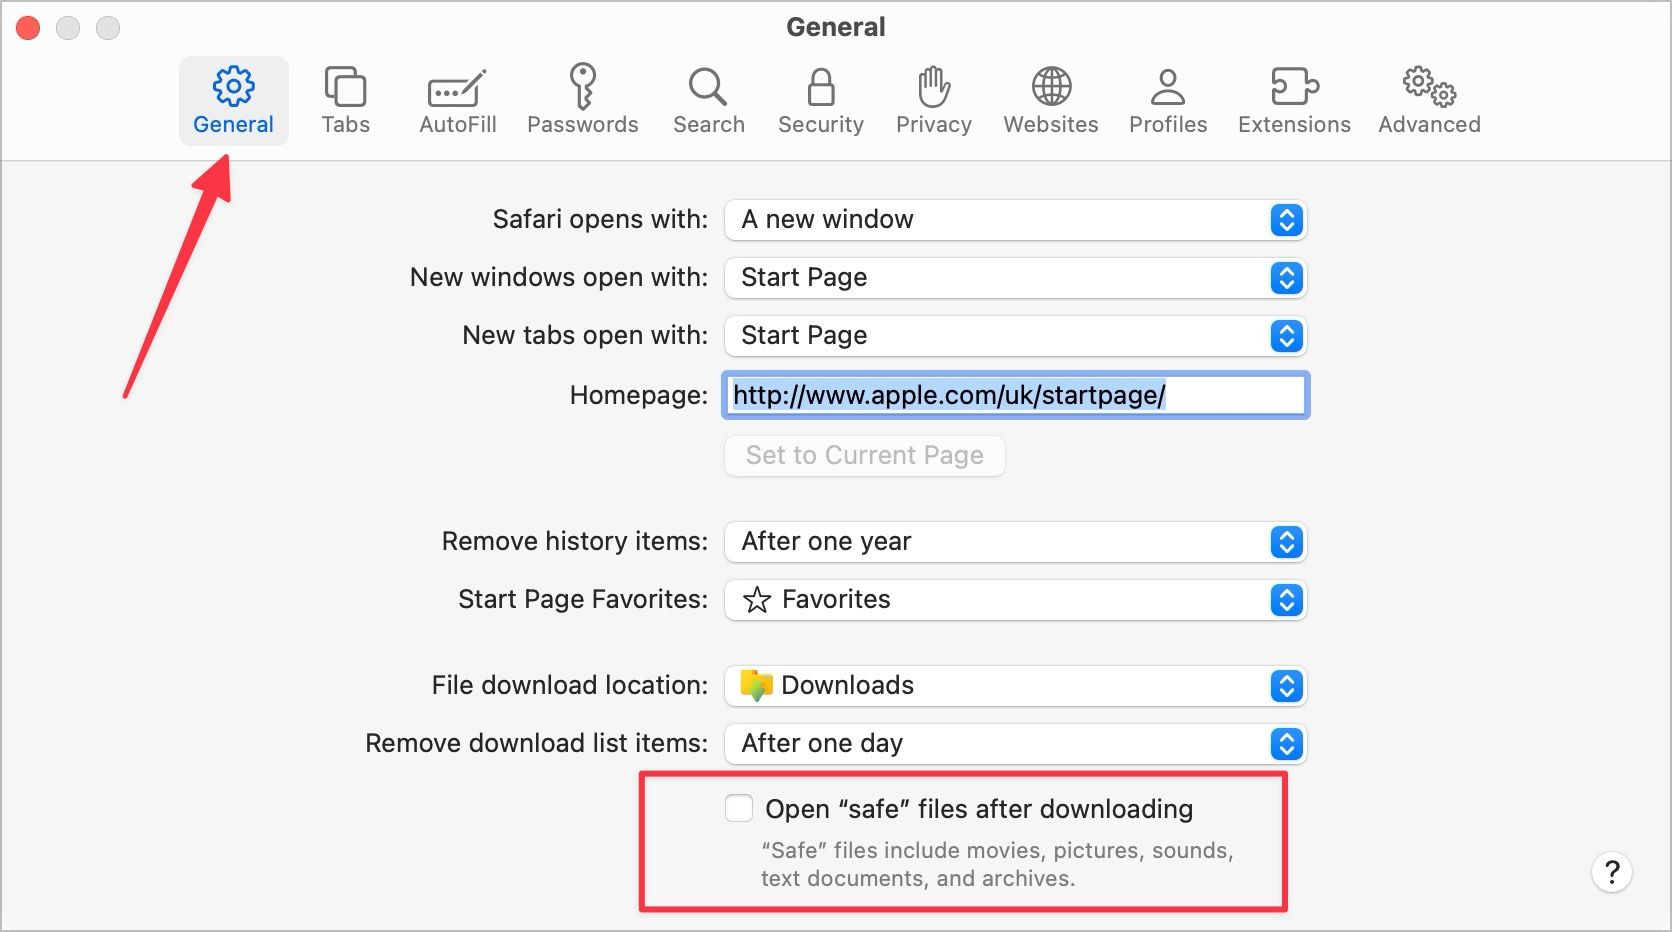
To enhance your Safari browsing experience, you should make some tweaks. To adjust Safari settings, launch the app, click the Safari menu item, and open Settings.
The first thing you should do here is to disable the Open safe files after downloading setting. It will ensure that the files don’t open automatically when you download them.
The second thing we recommend changing is in the Advanced setting tab. Enable the toggle for Show full website address to see the full URL for any web page. You can also enable the toggle for Save articles for offline reading automatically to download and save articles when you add them to your reading list.
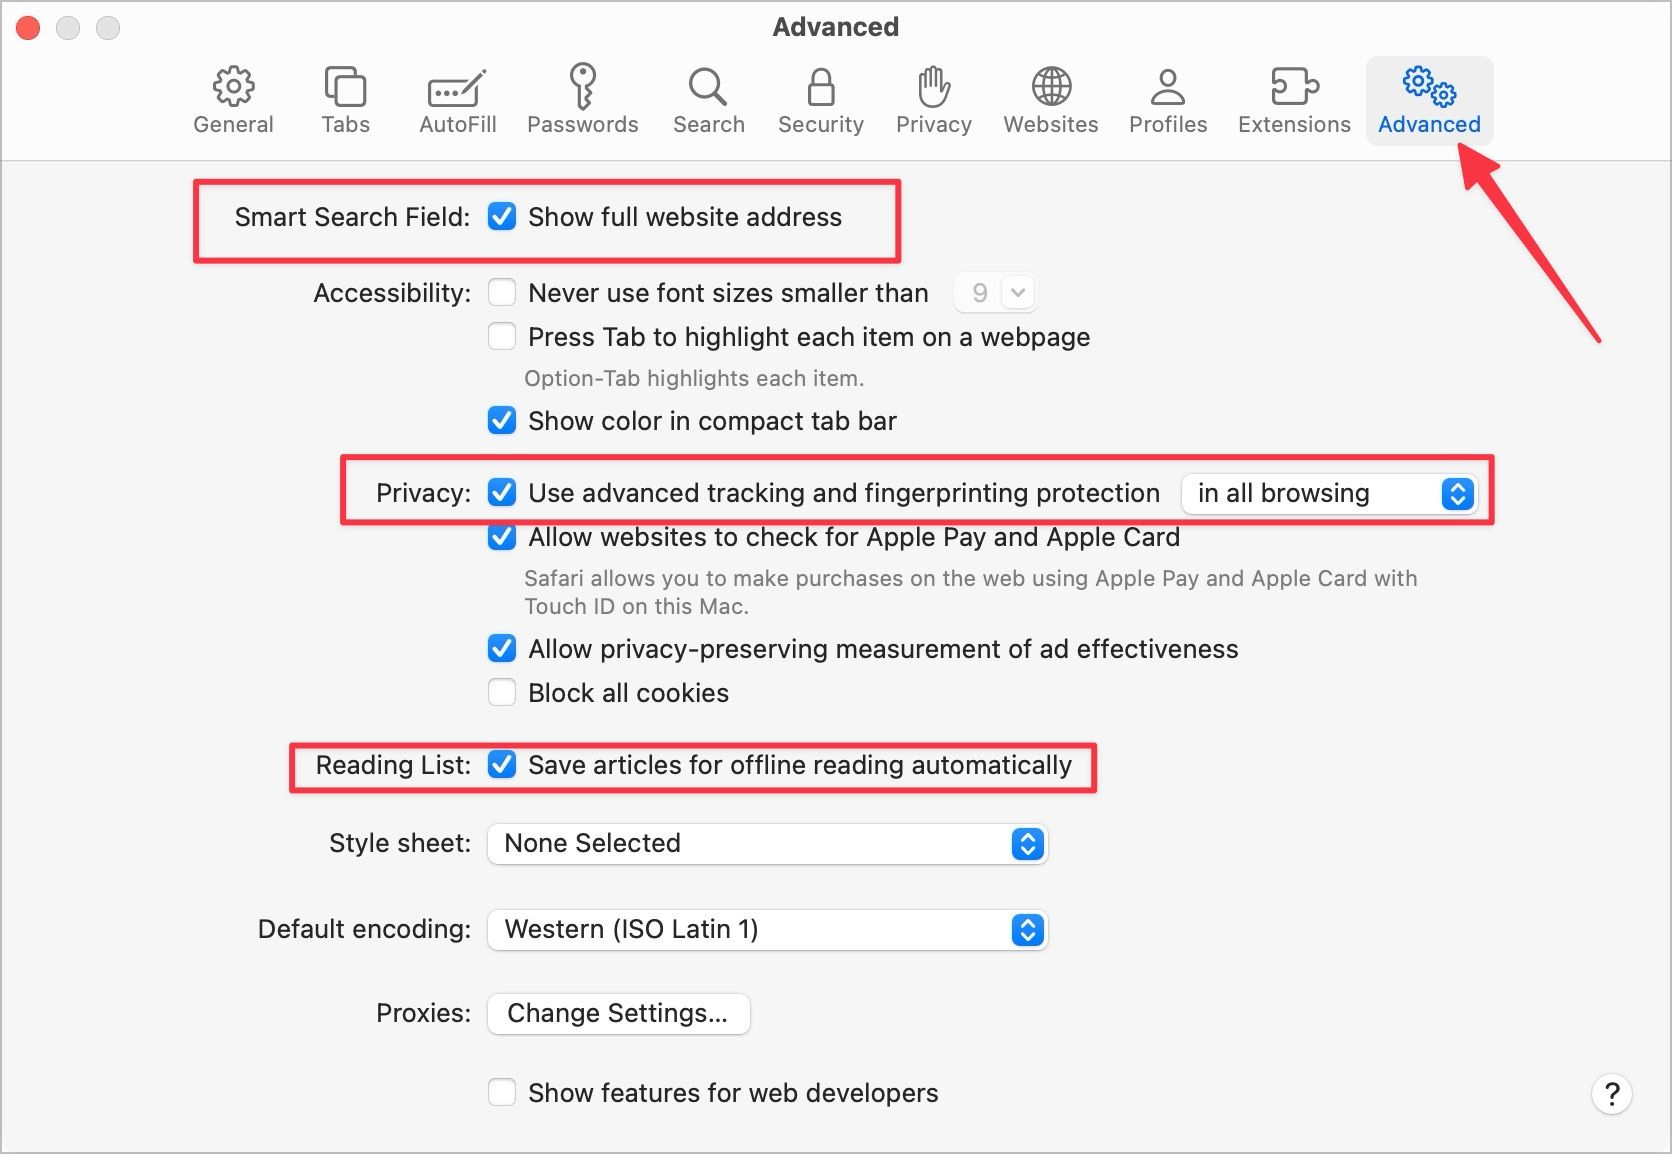
Now, click on the dropdown menu next to Use advanced tracking and fingerprinting protection and set it to in all browsing sessions to improve your online privacy. Finally, if you have updated to macOS Sonoma, you can use the Safari Profiles feature to create multiple profiles to separate your work and browsing history.
Show battery percentage and optimize battery charging
If you are using a Mac notebook, keeping track of its battery health is of utmost importance. By default, the battery symbol in the menu bar doesn’t show the battery percentage, and you have to click on the icon to reveal the percentage.
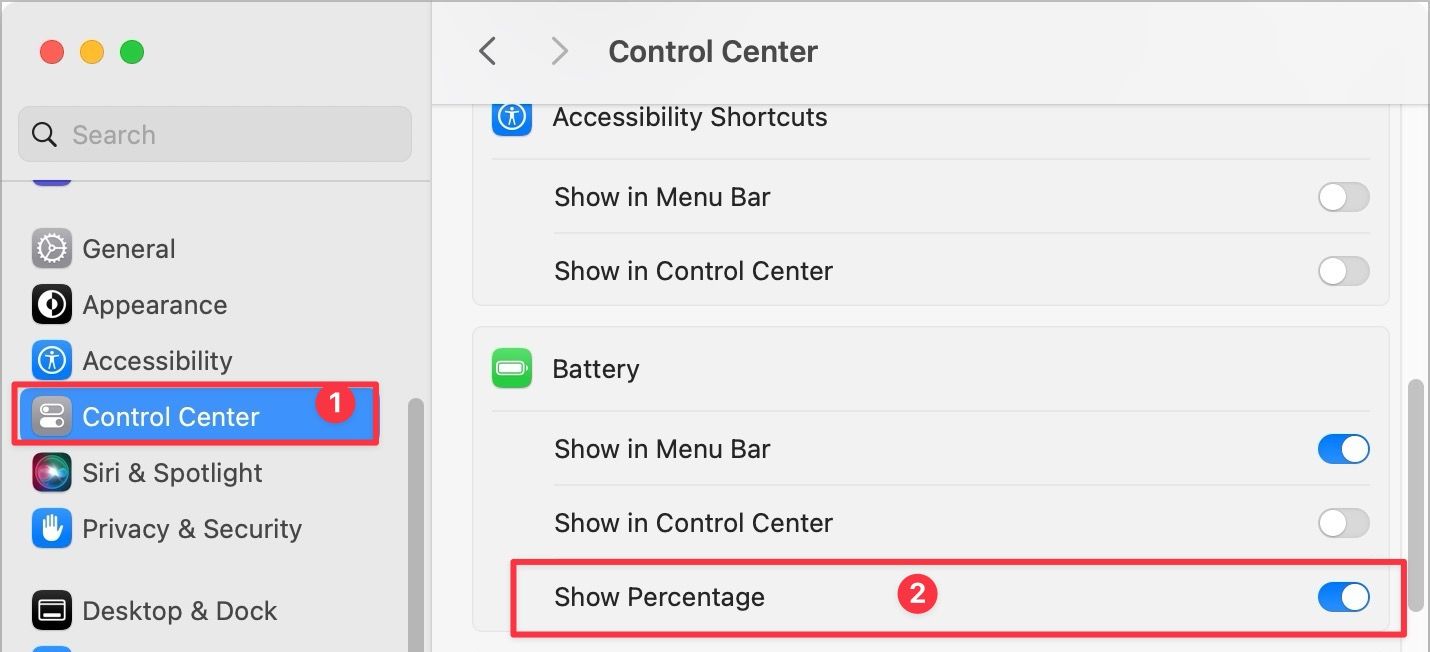
To always show battery percentage in the menu bar, open System Settings and go to the Control Center settings. Under the Battery settings, enable the toggle for Show Percentage to show the battery percentage in the menu bar.
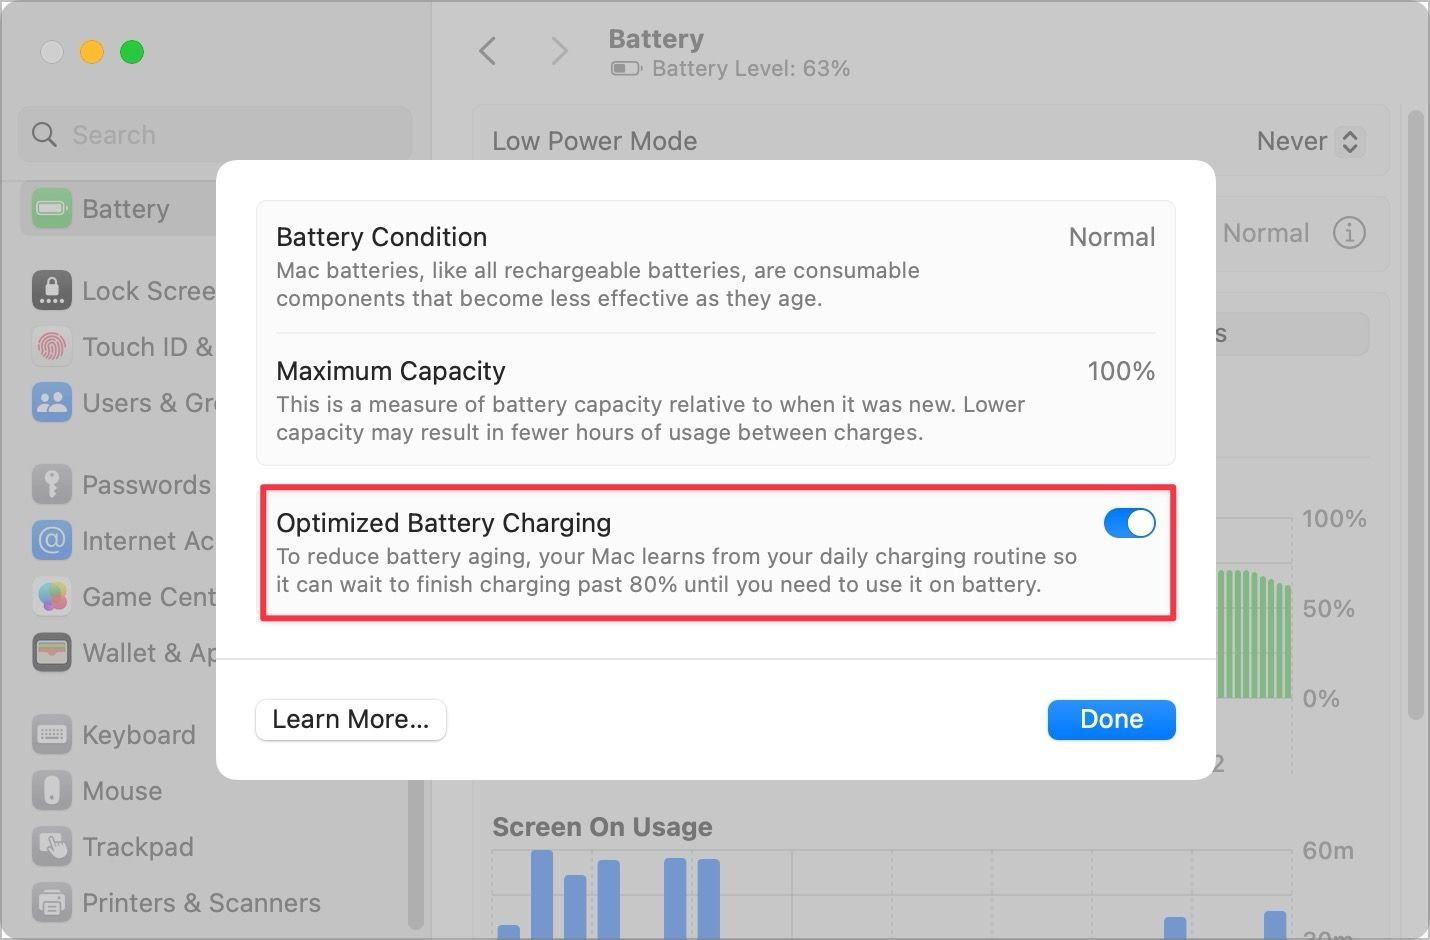
To improve your Mac’s battery life and longevity, first open the Battery settings. Now click the (i) button next to Battery Health to see the health of your battery. Now turn on the toggle for Optimized battery charging if it’s not already on.
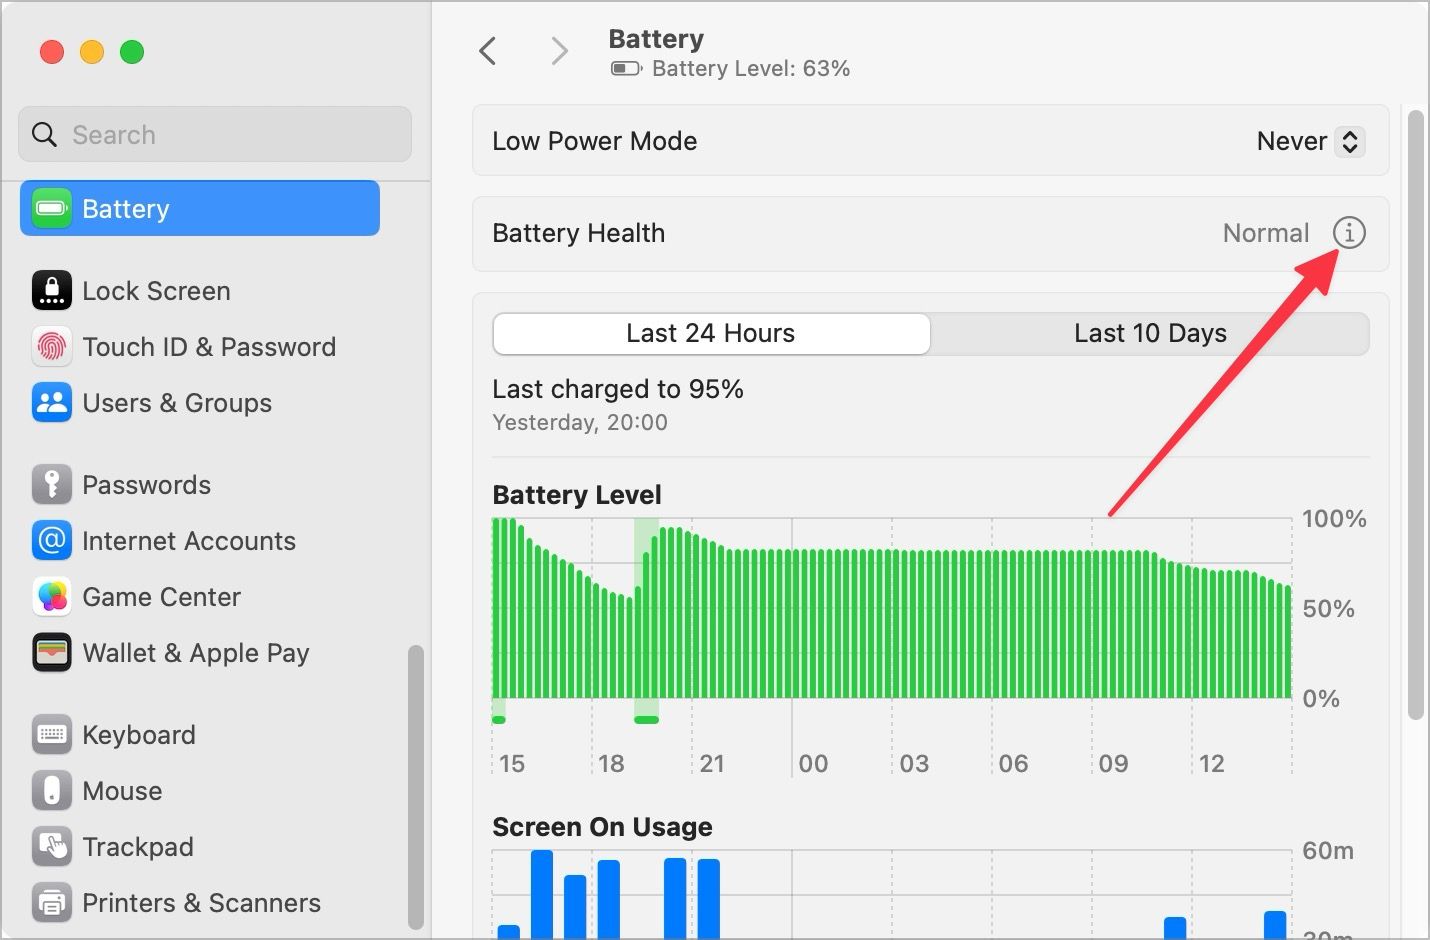
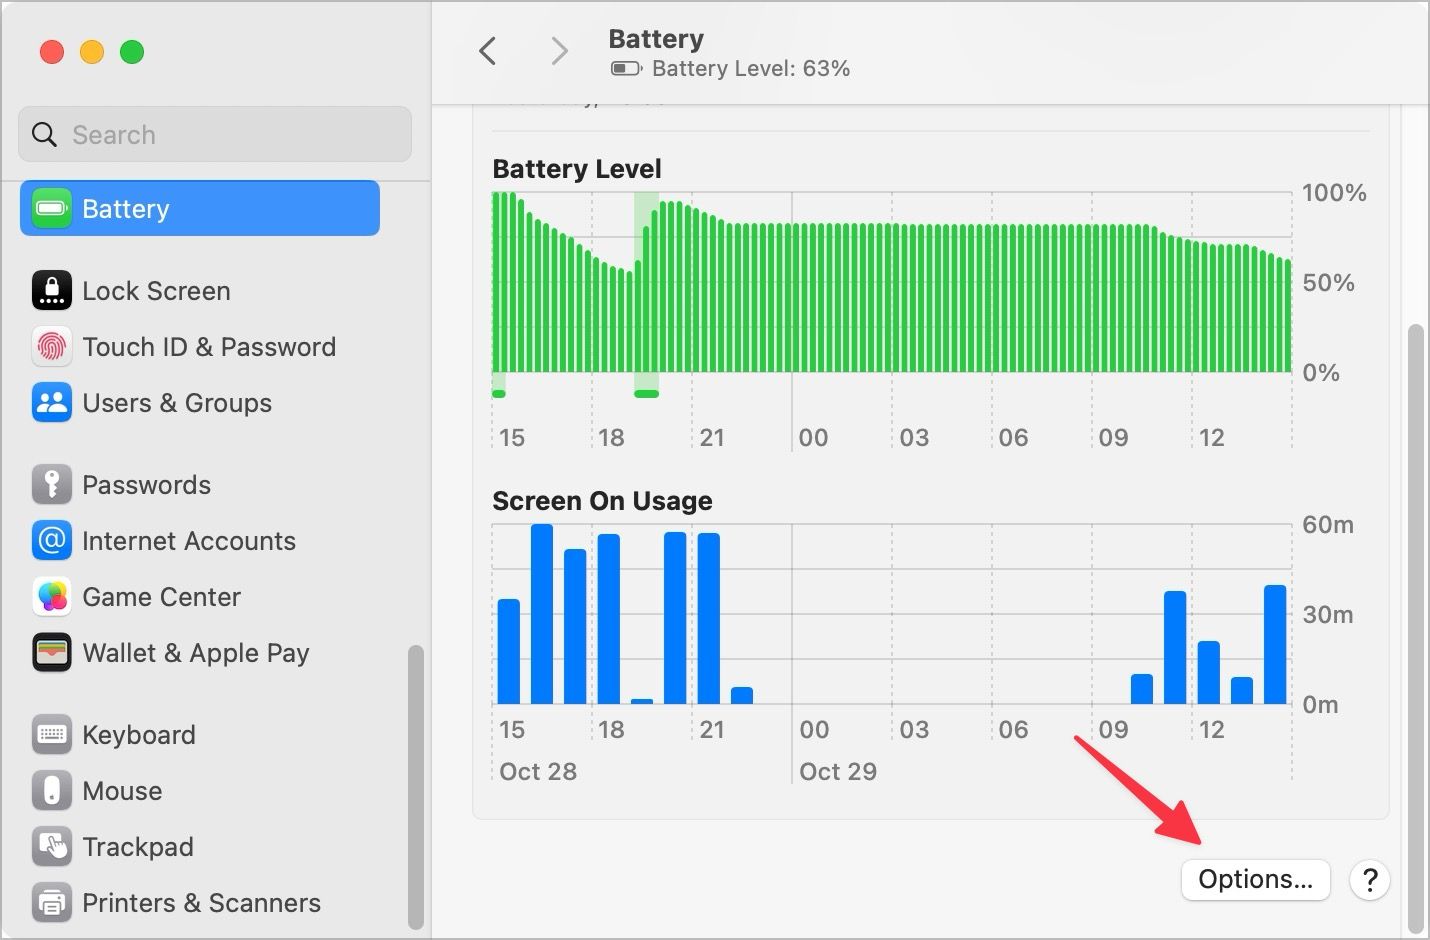
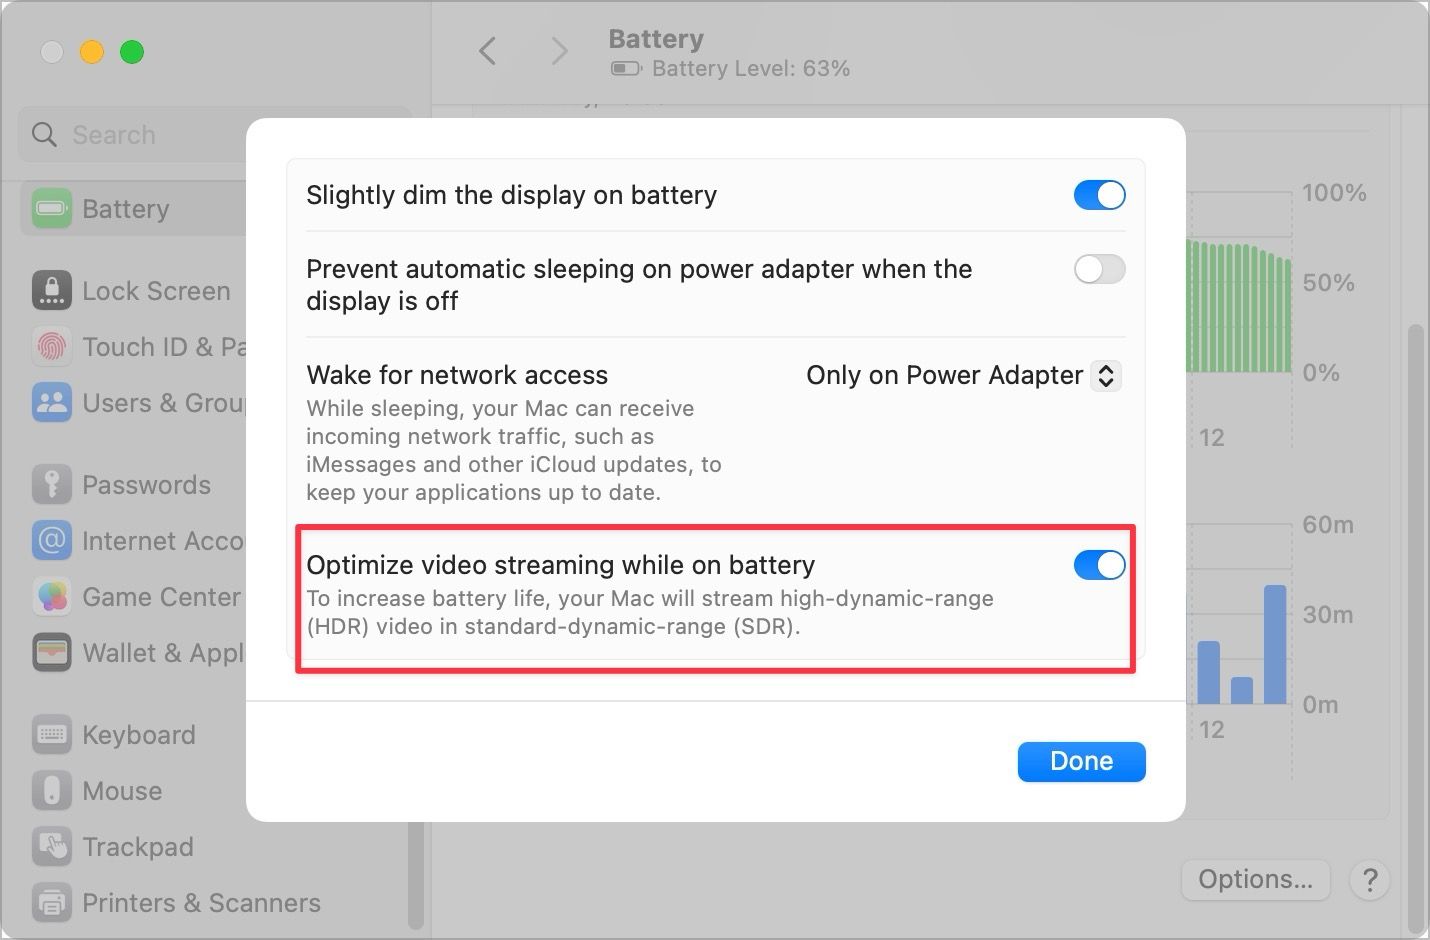
Finally, click on the Options… button and enable the toggle for Optimize video streaming while on battery to improve the battery life when streaming videos. Note that it will convert the HDR content into SDR content to save battery. If you don’t want that to happen, keep this setting turned off.
Create a custom folder icon
We love that macOS allows us to change icons for folders and apps. While we don’t always change the app icon, we love this feature to change folder icons to make them more identifiable.
To change a folder icon, select it and hit the ⌘i keyboard shortcut to open the info panel. Alternatively, right-click on the folder and choose the Get Info option.
To change the folder icon, drag and drop the icon you want to use where you see the folder icon.
Type to Siri
Type to Siri is the best way to use Siri on your Mac. If you are in a public space, activating and using Siri on your Mac with your voice can be awkward. When you enable type to Siri, instead of speaking, you can type your commands.
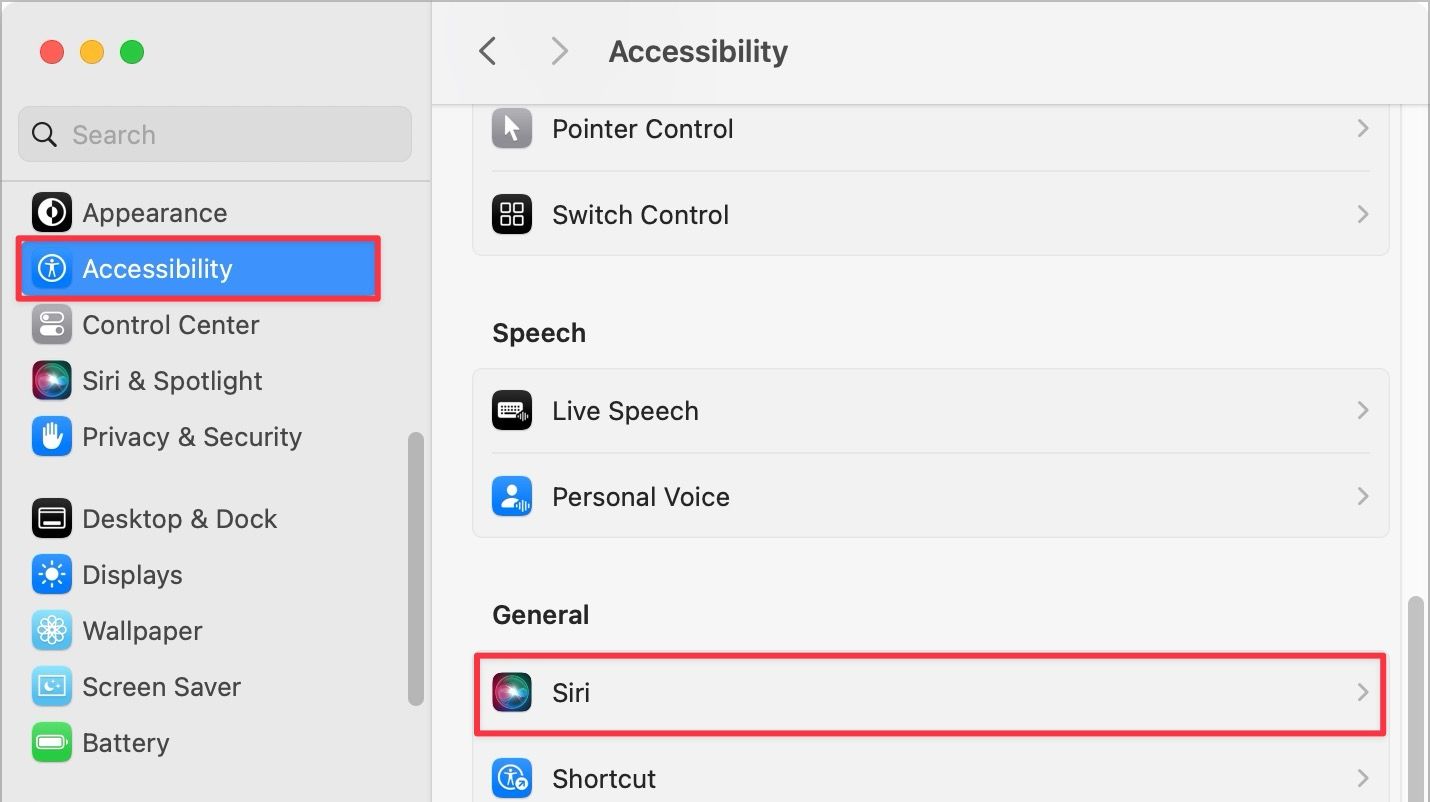
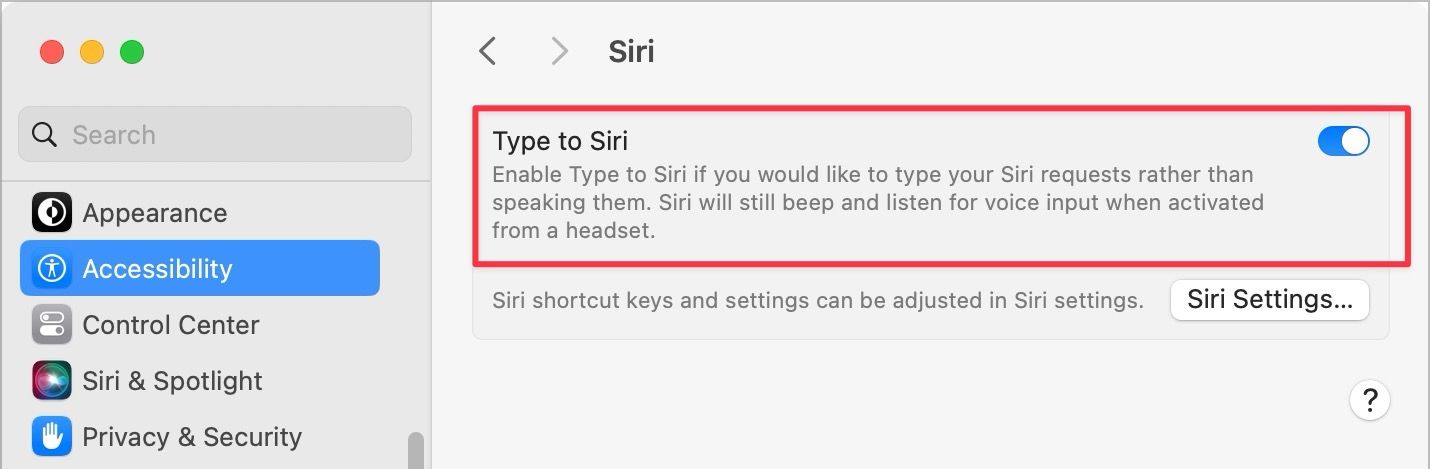
To enable this, open System Settings and go to the Accessibility settings. Here, enable the toggle for Type to Siri. Now, you can activate Siri by holding down the F5 key. Now, you can type your commands.
Another thing you should do is to disable the audio feedback of Siri, so it also shows its answer in text form. To do this, open the Siri & Spotlight setting.
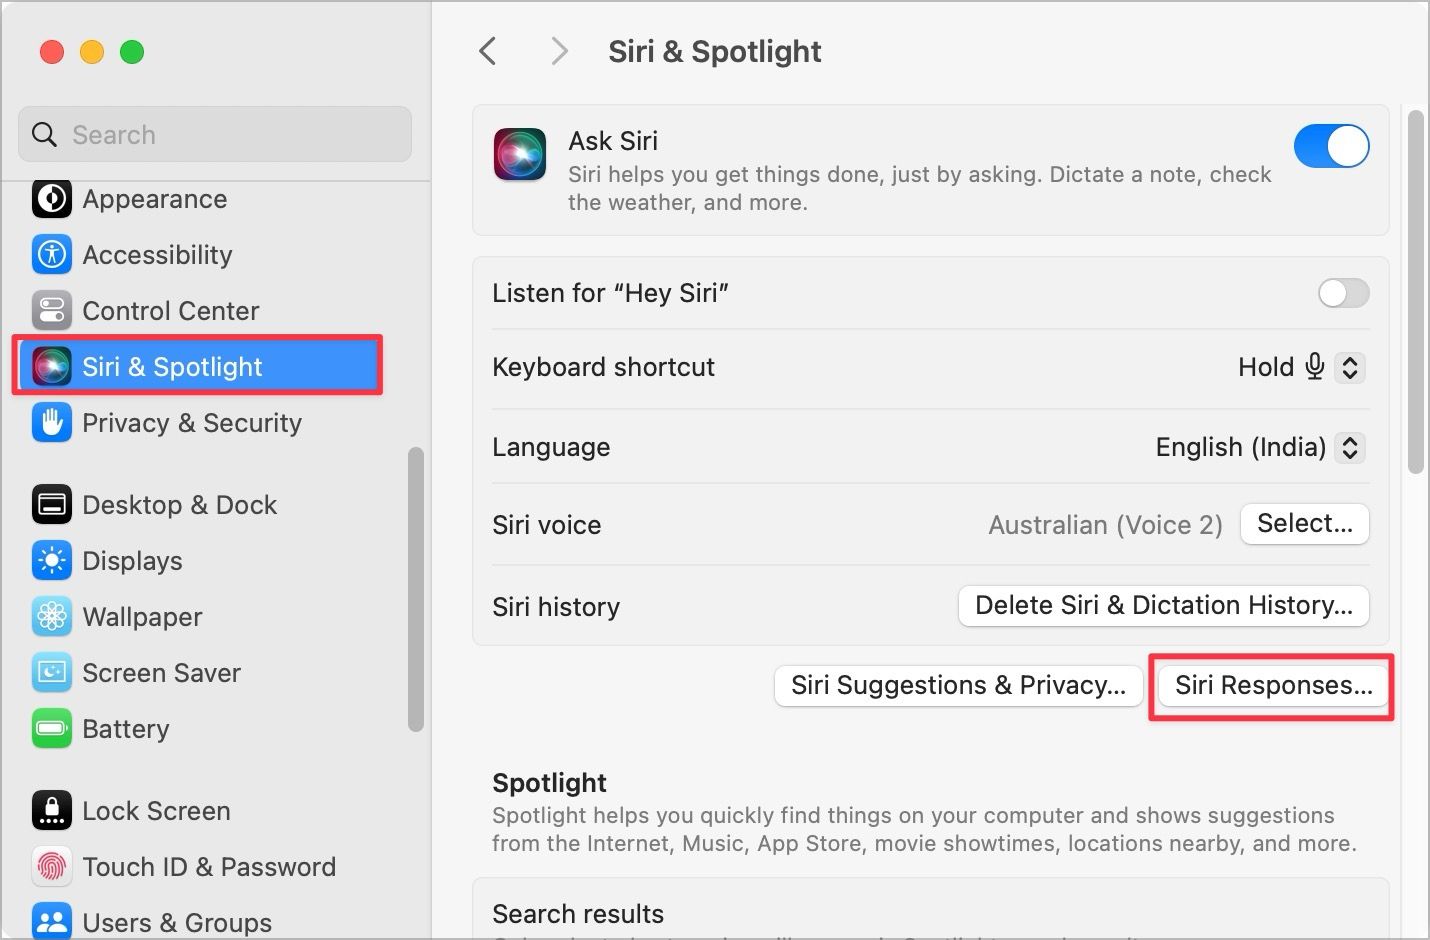
Now, click the Siri Responses… button and turn off the toggle for Voice feedback.

Disable click wallpaper to display desktop
The one thing that has irritated us the most after updating to the latest macOS Sonoma update is the click-to-display desktop feature. In macOS Sonoma, when you click on an empty area, it displaces all the app windows to show you the desktop.
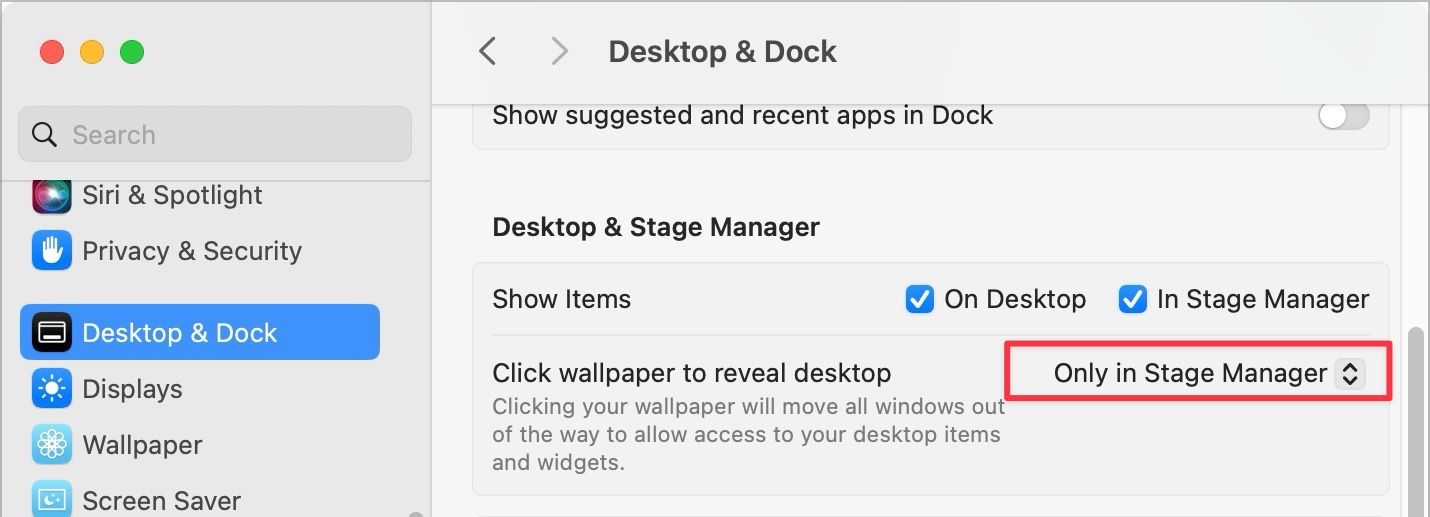
The feature is quite irritating, and we recommend turning it off as soon as possible. To turn off this feature, go to System Settings and open the Desktop & Dock settings.
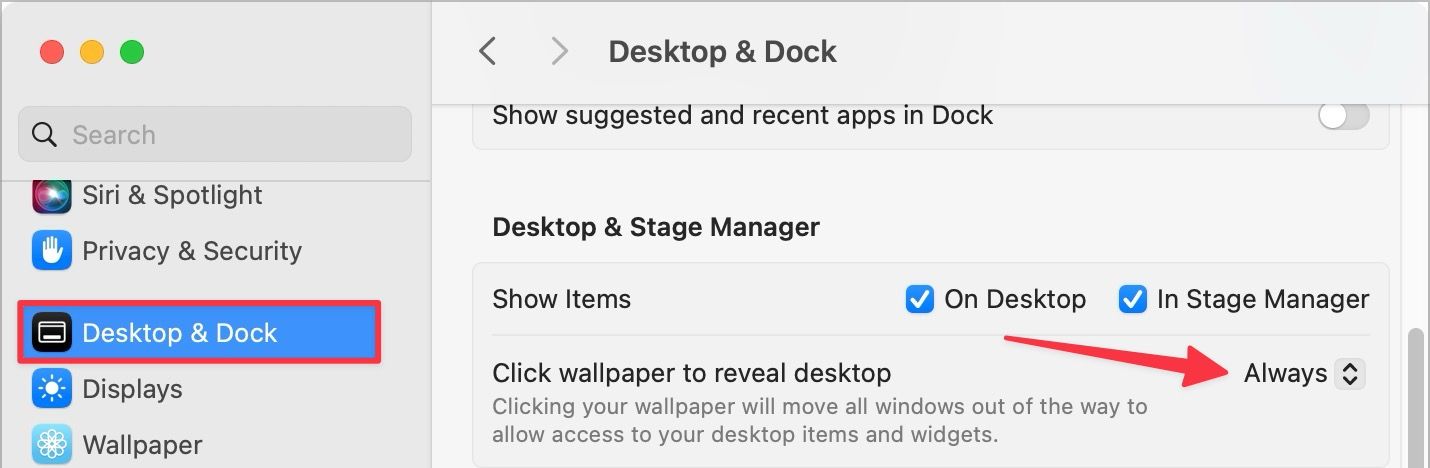
Now go to the Desktop & Stage Manager setting and change the setting for Click wallpaper to reveal desktop to Stage Manager.
Top Mac settings you should change in 2023
We hope this guide was able to help improve your Mac experience. If you liked this guide, don’t forget to read our Safari settings to change article, where we have covered in-depth what you need to do to make Safari better.


