
A Brief Guide to Enable an SSL Certificate on iPhone or iPad
Here's a brief guide to enable an SSL certificate on iPhone or iPad.
Do you need clarification about how to enable an SSL certificate on your iPhone or iPad? Well, this blog is all about resolving your query regarding the same. Before moving ahead, let us have a small brief about what’s SSL.
What is an SSL Certificate?
SSL stands for Secure Socket Layers. It is a cryptographic protocol which uses encryption security for securing client-server communications.
SSL certificates also authenticate the communications carried out between both parties. In short, each incoming or outgoing data exchanged from your iPhone email is in an encrypted (coded) format.
Hence, an intruder cannot access or alter this data since it is encrypted. Even if an intruder gains data access deceptively, they cannot misuse it since it is secured with 256-bit encryption security, and they need the decryption key (available with the intended recipient) to decrypt (decode) the same.
Now, let’s check out the methods that can be used to enable SSL certificates on outgoing and incoming mail servers. To enable SSL on different servers, one needs an SSL certificate issued by certificate authorities like Comodo SSL, Thawte SSL, RapidSSL, GeoTrust SSL, etc.
Enabling SSL Certificate on an Incoming Mail Server
- On the Homepage, Go to Settings → Mail → Accounts → Gmail.
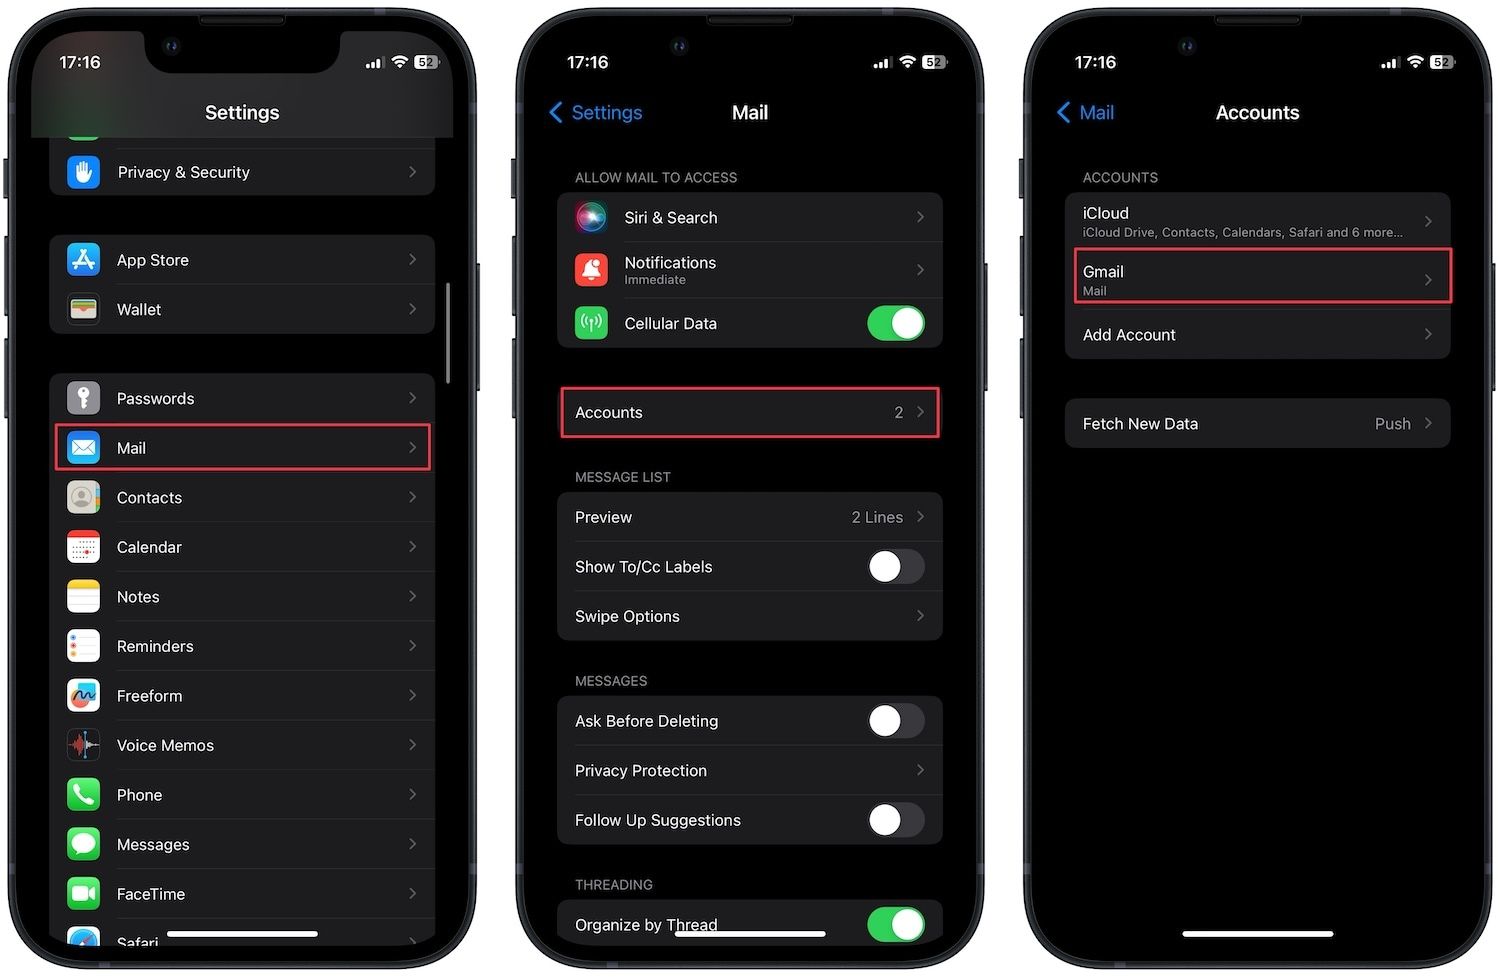
- Tap your desired email account which you wish to secure by installing SSL.
- Go to Advanced and enable Use SSL under the Incoming Settings section.
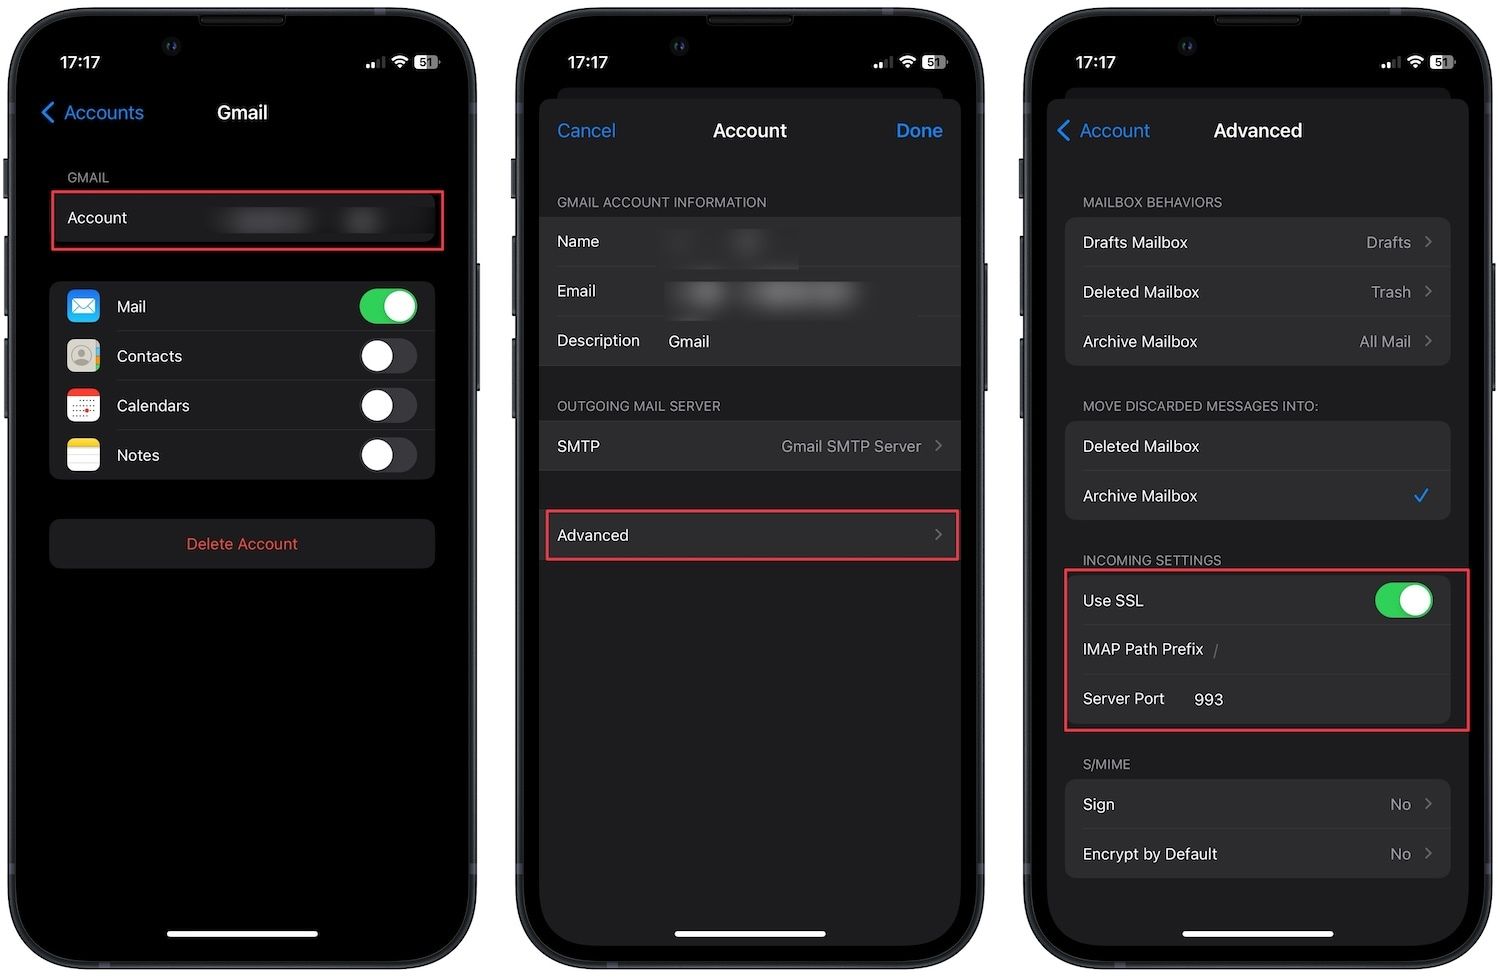
Note: If you are using IMAP, set the Server Port 993 and if you are using POP, set the Server Port 995.
Enabling SSL Certificate on an Outgoing Server
The initial procedure remains identical to the one mentioned above.
- Go to Settings on the Homepage and Click on Mail → Account → Gmail.
- Tap your desired email account on which you wish to install SSL to secure it.
- Under the Outgoing Mail Server option, click SMTP.
- Go to the Primary Server section where the domain server name is assigned.
- Enable Use SSL and set the Server Port to 465. Tap on Done to save changes.

Installing an SSL Certificate as a Trusted Root CA
- In the Safari browser of your iPhone device, open cert.n4l.co.nz.
- Click the Download N4L Certificate button.
- The below-stated message will be displayed by the device. “Would you like to authorize this website's access to a configuration profile for download?"
- Tap Allow to continue.
- Another message will be displayed by the device. "Review the profile in the Settings app to proceed installation process”.
- Tap Close.
The Profile Download process is complete.
Profile Installation
- Go to the Settings app and tap Profile Downloaded below the user details.
- Tap the Install button to install the profile.
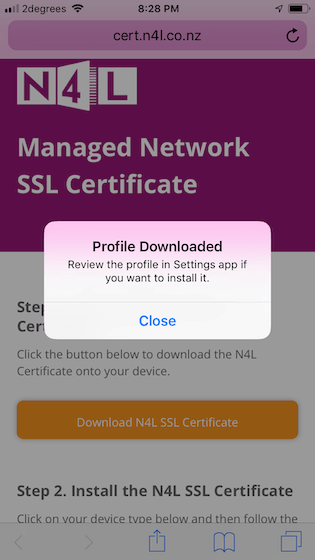
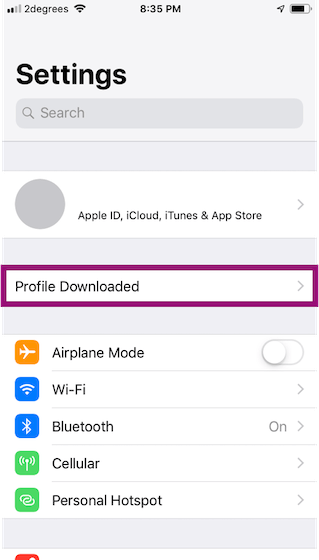
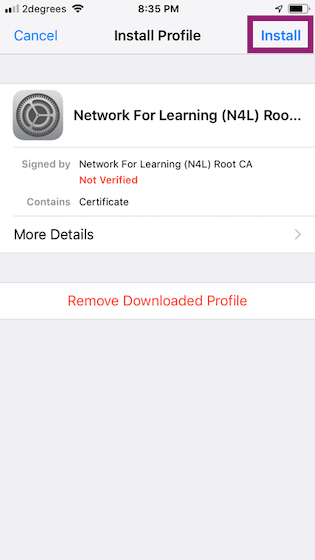
Image Source: N4L
The last step is to ensure that the SSL certificate is trusted by the iPhone device. After enabling the manual installation process of the SSL certificate, or downloading a profile sent via email/website, you need to turn on the SSL/TLS trust settings.
The certificate will function only after it's trusted by iPhone/iPad devices.
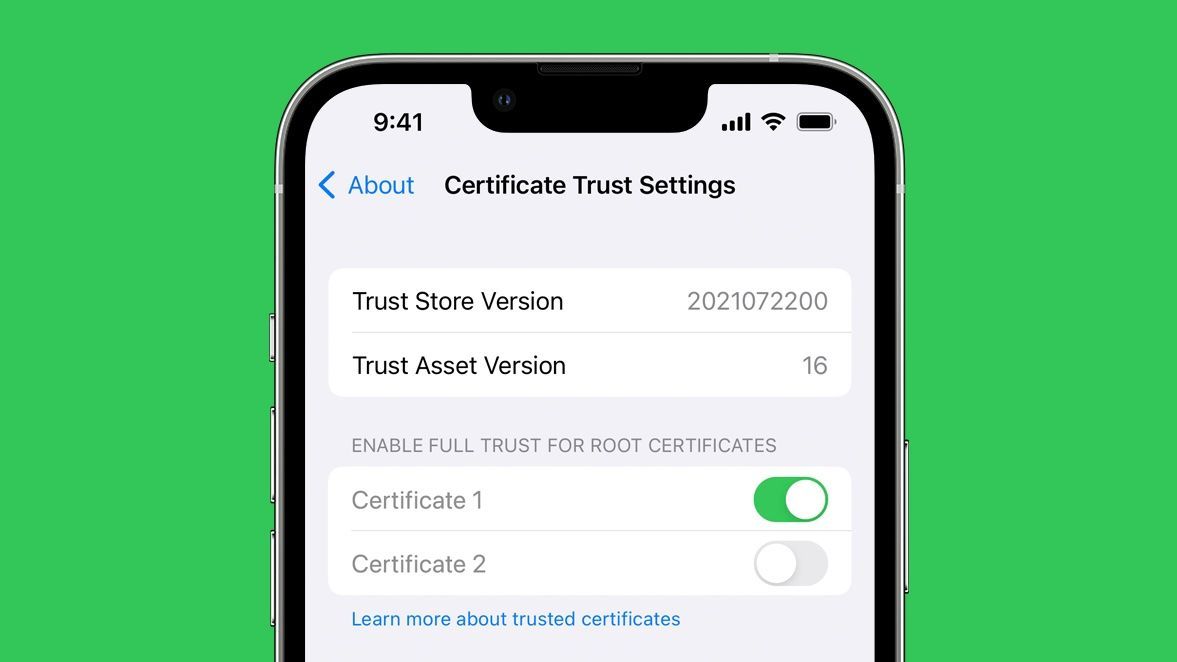
- Go to Settings > click “General” > About > go to “Certificate Trust Settings.”
- Under the “Enable full trust for root certificate” option, all the installed root certificates will be displayed.
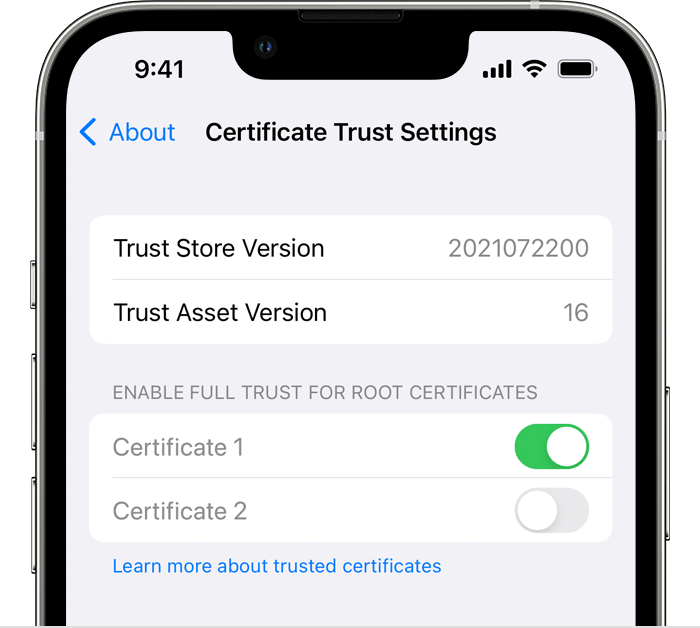
- Enable the trust for the desired certificate.
Wrapping Up
You can easily enable an SSL certificate on an iPhone or iPad by following these steps. The only thing you need to ensure is choosing an SSL certificate from a trustworthy certificate authority (CA).


