
Drafts 5 Review for iPhone: Worth the New Subscription Pricing?
Drafts 5 is a great note taking app for iPhone and iPad. With its latest update, it has become a subscription-based paid app. Let's find out if it is worth its updated pricing structure or not.

The popular note-taking apps Drafts has just released their newest version, the Drafts 5. With the new release, Drafts has taken the route of subscription-based pricing just like many other apps had done so in the recent past. Personally, I don’t have any problem with subscription-based apps, however, lately so many of my favorite apps have been taking the subscription route that I am starting to think, how many are too many? Now, it’s time that we take a look at all the apps and services that we have subscribed to and ask ourselves, do we really need to pay for them? In this article, I will be trying to find the answer to the same question for Drafts 5:
What is Drafts 5?
I have been using Drafts for a long time and it has always been the place where all my ideas start on my iPhone. In its simplest form, Drafts 5 is a note taking app which helps you quickly take notes. But if anyone of you has used Drafts in the past, you will know it’s much more than that. I think of Drafts 5 as a temporary holding place for ideas, notes, and everything else that has to do with text.
Drafts 5 allows me to quickly get the text out of my head and into the app, and then take necessary action on those texts. The closest analogy that I can make to easily describe Drafts 5 is a pocket notebook. I don’t know how many of you carried it in the past, but I sure did. The notebook allowed me to quickly jot down ideas and notes which I could process later when I had the right tools. For me, Drafts 5 does exactly that.
Drafts 5 Review: The Appearance
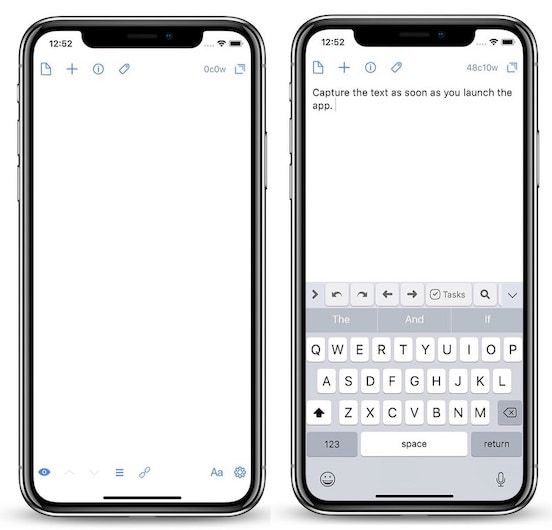
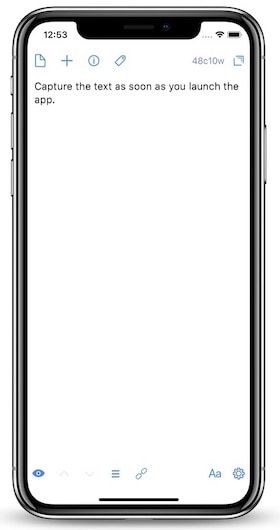
Drafts 5 just like the previous versions of Drafts brings a clean and simple user interface. You launch the app and you are greeted by a blank page and a blinking cursor. This has always been a trademark of Drafts. You don’t have to hit any extra buttons before you can capture the text. You just launch the app and you get right to it. With Drafts 5, it’s even better as the app now allows users to customize the look and feel of the interface.
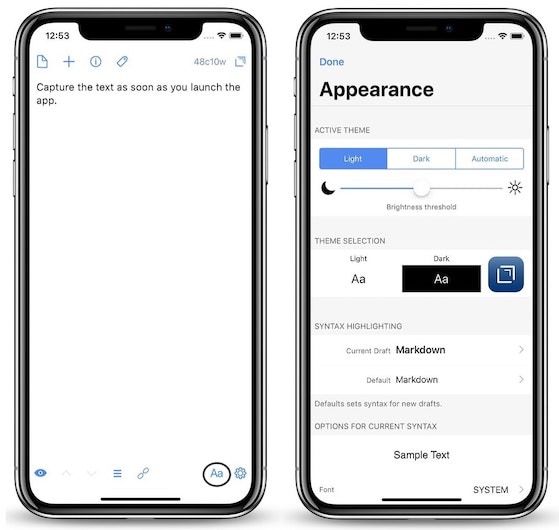
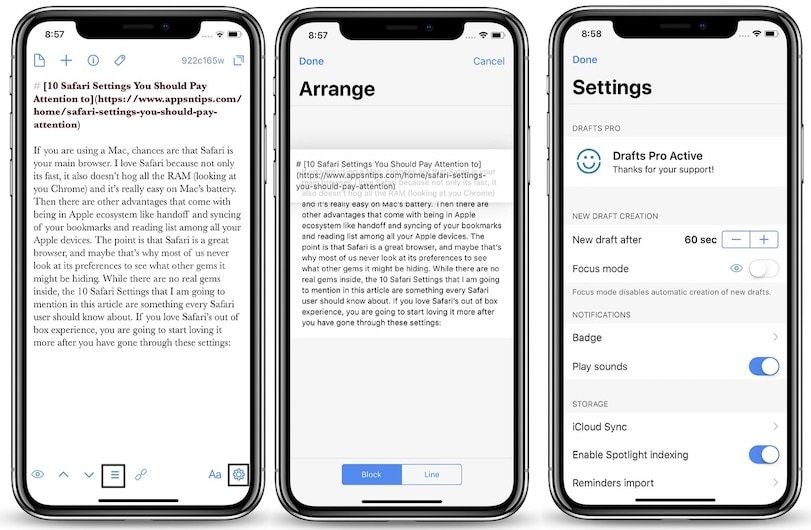
To customize the look and feel of the Drafts 5, all you need to do is tap on the “Aa” button. Here, as you can see, you can change pretty much everything about the app. You can change the theme, (there are multiple light and dark themes available), the input text format (markdown, plain text, simple list, and more), text fonts, spacing, paragraph spacing, margin, and more. If you want you can even change the app's icon by tapping on the Drafts icon.

The Interface
Drafts 5 follows mostly a three-pane user interface. There’s the Editor window that opens when you launch the app and where you record all your text. Swipe left to right on the editing window and that will open “Drafts List” tab. It’s where you can organize all your notes. Swipe from right to left on the editor window and you open the “Action List” tab. The Action List tab is where you can process all your text and send it where it needs to go. We will learn more about the Drafts List tab and the Action List tab in the later sections of the review. Here, let me just explain a little bit about the editor window.
As I said, the editor window is the place where you can record all your text. You can see that there are tons of buttons at the top and bottom of the editor window. Starting from the top-left, the first icon just lets you get to Drafts List tab which you can also access by swiping from left to right on the screen. The ‘+’ button allows you to add a new draft.
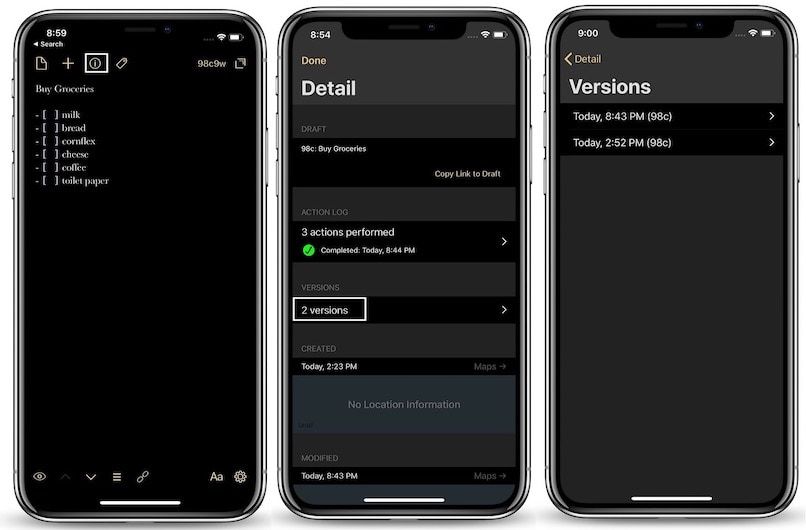
The information window is one of my favorite features of Drafts 5.
The ℹ️ button gives you a ton of useful information. You can see your version history, the number of actions performed on the note, and the dates when you created that document and modified it. The version history especially comes in handy as it allows you to jump back to the older version of the document and retrieve any information that you have deleted. The 🏷 button allows you to add tags which will learn more about in Drafts List section of the article.
The top right button opens the Action List tab and you can see the word and character count of your present document beside it. Coming to the bottom buttons, the first icon which looks like an eye 👁🗨is the focus mode button. In the previous versions of the Drafts and even in Drafts 5, by default, whenever you open the app, it opens on a blank document. This feature allows users to quickly jot down notes and ideas without having the hit any buttons. However, sometimes when you are working on the same idea, you don’t want Drafts 5 to open a new document whenever you launch the app. That’s where focus mode helps us. When you enable focus mode on Drafts 5, the app will always open in the document that you are working on.
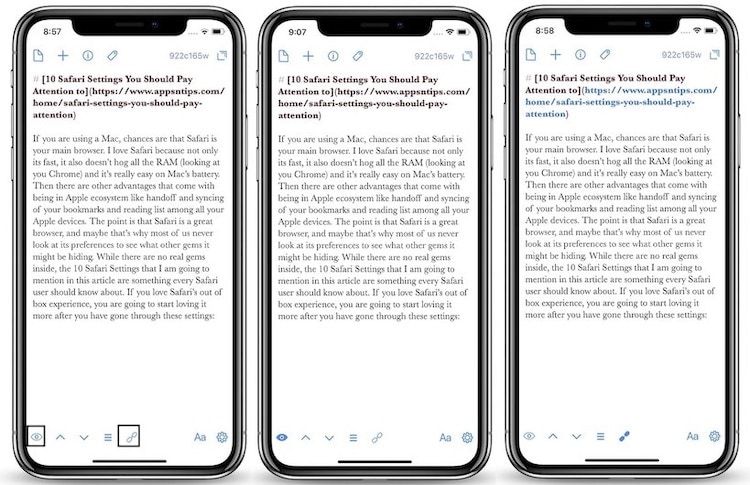
Besides the focus mode, there are two up and down arrow buttons which allow you to switch between different documents without opening the Drafts List tab. Then there’s the Arrange button which performs a unique function. The button allows you to quickly move different paragraphs or lines of the document to arrange them in different orders. The link button 🔗allows you to make the links that you have saved in the document clickable. We have already discussed the “Aa” button which lefts us with the settings icon. This is the place where you can manage the universal settings of Drafts 5 such as exporting, importing, backup, sync, and more.
Drafts 5 Review: Capturing Notes
Now that we are familiar with the Drafts 5’s interface, let us see how we can capture notes inside the app. There are a couple of ways of doing that and I am going to tell you about all of them in brief.
1. Launch The App
The easiest way to capture notes inside Drafts 5 is by launching the app. You can just launch the app and start typing. If you have the focused mode enable in the app, all you need to do is hit the ‘+’ button and it will create a new document for you. This will most probably be your most used capture action when using Drafts 5.
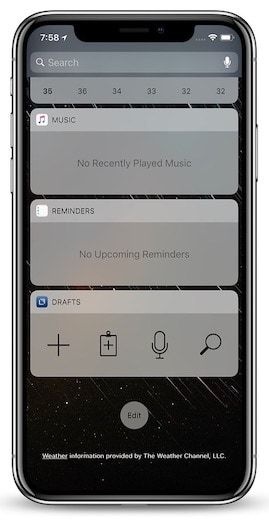
2. Using Today View Widget
Drafts 5 also comes with a Today view widget which you can use to capture your notes. Just tap on the action that you want to perform in the widget and it will launch the app for you to record your notes. The widget can perform four different actions. The first button opens a new document in the Drafts 5. The second opens a new document and paste anything that is copied on your clipboard. The third lets you start dictation notes, while the last is for searching notes inside Drafts.
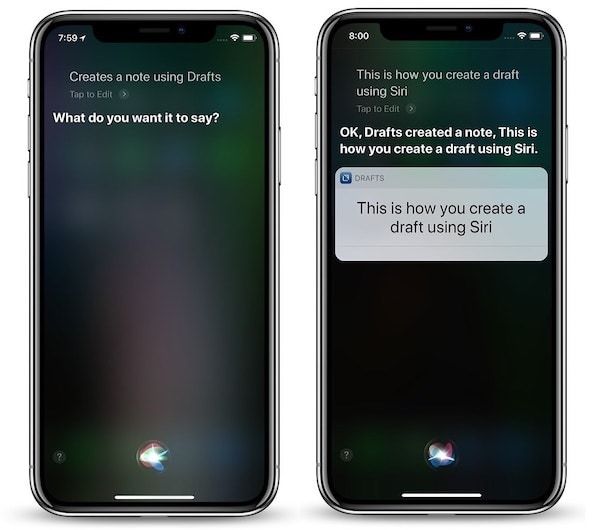
3. Using Siri
One of the new features of Drafts 5 is its integration with Siri. The app allows you to quickly take notes using your virtual assistant Siri. Just say, “Hey Siri, create a note using Drafts” and then dictate whatever you want to record.
4. Sharing to Drafts
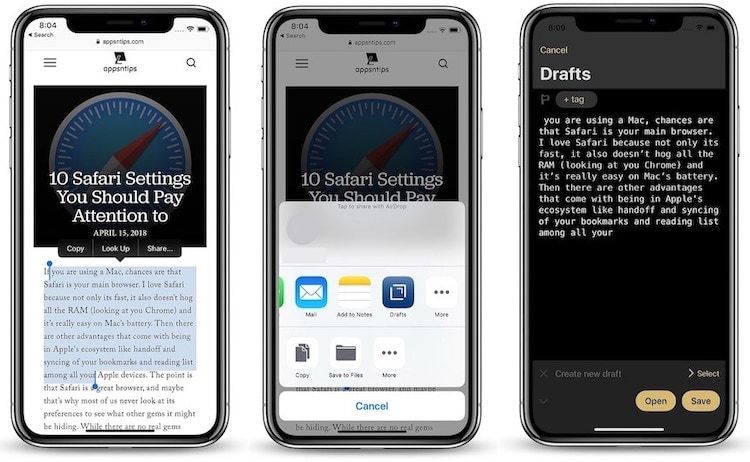
One of my favorite ways to capture notes inside Drafts 5 is by using the share function. Whether I am reading a PDF or reading an article on the web, I can just tap on the share button and select the Drafts option. You can even select a part of a document or a web page and share it to Drafts.
5. Using Dictation
Probably the best way to capture notes inside Drafts 5 is by using its built-in dictation features. The dictation features of Drafts 5 uses Siri so it’s already good at recognizing your voice. I love using dictation with Drafts 5 as it saves me from typing out the whole document and helps to just get the thoughts out of my head as fast as possible. To use the dictation feature in Drafts 5, launch the app and find the microphone icon on the extra row present at the top of your keyboard.
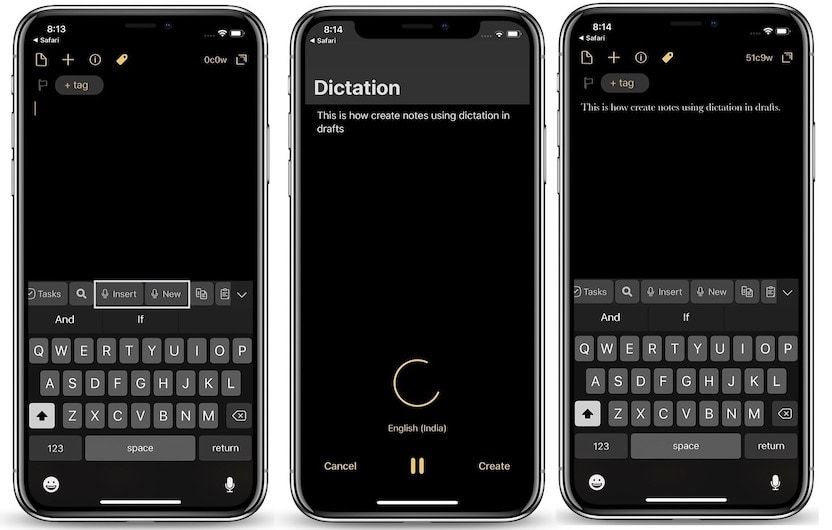
Drafts 5 adds this extra row to help perform some quick actions, and one of them is the dictation button. Well, actually there are two dictation options. The one with “insert” will append the text that you dictate in the document that you are already on while with “new” will create a new document and add your dictation there. You can also use the dictation button on the Drafts 5’s today widget to start dictating from there.
Organizing Your Drafts using Drafts List
By now you have learned about the editor window and the different ways Drafts 5 allows you to capture your notes. Now, we will see how we can organize these notes that we capture. There are foure main tools that Drafts 5 uses to organize your documents, “Tags, Filters, Flags, and Workspaces”.
1. Using Tags
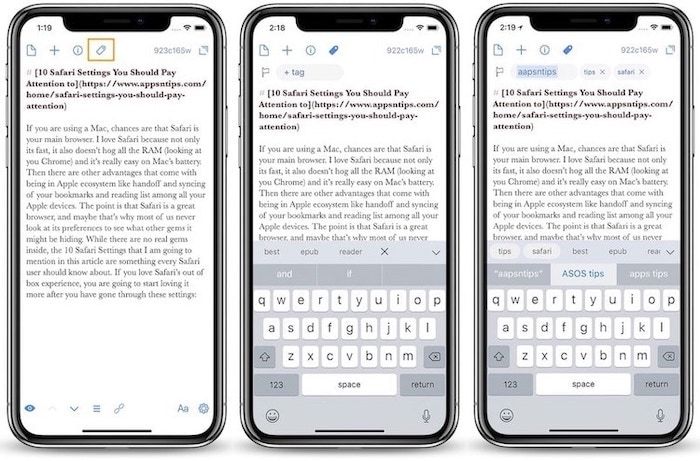
The most basic form of organization in Drafts 5 is by using Tags. To add tags to a document, you can tap on the tags button in a document which is present at the top. You can add multiple tags inside a document. Just create a tag and hit the return button on the keyboard to enter another tag.
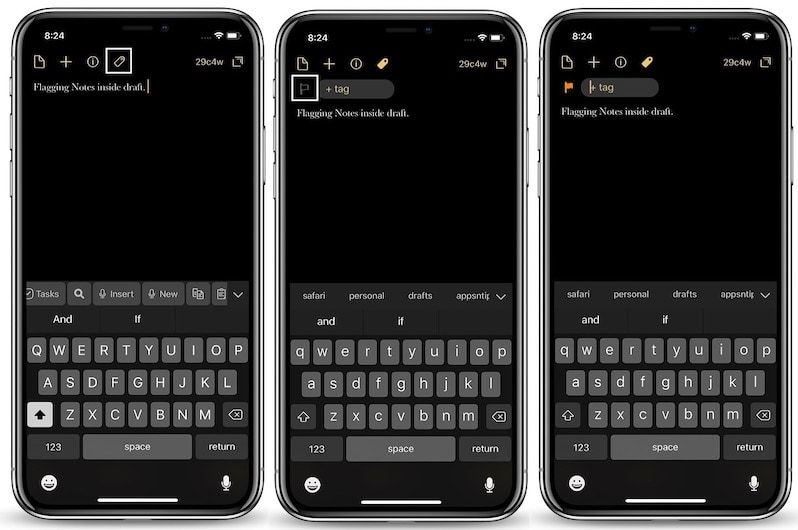
2. Using Flags
Once you tap on the tags button, you will see that beside the tag field there’s also a flag ⚐ icon. You can tap on the flag icon to flag that document. Flagging a document is equivalent to marking it as important. That’s why I use flags only when necessary. You don’t want too many flagged documents as it will defeat its purpose.
3. Using Filters
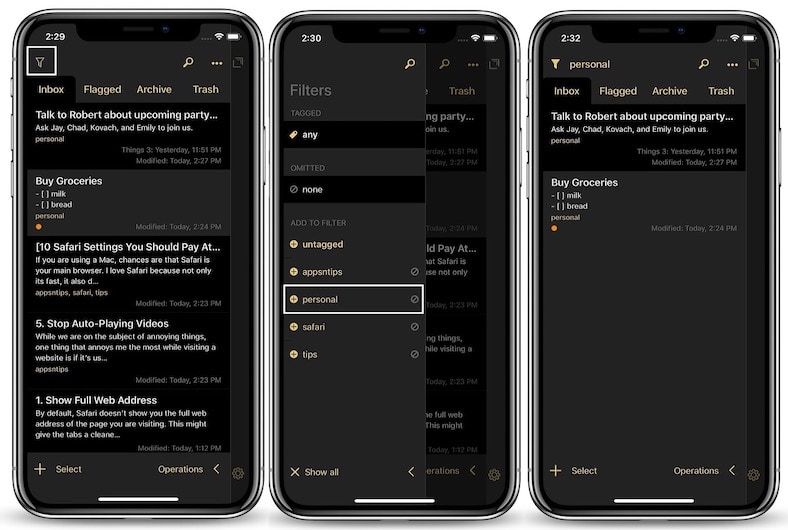
Now that we have tagged our documents, we can use the tags to create a structure with the help of filters. To create a filter, first ,open the Drafts List by swiping left to right and then tap on the Filter icon at the top left. Here, you will find every tag that you have created in documents and use them to filter only the documents that contain those tags. For example, once I tap on the personal tag, Drafts 5 will only show me those documents which have been tagged personal.
4. Using Workspaces
Workspaces is a new feature introduced with Drafts 5 and allows users to create permanent organizational spaces for documents. To create Workspaces, while you are on the Drafts List, tap on ‘•••’ present at the top right and then tap on New. As you can see, you can create Workspaces utilizing tags, filters, and even specific text inside your documents. For example, let’s create different workspaces for my personal and work-related drafts.
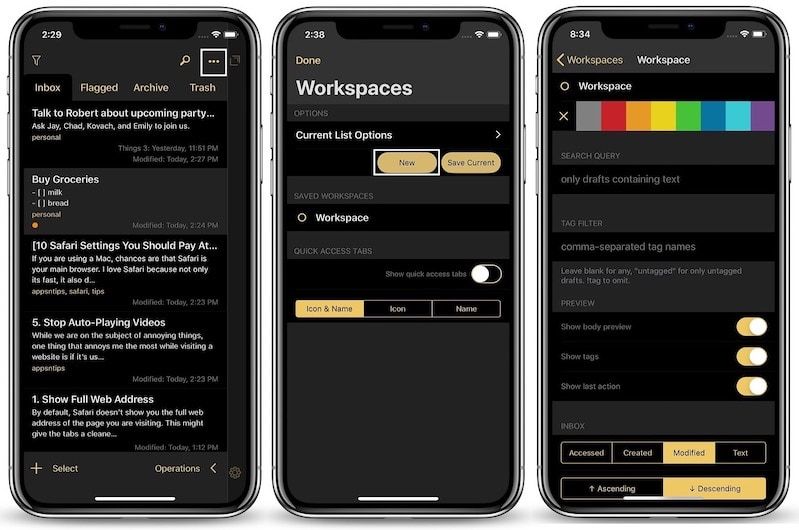
Since all my personal and work-related documents have been marked with tags ‘personal’ and ‘appsntips’ respectively, I will use those tags to create the required workspaces. To access your workspaces, you can either tap on the ‘•••’ or allow quick access tabs as I have done. As you can see, my Drafts List shows my workspaces at the bottom and I can easily tap on any one of them to switch to my personal or work-related spaces.

5. Archiving and Trashing Notes
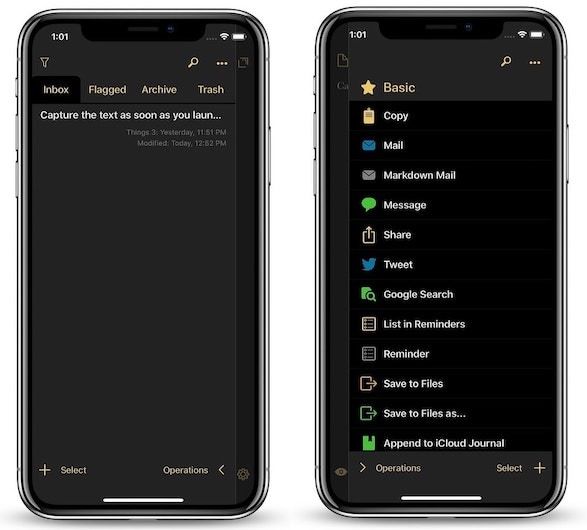
The last step of organizing your notes is by archiving and deleting them. I don’t like to keep too many notes in my normal Inbox to prevent crowding. If there’s any note that I am not going to need in the next few days, I archive it. I delete the notes which have served their purpose and are no longer needed. Archiving and deleting notes in Drafts 5 is pretty simple. All you need to do is open the Drafts List and swipe on the note from right to left which you want to either archive or delete.
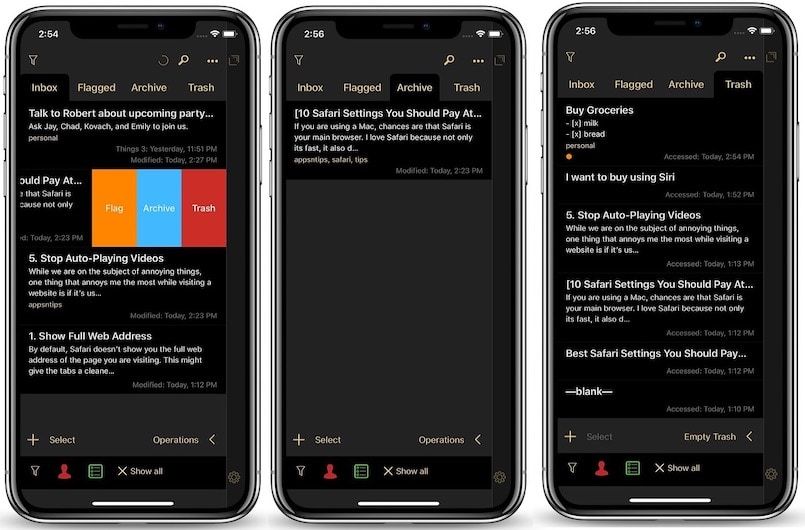
For example, since I have already purchased the groceries I am going to delete that note and going to archive the note about Safari as we have already published that article. In the pictures, you can see that you can also flag or un-flag notes from here too. You can access your flagged, archived, and deleted notes, from the tabs at the top of the Drafts List.
Drafts 5 Review: Transferring Text with Actions
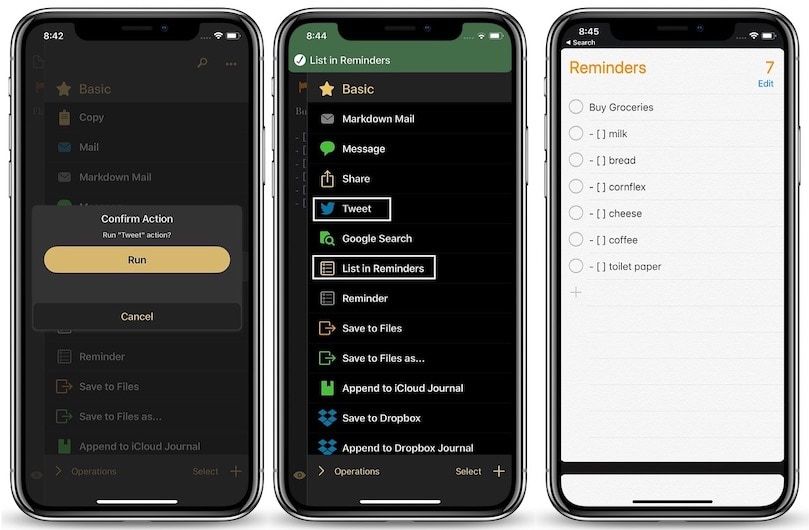
Actions are at the core of Drafts 5 and the main reason which separate Drafts 5 from any other note taking apps out there. Actions are basically a way to process the text that you have captured in Drafts 5 and send it to apps where they belong. There are a ton of actions that you can perform using Drafts 5. You can send the text as messages or email, you can send out tweets, you can perform Google search, you can save the text in the Files app, send it to Evernote, Dropbox, Google Drive, and more.
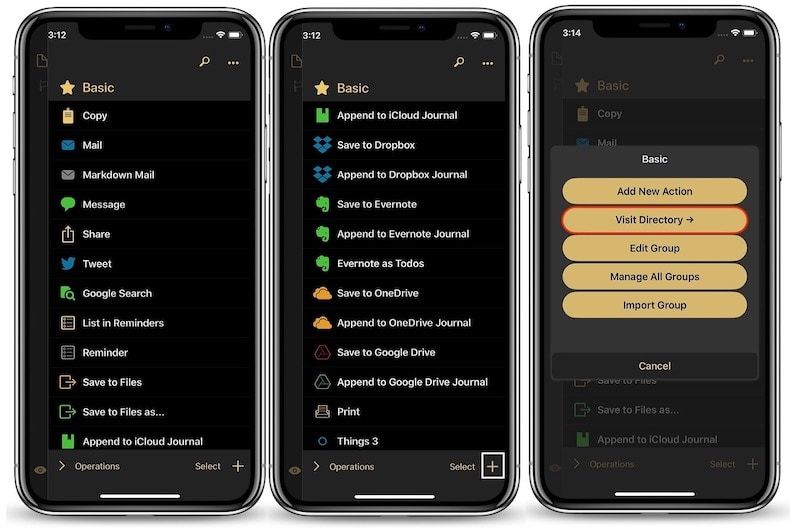
To access the Actions that you can perform using Drafts 5, swipe from right to left on the editor panel to open the Actions List. Here, you can see the list of pre-built actions that come natively with Drafts 5. However, this is just the tip of the iceberg. Drafts 5 also allows users to create their own actions using the third party app APIs, scripts, and more (paid feature). If you don’t want to create your own actions, you can download the actions created by other Drafts 5 users by first tapping on the ‘+’ button and then tapping on “Visit Directory→” button.
Look, I will be the first one to tell you that, I am not a pro Drafts 5 user and my needs are filled with the built-in actions that come with the app. However, if you are into scripting and like to automate things using actions, you can do that with Drafts 5. The best thing is that you get choices. You can either use Drafts 5 as a simple app as it comes, or you can take a deep dive into actions, scripting, and automation to make it as complex and feature-rich as you want.
Drafts 5 Review: Is It Worth the New Subscription Pricing?
Since Drafts 5 has a free option with some of the advanced features saved for the Pro version, it really depends on how you want to use the app to figure out if its worth its asking price to you or not. All you need to do is follow a simple exercise. In this article, I have mentioned all the major features of the app with the tag paid against those which are only available if you subscribe to the app.
Make a list of those features and then separate them into paid and free. If you can live without the paid features, you don’t need to subscribe to the app. However, if paid features are what you want, then you will have to either subscribe to the app or take a look elsewhere.
For me, Drafts 5 is my one stop solution for all my text-related needs. I don’t have to open multiple apps to message, email, send out a tweet, or any of the multiple actions that I can perform using Drafts 5. I can just open Drafts 5, capture the text, and then use actions to do whatever I want with the text. At the end of the day, Drafts 5 helps me get things done and I cannot hold its subscription pricing as a grudge against it and let my productivity suffer in the process.
Drafts 5 Review: Final Thoughts
I have been using Drafts for quite a long time and it has been always been the place where I capture notes on my iPhone. Drafts 5 is as essential to my workflow as Ulysses is to my long-form writing. Although Drafts 5 has evolved to the place where it can also be used for long-form writing content, I still think of it as a text capture and processing app than as a full-blown writing app. The main reason behind that sentiment is that Drafts 5 doesn’t have a Mac app and I do most of my writing on the Mac. If Agile Tortoise, the developer of Drafts 5, will release the Mac version of the app in future, maybe we can revisit the app.
Install: Drafts 5 ($1.99/month or $19.99/Year)


