
Top 10 Terminal Commands That Are Actually Useful
Here, are top 10 terminal commands which are easy and actually useful for normal users.

One of the most underused features of Mac, at least from the perspective of a normal user is the Terminal. Many of the new and even experience Mac users don’t open the app even once in their life. Quite frankly, it’s quite understandable. Nobody wants to use a complex application where they have to use commands that they know nothing about. There’s also the fear of breaking your Mac without having any idea as to how to fix it. I know that because even I went through the same feelings when I first came to know about the things I could do with Terminal.
However, unlike many users who never get over that fear, my curiosity got the better of me and I ended up testing hundreds of Terminal commands, and truthfully, many of them caused severe problems. Still, I am glad that I went down that path, because despite the issues that I faced, I found some very cool features which otherwise I wouldn’t have. Today I am sharing those features with you. I have tested all these features on personal Mac, so you don’t have to worry about breaking your Mac or anything like that.
Also, these features are really useful and will come in really handy. I have already mentioned a few of these commands in my MacBook Pro tips and tricks article which you can read if you are looking for some non-terminal based tips and tricks for your Mac. So, if you are on your Mac, open your Terminal and get ready to try out the top 10 Terminal commands which are actually useful:
1. Take Screenshots in JPG Format
This is by far my favorite Terminal command as it tells my Mac to take screenshots in JPG Format instead of the PNG format. As you might have guessed, I take a lot of screenshots and converting them from PNG to JPG was a real pain, that is until I came to know about this terminal command. As to why you would want to do that, the reason is pretty simple. JPG format takes a lot less space on your hard drive than PNG format and hence saves a lot of space on your hard drive, and also makes it easier to share your screenshots on the internet.
defaults write com.apple.screencapture type jpg
It’s very easy to teach your Mac to take screenshots in JPG format. Just open the Terminal on your Mac, type the command mentioned above and hit enter/return. Now, every time you take a screenshot, your Mac will be taking it in a JPG format. In fact, you can replace jpg with pdf in the above command to take screenshots in PDF format. I don’t know why you would want to do that, but you surely can. Lastly, if you ever want to go back to taking screenshots in PNG format, replace jpg with png in the above command.
2. Create a New Default Name Scheme for Screenshots
While we are on the subject of screenshots, did you know that you can choose the default name for your screenshots? While it might not matter to people, I do like to change the default naming scheme for my screenshots as it helps me quickly reorganize and find them.
defaults write com.apple.screencapture name "New Screen Shot Name”
killall SystemUIServer
defaults write com.apple.screencapture name "clicked”
To do that, first, edit the first command by putting your desired name in place of the New Screen Shot Name. Now, copy and paste the command in the Terminal and hit enter/return. Then copy and paste the second line of the command in Terminal and hit enter. By the way, you can edit the command right inside the terminal or in any other text editor. Just to help you a little bit more, the third line of the command is what I used for changing the naming scheme for my screenshots.
3. Speed Up Dock Animation
Personally, I like to keep my Dock hidden. Not only it gives me a little bit of extra screen real estate, it also helps me to keep my desktop clean which I like. That said, there is one problem with keeping the Dock Hidden. When you move your cursor to the edge of the screen to call up your Dock, it just takes too much time to pop up. That’s why before I started using this command, I used to just hit the ⌘⌥D key combo to unhide it. But, now I don’t have to do that every time I want to call upon my Dock, because using Terminal I can speed up Dock pop up animation.
defaults write com.apple.dock autohide-time-modifier -int 0;killall Dock
defaults delete com.apple.dock autohide-time-modifier;killall Dock
The first command will kill the animation speed and make the Dock reappear in an instant. However, if you don’t like the snappiness and want to go back to the original animated pop-up, copy and paste the second command in the terminal and hit return/enter. Now, remember that when you enter any of these two commands and hit enter, there will a microsecond when your screen will go black and come back to life again. There is nothing to fear here, as it happens because we are killing the dock to apply the effect.

4. Put Spacers Inside Dock
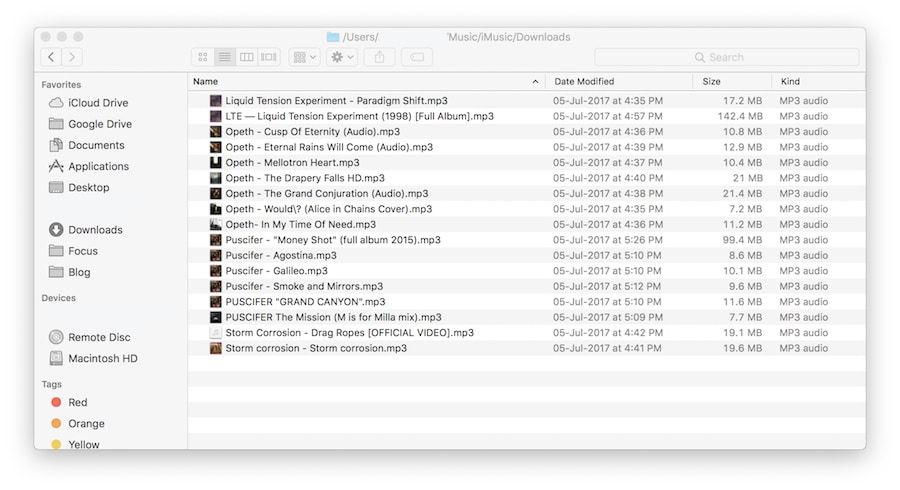
Another useful Terminal command that has to do with macOS Dock is the ability to put spacers inside Dock. Think of spacers as invisible apps which don’t do anything and are there just to take space. Spacers are really useful if you keep a ton of the apps on your Dock and have to find the apps that you are looking for. Spacers give you an ability to easily organize Dock by app types. For example, in the picture below, you can see that my browsers, text editors, image editors, and video editing apps are organized using spacers.
defaults write com.apple.dock persistent-apps -array-add '{tile-data={}; tile-type="spacer-tile";}'
Killall Dock
The cluster of apps helps me quickly find the app that I am looking for. To put a spacer on your dock, all you need to do is copy and paste the first command and hit enter/return. One thing to remember here is that one command line equals to one spacer on your dock. So, if you want more than one, just paste the code multiple times in Terminal. For example, if I want three spacers on my Dock, I will paste the command three times and then hit enter/return. Once you have done that copy and paste the second command and hit enter/return.

If you want more spacers, you can just repeat the above process. However, if you would like to remove a spacer, all you need to is to click and hold the spacer and drag it out to remove it. It’s just like removing any other app from your Dock.
5. Make the Hidden Apps go Translucent
I love hiding apps more than minimizing them as hidden apps don’t take any extra space on the Dock and it’s also easier to recall them using the simple ⌘+Tab key combination. However, there’s no way to know which apps are hidden as macOS doesn’t give you any visual cue. If you are thinking that the little dot present at the bottom of the app is going to help you, think again, because that little dot is also present below the apps which are closed (not quit). In this case, the Terminal command which I am mentioning here comes in very handy.
defaults write com.apple.Dock showhidden -bool TRUE
Killall Dock
defaults write com.apple.Dock showhidden -bool FALSE
Killall Dock
The command makes the hidden apps go a little translucent thereby easily allowing you to identify the hidden apps. So, to enjoy this feature, first, copy and paste the first command and hit return/enter. Then copy and paste the second (killall dock) command and hit enter/return. The third and the fourth command are to make things go back to the way it was.

6. Check for App Updates Daily
Did you know that macOS by default looks for app updates on a weekly basis? While this might not matter to most people, I for one want to get the updates as soon as they are released from Apple or the app developers. Thankfully, there’s a command for Terminal which will help you do just that.
defaults write com.apple.SoftwareUpdate ScheduleFrequency -int 1
You know what to do to enable that by now right? Copy and paste the given command in Terminal and hit enter/return. Now, remember that the numerical value after the “-int” command is basically the number of days. So, in the case of the above command, macOS will look for update everyday as we set it to 1. If you want to change the settings back to default, just replace the number 1 with 7 and your Mac will look for the updates every 7 day which is the default setting.
7. Show Full File Path in Finder
When it comes to Finder, I have a love and hate relationship with it. I love its simplicity and yet sometimes it just makes it hard to find files. I am going to come out and say it. Windows definitely has a better file explorer system than the Mac. My biggest gripe with Finder is that it doesn’t show the path of a file when you open it. It makes it hard to remember where your important files are. Call me an old-fashioned guy, but I like to remember where my important files are organized.
defaults write com.apple.finder _FXShowPosixPathInTitle -bool YES; killall Finder
Well, if you also have the same problem, I can help you eliminate it. I have posted a little command above which by now you know what to do with. Just copy and paste it into the Terminal and hit enter. After this, your Finder will show you the files paths at the top just as shown in the picture below. If for some reason you want to go back to the way it was. Just replace the word ”Yes” with “No” (without the quotes), and everything will go back to normal.
8. Keep Mac from Sleeping
Although there are a ton of third-party apps which can keep your Mac awake, why use them when you can do it simply with a Terminal command. The best part about this command is that unlike all the other commands on this list which you might need to save somewhere, it’s very easy to remember.
caffeinate
Yep, that’s the command you need to remember. Once you type it in Terminal and hit enter, your Mac will not sleep unless you either quit your Terminal window or press Control-C. If you want to specify a time limit after which you want your Mac to sleep, you can do that too. Just type in the following command
caffeinate -u -t 3600
The number you see is the time in seconds for which your Mac will not sleep. In the above command, I am telling my Mac to not sleep for 1 hour. You can change the number to set the time as per your requirement.
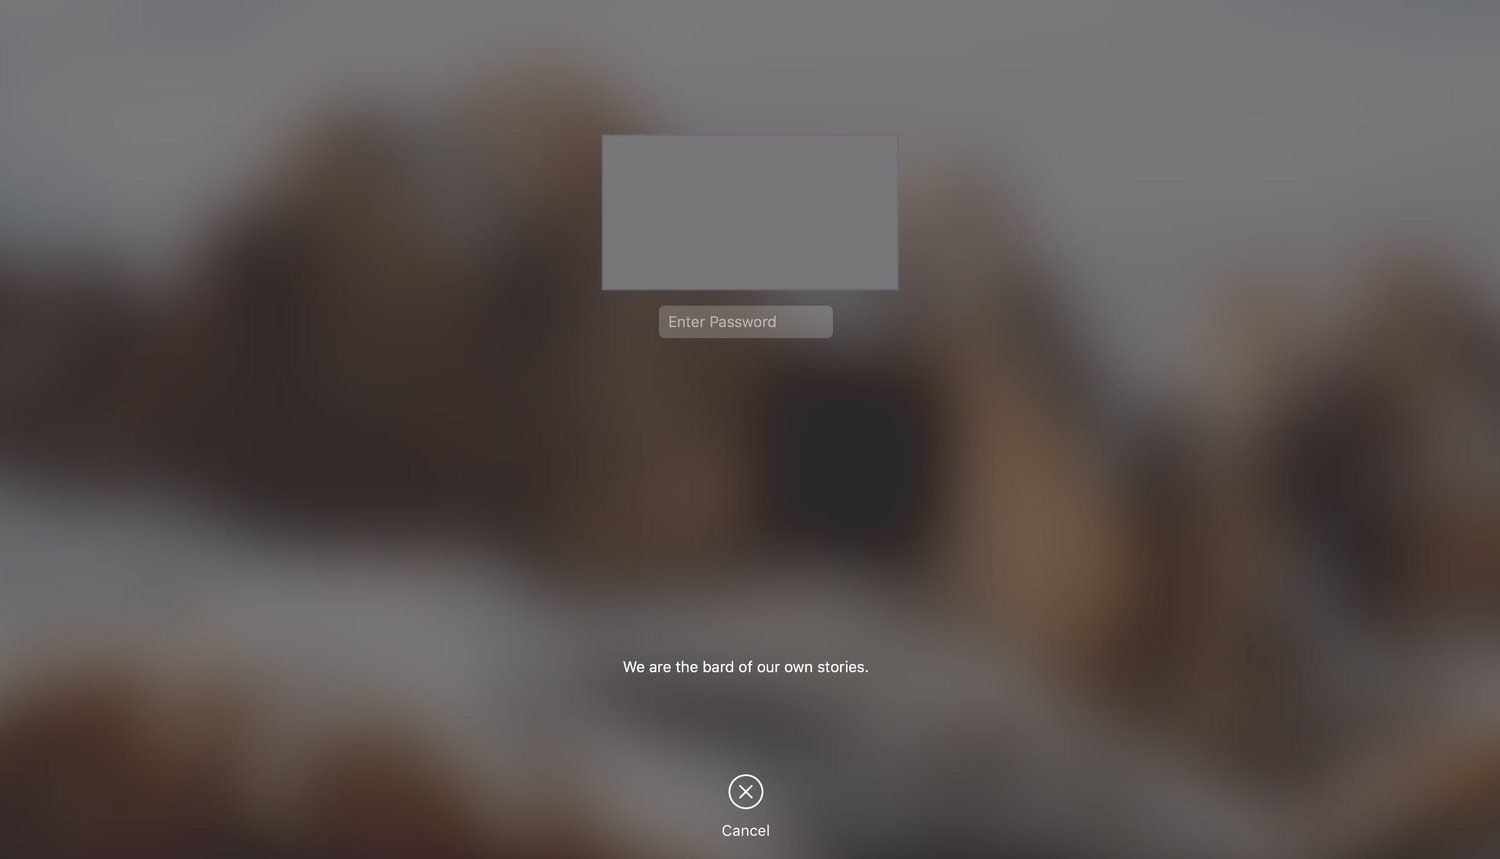
9. Show Custom Message on Your Lock Screen
I love this feature. Whether you want to display some emergency contact or leave some messages for your friend, setting a custom message on your lock screen is a good way to do that. I personally use it to display my favorite quotes which I keep changing from time to time. It’s a good way to open my laptop with a smile on my face. Just switch text inside the quotation marks and enter your own text. Now copy and paste it inside Terminal and hit enter/return.
sudo defaults write /Library/Preferences/com.apple.loginwindow LoginwindowText "Your login window message text goes here"
10. Hide Files Using Terminal
You can also use Terminal to hide sensitive files on your computer. It’s very easy to do it and you just need to use a simple command.
chflags hidden
chflags nohidden
Once you type in the first command hit space and drag and drop the file you want to hide. This will tell Terminal as to which file you are trying to hide. Now, hit enter/return and that file will be hidden. Also, remember to copy and keep the file path as you will need it to unhide the file. When you want to unhide the file, copy and paste the second command, hit space, paste the file path and hit enter/return.
Bonus: Download a File Without a Browser
Did you know that if you have the file’s URL, you can download it without opening your browser? Well, it’s true and you can use the Terminal to do it.
cd /Downloads/
curl -O the file url
Just enter the first command hit return and enter the second command. Remember to replace the word “the file url” with the actual URL of the file you want to download. This one is not necessarily something you will use a lot, but it does come handy in certain situations.

Best Terminal Commands: Final Thoughts
I have tested and used all of these commands and I can tell you with a certainty that all of them work and will not cause any harm to your Mac. My most favorite Terminal command is the one which grays out hidden apps making it easier to locate them. Do check these commands out and let me know which one is your favorite by dropping it down in the comments section below.


