MacBook Pro Tips and Tricks: Get the Most Out of macOS
Unleash the true power of your MacBook Pro with these beginner to advanced tips. These Mac tips and tricks will help you get things done quickly and save you valuable time.
The 14-inch MacBook Pro is a powerful beast, and I love the device. I have been using this MacBook Pro for the past year, and it has been the best Mac experience I have had in a while. The MacBook Pro is ultra-fast, packs a gorgeous display, and lasts for the entire day on a single charge. The inclusion of 120Hz ProMotion technology in the display makes everything feel smooth as butter. Here are some of the best MacBook Pro tips and tricks that will unleash the true power of this laptop and will help you do things in a quick and seamless manner.
MacBook Pro tips and tricks to use in 2023
I have divided this article into three sections: beginner, intermediate, and advanced. If you find the tips to be too easy in the beginner section, you can use the table of content below to move onto other sections to learn more advanced tips.
Table of content
- Best Beginner Mac Tips and Tricks
- Quick Look
- Force Quit Apps
- Perform Faster App Search in Spotlight
- Use Spotlight for Weather, Definition, Conversions, and Calculations
- Show Menu Bar Even in Full-screen Mode
- Automatically Hide and Show Mac Dock
- Use Quick Note
- Paste Copied Text without Weird Formatting
- Enable Do Not Disturb with A Click
- Enable Tap to Click
- Access Emoji Keyboard
- Show File Path in Finder
- Keep Search Restricted to a Folder
- Minutely Adjust the Volume and Brightness
- Move Files with Cut and Paste
- Trash Files in Seconds
- Remember the Word
- MacBook Pro Tips and Tricks: Intermediate Level
- Fit More Content on Your MacBook Pro’s Display
- Master the Screenshot Tool
- Sign PDFs Using Preview App
- Redact PDFs Using Preview App
- View Document History and Restore Past Versions
- Create Secret Notes Using Keychain Access App
- Master the Hot Corners
- Quickly Access Folders Using the Go Menu and Shortcuts
- Using the Delete Key Both Ways
- Smartly Navigate Text and Use Smart Text Selection
- Create Text Clipping
- Rename Multiple Items at Once
- Organize Your Files With Tags and Stacks
- Best Advanced Mac Tips and Tricks
Best Beginner Mac Tips and Tricks
1. Quick Look
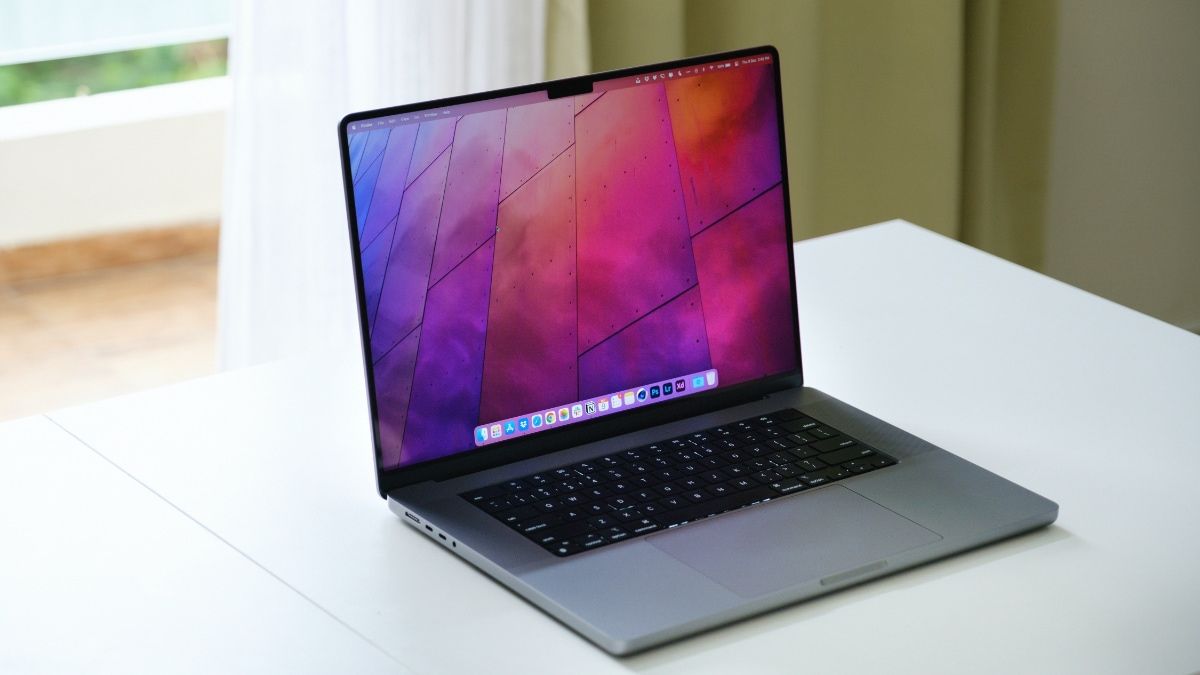
Quick Look is one of the most used features on my Mac. Once you make using this a habit, half of the time you will not have to open any file as it allows you to see the content of a file without opening it. To perform the quick look Action, all you need to do is to select your file and tap the space bar once. For example, you can select a PDF and hit the space bar to quickly scan the content of the PDF without even opening it. That said, this feature does have its limitations.
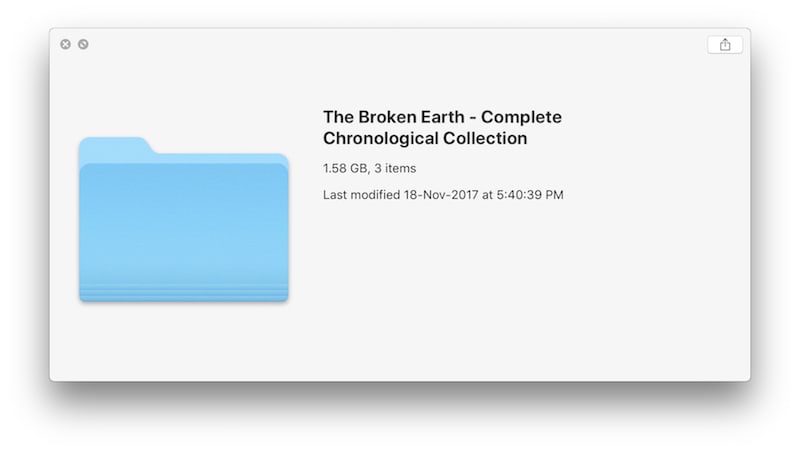
The preview that Quick Look can show you depends on the file you are trying to preview. If it’s a document or an image file, Quick Look will allow you to see the whole content of the file as shown in the pictures below. However, if it’s a folder or an eBook it will only show you superficial information such as the file size and last modified date. Once you learn where the Quick look is helpful and where it’s not, the feature will come really handy.
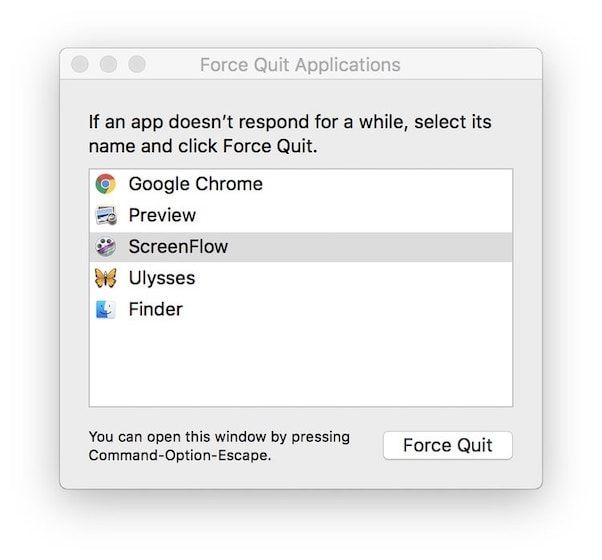
2. Force quit apps
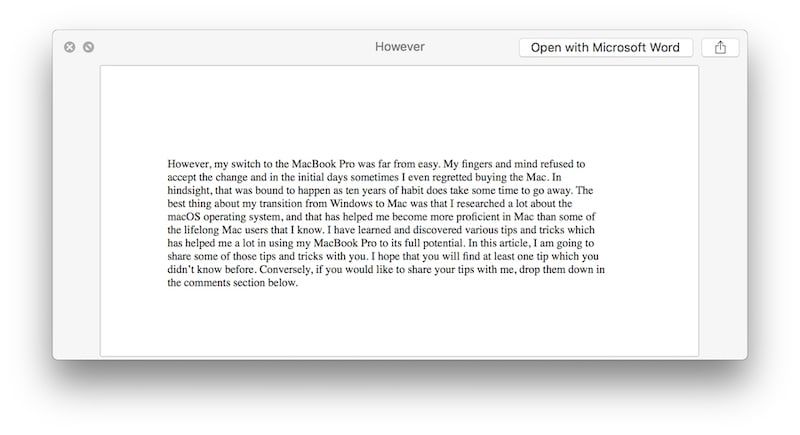
While one of the benefits of using a Mac is that you rarely have any app which goes unresponsive, there are sometimes that it will happen, and when it happens, you will need to know how to force quit them. While on Windows you must be habituated to type Ctrl+Alt+Delete, the keyboard shortcut for force quitting on Mac is a little different. The keyboard combo that you need to hit is - Cmd+Opt+Esc (command, option, and escape key).
Once you hit the combo, “Force Quit Application” box will open in a floating window. Here, you can just select the app which is misbehaving and click on the Force Quit button. If the keyboard combo is a little hard for you to remember, you can use an alternate method. Click on the Apple Menu at the top left corner and you will find the Force Quit option.
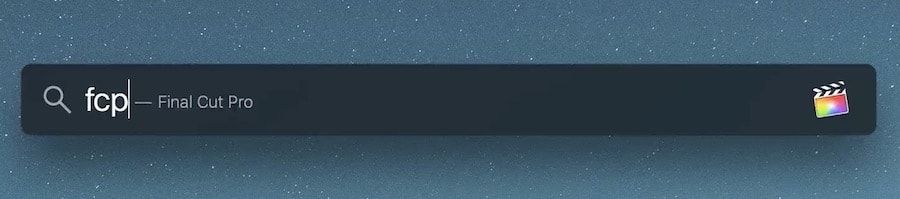
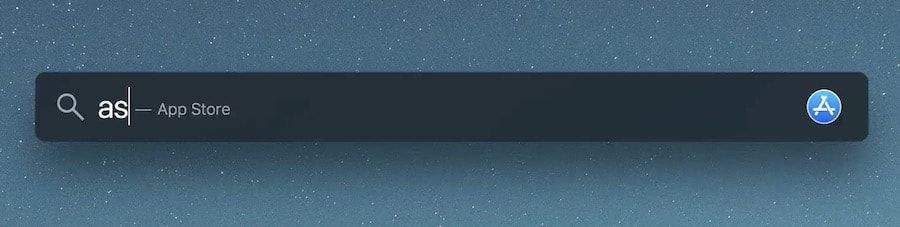
3. Perform faster app search in Spotlight
This is a very quick and handy tip. Whenever you are searching for an in Spotlight, typing the initials of the app will bring the results faster than typing its whole name. For example, if I want to search for App Store, I will simply type the letters a and s. Once you make this a habit, you will perform faster app searches and save time a few keystrokes at a time.


4. Use Spotlight for weather, definition, conversions, and calculations
Over the years Spotlight has evolved from being just a search mechanism for Mac. Now, you can use it to perform many functions. For example, you can use Spotlight for carrying out currency and unit conversions. I use it almost daily to convert measurements, currency, and more.
You can also use Spotlight to perform simple mathematical calculations including multiplication, division, addition, subtraction, and more. Similarly, you can use Spotlight to get weather information of any city in the world. Type the word weather followed by the city name and it will give you the current weather condition. You can also find word definitions. Type the word and hit the “⌘+L” keyboard shortcut to pull up the definition of that word.
5. Show Menu Bar even in full-screen mode
The extra vertical space that you gain thanks to the shrinkage of bezels on the new MacBook Pro ensures that the Menu Bar is not taking unnecessary space on your Mac’s precious display area. By default, when you take an app in full-screen mode, the Menu Bar is automatically hidden, which doesn’t make sense, as thanks to the notch, the apps cannot make use of the Menu Bar area anymore.
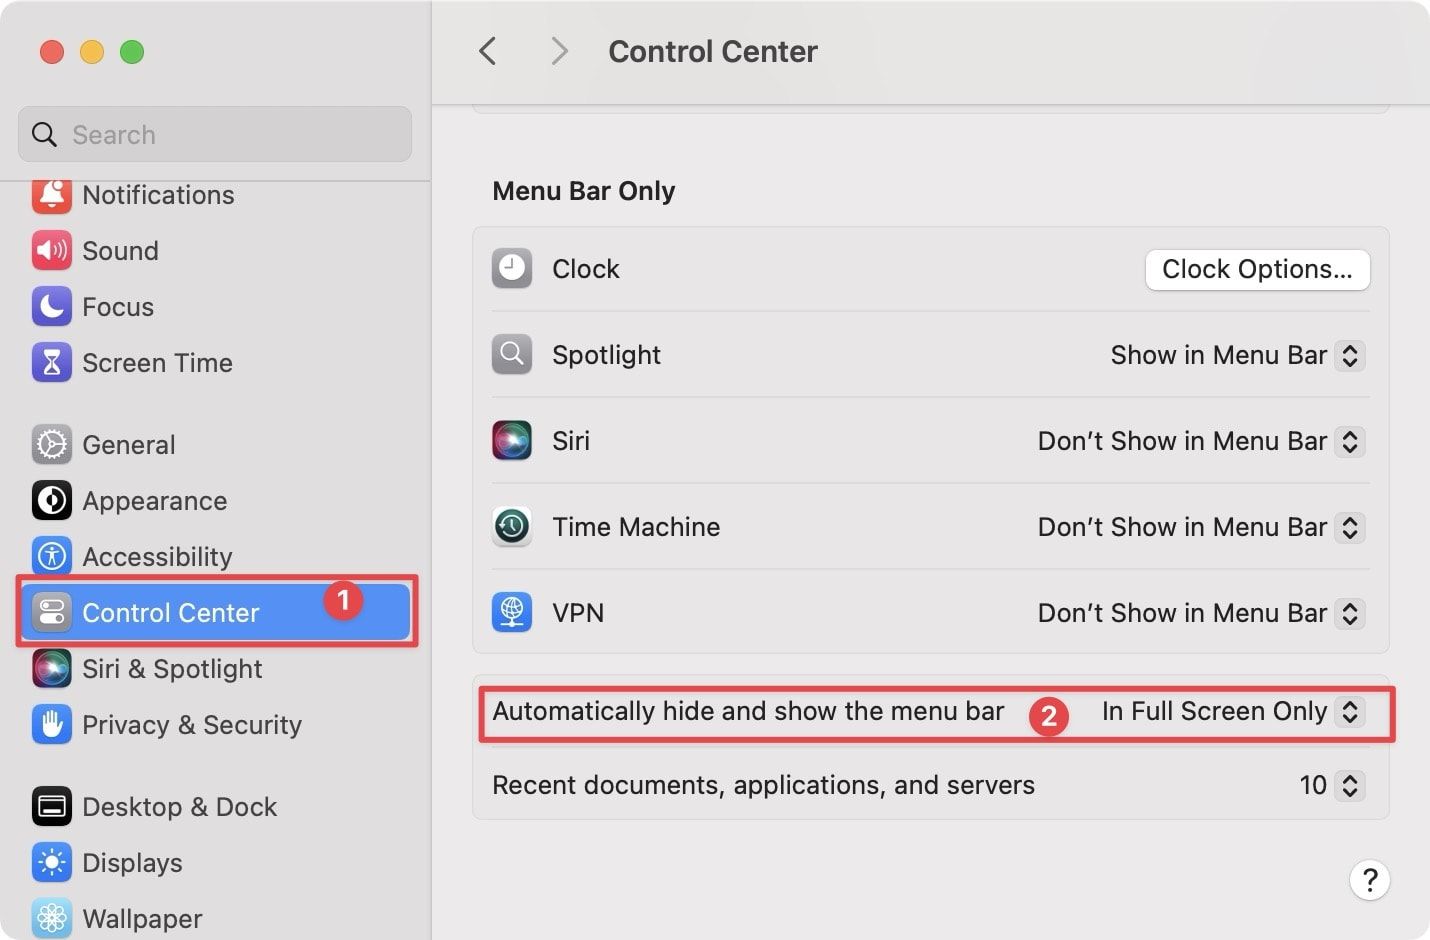
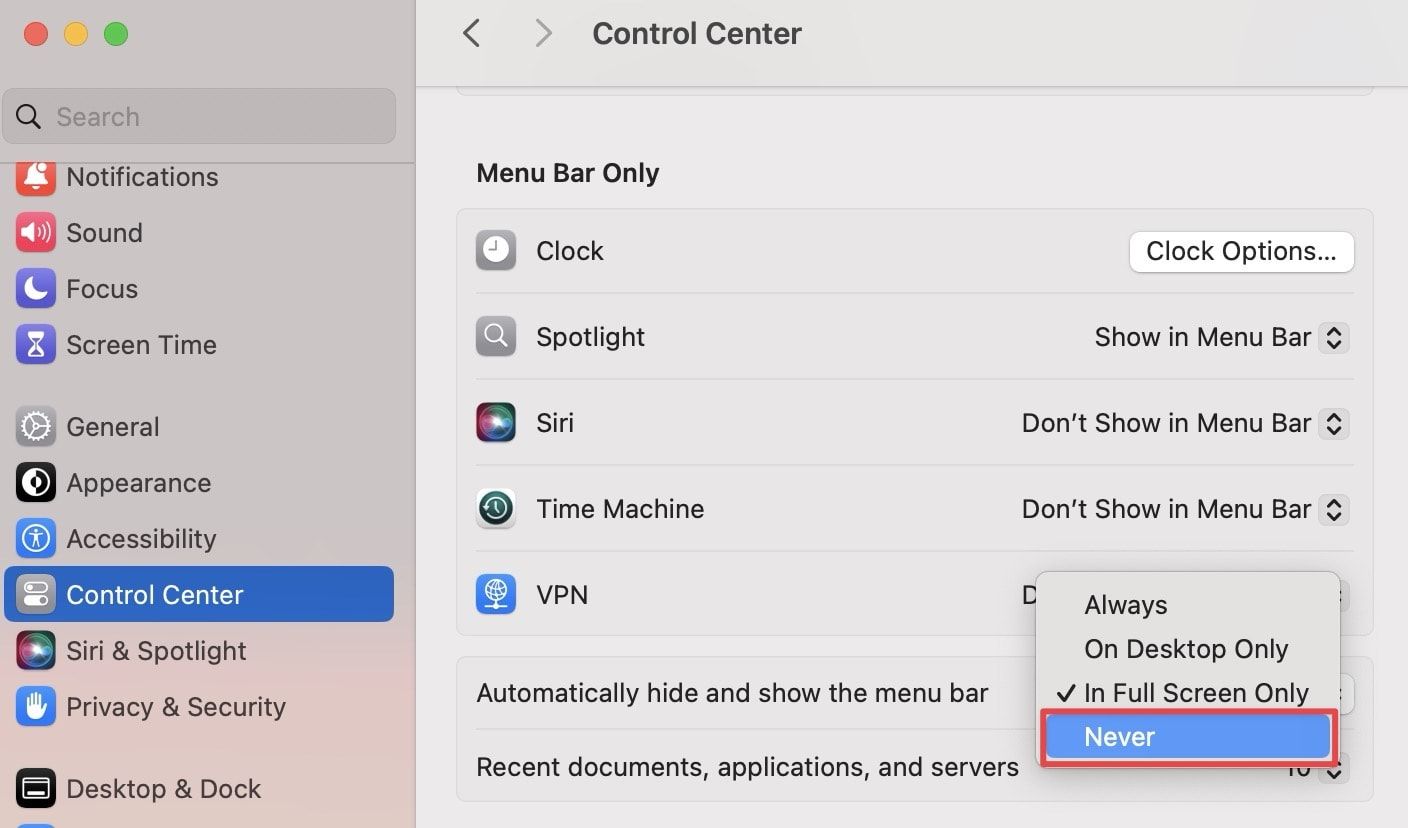
Thankfully, macOS allows you to show Menu Bar even when your apps are in full-screen mode. To enable this, go to System Settings → Control Center and click on the drop-down menu next to Automatically hide and show the menu bar. Now, choose the Never option to always show menu bar.
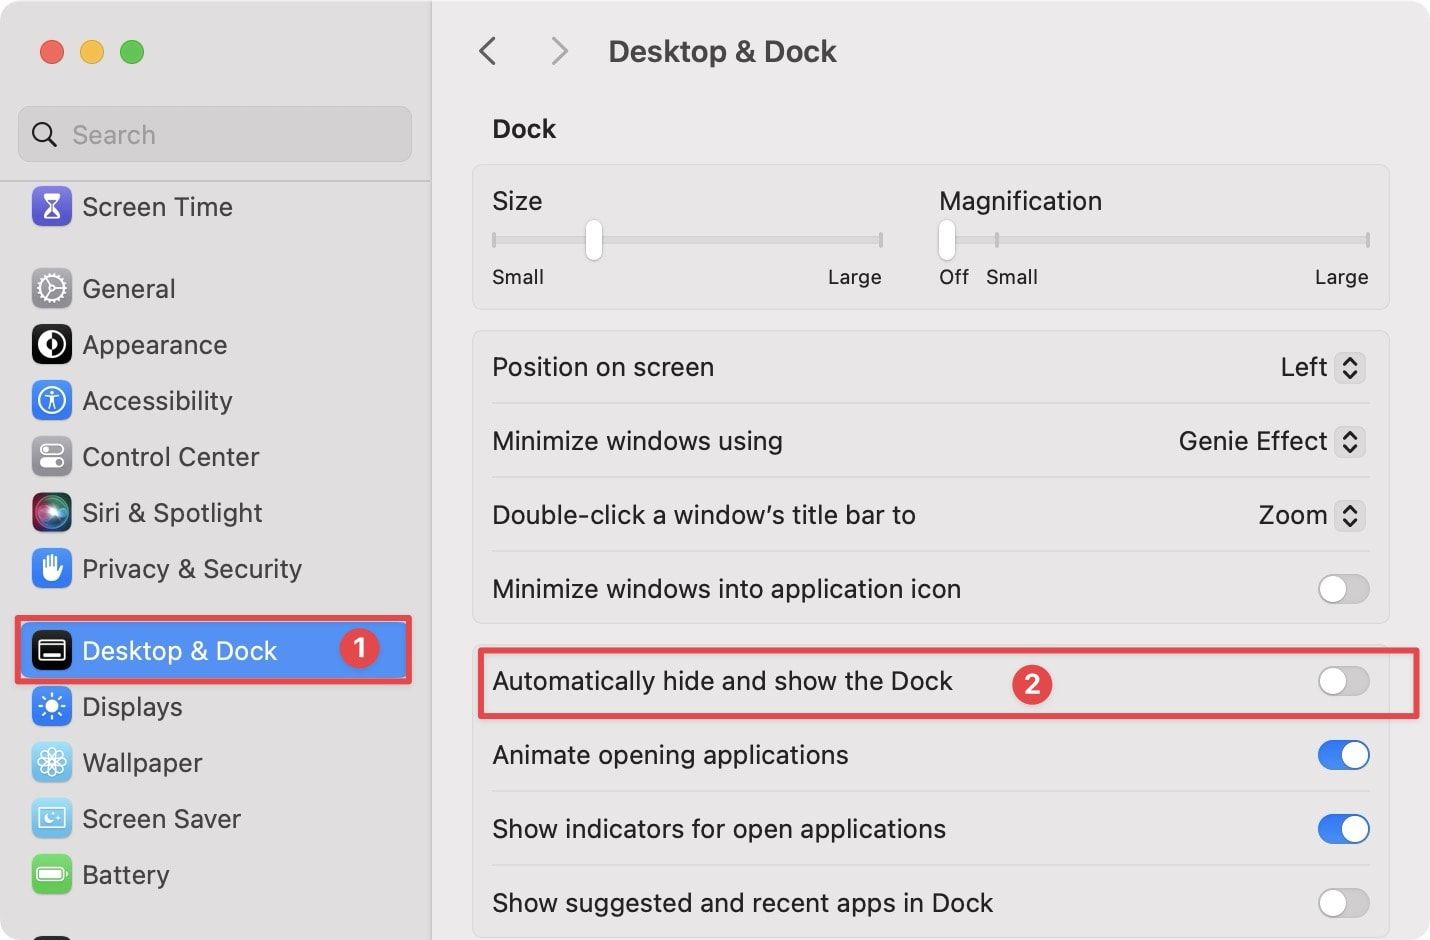
6. Automatically hide and show Mac Dock
If you don’t want your Mac’s Dock to unnecessarily take up space, you should enable the option to automatically hide and show Mac Dock. To do this, go to System Settings → Desktop & Dock and disable the toggle next to the Automatically hide and show the Dock option.

It will make sure that the Dock is hidden until you need it and move the cursor to the bottom of the screen. While you are here, you can also check out the settings for changing the Dock’s size, magnification, and position.
If you don’t want to hide the Dock automatically, remember the CMD+Opt+D keyboard shortcut. You can use this keyboard shortcut to hide the Dock when you want. Use the keyboard shortcut again to bring back the Dock.
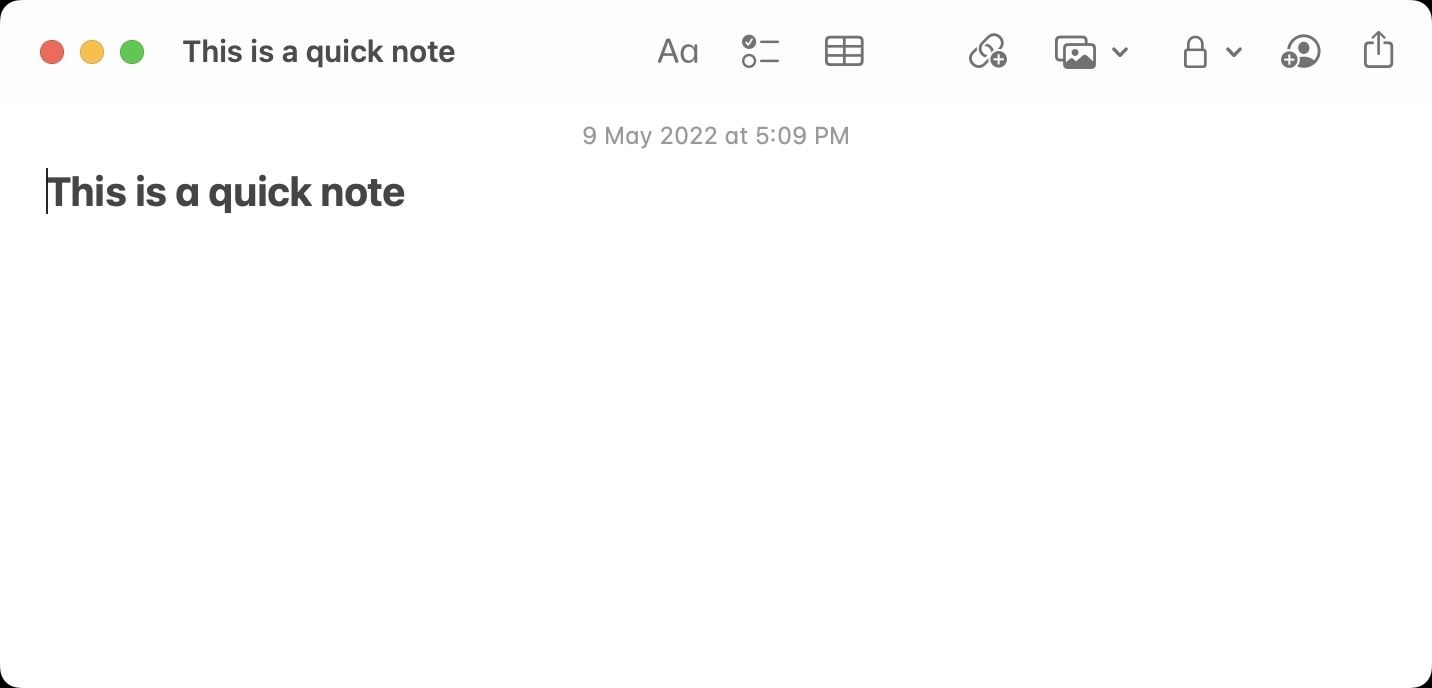
7. Use Quick Note
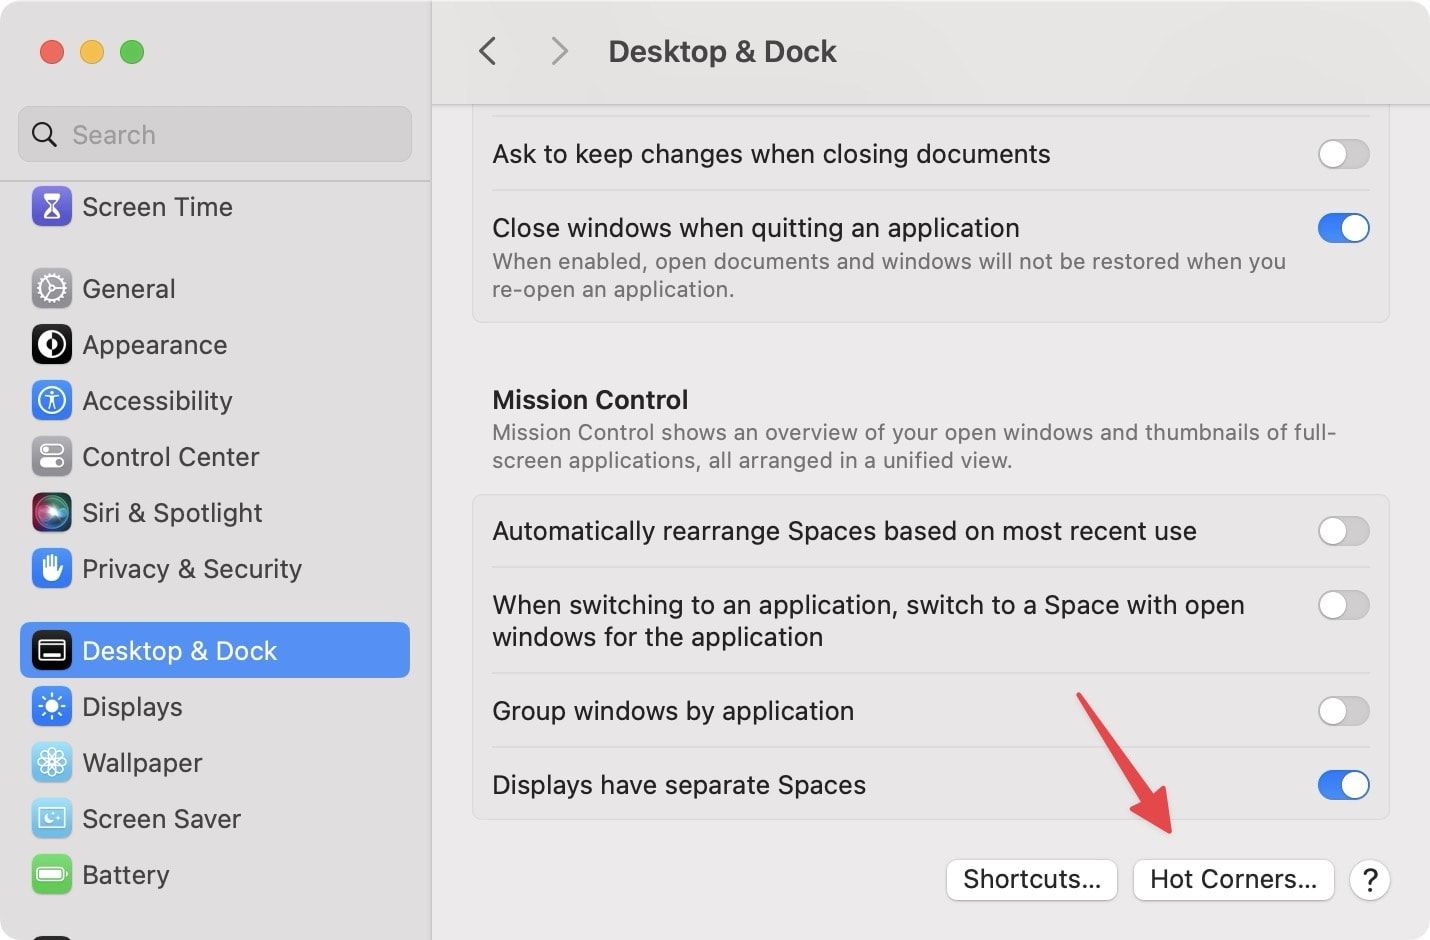
macOS Monterey introduced a new Quick Note feature. You can use this feature to quickly jot down notes and ideas while you are working with other apps without breaking the flow. By default, you can access the Quick Note by moving the cursor to the bottom-right corner of your Mac’s display. However, you can change this behavior by going to Apple Menu → System Settings → Desktop & Dock → Hot Corners.
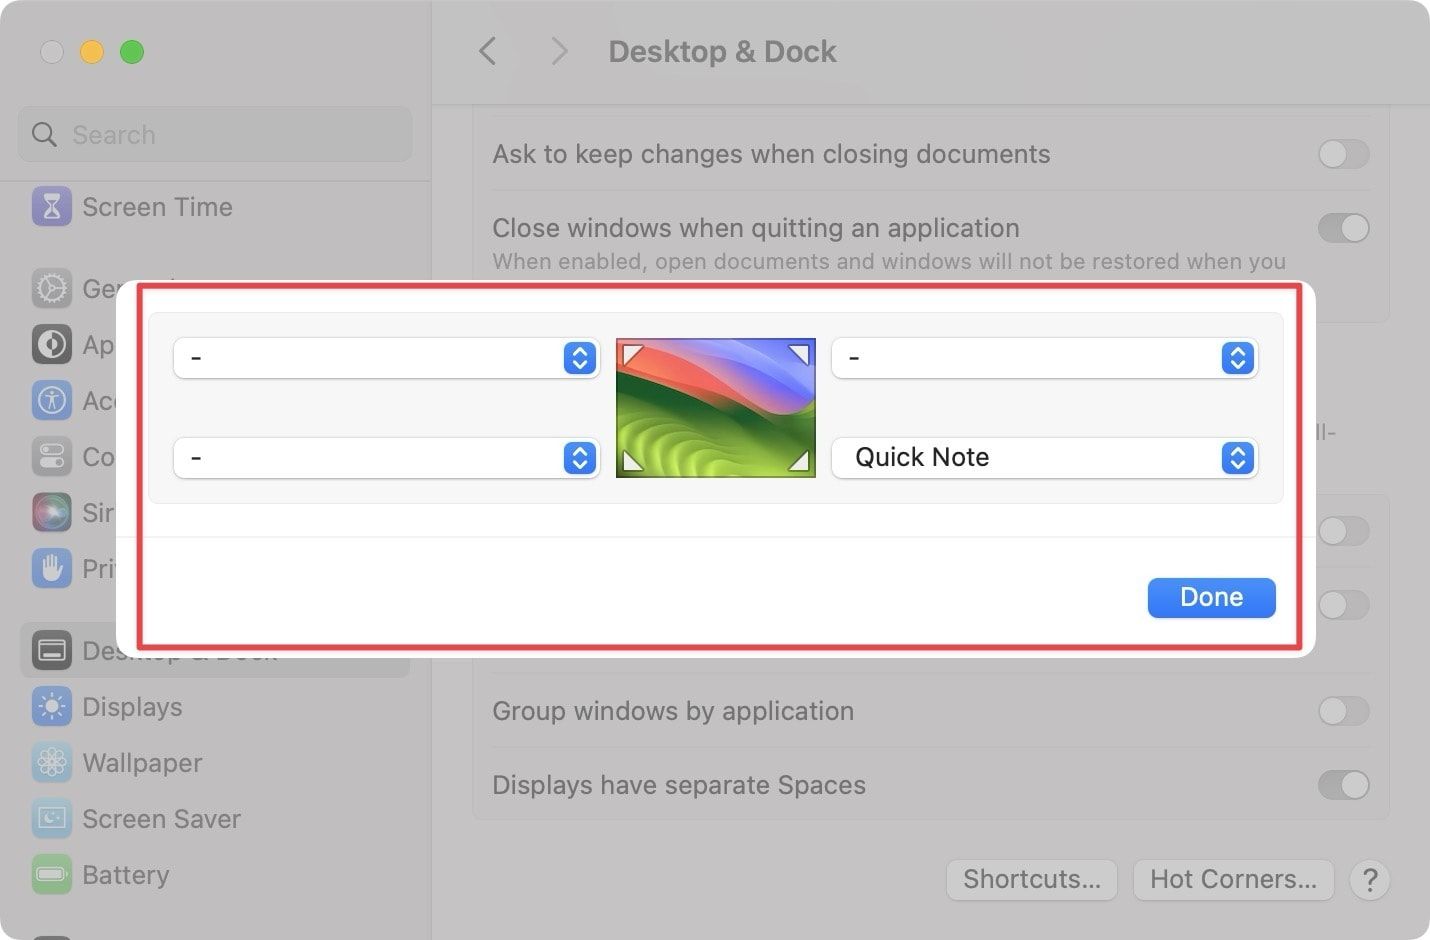
I keep the Quick Notes access via Hot Corners disabled on my Mac as there’s also a quick keyboard shortcut that you can use to call up a quick note. It’s quite easy to remember and handier than dragging your cursor. To use the Quick Note feature, hold the Fn key or Globe key, and press Q.
8. Paste copied text without weird formatting
When you copy text from a webpage and paste it into a document, you will see that it carries its formatting information with it. This behavior can mess up your document’s formatting, and you will have to waste time reformatting the text. To paste text without weird formatting on a document, go to the Edit menu and choose the Paste and Match Style option.
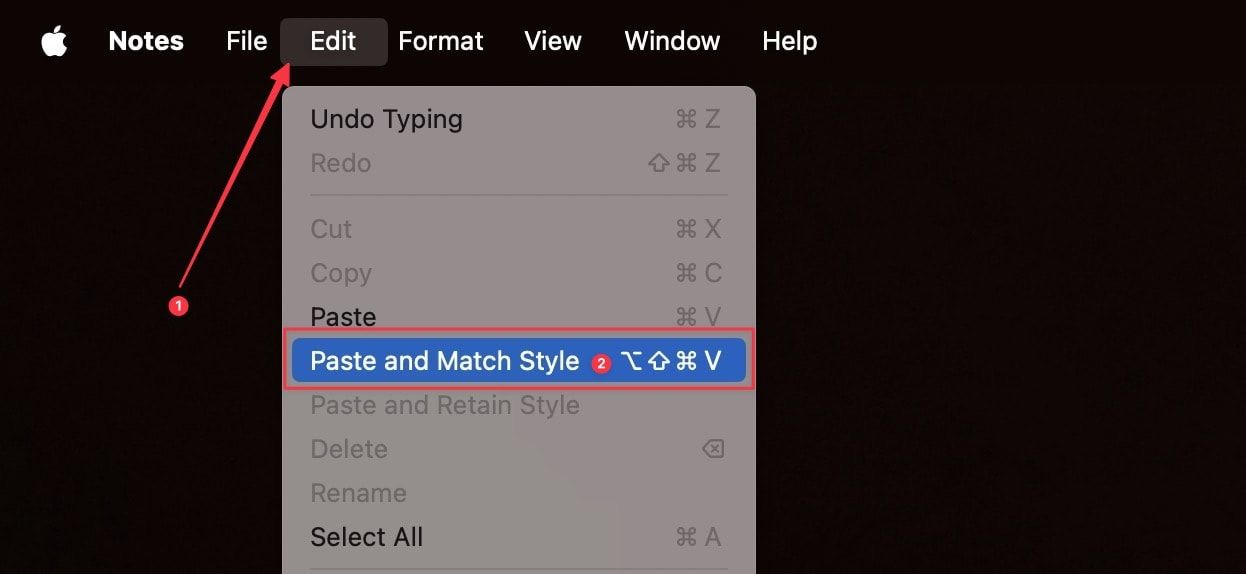
Alternatively, instead of hitting the CMD+V keyboard shortcut, use the CMD+Opt+Shift+V keyboard shortcut. It will ensure that the text you paste matches your documents’ formatting.
9. Enable do not disturb with a click
I hate receiving notifications on my Mac when I am working as it breaks my concentration and disturbs my flow. If you also feel the same way, you can use this simple trick to silence notifications on your Mac when you start working. To enable do not disturb on your Mac, hold down the Option key and click on the Date and Time on the Mac’s Menu Bar. If you find it hard to remember keyboard shortcuts, you can use this method that takes two clicks. First, click on the Control Center icon in the Menu Bar and then click on the half-moon icon to enable do not disturb.

10. Enable tap to click
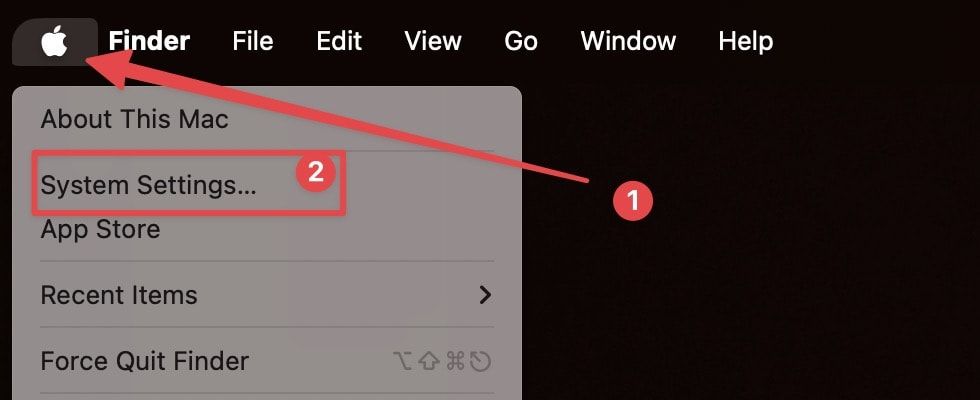
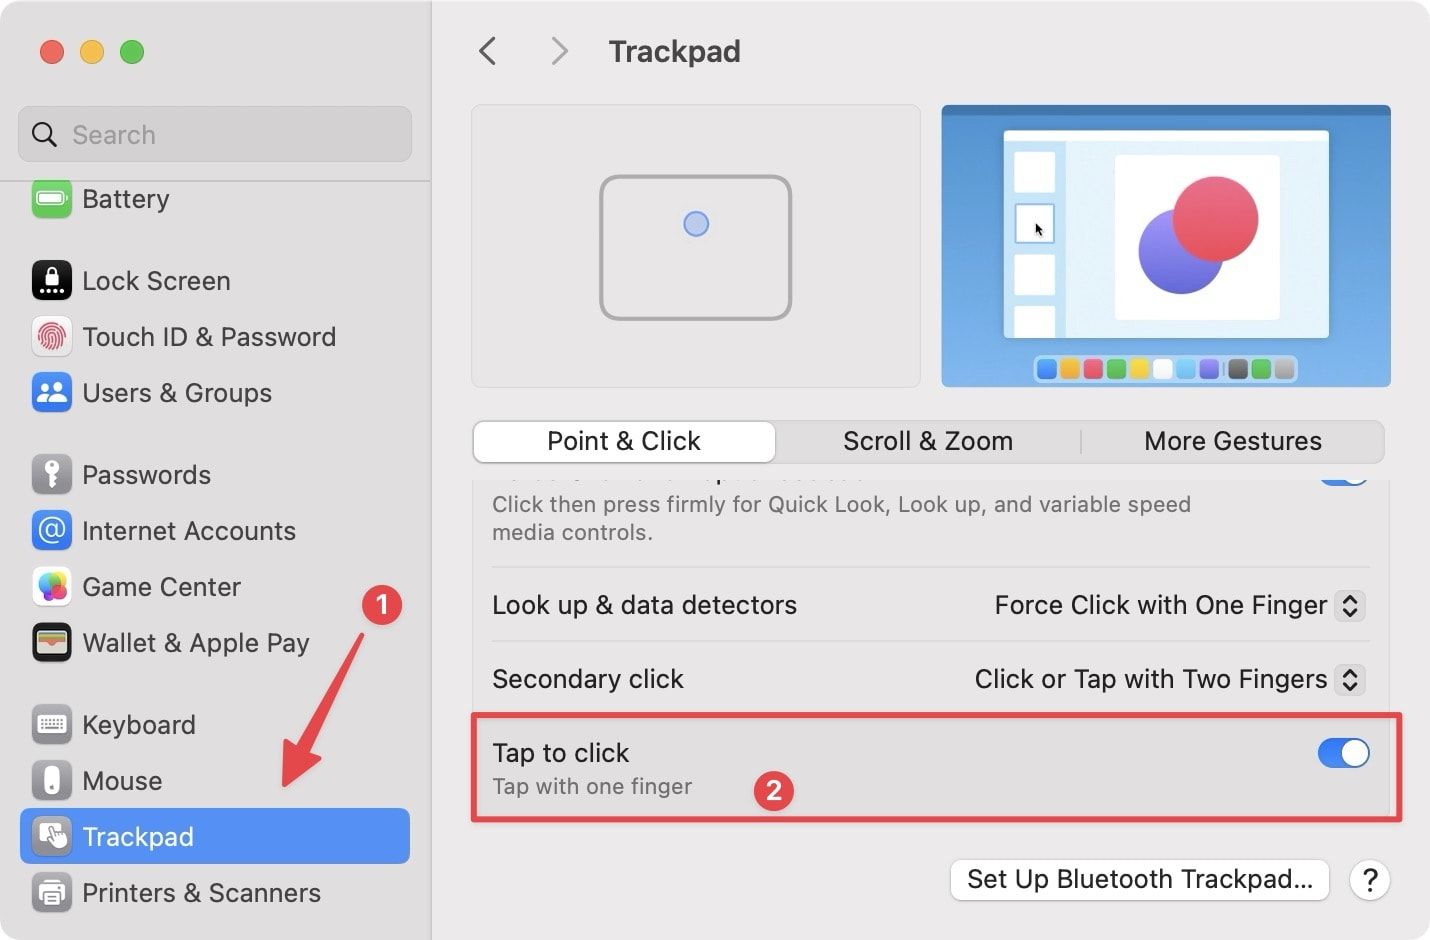
The Taptic Engine beneath the MacBook Pro’s trackpad gives you precise feedback, no matter where you click on the trackpad. However, if you don’t like the sensation, you can enable the tap to click on the trackpad, so you no longer have to press on the trackpad to register a click. To enable this feature, first go to Apple Menu → System Settings.
Now, scroll the left sidebar to the bottom and click on the Trackpad option. Here, enable the toggle next to the Tap to click option. You can use this trackpad settings page to also manage the tracking speed and other trackpad features such as two-finger scrolling, multi-touch gestures, and more. The settings page shows you a video representation of all the features, so go through them one by one and set your trackpad preferences to set it up as you see fit.
If you use a Magic Mouse, check out our guide on how to zoom in macOS using the Magic Mouse.
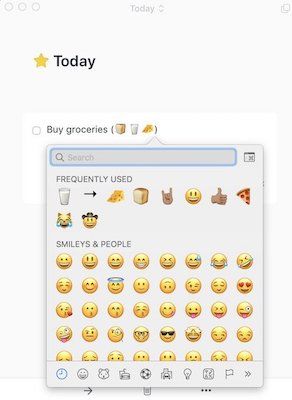
11. Access emoji keyboard
This is a fun one. If you love to use emojis, there’s an easy way to call the emoji keyboard on your mac. To do that, hit the keyboard combo Cmd+Ctrl+Space and the emoji keyboard will open. Here you can scroll down to find the emoji you want to use. You can also perform a search to find the one you want to.
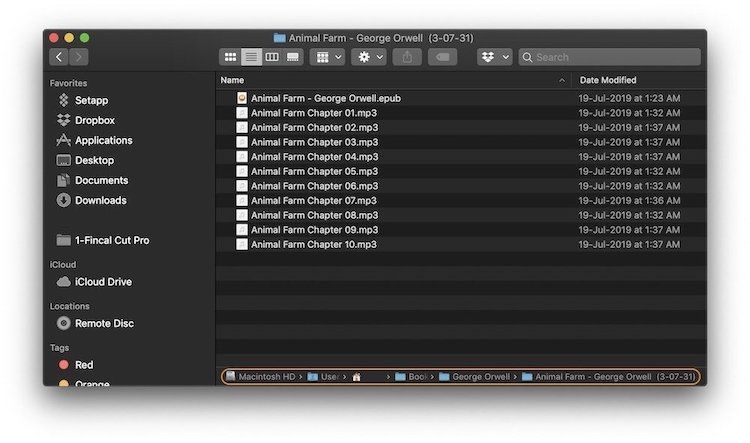
12. Show file path in Finder
macOS focuses on keeping the user interface clean and simple. And while it makes sense, sometimes it hinders usability. For example, one thing that irks me about macOS is that it doesn’t show the file path by default. So, if you search for a file in Spotlight and open its location, you will not be able to figure out how to reach that location.
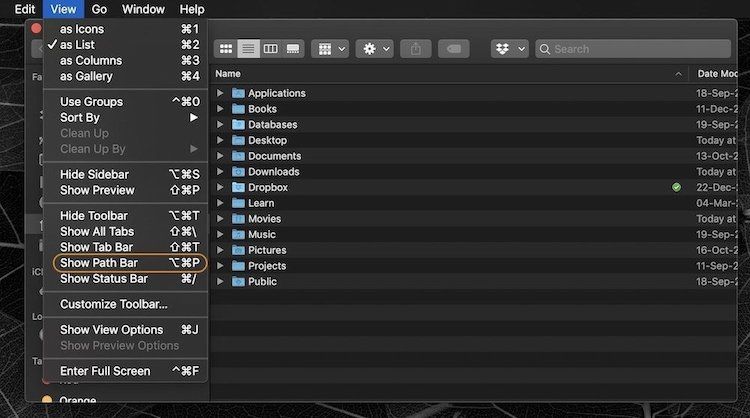
Thankfully, there’s a handy keyboard shortcut that can enable the file path. If you want to see a file’s location path, hit the “Cmd+Opt+P” keyboard shortcut and it will display the file path. If you forget this keyboard shortcut, you can find it using the “View” menu as shown in the picture below.
Fore more Finder customization features, check out our guide on the top macOS settings to change to enhance your Mac experience.
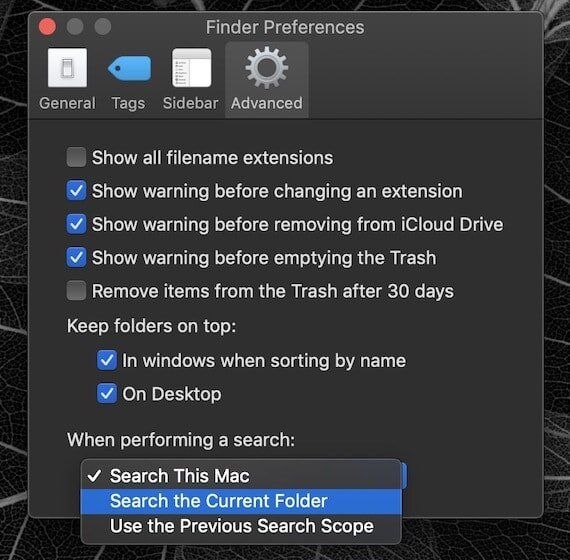
13. Keep search restricted to a folder
One of the most infuriating thing about performing search in a Finder window on Mac is that it initiates the search for the entire Mac. It makes no sense but that’s how it has been since ages. Thankfully, you can change this behavior in the Finder Preferences. So, open Finder Preference (⌘,) → Advanced and under “when performing a search” option click on the dropdown menu to select “Search the current folder”. It is going to save you a lot of grief in the future.
14. Minutely adjust the volume and brightness
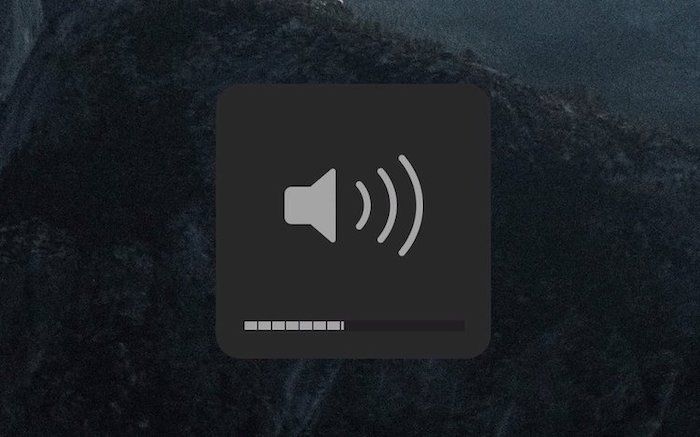
As you know, we can use the keyboard shortcuts to adjust brightness and volume on your Mac devices (F1 & F2 for brightness and F11 & F12 for volume), the control they provide is not good enough for me. That’s because the first few steps barely make any change while the last few steps do too much. I like to control my volume and brightness a little more minutely.
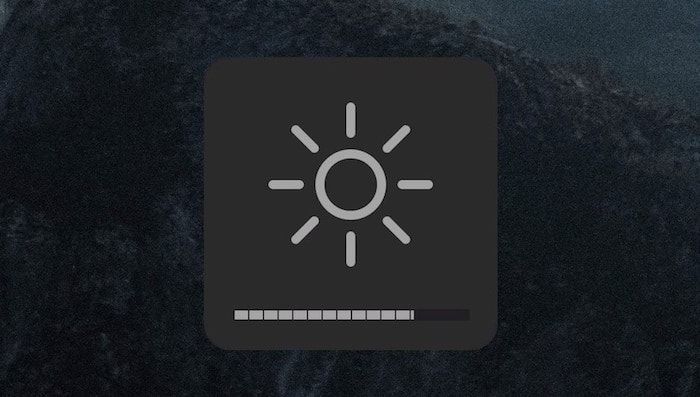
If you also want to do that, first hold down the option and the shift key and then use the volume or brightness keys to make the adjustment. A single press will result in an increment or reduction of a quarter of bar instead of the full bar which happens if you don’t use the option and the shift key. If you look at the pictures below carefully, you can spot the quarter increment.
15. Move files with cut and paste
Coming from Windows, it really frustrated me a lot when I was not able to use cut and paste command with the keyboard. Cmd+C works for copying but there’s no Cmd+X for performing the Cut Action. If you are a Mac user who doesn’t know what the Cut Action is, let me explain it to you. While using the Cmd+C or the Copy Action can help you copy files from one place to another, the cut Action allows you to do the same thing with one major difference.
The difference is that the Copy Action keeps the original file or text in place and creates a duplicate of that file whereas, the cut Action moves the original file and doesn’t create a duplicate.To perform the Cut Action on a Mac, first, copy the file using ⌘C (Cmd+C) combo. Now open the location where you want to paste the file and hit ⌘⌥V (Cmd+Opt+V) instead of ⌘V (Cmd+V).
Performing the Cut Action: Copy (Cmd+C) → Paste (Cmd+Option+V)
16. Trash files in seconds
This is a simple Mac tip that can save you time. When you have to delete an item on your Mac, you usually either drag it to the Trash in your dock or right-click on the file and select the “Move to Trash” option. Well, there’s a keyboard shortcut which can save you the trouble of doing these things. To easily trash a file, just click on it and then hit the “⌘+Delete” keyboard shortcut and it will move to Trash. If you want to skip trashing a file and permanently delete it, use the “⌘+⌥+Delete” keyboard shortcut. Remember, this will permanently delete a file and you will not be able to recover it.
17. Remember the word
This is a simple tip that can save you a lot of searches. There are times when we remember a word but don’t exactly remember the spelling. The first way to solve this problem is to fully type the word and then right-click on it and hope that the system knows what we are typing. The second way is to Google the word and it will most definitely tell you what word you might be thinking. The third and easiest way is to type the spelling to the point that you remember and then hit the “Fn+F5” keyboard shortcut. It will give you a list of the word right there and you can select the one you want to use.

MacBook Pro tips and tricks: intermediate level
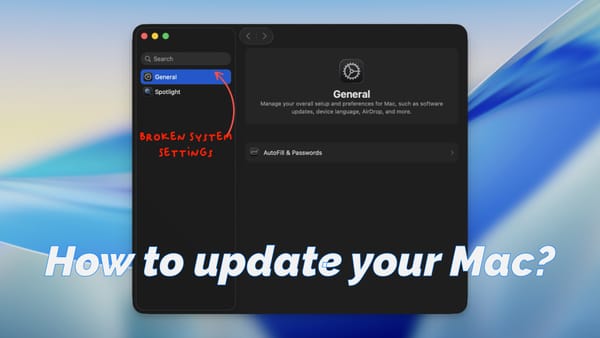
18. Fit more content on your MacBook Pro’s display
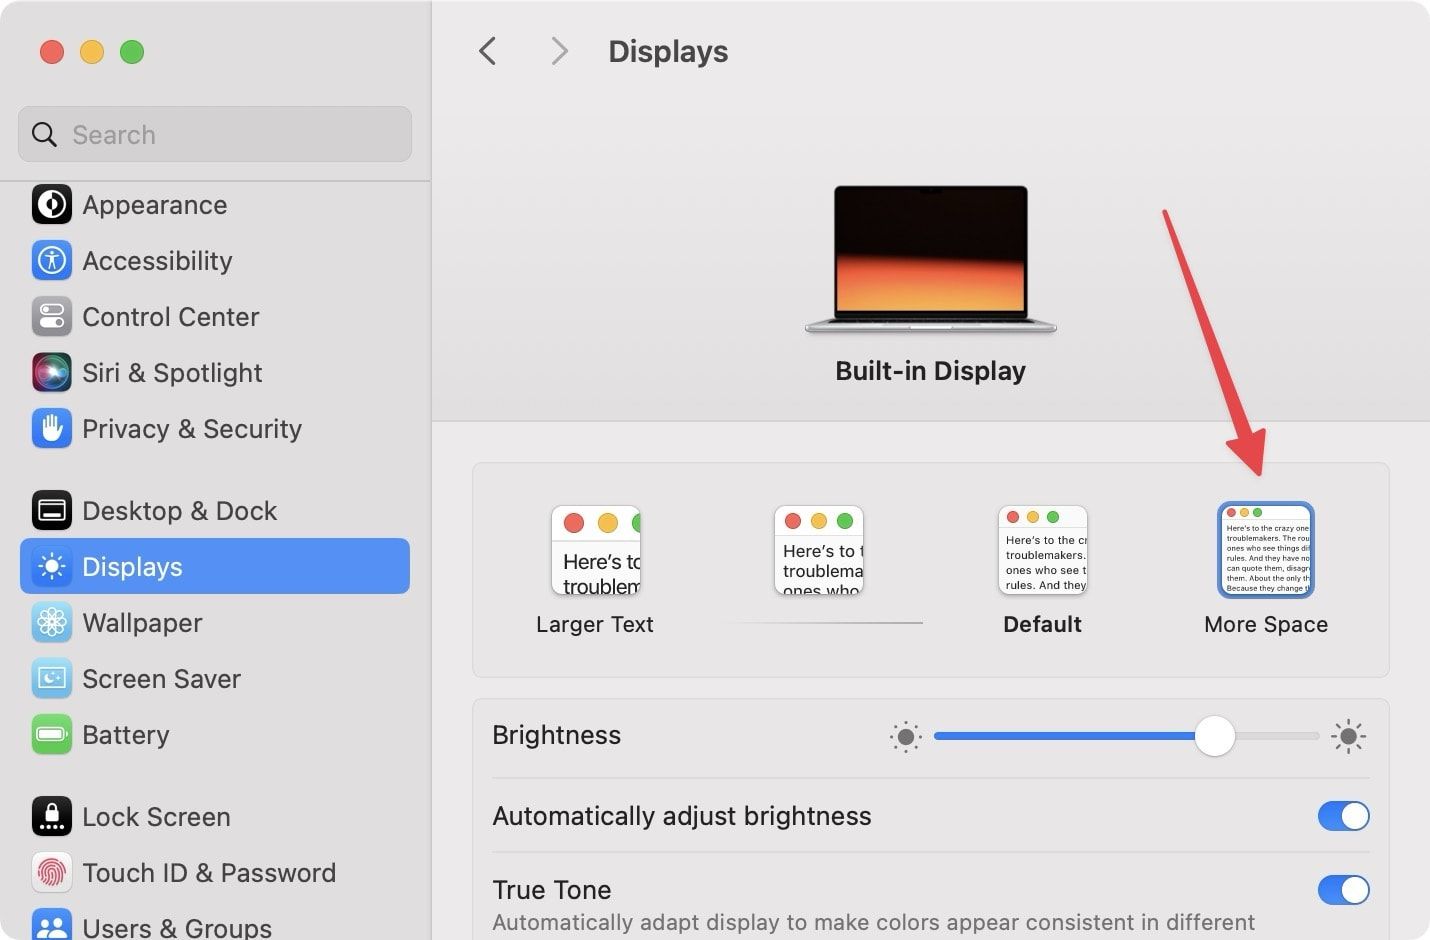
The MacBook Pro’s display comes with a resolution scaling feature that lets you the size of text and objects on your screen. The smaller the size of text and objects, the more content you can fit on your display. By default, the MacBook Pro’s display comes with a default resolution that is best for the display. However, if you want to fit more things on the display, you can use the Scaled option to get More Space on your Mac. To enable this scaled version, go to Apple menu → System Settings → Displays. Now select the More Space option.
19. Master the screenshot tool
macOS comes with a built-in screenshot tool that lets you capture screenshots of an app’s windows, the entire screen, and a selected area of the screen. To take a screenshot of the entire screen, use the keyboard shortcut CMD+Shift+3. If you want to take a screenshot of a selected area, hit the keyboard shortcut CMD+Shift+4 and click and drag the cursor over the area you want to capture.

To capture the screenshot of an app’s window, use the same CMD+Shift+4 keyboard shortcut. Then hit the space bar once and you will see that the cursor has changed into a camera icon. Now, click on the app’s window that you want to capture and it will take the screenshot of that app’s window. If you find it difficult to remember so many keyboard shortcuts, just remember one CMD+Shift+5 keyboard shortcut. It will open the screenshot overlay tool that will let you access all the features we discussed above along with the ability to screen record your mac’s screen.
- Check out how you can take scrolling screenshot on Mac by clicking on the link.
20. Sign PDFs using Preview app
Did you know that you can sign PDF files using the built-in Preview app on Mac? To sign a PDF, open it with the Preview app and then click on the annotation tool. Now, click on the signature tool and you will see the option to add your signature if you have not already added it.
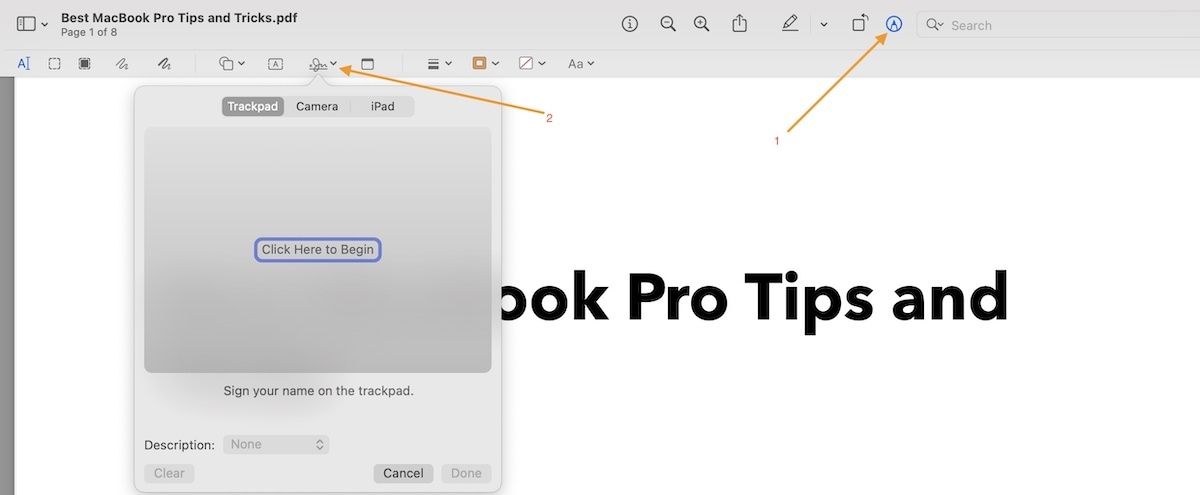
There are several methods to add a signature in the Preview app. You can sign on paper and scan it using Mac’s camera, sign using the trackpad on your MacBook Pro, and even import your signature by signing on the touch screen of your iPhone or iPad. Once you add a signature, the Preview app saves it, so you don’t need to recreate your signature every time you want to sign a new PDF. Click on the link to check the step-by-step guide on how to sign PDFs using Preview on Mac.
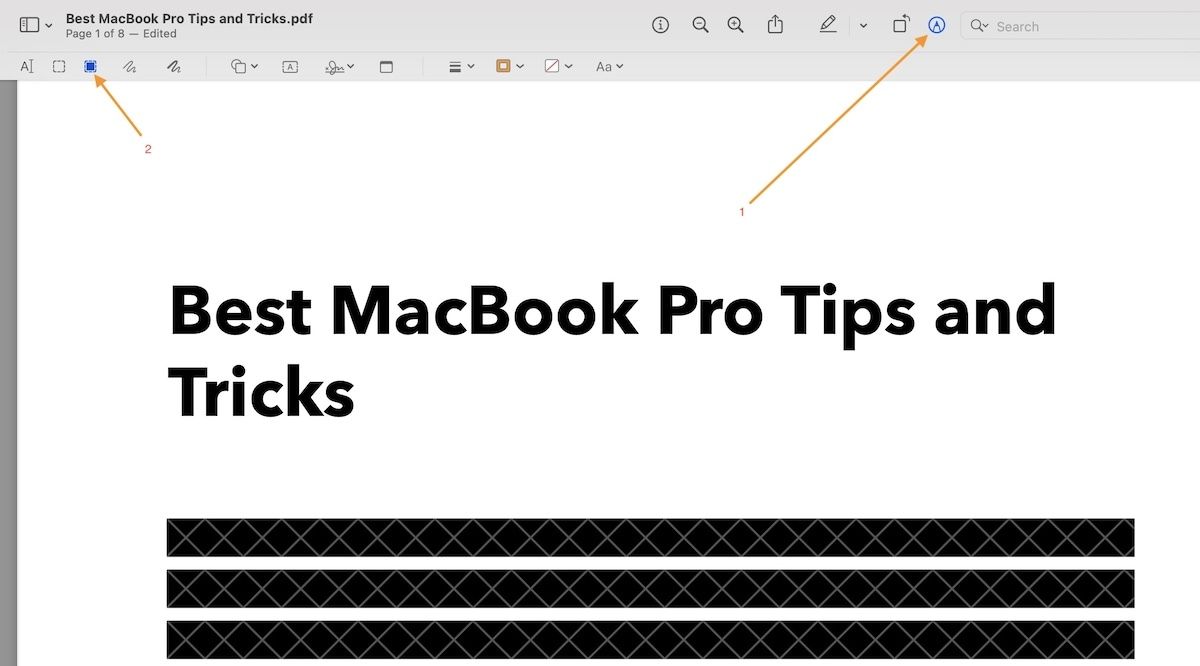
21. Redact PDFs using Preview app
Apart from letting you sign PDF documents, the preview app can also edit and annotate PDF documents and even redact sensitive information. To redact a PDF on Mac, double-click on the PDF file to open it in preview. Here, click on the annotation tool and then on the Redact too. Now, drag the cursor on the text you want to hide and it will redact the selected text. Remember that this is an irreversible process, so once you save the changes, the redaction will be permanent.
22. View document history and restore past versions
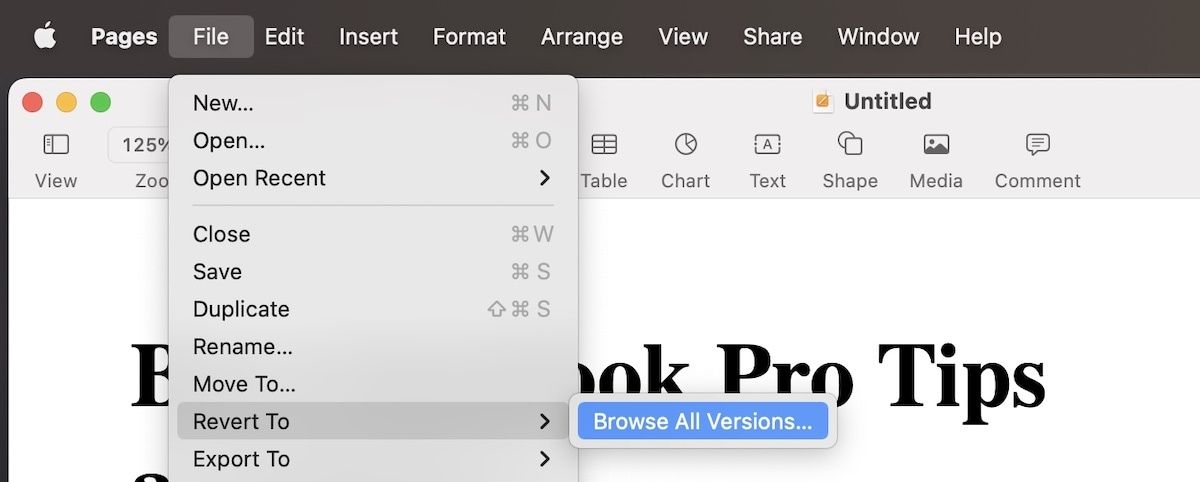
macOS comes with a built-in versioning feature that keeps a history of all the changes you have made to a document. It not only works in the official Pages app but also in several third-party apps that have integrated this feature. To view document history and restore a past version of the Pages document, open the document and then click on the ‘File’ menu. Now, click on the ‘Revert to’ option and click on ‘Browse all options’.
Now Pages will open in the version history mode where your current document will be on the left, with the past versions on the right. You can browse the past versions using the timeline or arrow button. Once you find the correct version of the document, click on the Restore button to restore the document to that point.
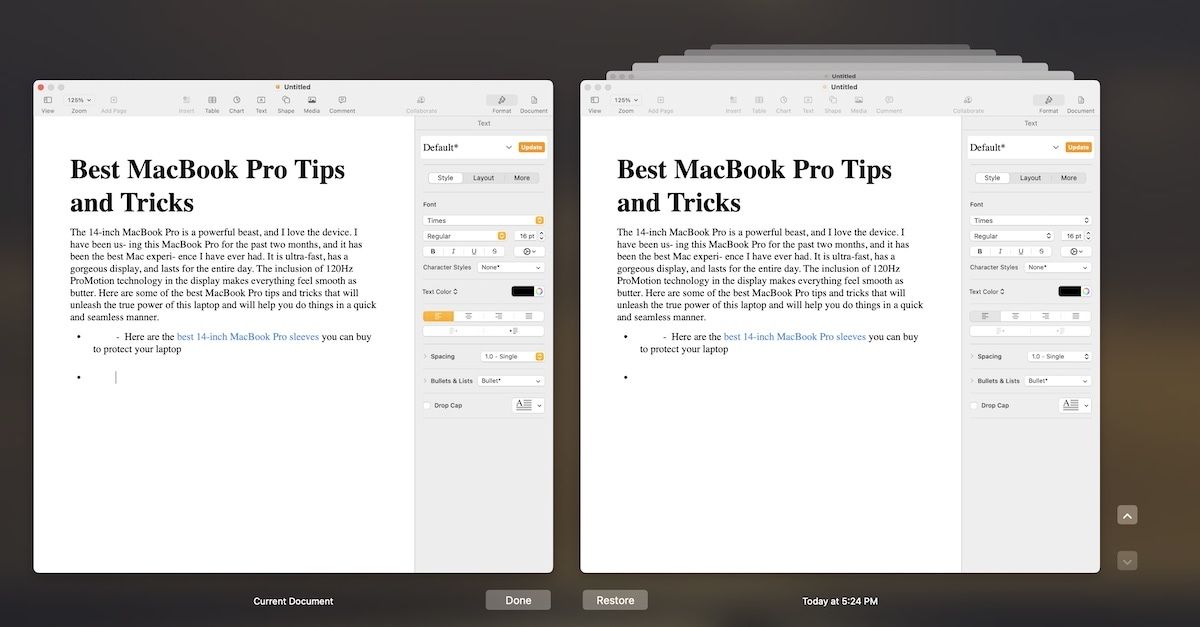
If you don’t want to restore the entire document, you can copy the required passages by selecting and using the CMD+C keyboard shortcut.
23. Create secret notes using Keychain Access app
If you want to safeguard sensitive information on your MacBook Pro and keep it behind a password-protected wall, you can use the Keychain Access App to create secret notes. While the Apple Notes app also comes with a note-locking feature now, I still prefer the secure notes feature as not many people know that it exists, so there’s less of a chance someone will be looking there.
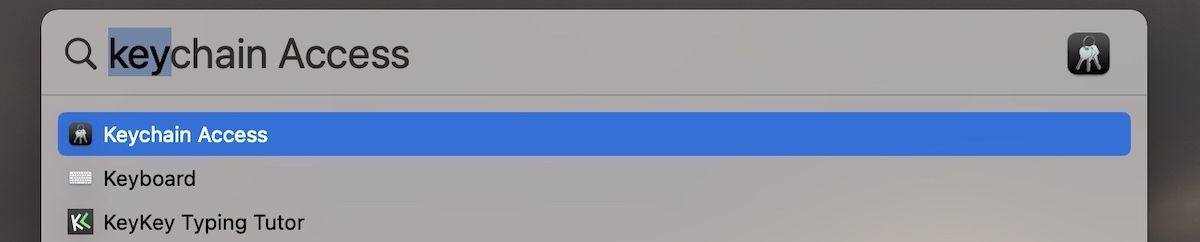
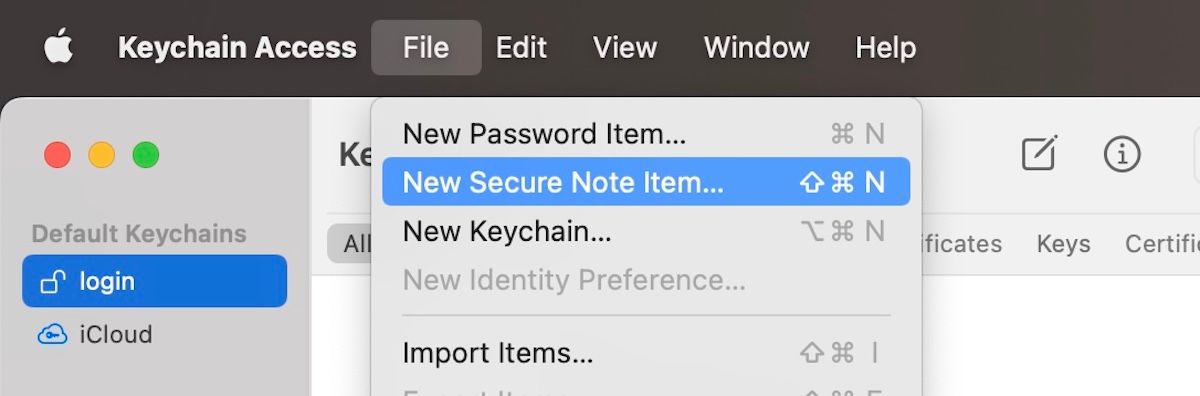
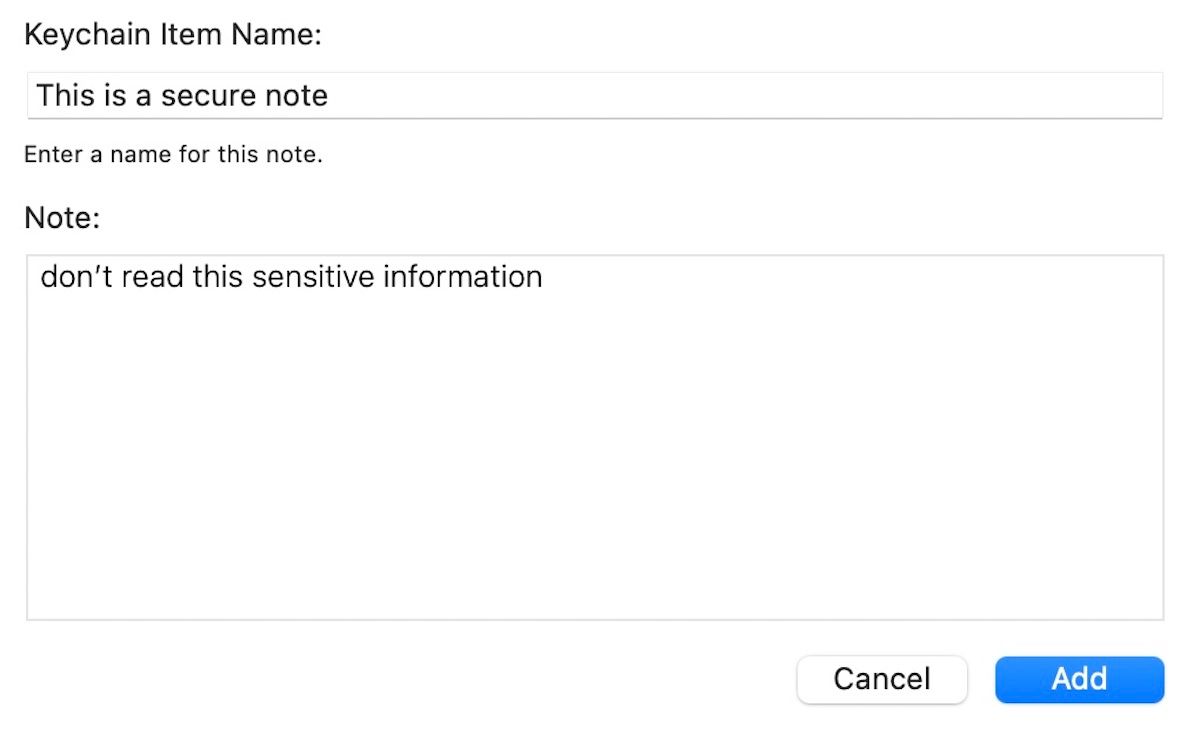
To use this feature, launch the Keychain Access app using Spotlight (or go to Applications → Utilities). Now, either use the keyboard shortcut CMD+Shift+N or go to File → New Secure Note. Write what you want to protect and then authenticate with your password to save the note.
24. Master the Hot Corners
Hot Corners are one of the most under-appreciated features of macOS. Either people don’t know about them or they just don’t find it useful. For me, Hot Corners is a feature which I can’t live without. Using Hot Corners feature, a user can assign different actions to each of the corners of the display. Dragging your mouse pointer to that corner will execute that action.
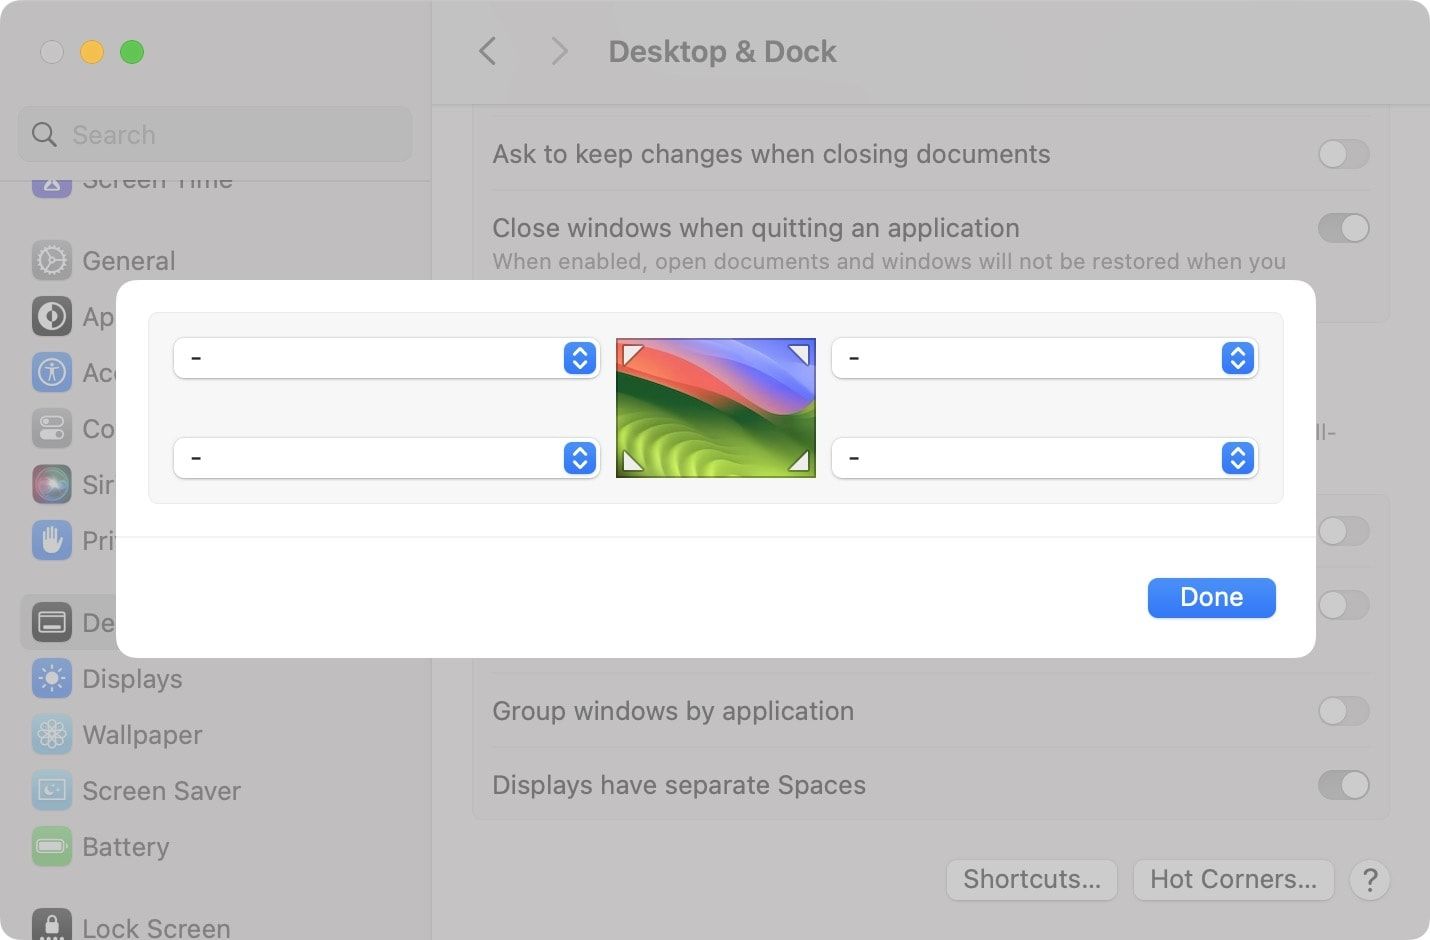
So whenever there are a lot of windows open on my desktop and I want to grab a file to attach or do any other thing which requires me to look at my desktop, I just drag my cursor to the top-left corner and I am done. It’s up to you how you want to use the four corners of your desktop, but once you make using them a habit, you will speed up your workflow many folds. The picture below shows all the actions that I have assigned and am using Hot Corners for. To set-up a Hot Corner all you need to do is to follow the following path:
Apple Menu → System Settings → Desktop & Dock → Hot Corners
25. Quickly access folders using the Go menu and shortcuts
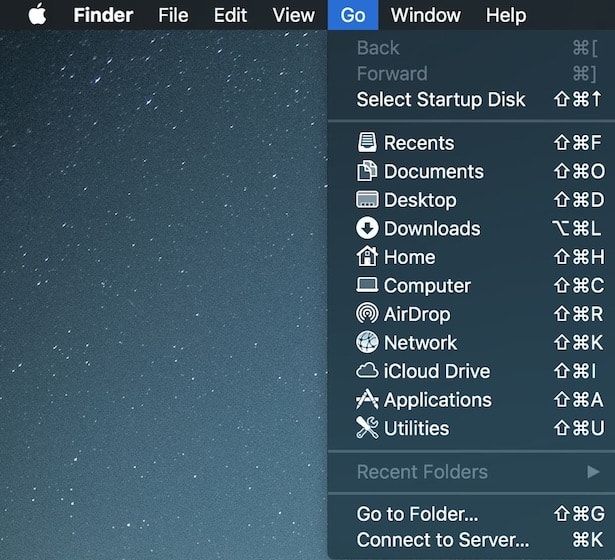
Another under-appreciated feature which can greatly increase your workflow speed is the Go Menu which is present in the Menu bar in the default mode. You can use the Go Menu to easily access folders without first opening the Finder window. If you put in some effort to remember the shortcuts mentioned in the Go Menu, you don’t even need to use the Go Menu, and can directly use the keyboard shortcuts to open a window. For example, if I have to open my Downloads folder, I simply tap the keyboard command ⌥⌘L (Opt+Cmd+L). The picture below shows all the other keyboard shortcuts which you might want to learn.
26. Using the Delete key both ways
Users who have just switched to Mac from Windows will surely appreciate this feature. Windows has two keys for deleting texts which are Backspace and Delete. The Backspace button deletes the text which is behind the cursor while the Delete button deletes the text which is in front of the cursor. However, macOS only comes with the Delete key. What’s even more confusing is the fact that the Delete key on macOS works as the Backspace key on Windows.
However, there is a way you can use the Delete key both ways i.e. use the Delete key to delete the text both before and in front of the cursor. To delete the text in front of the cursor, a user needs to hold on to the ”fn” key while hitting the delete key. You don't need to hold the function key if you just want to delete the text before the cursor.
27. Smartly navigate text and use smart text selection
Most of use the left-right-up-down arrow key to navigate the text. But a surprising number of Mac users don’t know about the keyboard navigation modifiers that make navigating the text a breeze. You can use these navigation modifiers to move not only by a character but also by word, by line, by paragraph, and even move to the beginning and end of the text. Here are the navigation modifiers that you need to remember.
- ⌥ + ←/→ = move cursor by word instead of by character
- ⌥ + ↑/↓ = move cursor by paragraph
- ⌘ + ←/→ = move cursor to beginning/end of line
- ⌘ + ↑/↓ = move cursor to beginning/end of all text
Similarly, when selecting text, just add the Shift button to this combo. For example, if you use ⌘+Shift+→ shortcut, you will select the whole line in front of your cursor. Using these shortcuts is an easy way to navigate and select text.
28. Create text clipping
It’s an old but useful feature that not many people know about. On your Mac, you can select any text (works on most apps) and drag it to your Desktop or a Finder window to create a simple text clipping with .txt file format. This feature is helpful when you want to create a summary of an article or want to save important snippets from a book. Using the text clipping is also pretty easy. You can either double-click on the file to open it and copy from there, or you can directly drag and drop the file in any document and it will paste the text at the cursor head. Note that when you are clipping a text, it preserves the rich-text format. That means any text formatting and links are preserved.
29. Rename multiple items at once
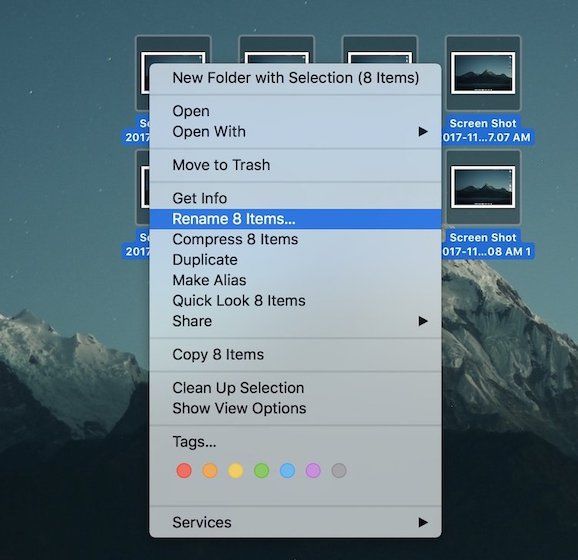
This one might not be useful for everyone but it can be a lifesaver for someone who really needs it. As the heading suggests, you can rename multiple files on your Mac in a single action. I take a lot of screenshots on a daily basis, and renaming them in batches saves me a lot of time. To rename multiple files at once, first, select all the files and then right click (control + click / secondary click). From the right-click menu, select the “Rename multiple items” option, as shown in the picture below.
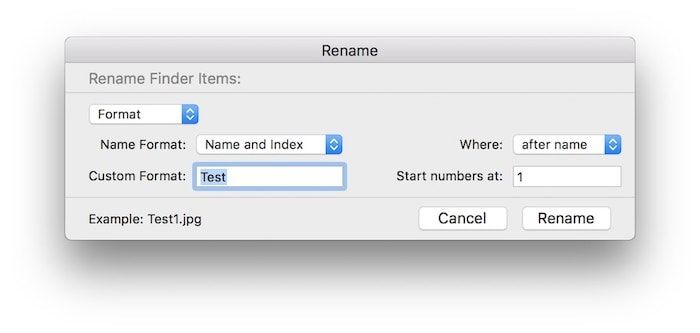
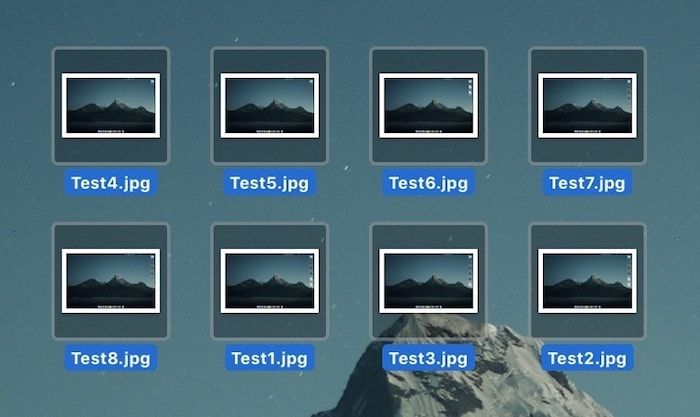
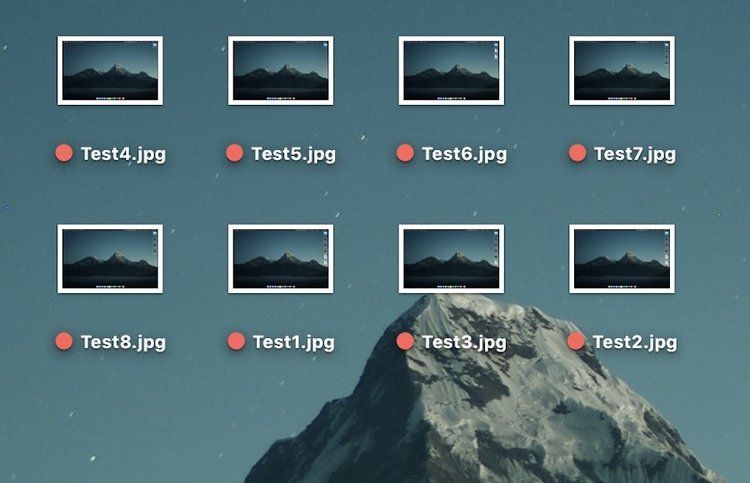
A popup menu will open. Here select the option shown in the picture below and enter the name you want to use in the custom name field. Since I am using this as a test, I will just use the word test. Now, click on the Rename button. Now, all the files will be renamed using the word test followed by a number. (Test1, Test2, Test3, and so on). This feature will save a lot of your time when you need to crudely rename files for organizing them.
30. Organize your files with tags and stacks
While we are on the topic of organizing files, I want to show you how you can easily organize and access files using tags and stacks. In its most basic forms tags are colored dots which can be assigned to any file or folder. If you open your Finder window, you will see a Tags menu in the left bar. Once you assign a tag to a file, it can be quickly accessed by clicking on its respective tag in the Finder window.

This is extremely helpful if you want to access multiple files in a place without moving them outside their parent folder. For example, I will assign the Red tag to all the screenshots I just took. To assign the tag I will just right click on them and choose the read tag. Also, since I am assigning the same tag to all of the files, I will select all and then do it. This saves me from assigning tags individually for each file.
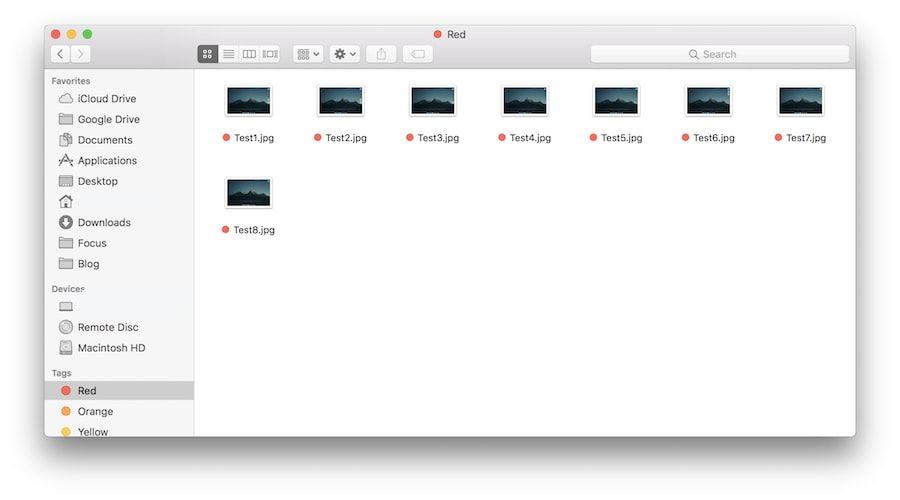
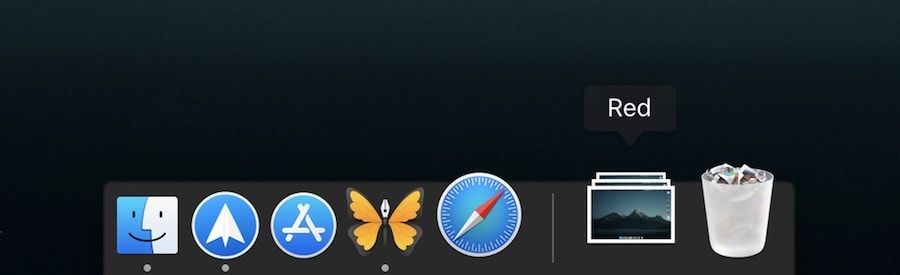
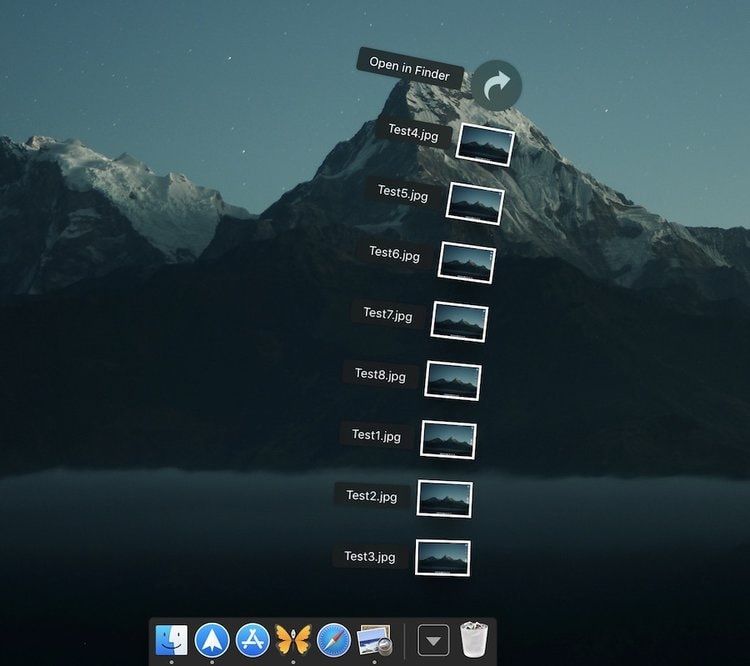
Now, I will open the finder window and click on the Red tag and you will see that all my screenshots are there. To make these files even more accessible we will add them to our dock using the Stacks feature. To do that, click and drag on the Red tag from the Finder window and drop it between the Trashcan and the line separating it from other items on your dock. You will see that the tag Red has been added to a stack. Click on the stack to access all your files which are tagged Red. This is an easy way to organize and access your files.
Best Advanced Mac Tips and Tricks
31. Take screenshots in JPG format
If you take a lot of screenshots on Mac, you must know that your Mac takes screenshots in PNG format. Although there are a lot of advantages of keeping photos in PNG format (for one, it is lossless), it also comes with a major disadvantage. PNG format images take larger space on your Mac’s hard drive as the file size is bigger. Hence, its always good to take screenshots in JPG format. With JPG format the screenshot quality is almost the same and you save space. It also makes them easier to share as the files are smaller in size.
defaults write com.apple.screencapture type jpg
It’s very easy to teach your Mac to take screenshots in JPG format. Just open the Terminal on your Mac, type the code mentioned above and hit enter. Now, every time you take a screenshot, your Mac will be taking it in a JPG format. In fact, you can replace jpg with pdf to take screenshots in PDF format. Also, if you ever want to go back to taking screenshots in PNG format, just replace jpg with png in the above code.
32. Mark the hidden apps
We all know that macOS lets us hide apps using the “Command+H” keyboard shortcut. Hiding app is a good way to keep your desktop clean. One major benefit of hiding apps instead of minimizing it is that you can use the “Command+Tab” keyboard shortcut to call an app back. To call up a minimized app, you need to hold the option key and release the tab key while command tabbing through the cycle. It's not as intuitive as using CMD+Tab.
defaults write com.apple.Dock showhidden -bool TRUE; killall Dock
However, there’s one problem with hiding apps. There is no indication which apps are hidden and which are closed. It makes it harder to call back apps as closed apps don’t come up using the keyboard shortcuts. Well, I am going to save this problem for you today. Just open Terminal, copy and paste the command written above and hit enter. Once you do that, you will see the hidden apps are a little greyed out than the rest of the apps, just like shown in the picture below.

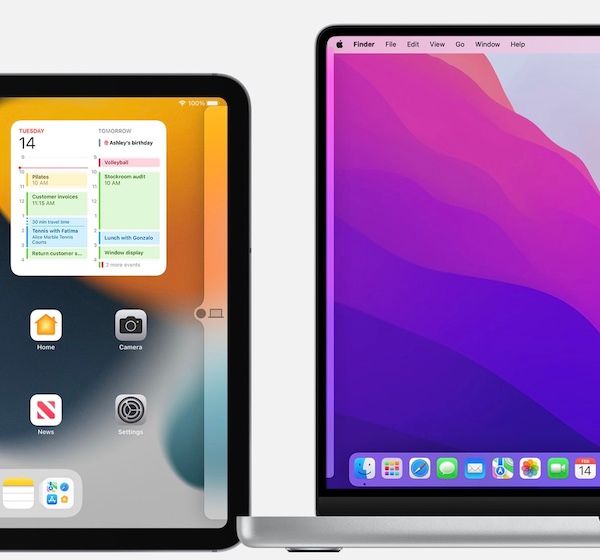
33. Use Sidecar to use your iPad as a secondary display
With macOS Catalina, Apple introduced a new Sidecar feature that allows you to use your iPad as an extended display for your Mac. It’s quite a handy feature and is perfect for creating a multi-screen setup, especially when traveling. The feature works with almost all modern Macs and iPads released in the past five years. If you are not sure whether your Mac and iPad are compatible, you can click here to check the compatibility. Also, note that your iPad and Mac should be using the same Apple ID for this feature to work.
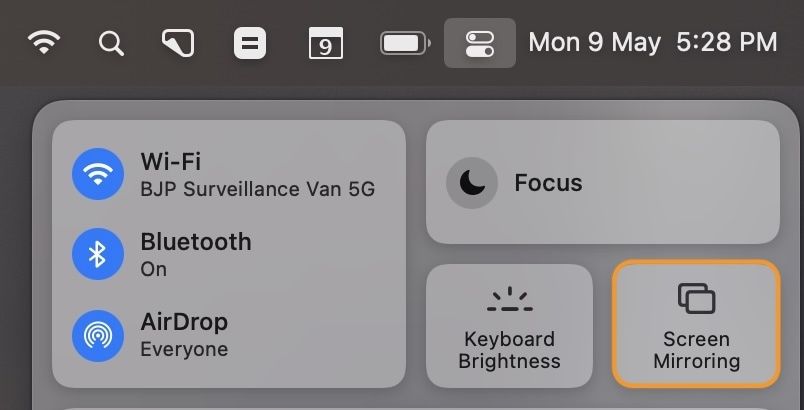
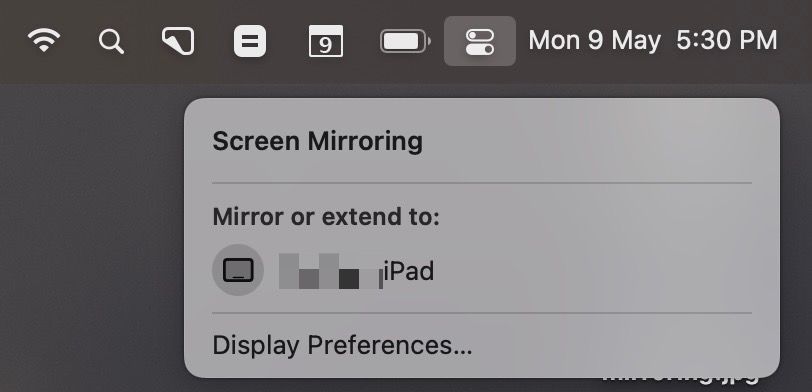
First, ensure that your iPad is near your Mac. Now, click on the Control Centre icon on the Menu Bar, and click on the ‘Screen Mirroring’ option. Here, select your iPad below the ‘Mirror or extend to’ sub-heading. Use the mirror option if you want your iPad to mirror what’s on your Mac, and use the extended to option if you want to use the iPad as an extended display.
34. Use Universal Control to control the iPad with your Mac’s keyboard and trackpad
With macOS Monterey and iPadOS 15, Apple introduced the Universal Control feature. This feature lets you control your iPad using your Mac’s keyboard and trackpad and vice-versa. The feature shines when using an external keyboard and mouse, as you can use the same input to control both your devices.
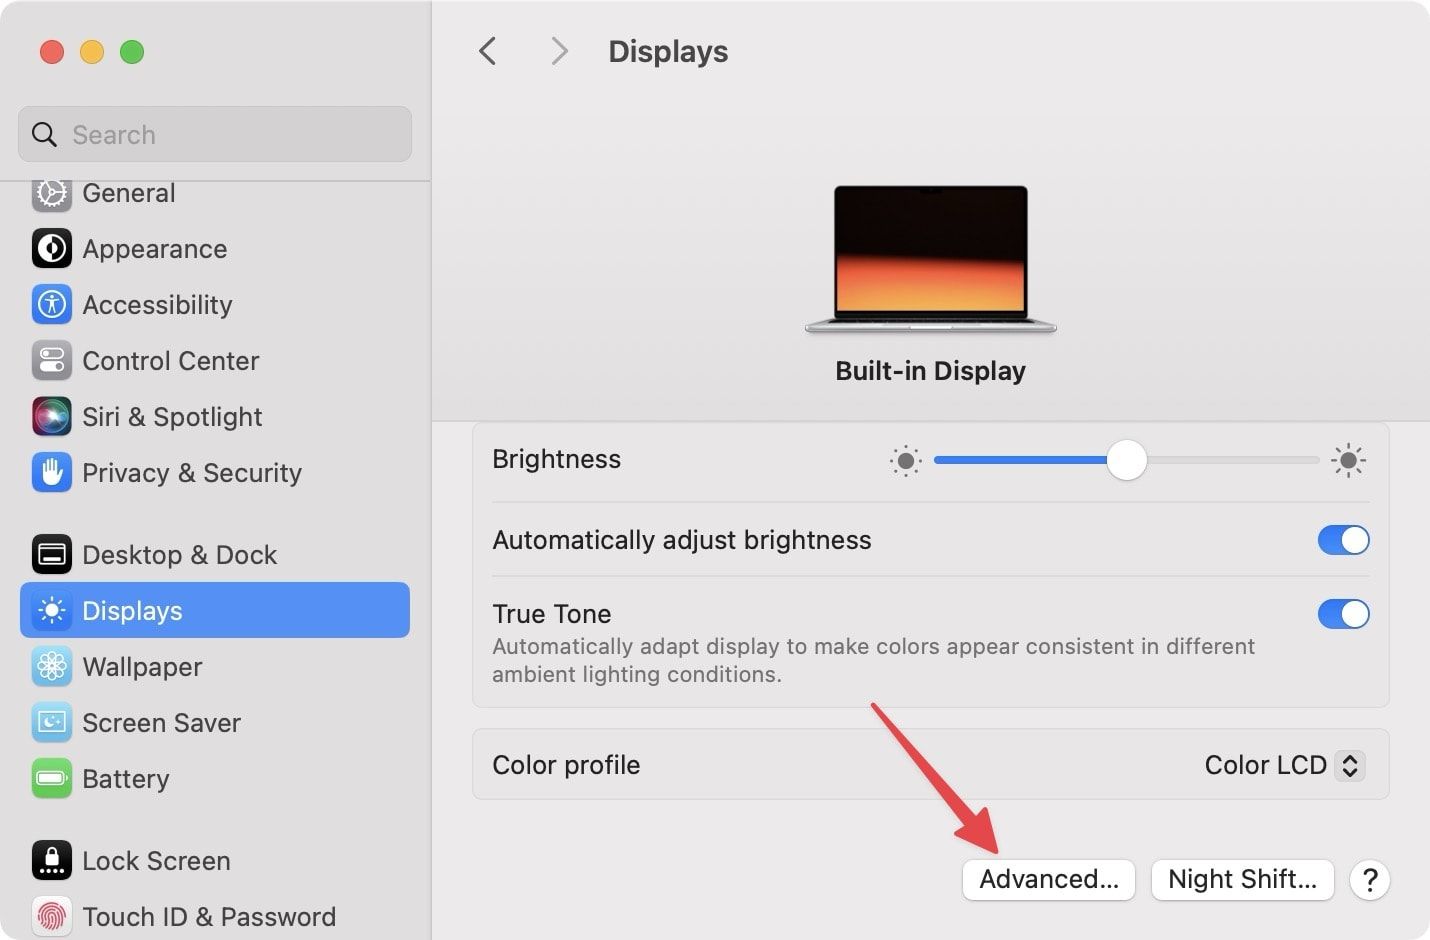
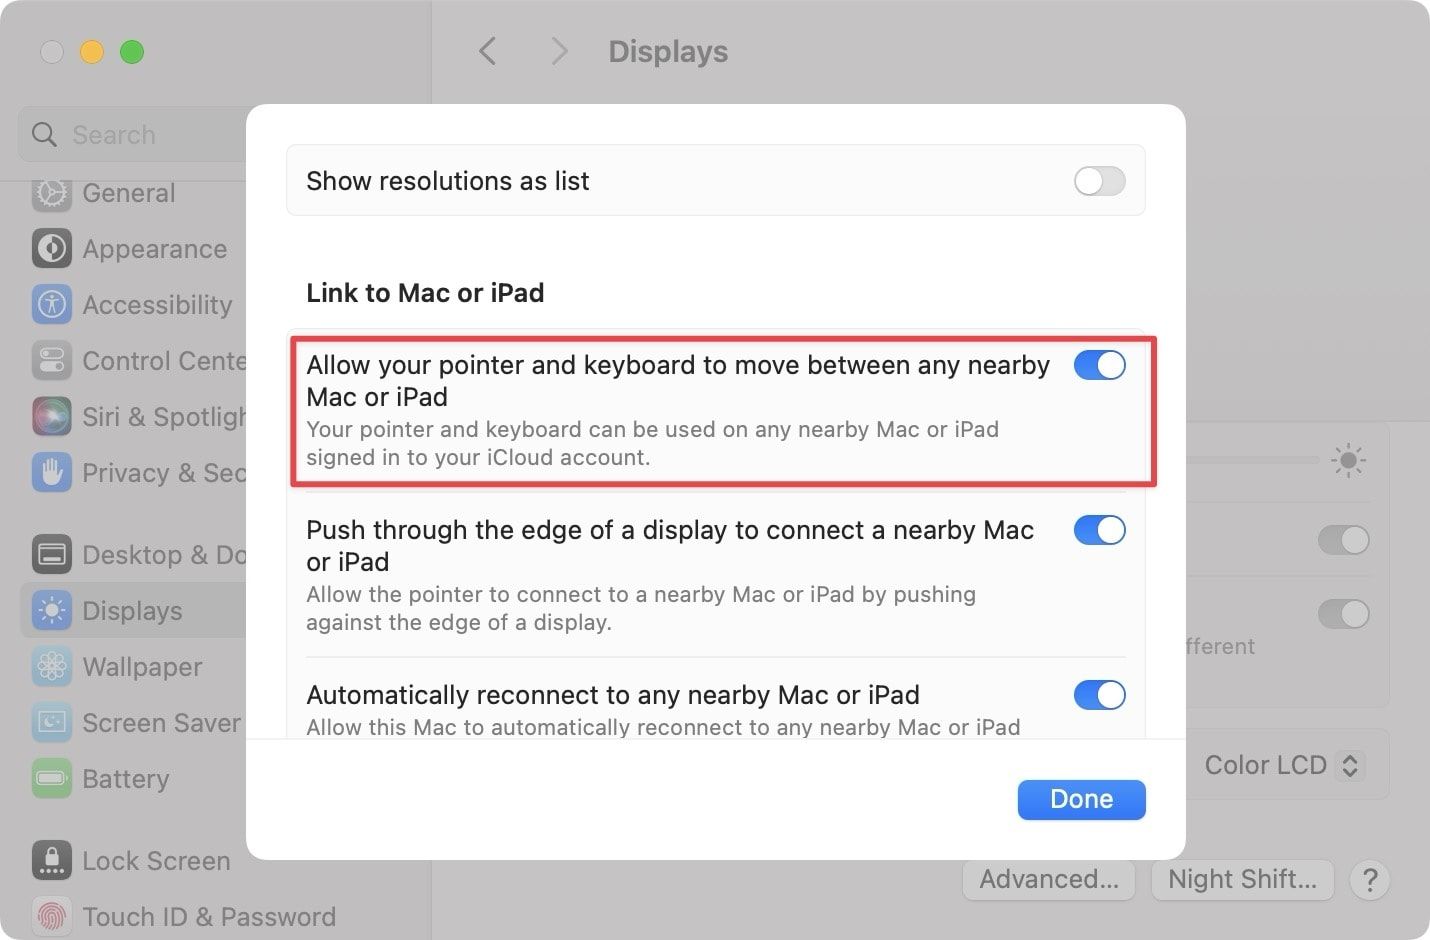
To enable Universal Control, go to the Apple Menu → System Settings → Displays option. Now, click on the Advanced button. Here, enable the toggle next to Allow your pointer and keyboard to move between any nearby Мас or iPad.
Now, keep your iPad near your Mac and move your cursor towards the edge of the screen (on the side where you have kept the iPad). As you move the cursor past the edge of the screen, the other device shows the cursor beginning to push through to its screen. To connect to that device, push the cursor all the way through.
35. Add desktop widgets
If you update your Mac to the latest macOS Sonoma version, you will unlock a new feature that will allows you to add widgets to your Mac desktop. You can add both first-party and third-party app widgets, and show glancebale information on your Mac. To learn more about this feature and how to add widgets to Mac desktop, either click on the link or watch the video.
If you have not updated to macOS Sonoma and want to use the desktop widgets feature, you can do so by using a third-party app called WidgetWall. Click on the link to find out how to add desktop widgets using WidgetWall on your Mac.
MacBook Pro tips and tricks: conclusion
That ends our article. I wanted to add more but the article is already too long. If you want more tips, be sure to let me know either by liking this post or commenting below. Your engagement proves that the work I am doing is helping some of you out there. Also, if you found this article helpful, do share this with others because we need your help to share the blog with others.