
How to Edit a PDF on Mac - A Complete Guide
Here is how to edit PDF on Mac using free and paid tools. Learn all the PDF editing features of Preview, and discover best pro PDF editing apps for Mac.
PDF documents are everywhere. Whether you are a student, a writer, a professional, or a freelancer; you will have to deal with PDFs regularly. PDFs became popular as the documents retain the formatting and are generally easier to read. The scrolling is consistent, and the images don’t behave erratically like they do in other formats. That said, PDFs are tricky to deal with if you need to edit them. In this article, I am going to show how to edit PDF on Macs, using both built-in and third-party tools.
Learn to Edit PDF Files on Mac
In this guide, I am will take you through the entire process of editing a PDF document. You will learn how to sign, edit, highlight, and annotate PDF files. You will also learn how to add comments and extract text from PDF files.
The article has two major sections. In the first section, I will show you how you can edit PDF on Mac using the native Preview app.
In the second section, I will show you some third-party apps that can help you edit PDF. These tools are for people who need more features and command over editing PDFs than what Preview can provide. You can use the table of content below to switch to any section of the article.
Table of Content
- How to Edit PDFs on Mac for Free Using Preview
- Highlight, Underline, and Strikethrough PDF Files Using Preview on Mac
- Type and Add Text on PDF Using Preview on Mac
- Add Notes to PDF Using Preview on Mac
- Rotate, Delete, and Rearrange PDF Pages Using Preview on Mac
- Add Signature to PDF Using Preview
- Combine Multiple PDF Files Using Preview on Mac
- Split PDF Using Preview on Mac
- Export and Resize PDF Files Using Preview on Mac
- How to Do Advanced Editing of PDFs on Mac
How to Edit PDFs on Mac for Free Using Preview
Preview might just be my favorite built-in app for the Mac. Not only it is versatile and can open several different file formats, but it’s also powerful and has tons of features.
Using Preview on Mac, you can highlight PDF, add comments and annotations, combine PDF files, delete pages from PDF files, and more. In this section, we will go step-by-step to show you how you can achieve all these things.
Highlight, Underline, and Strikethrough PDF Files Using Preview on Mac
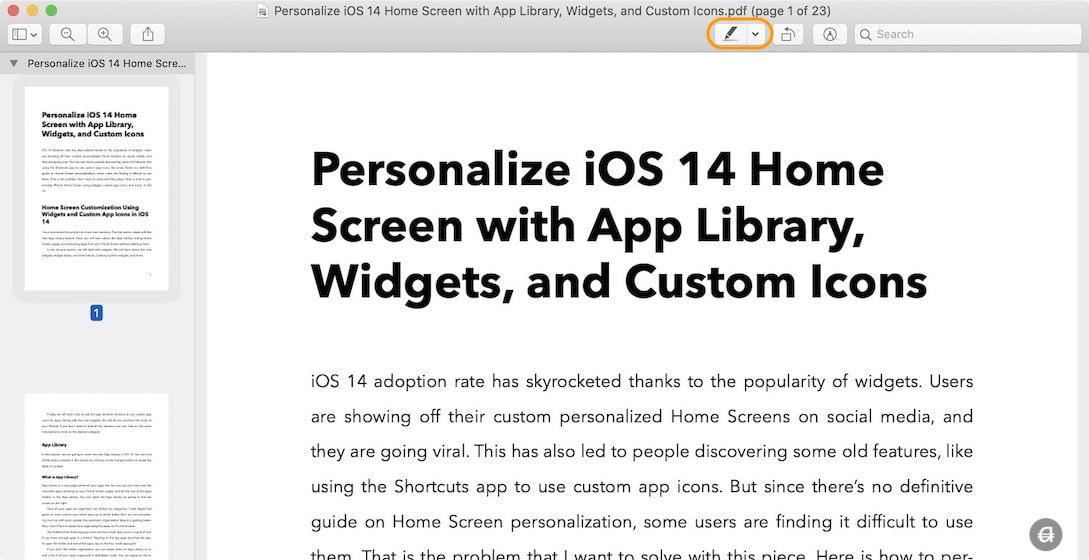
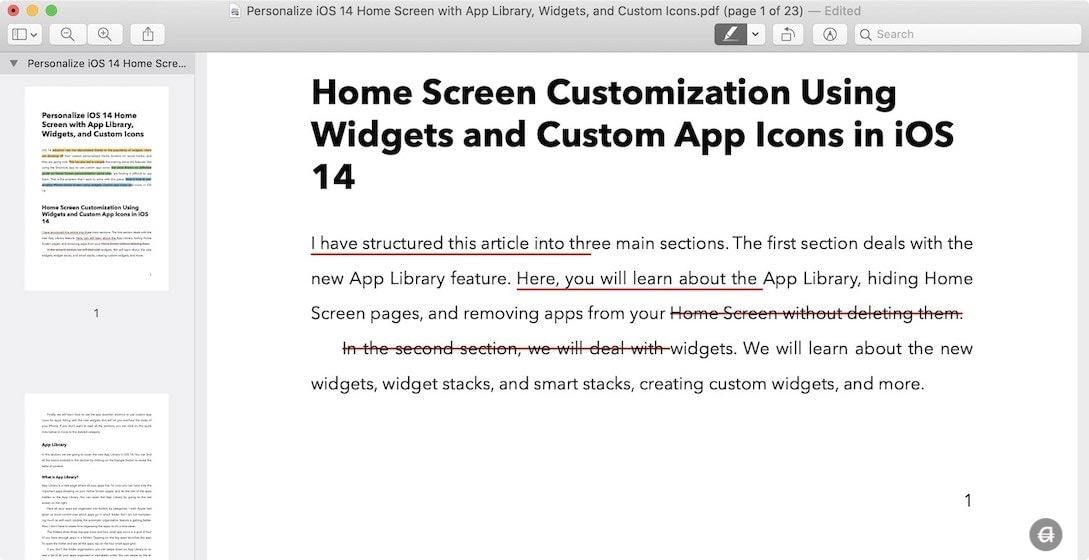
The Preview app makes it easy to highlight, underline, and strikethrough PDF files. To highlight text in a PDF file, open it in Preview, and then click on the highlight tool (marked in the screenshot below).
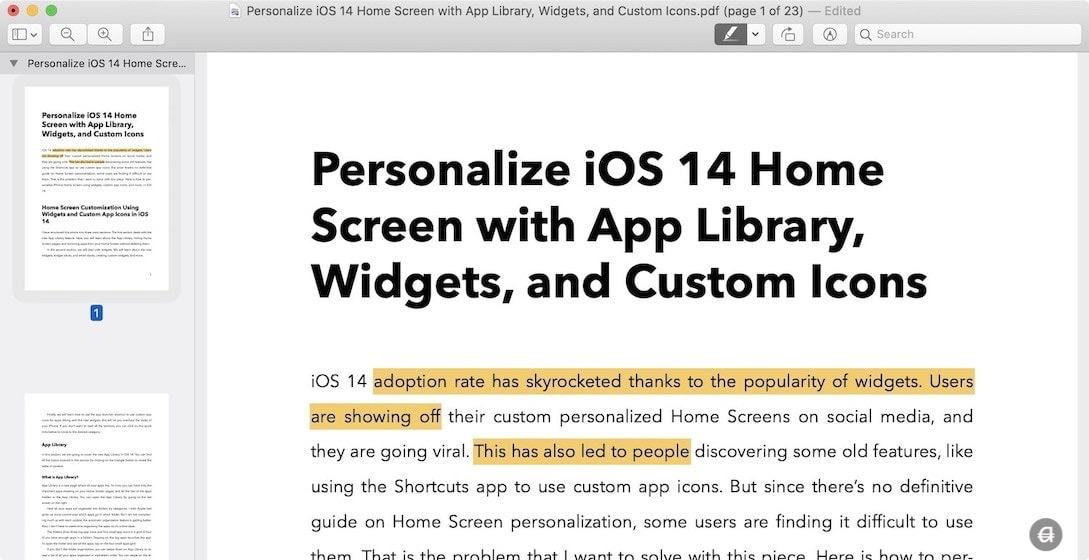
After selecting the tool, click and drag on text to select and highlight it.
By default, the highlight color is yellow. You can change the highlight color by clicking on the dropdown arrow on the highlight tool and selecting a color.
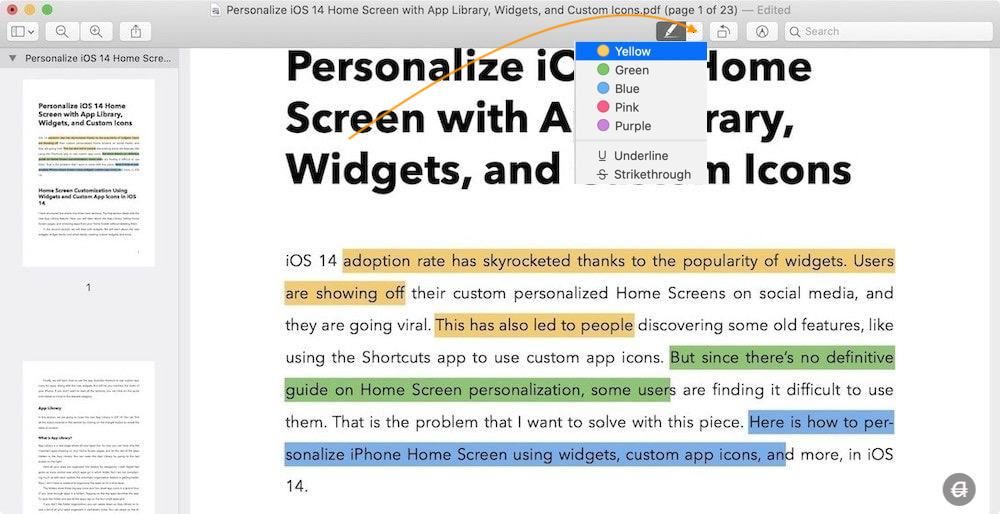
Using the same dropdown menu, you can also change the highlight tool to the underline and strikethrough tool. Select the tool you want and click and drag on text to underline or strike it.
Type and Add Text on PDF Using Preview on Mac
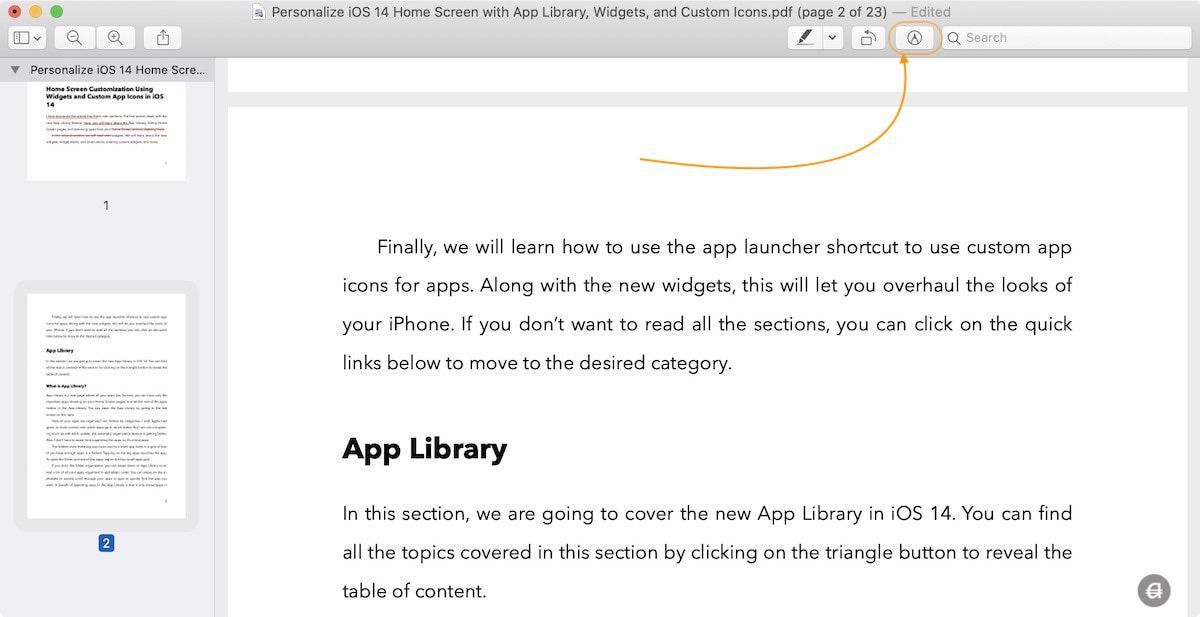
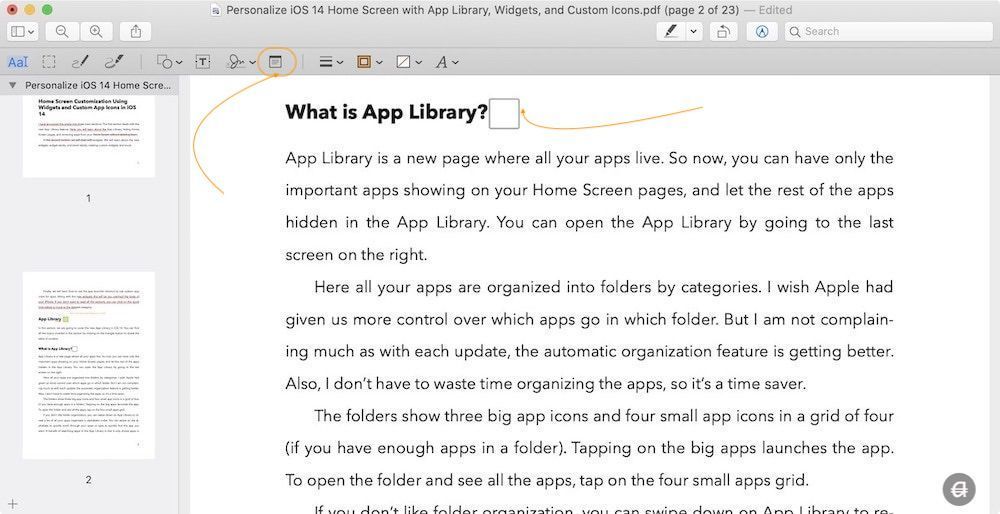
To add text to a PDF file, we will use the built-in annotation tools in Preview. The annotation toolbar is hidden by default. You can enable it by clicking on the annotation tool in the top-right.
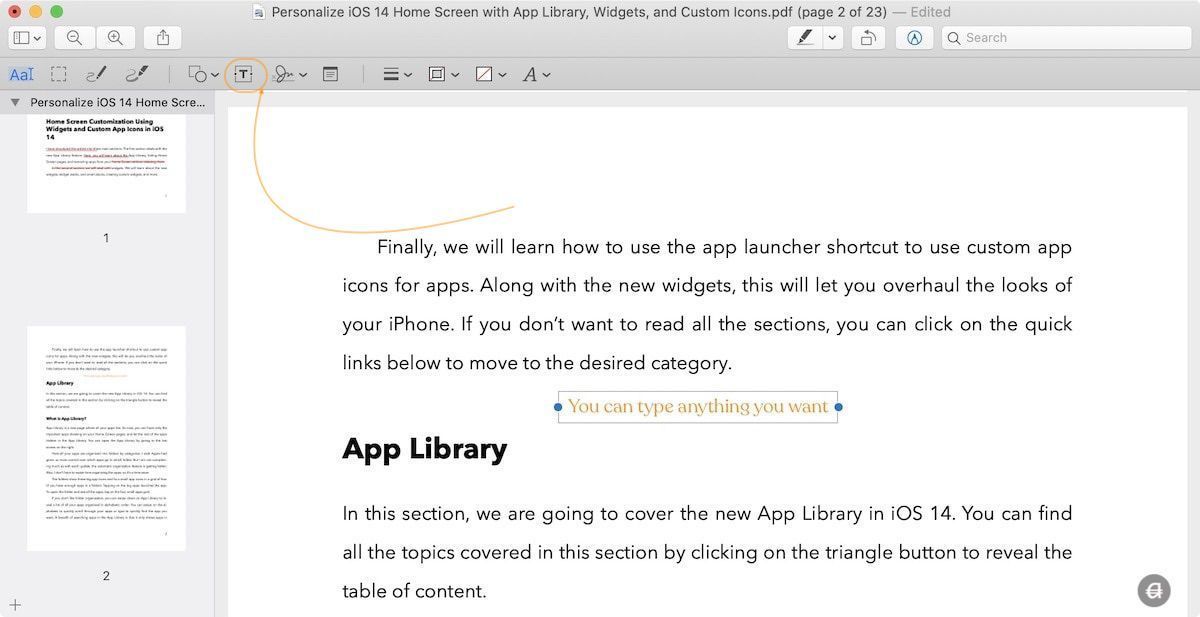
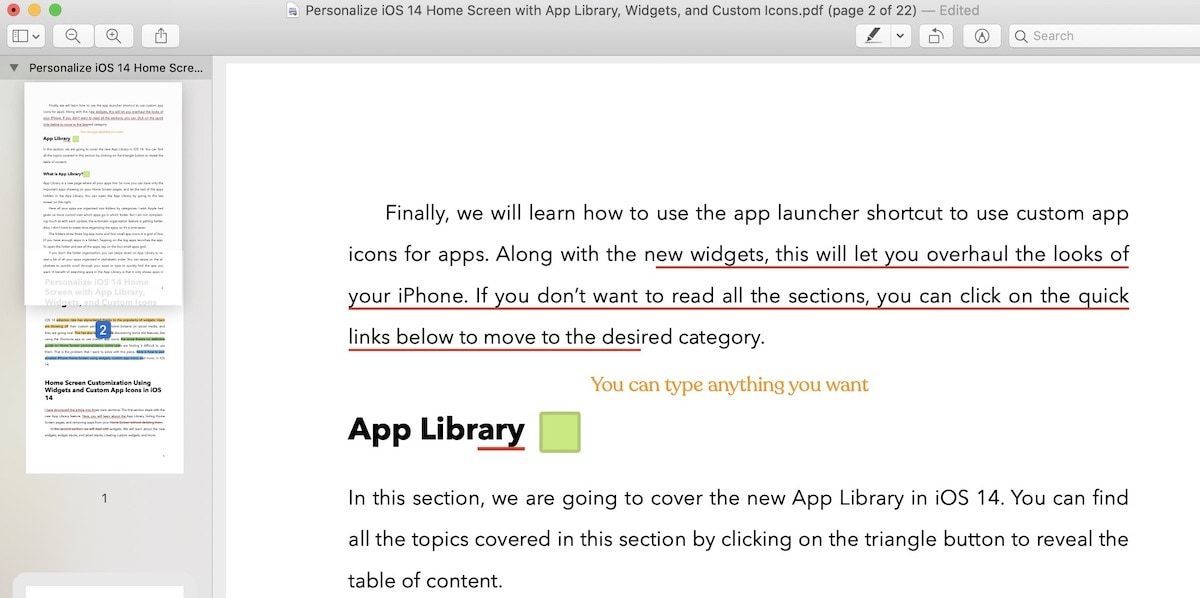
To add text, click on the Text tool. It will add a text block, as shown in the picture below. You can type anything you want and drag the text box to your desired place.
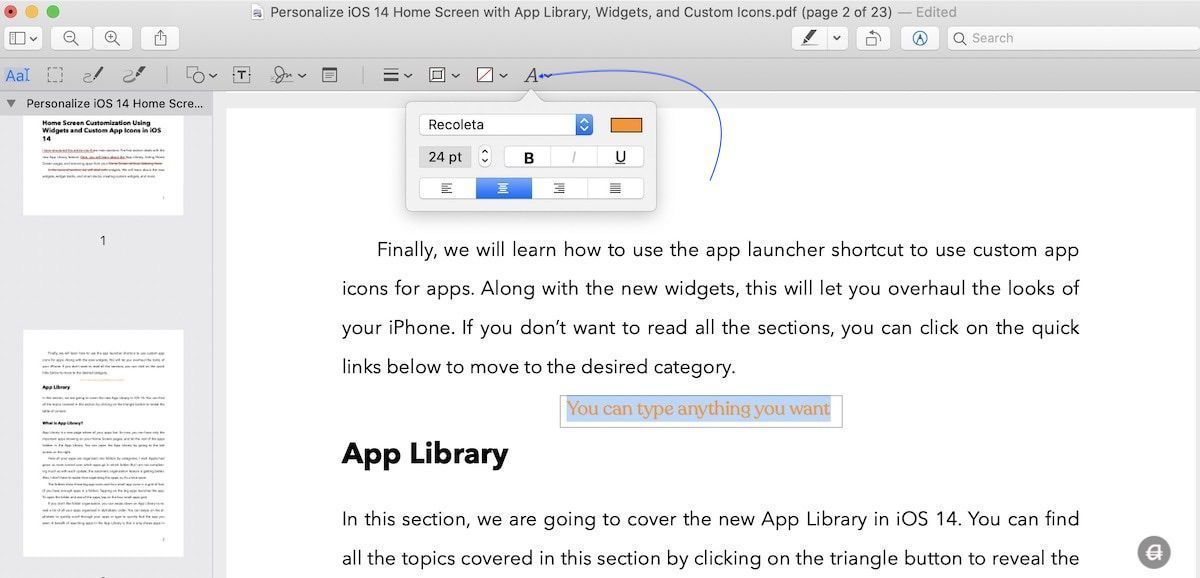
To change text formatting and appearance, select all text, and click on the text formatting button. You can change the font, font size, font color, and more.
Add Notes to PDF Using Preview on Mac
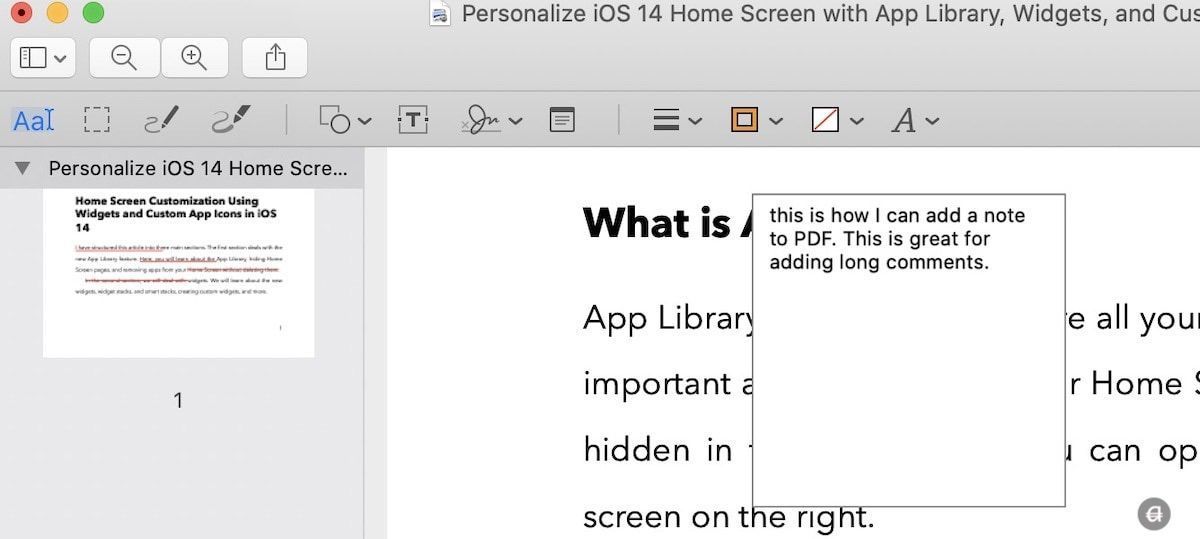
If you want to add long comments to PDF files, it’s better to add a note rather than a text box. To add a note, click the Note tool. It will create a note box that can drag anywhere you want.
Click on the box when you are ready to add a note. Once you write inside the note, click anywhere in the document to collapse it.
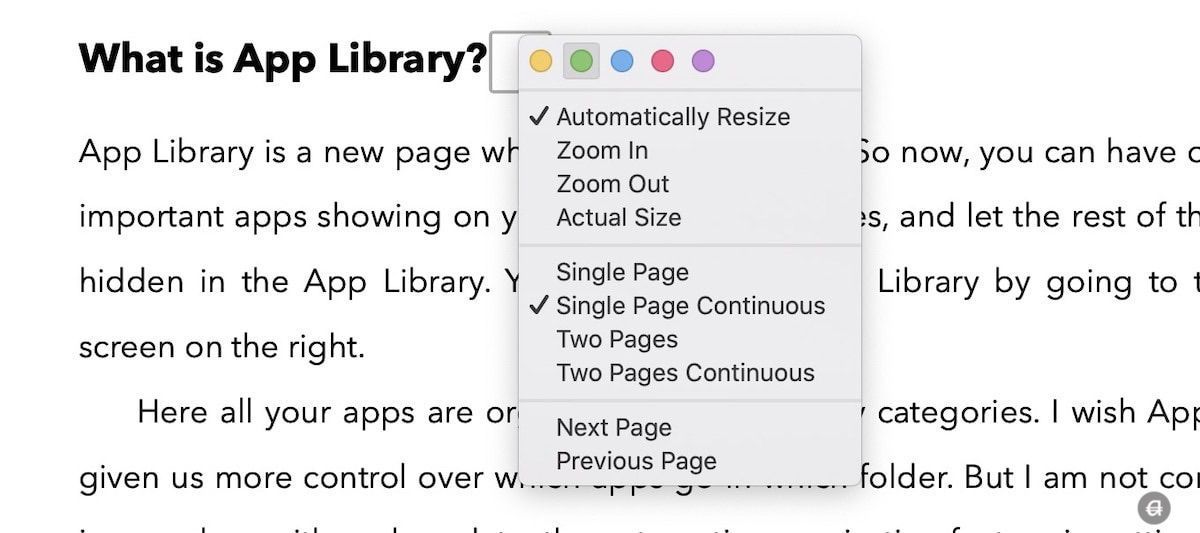
To customize a note's color, right-click on it(Ctrl+Click) and choose the color you want.
Rotate, Delete, and Rearrange PDF Pages Using Preview on Mac
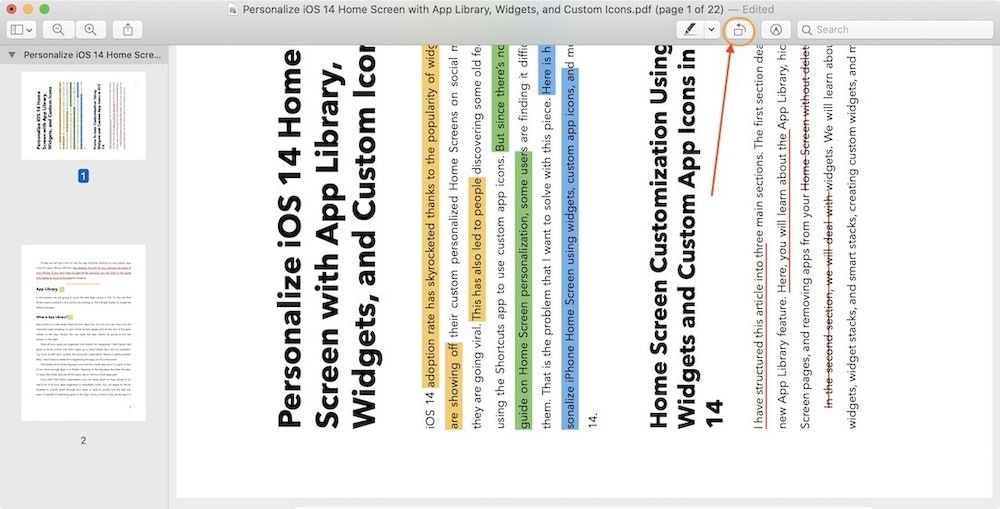
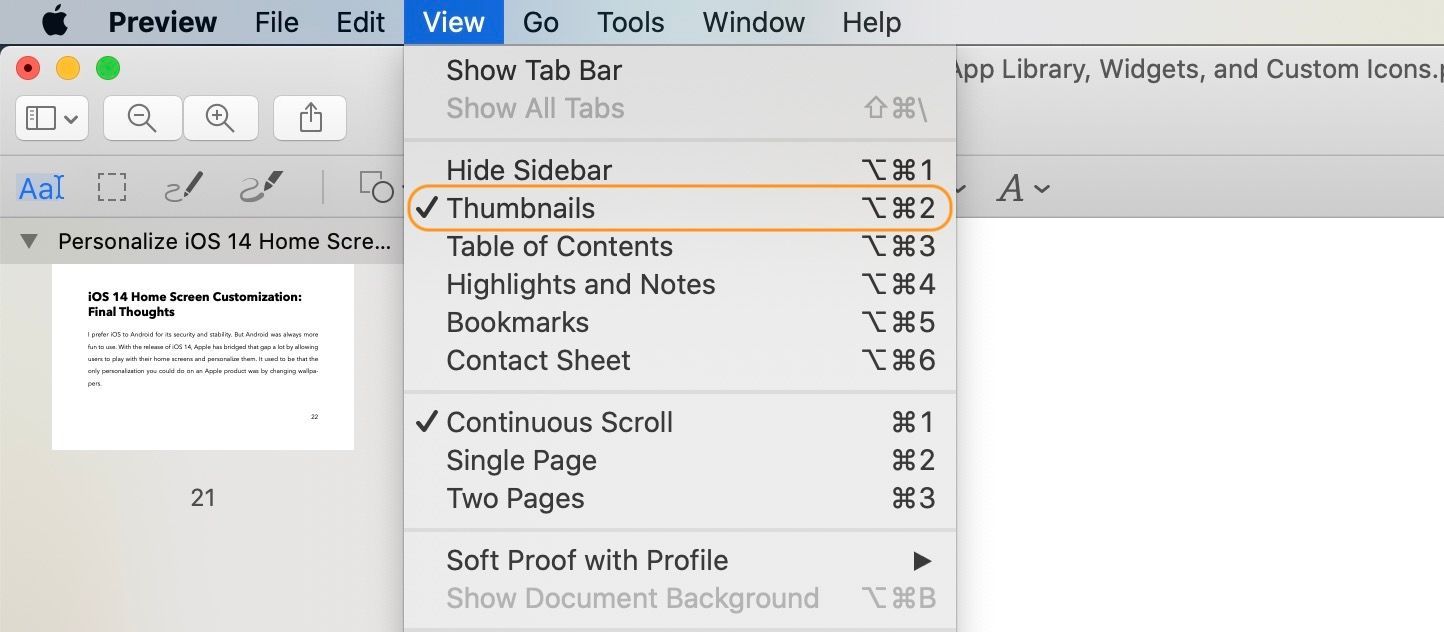
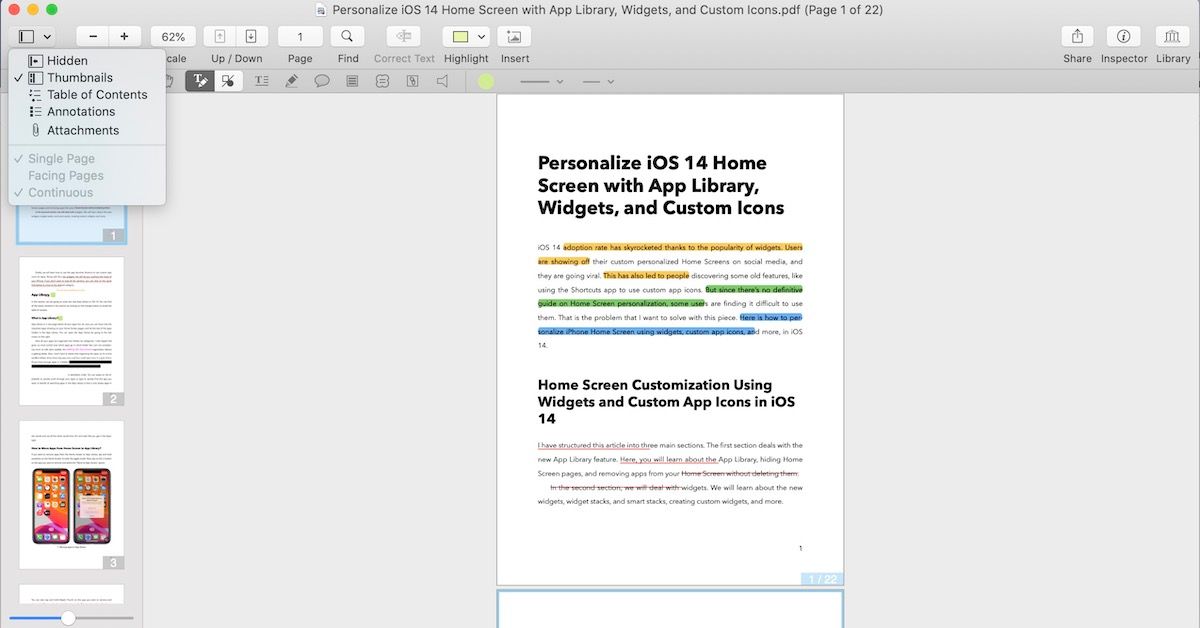
Preview also makes it easy to manage pages inside PDF files. You can rotate, rearrange, and delete pages with ease. To use these features, open the PDF file and make sure that the page thumbnail view is open. If you can’t see thumbnails, go to View → Thumbnails to enable it, or hit the CMD+Opt+2 keyboard shortcut.
- Rotate Pages
To rotate a page, click on its thumbnail and then use the rotate tool at the top.
- Rearrange Page
To rearrange pages, select one or more pages, and then drag it to the place where you want to drop it.
- Delete Pages
Select one or more pages using thumbnails and then hit the “Delete” key to delete the pages.
Add Signature to PDF Using Preview
One of the regular uses of PDF documents is to get consent using a digital signature. If you are on an iPad, you can use your Apple Pencil to sign and send your document with ease. But that’s not possible with the Mac.
Thankfully, the Preview app provides you with three different ways to sign PDF documents. You can either use your Mac’s trackpad to sign, upload your signature and place it on the document, or use your iPhone as a trackpad to create your signature.
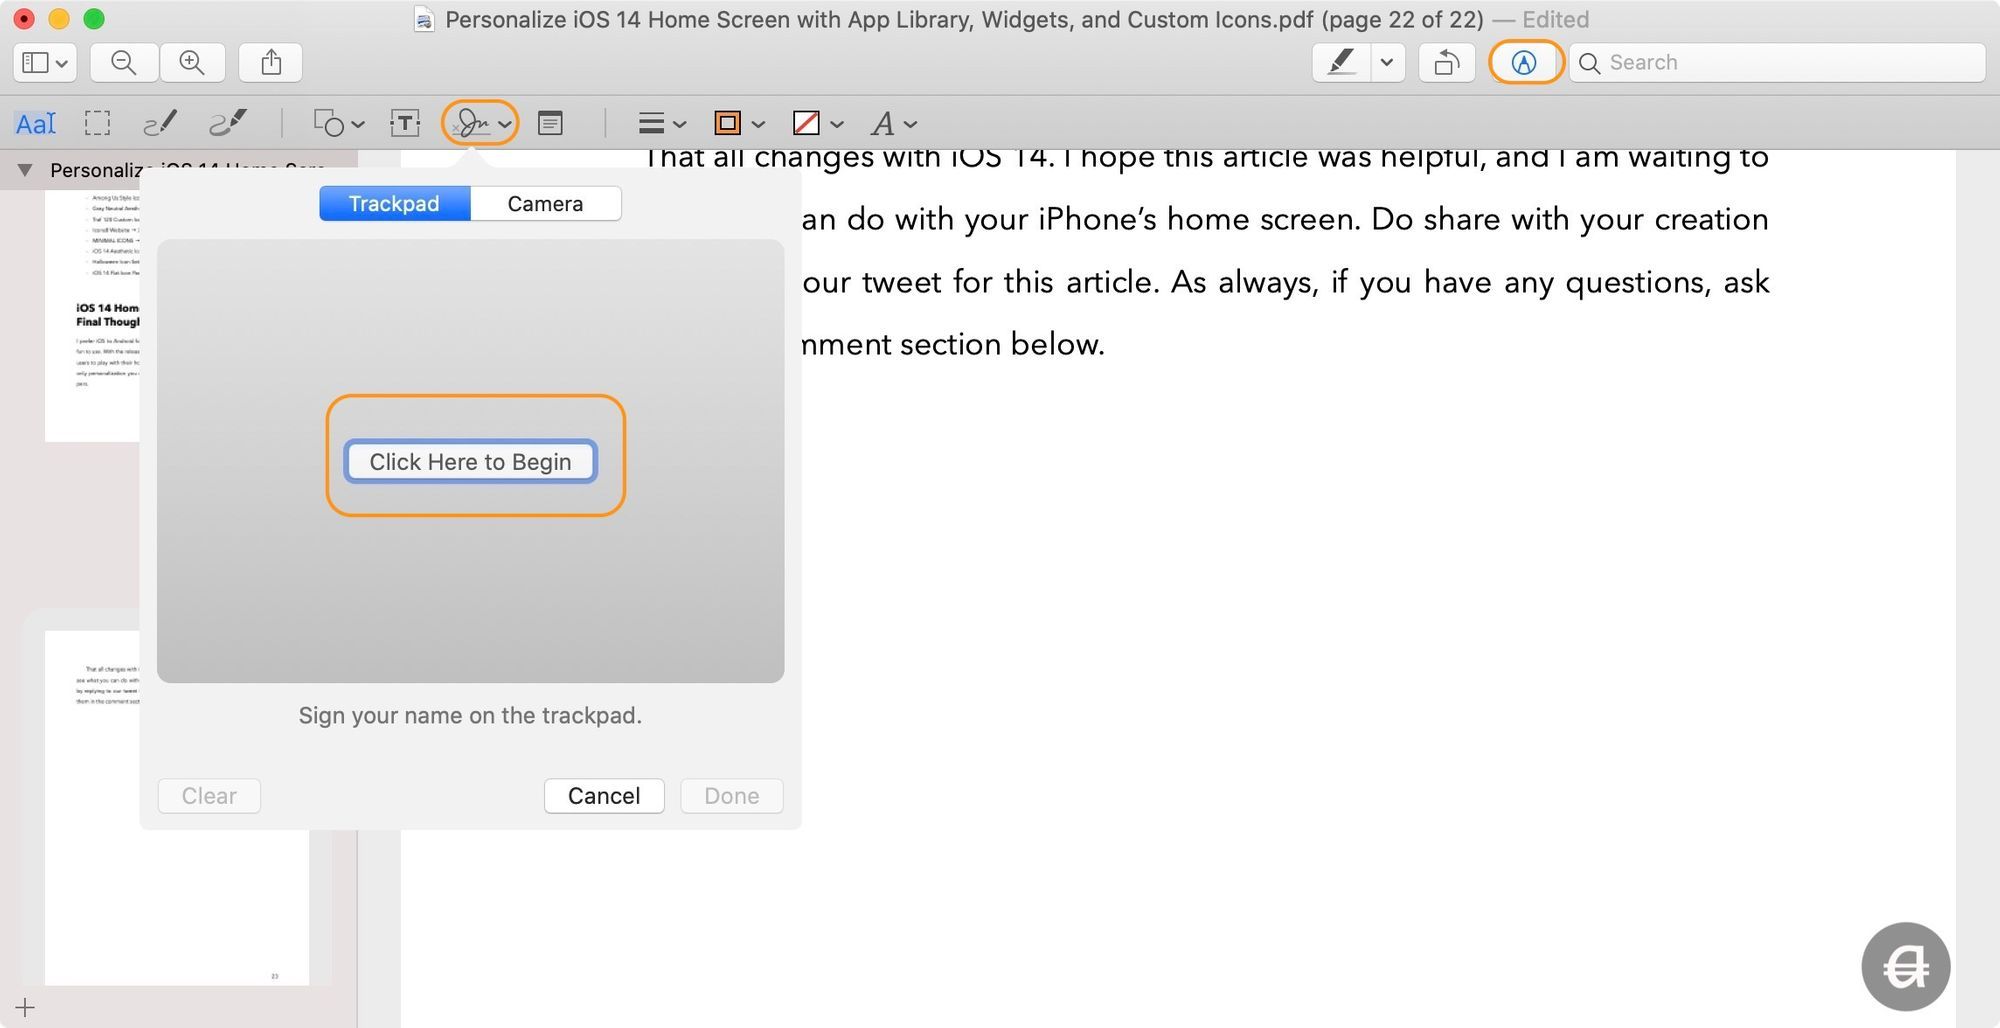
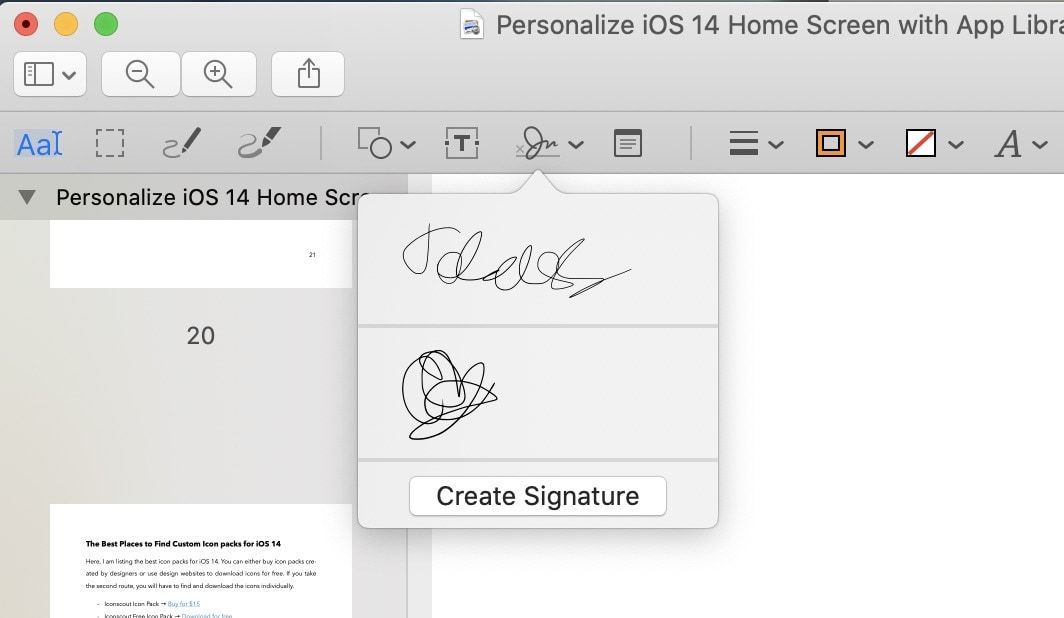
To sign a PDF document using Preview, click on the annotation tool and then on the Signature tool. Now, click on “Click here to begin”.
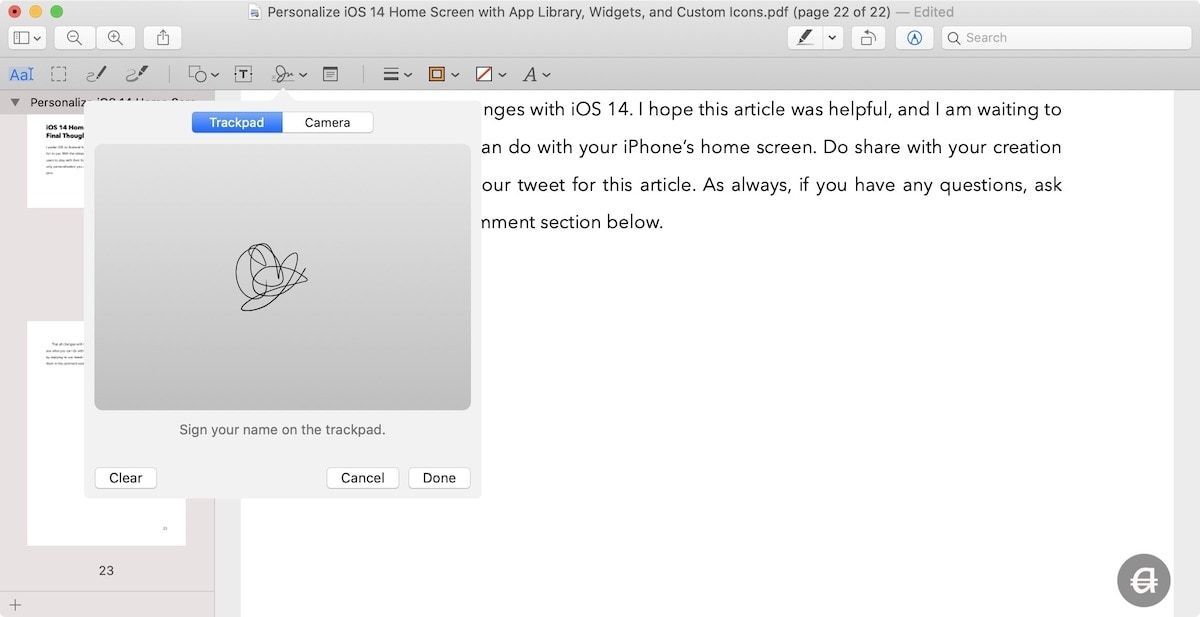
Now, use the trackpad to create your signature. Once done, press any key on the keyboard and then click on the “Done” button. Now drag and drop the signature wherever you want.
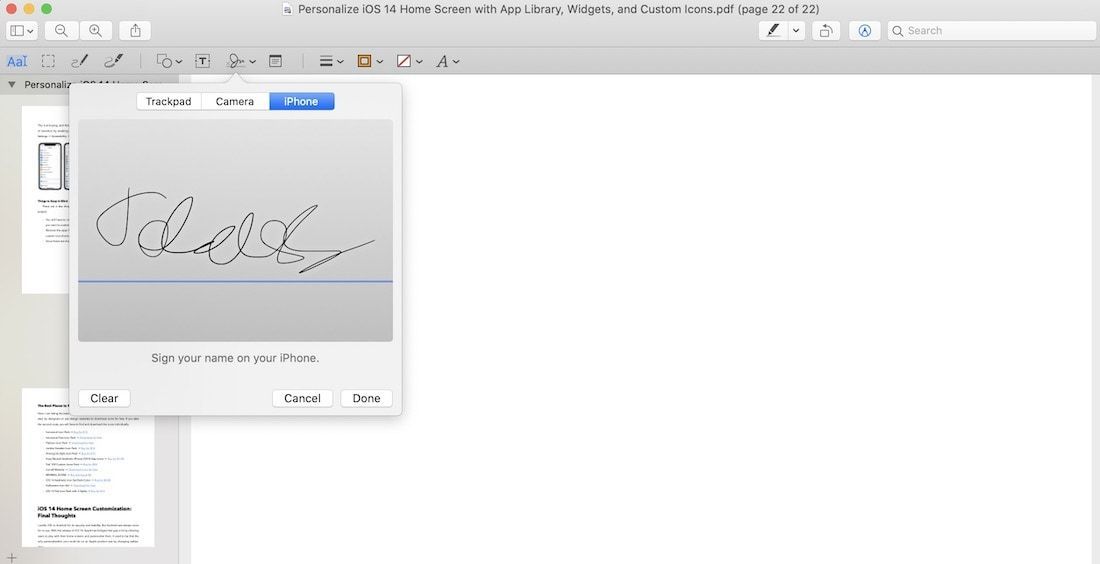
To upload your signature, select the camera button, and then hold your signature on white paper so the app can scan it. Once Preview stores the signature, you can drag and drop it anywhere you want. If you have an iPhone, you can select the iPhone tab. It will then open a signature window on your iPhone, where you can use your fingers to create a sign.
One good thing about these methods is that once you create a signature, Preview saves it. So, you don’t have to create a new signature for every new document. You can reuse your signature for any future needs.
Combine Multiple PDF Files Using Preview on Mac
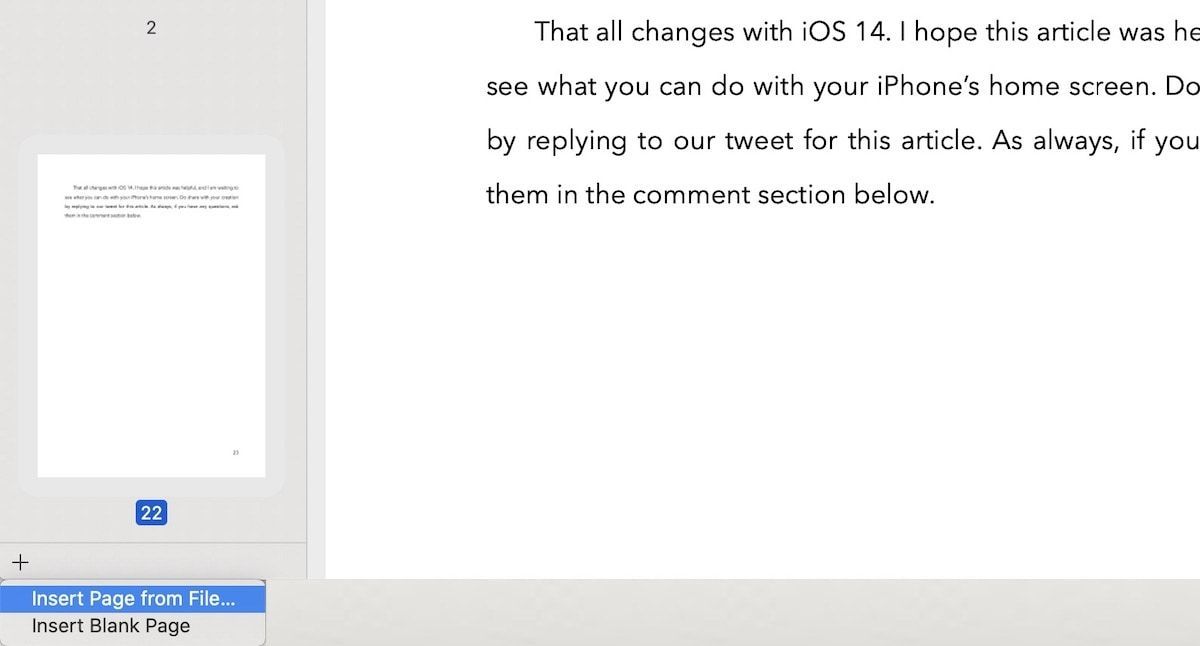
Preview makes it easy to combine multiple PDF files. To combine PDF files, open the first PDF file and then enable the thumbnail view by hitting the CMD+Opt+2 keyboard shortcut. Now, click on the thumbnail, after which you want to add the next file.
Now, click on the + button at the bottom and select “Insert Page from file..”. You can also use the Edit menu at the top to get to the same menu. Go to Edit → Insert → Page from File.
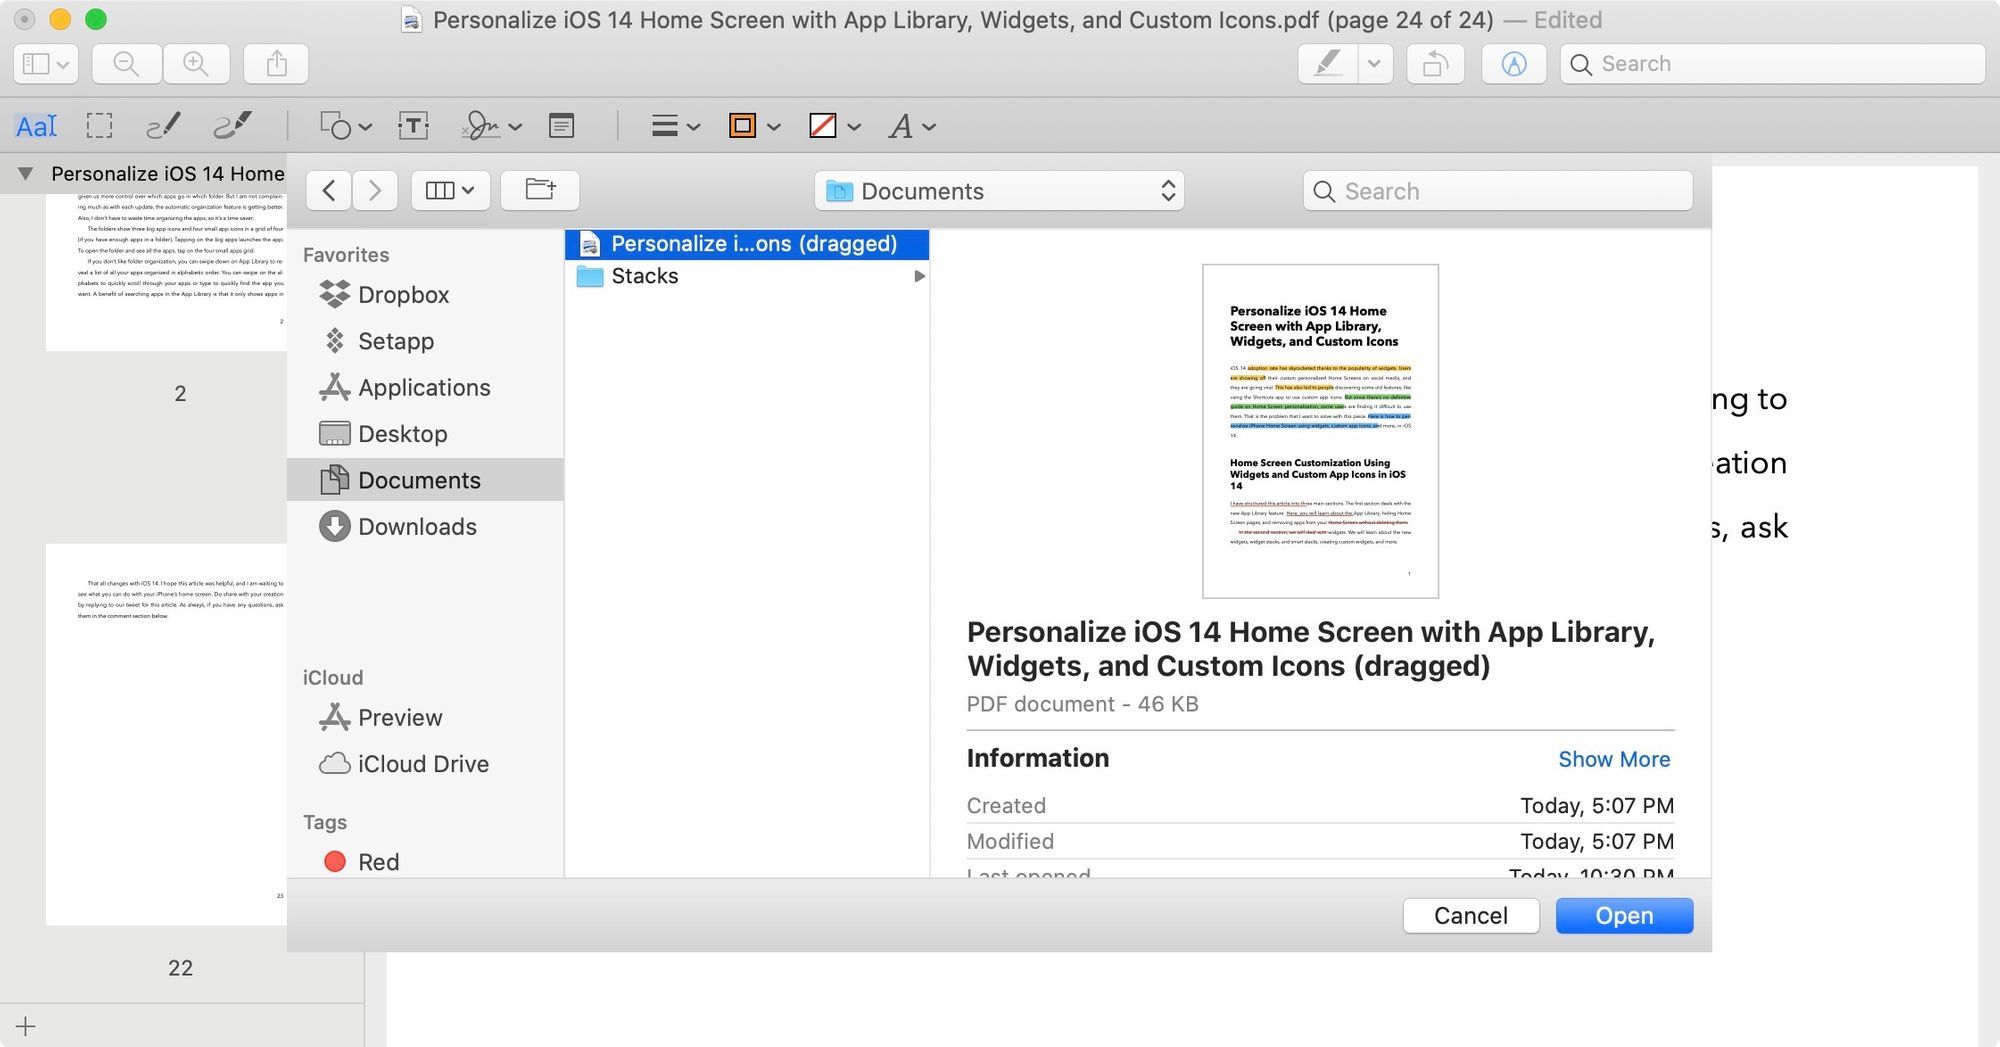
This will open the file browser. Browse and select the file that you want to add and click on “Open” to import the file.
Split PDF Using Preview on Mac
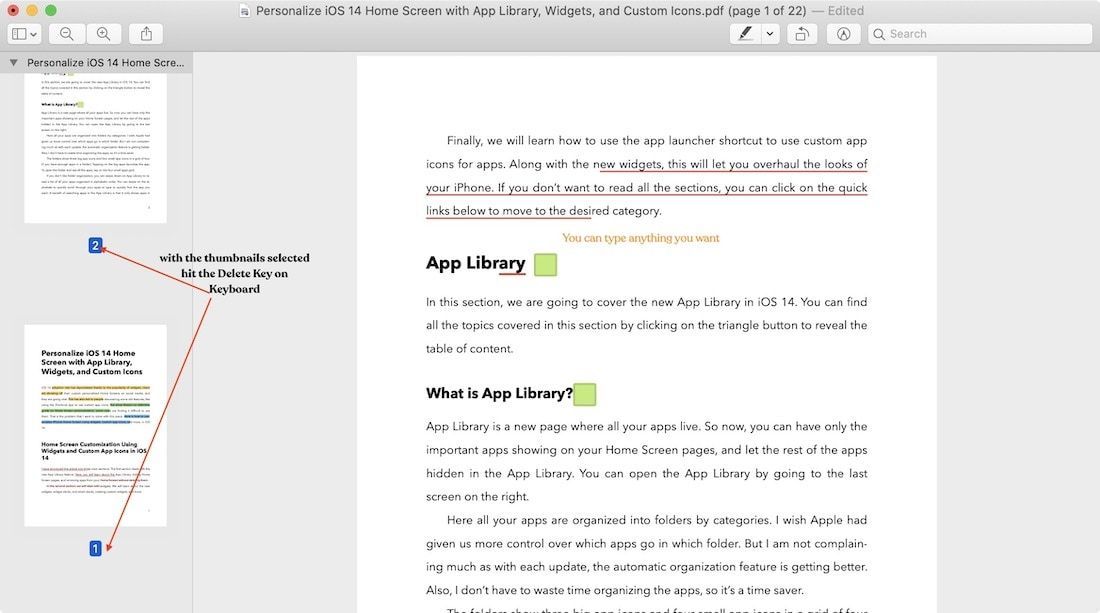
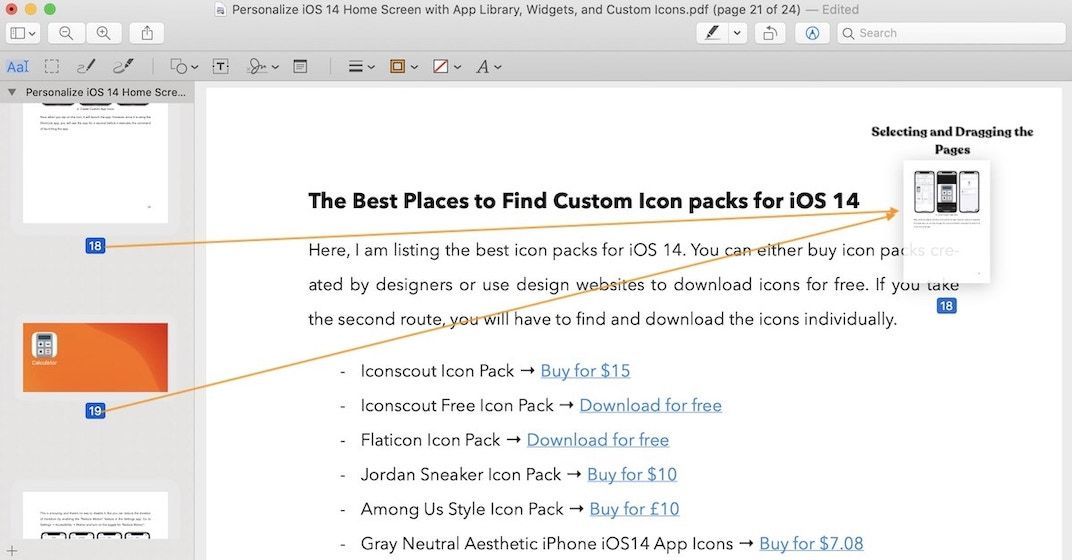
There’s no split tool in the Preview app. However, you can use a workaround to split PDF files. First, select all the pages that you want to save in a separate PDF. Now, drag and drop those pages onto the desktop. It will create a new PDF file with all the selected pages.
But you will notice that all those pages are still in the original PDF. To get rid of those pages, while the thumbnails are still selected, hit the Delete key to delete them.
Export and Resize PDF Files Using Preview on Mac
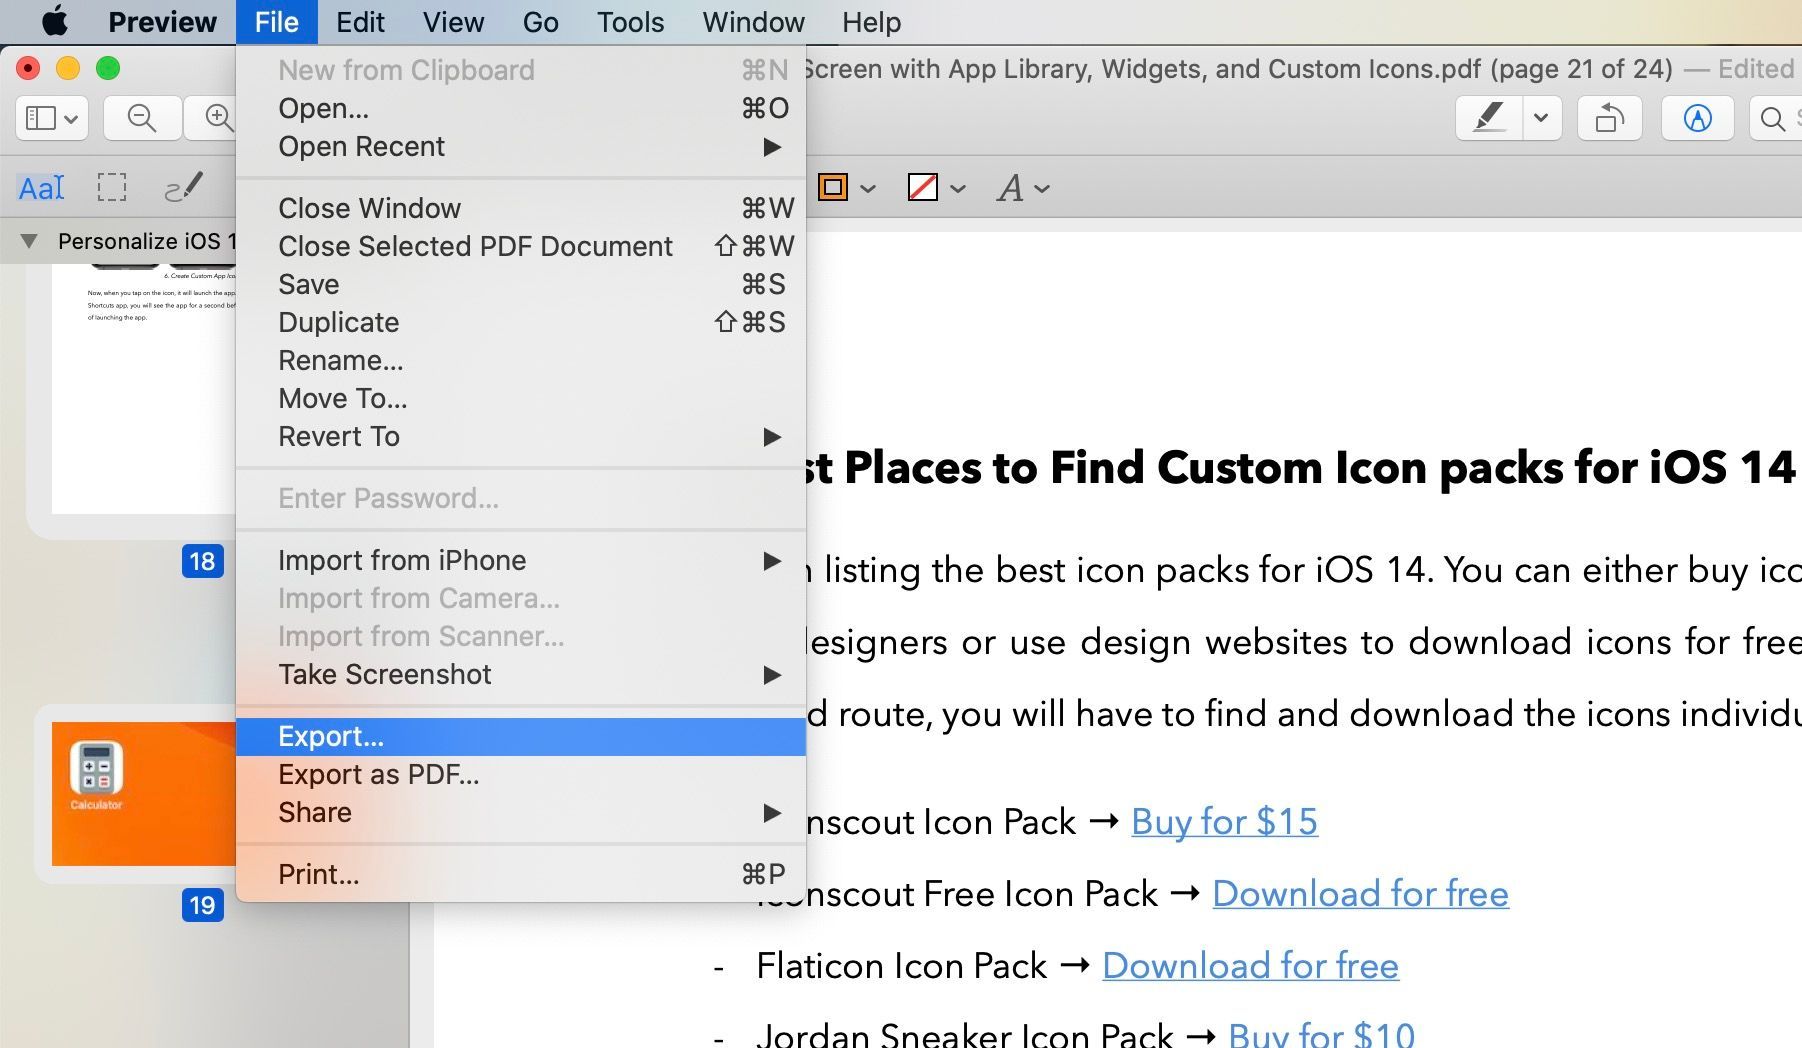
Preview also lets you export PDF files and reduce their file size. It comes in handy if you have a large PDF that you are not able to share due to file size constraints. To reduce the size of PDF files on Mac, open it in Preview and then go to File → Export.
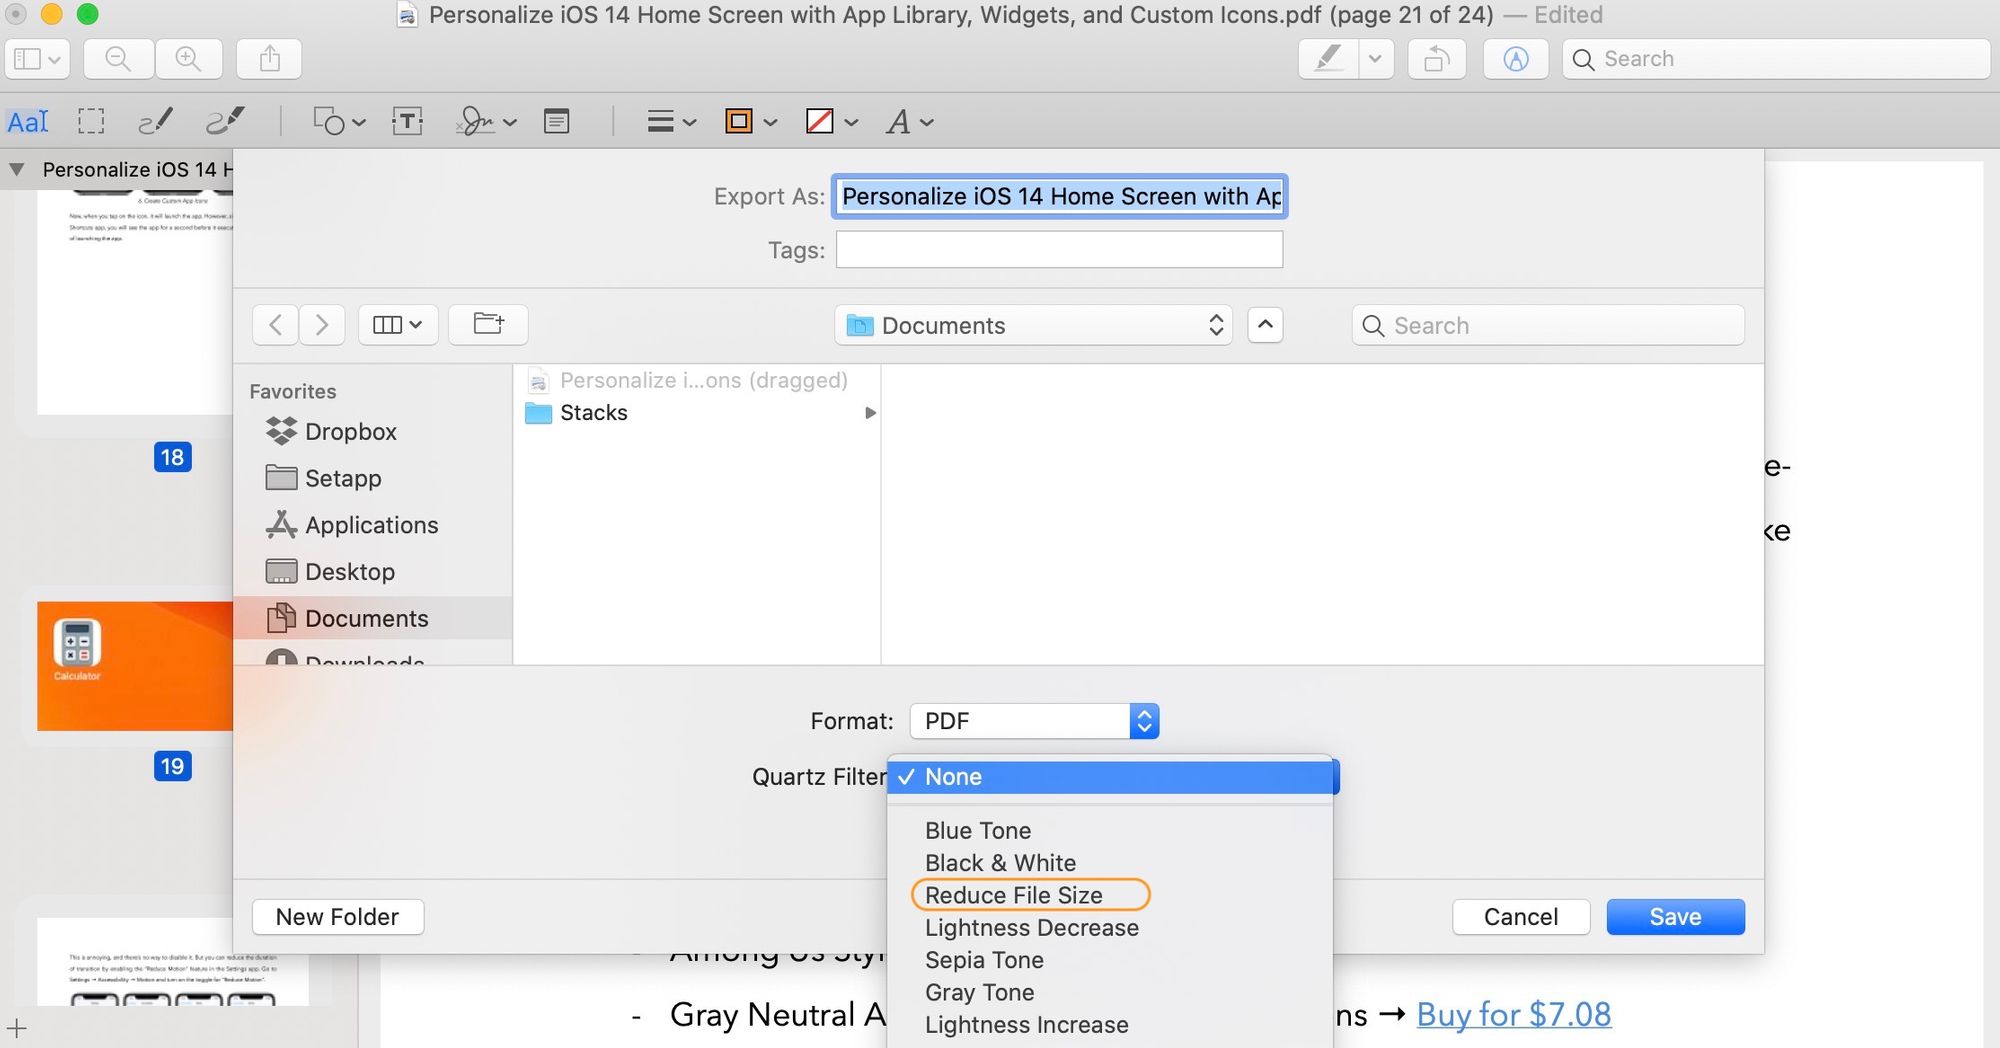
Here, click on the dropdown menu next to “Quartz Filter:” and select the Reduce File Size option.
How to Do Advanced Editing of PDFs on Mac
By now, you know that you can do all the basic editing of PDF files, including annotating, adding notes, reducing size, splitting and merging PDF files, and more, for free, using the built-in Preview app.
However, if you want to perform advanced operations like OCR (optical character recognition) or edit the text of PDF files, you will have to use a paid app. I have tested many such apps on my Mac, and two of them stand out above the rest.
The first is the PDFExpert app by Redaddle (the same company that makes my current favorite email app - Spark), and the second is PDFpen by Smile software (the company that makes TextExapnder - one of the most popular text expansion apps for Mac).
Since I have already covered the basics of PDF editing in the previous section, I will not cover them here. Know that all the features that we covered for Preview are here. In this section, we are going to discuss the pro features of both apps to give you a sense of all the extra features that you can expect from these apps.
How to Edit PDF files Using PDFExpert on Mac
PDFExpert is a powerful PDF editor for Mac that lets you edit PDF files with ease. Not only you can do all the usual things, like annotating PDFs, adding notes, managing pages, and more, but also things like editing the original text of PDF, add comments to highlights, export your highlights, and more.
Probably my favorite feature of PDFExpert is the left sidebar that shows me a summary of all my highlights. It saves me a ton of time when doing the second reading of a document, as I don’t have to scroll through and read the entire thing again. I click on the highlights in the sidebar, and it takes me to the appropriate place in the document.
I also like that I can add comments to my highlights. It lets me add context to my highlights, so the future me knows why I decided to highlight a specific paragraph.
- How to Edit Original Text of a PDF Document using PDFExpert
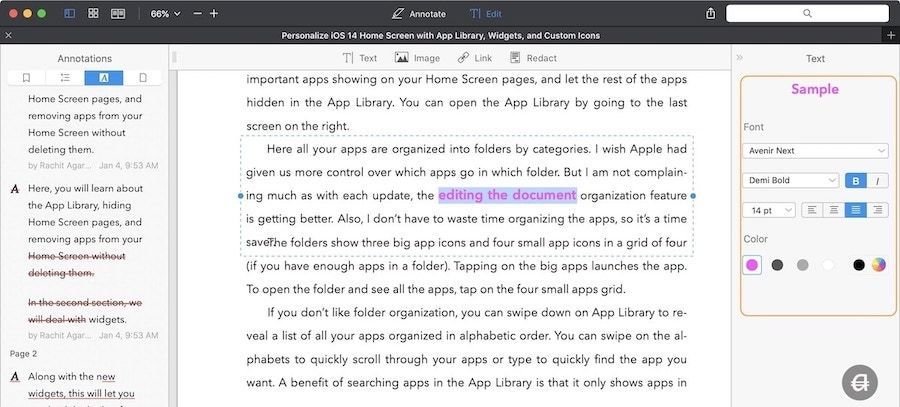
As mentioned above, you can also use PDFExpert to edit the original text in PDF files. To edit a PDF file, click on the Edit button on the top, and then click anywhere in the document to edit it. Apart from text, you can also remove or replace images, change links, and more.
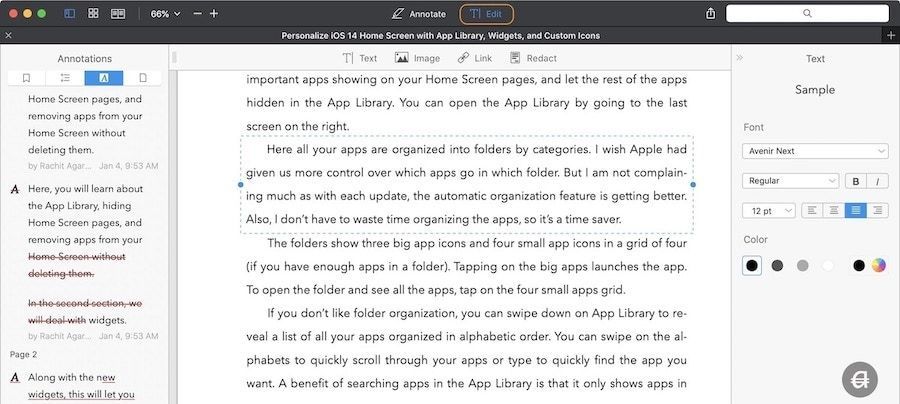
PDFExpert automatically recognizes the font, size, and opacity of the original text, so your edits will not look out of place. On the other hand, if you want your edits to stand out, you can use the text tools in the right panel to change the font, font color, size, style, and more.
- How to Redact a PDF Document using PDFExpert
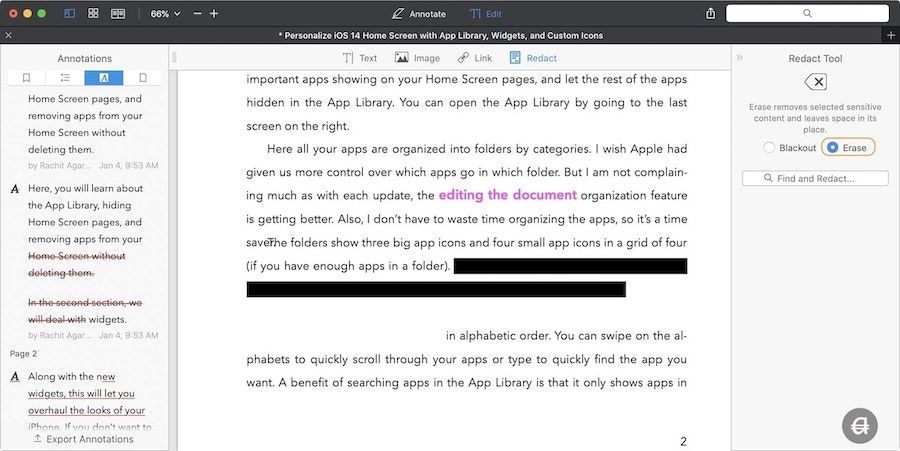
While you are in the edit tab, you can also redact documents. This is very handy if you want to hide sensitive information before sharing a document. There are two methods of redacting a PDF.
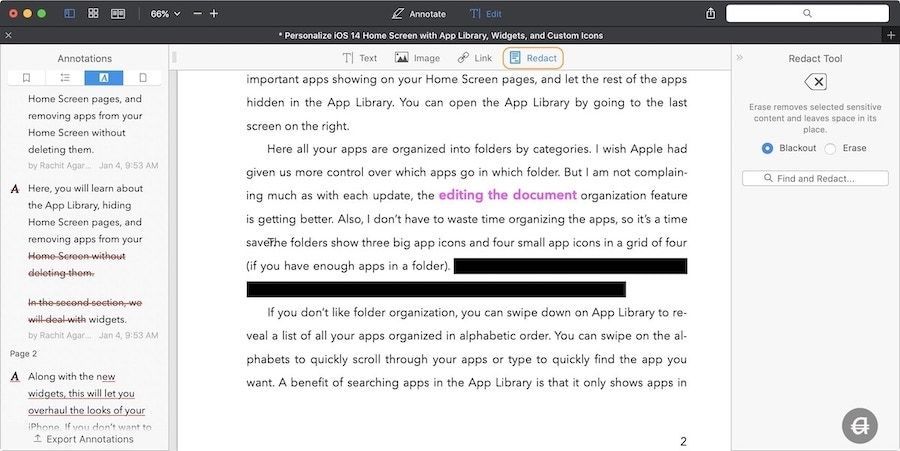
You can use the Blackout feature to blacken the text, or you can use the Erase feature to erase the text that you want to hide. The image above shows the blackout reaction and the one below shows both blackout and erased reaction.
- Other Features of PDFExpert
Apart from the above-mentioned features, PDFExpert offers a ton of other built-in tools. You can fill forms, add signatures, change page numbering, reduce file size, crop pages, and do a lot more.
One small but nifty feature of PDFExpert is its ability to open multiple documents in tabs. The ability to quickly switch between different files and keeping them open in tabs is a feature that I dearly miss on other PDF editing apps for Mac.
- Download PDFExpert Free Trial
- Price when upgrading to the full version: $79.99
Edit PDF files Using PDFpen on Mac
Like PDFExpert, PDFpen also has a plethora of pro editing tools in its arsenal. The highlighting feature of PDFpen is Optical Character Recognition or OCR for scanned documents. OCR allows you to copy and edit text from documents, even if the documents are scanned. So, if you deal with a lot of scanned documents, this is the app for you.
PDFpen also has all the other pro features like the ability to edit text inside documents, changing page numbers, adding password protection to files, redacting documents, exporting PDF files in Microsoft Word, plain text, and rich text formats, adding and changing links, exporting annotations, and more.
Note that there are two versions of the app available to buy: PDFpen and PDFpenPro. With PDFpenPro you get extra features such as batch OCR, the ability to turn websites into PDF, the ability to edit & create forms, editing table of contents, editing images inside PDF, and more. You can check the feature comparison between the two apps by clicking here.
PDFpen offers more features than PDFExpert. That said, I prefer PDFExpert’s cleaner user interface and fast performance. If you need the extra features such as OCR for scanned documents, form creations, etc.. you should get PDFpen. Otherwise, I think most users will be happy with PDFExpert.
Both these apps offer a free trial period, so it would be better for you to test them out and then decide.
- Download PDFpen and PDFpenPro Free Trial
- Get it for Free on SetApp
- Price when upgrading to full version (PDFpen - $79.95 / PDFpenPro - $129.95)
Edit PDF Documents with These Best PDF Editing Apps for Mac
For macOS users who don’t deal with PDF files regularly, the built-in PDF editing tools in the Preview app are more than enough. For people who need extra features, both PDFExpert and PDFpen are excellent apps. I went with PDFExpert as I don’t need the OCR capability of PDFpen, and I prefer the overall UI and look of PDFExpert.
But personal preferences aside, I think these both are excellent PDF editing apps, and you should check out their free trial before making the purchasing decision. If you liked this article, don’t forget to check out our article on macOS tips and tricks to get the most out of your Mac.


