
How to Change MacBook Name in Easy Steps
Learn how to change MacBook name in easy steps. Also, find out how to set different MacBook and localhost name.
When you first set up your MacBook, macOS auto assigns it a name based on your Apple ID and name. Your Mac's name is important as this is what you see on the local network, AirDrop share menu, or Bluetooth connection menu. If you don't like what name macOS has auto-assigned to your MacBook, here are steps you can take to change them.
Why change the name of your MacBook
There are several reasons why you should or might want to change the name of your MacBook. Here are a few of them:
- To make it more identifiable: As mentioned, your MacBook's name is its identity. If you own multiple MacBooks, having the same name can make it confusing to identify it on your local network when sharing files on AirDrop, or connecting to a Bluetooth accessory like one of these open-ear Bluetooth earphones.
- To enhance your privacy: If you keep your AirDrop settings set to visible to everyone, anyone can locate your MacBook using your name or vice versa. It's better to give it a name that doesn't identify you to the public.
- If you are a secondary user: If you are using a MacBook that someone in your family gave to you, they might not have reset the Mac. In such a case, the MacBook will still have the old name. Changing the name allows you to make that Mac your own.
How to change MacBook name
There are two methods you can use to change your MacBook's name. The first method uses the System Settings app on your Mac, while the second uses a Terminal command. We have described both methods below.
How to rename MacBook (macOS Ventura and above)
If your MacBook is running on the latest macOS version, use the steps below to change its name.
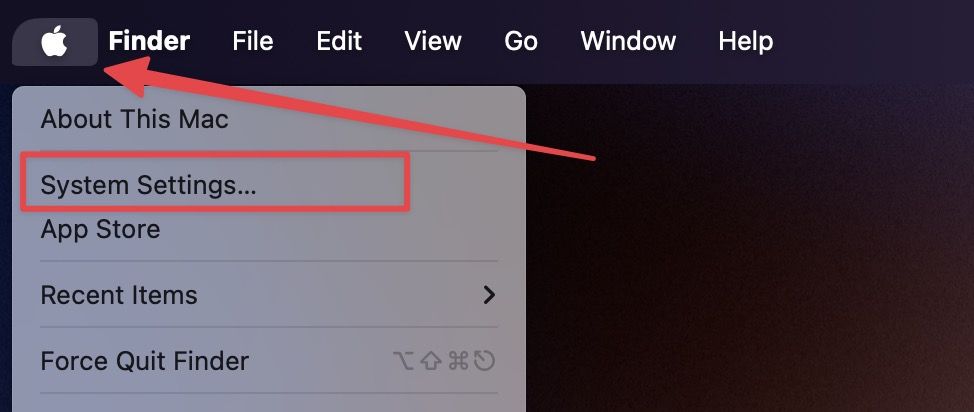
1. Click the Apple logo in the top-left corner of your Mac and choose the System Settings option.
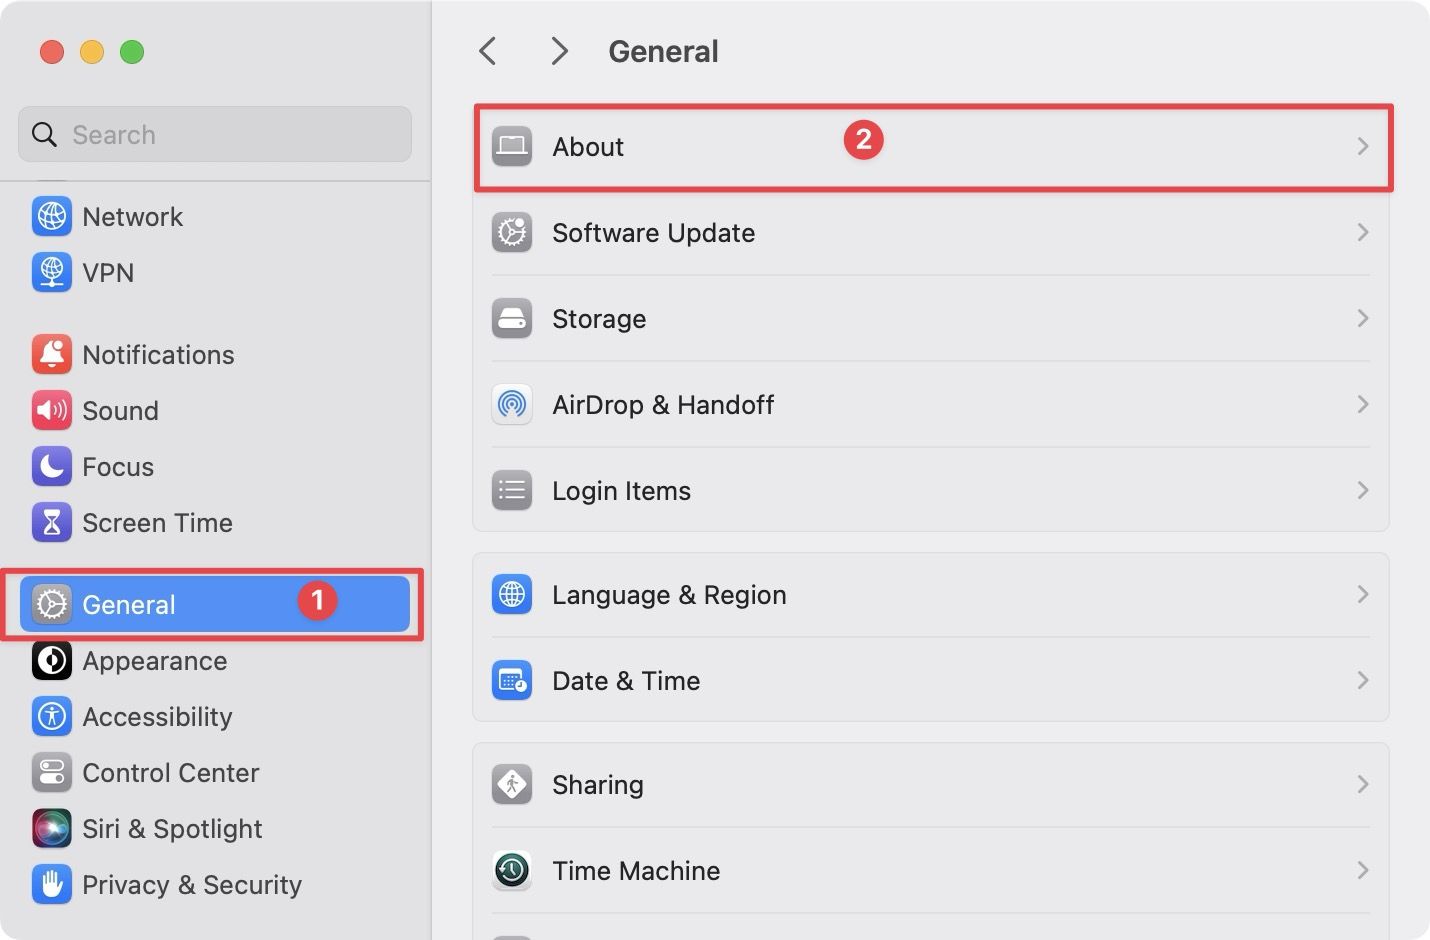
2. Now, select the General tab in the left sidebar and click on the About section.
3. Click on the field next to the Name option.
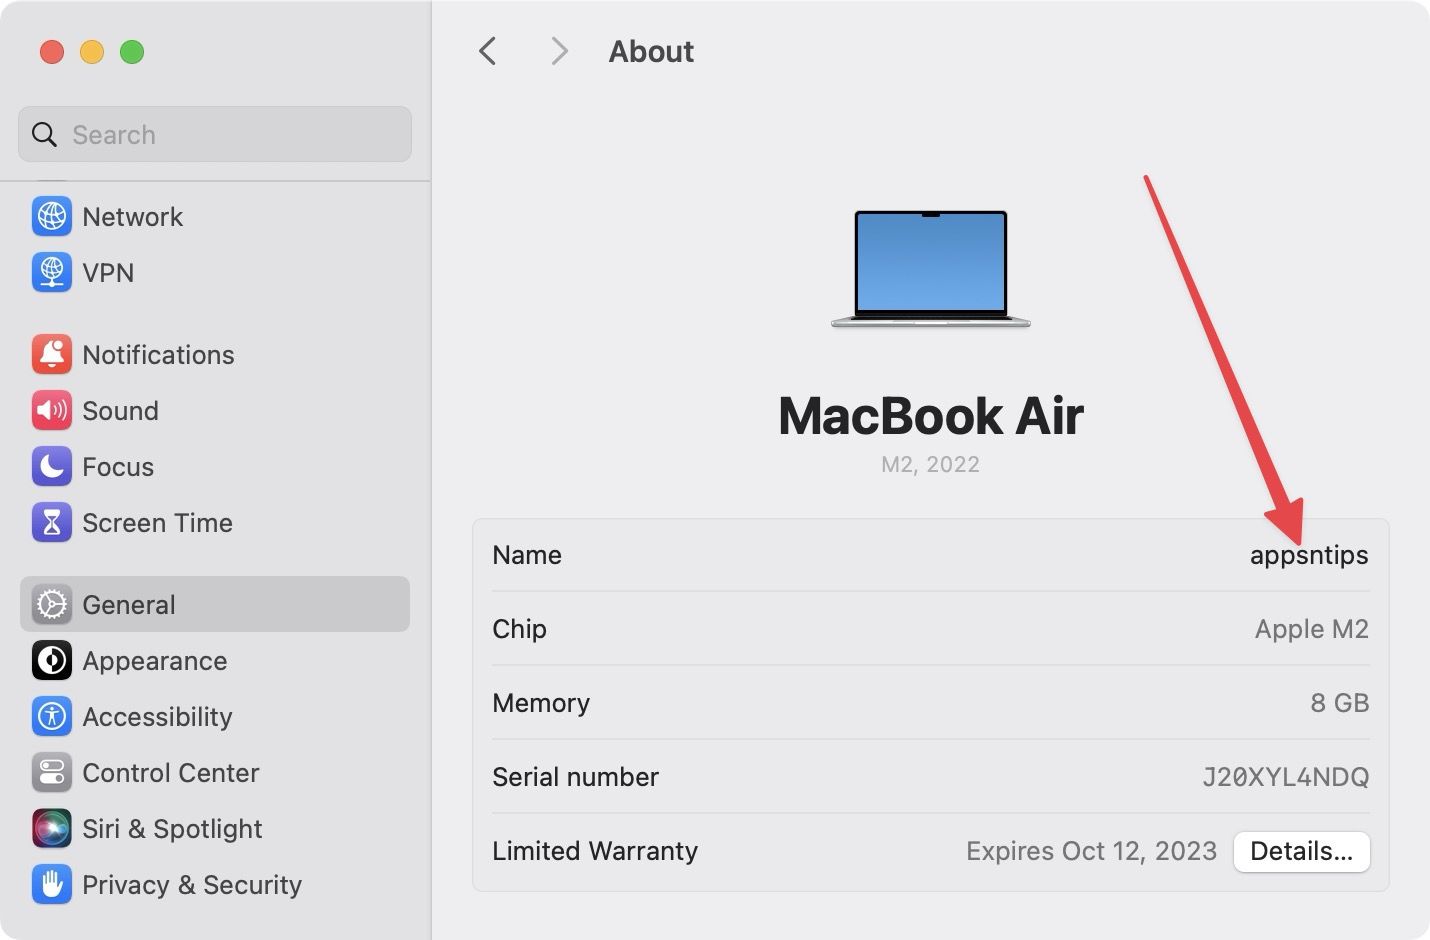
4. macOS will ask you to verify using Touch ID or password.
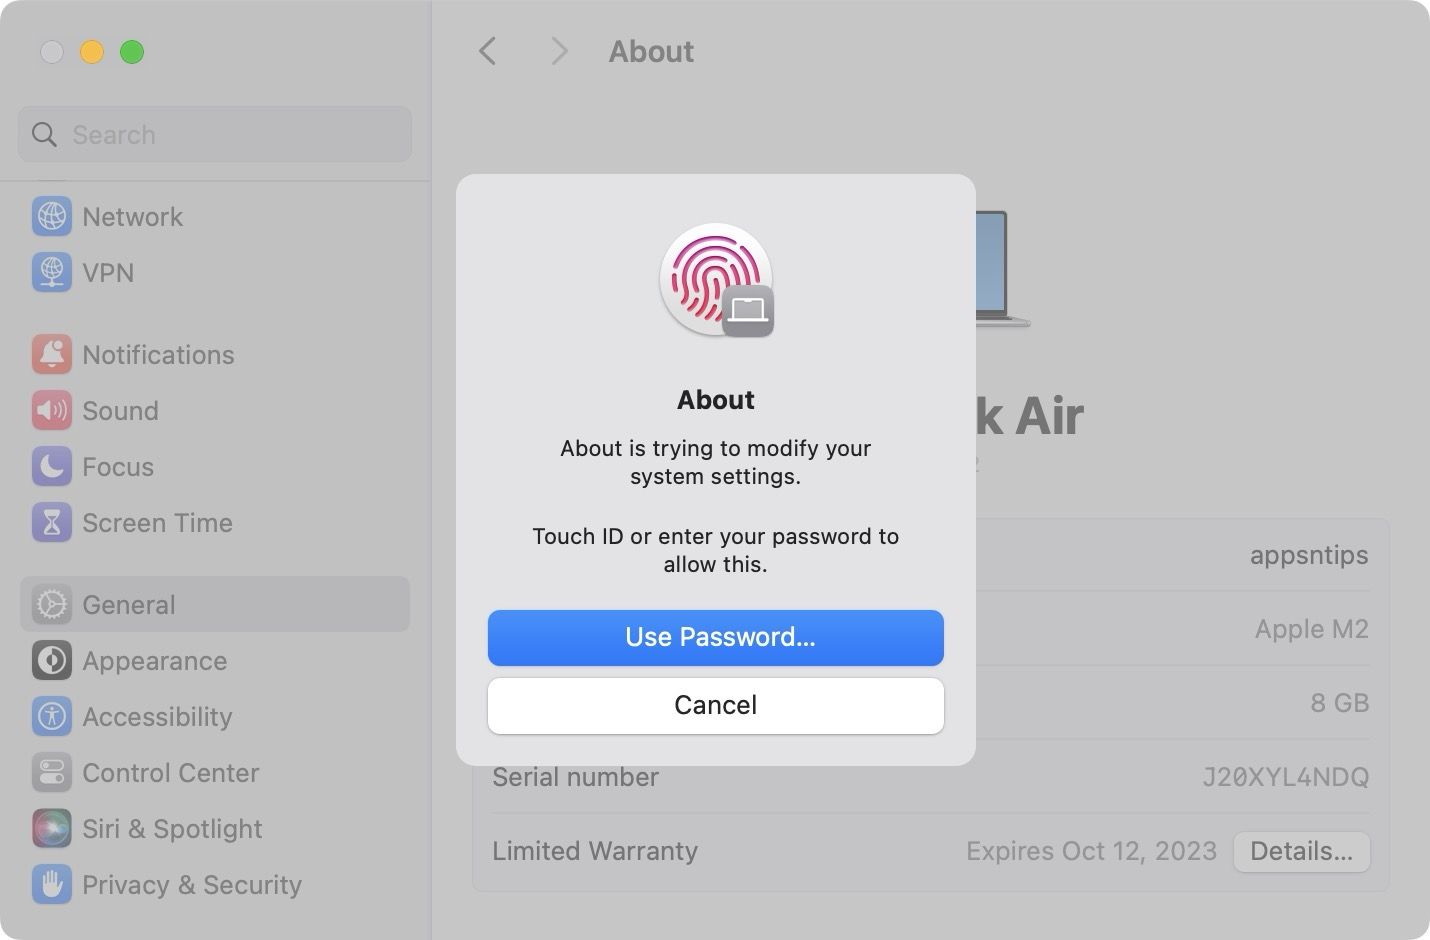
5. Authenticate and enter the new name for your MacBook.
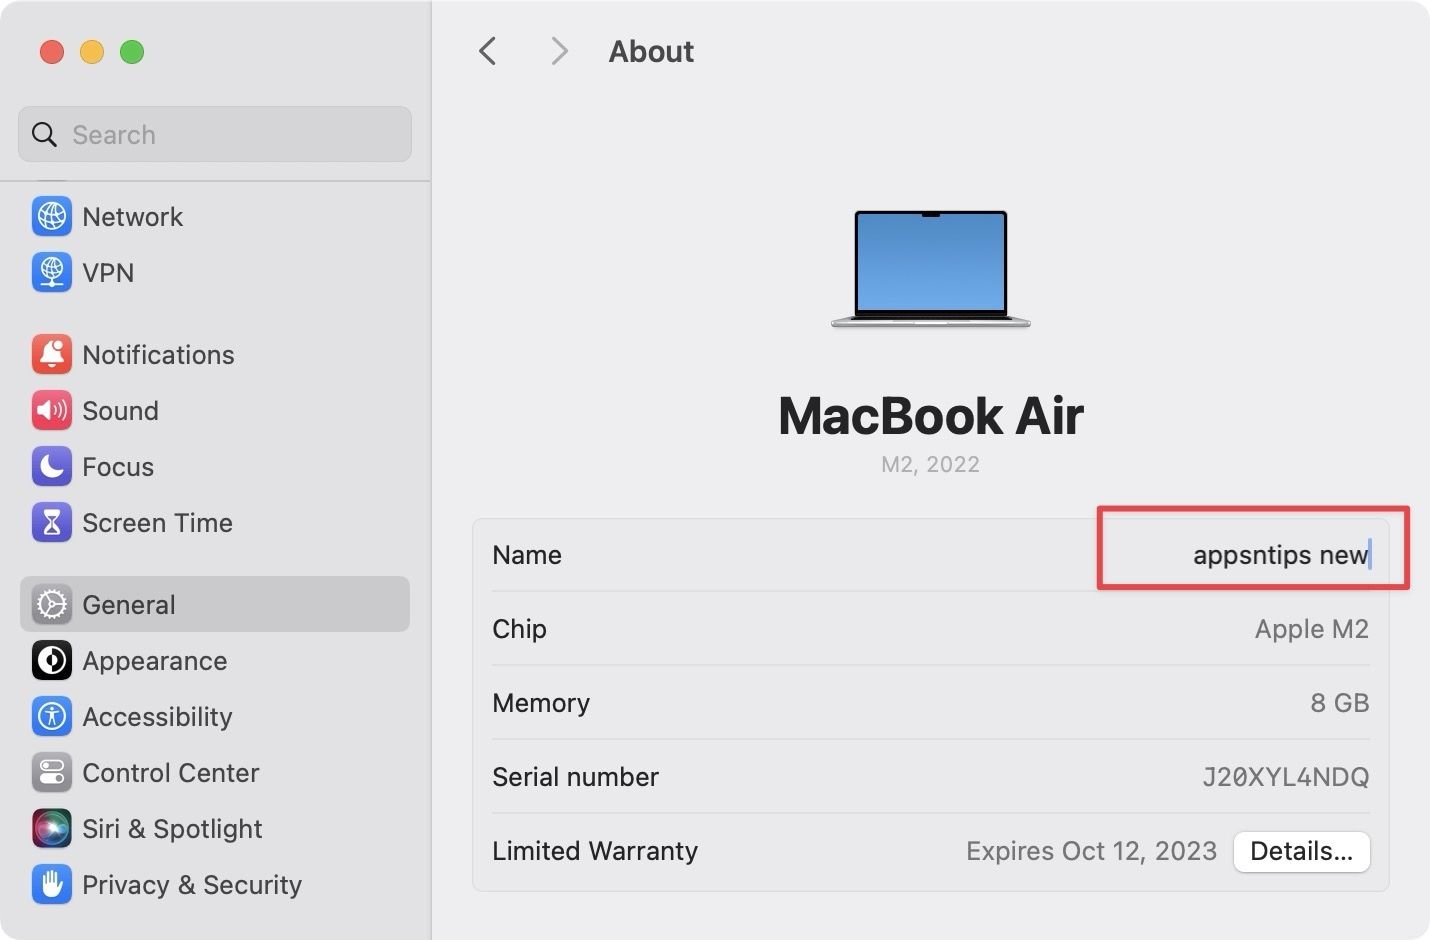
That's it. You have successfully changed the name of your MacBook. You can now quit the System Settings app. Note that it might take a few minutes for the new name to update everywhere.
Change the Local hostname of your MacBook
By default, your MacBook's local network name is the same as your default MacBook name. The only difference is that it uses dashes instead of spaces if you have multiple words in the name. If you want, you can keep different names for your MacBook and its name on the local network.
1. Use the Apple logo to open System Settings.
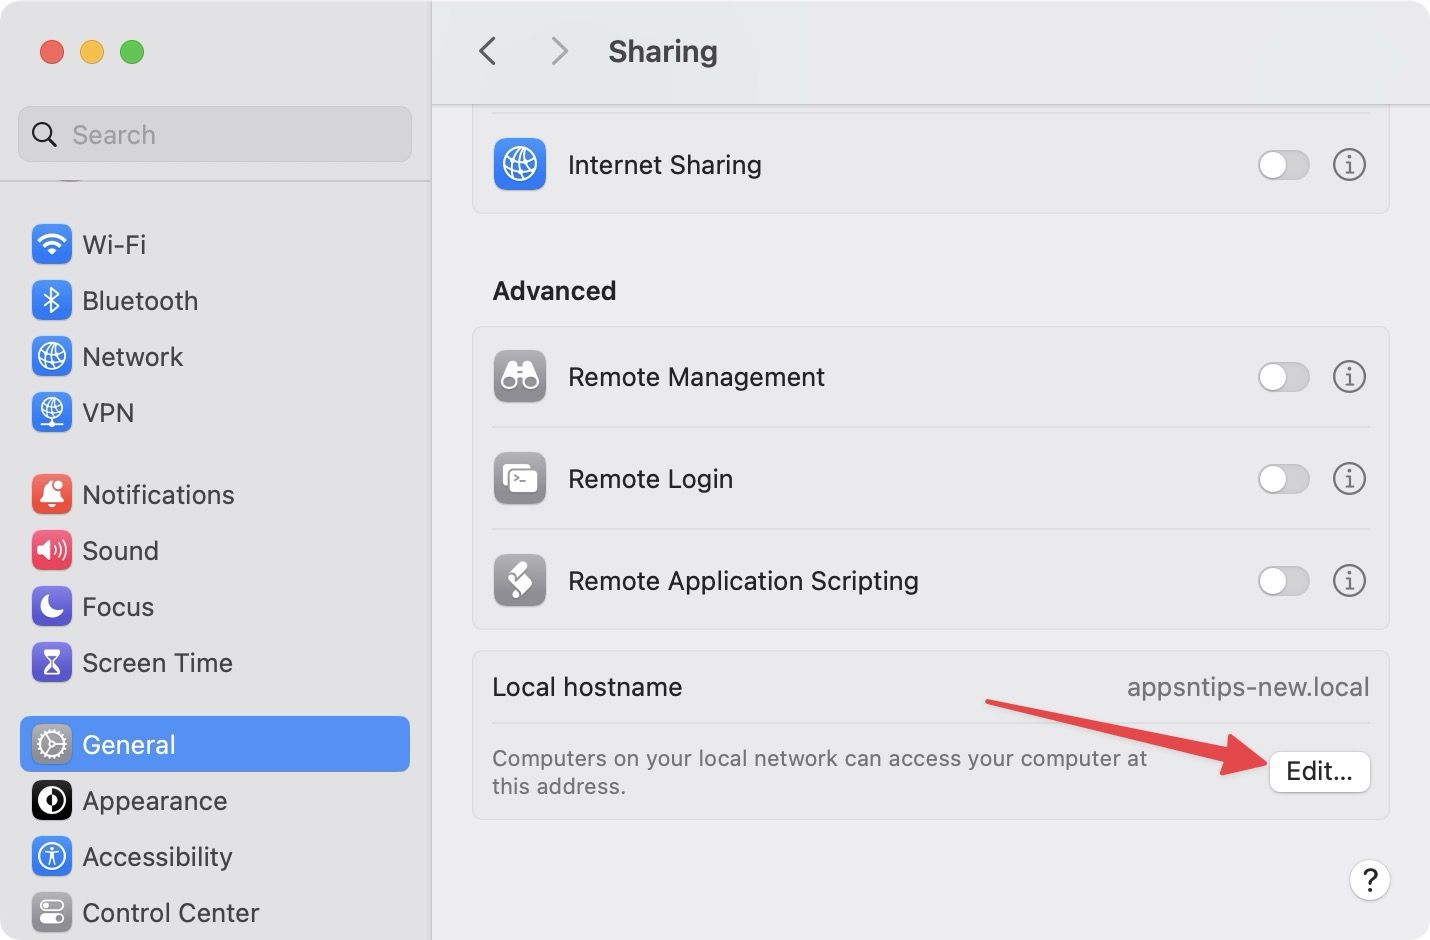
2. Now, select the General option. Now, click on the Sharing option.

3. Scroll down to the bottom and click on the Edit button under the Local hostname setting. Notice that it's showing the same name we set for our MacBook.
4. Click in the text field, set any name you want, and click the OK button to save changes.
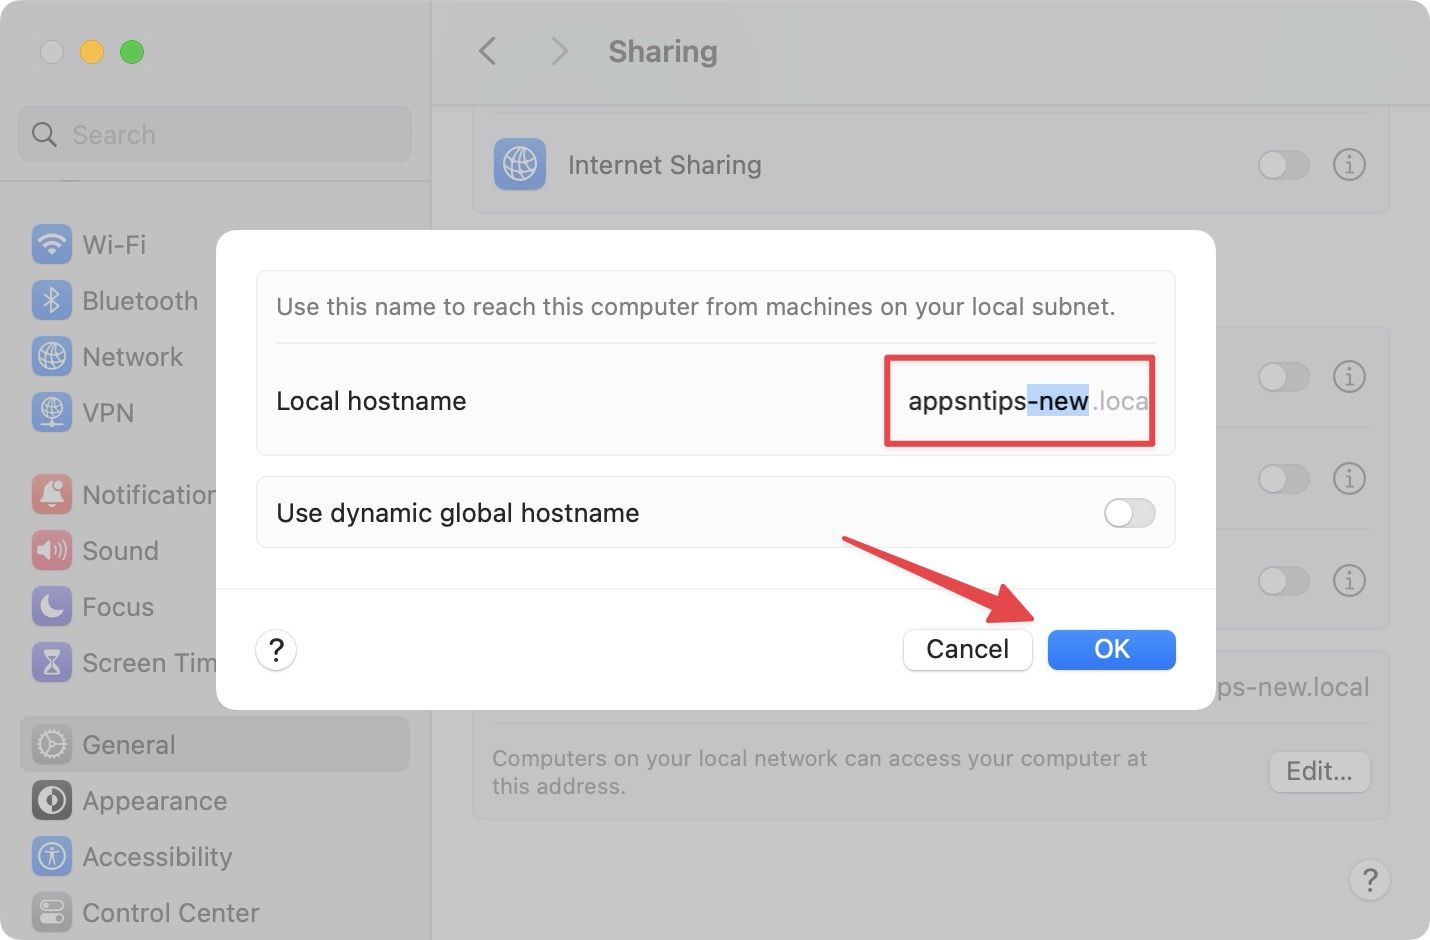
Changing the local hostname of your MacBook only changes it on your local network. Your regular computer name will still appear in AirDrop and FindMy.
Change MacBook name using Terminal
You can also change the name of your MacBook using the Terminal app on your Mac. Here's how you do it.
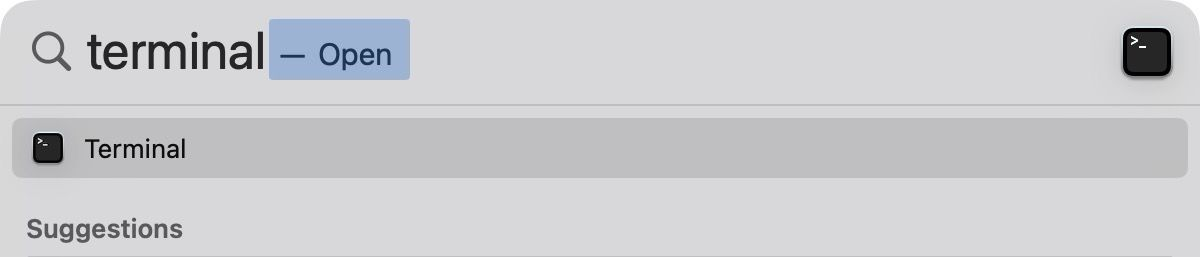
1. Use the Command+Space (⌘+␣) keyboard to launch Spotlight and use it to open the Terminal app.
2. Paste the following command and hit the enter/return key to execute the command. Remember to swap the NewName text with the name you want to set for your MacBook.
sudo scutil –set ComputerName <NewName>

4. Now, you will be prompted to enter your MacBook password. Type the password and hit enter to rename your MacBook.

5. If you only want to change the local hostname of your MacBook, use the following command instead.
sudo scutil --set LocalHostName <new host name>

Change your MacBoo's name in seconds
So that is how you can change the name of your MacBook in seconds. If you liked this guide, you will also enjoy our guide on the best MacBook Pro tips and tricks, where we will show you 35 tips to get the best out of your MacBook.


