
A Primer on Roam Research: Build Your Roam Graph from Scratch
Roam Research is an exceptional note-taking tool. In this guide, learn how to use Roam Research and build your own database from scratch.

Roam Research has become a hot topic lately. There are very few apps that have been so polarizing. While several people are disparaging Roam Research as just a new shiny tool, many esteemed people swear by its benefits. Despite a negative environment around Roam on social media, it’s clear that its users love the service. No matter how shiny a new app is, no one will put $500 of their hard-earned money if they don’t see tangible benefits. So, if you are someone who is intrigued by Roam Research but don’t know where to start, this is the article for you. Here’s my primer on Roam Research that will help you start your networked thought database.
Show Table of Content
- What is Roam Research
- Networked Thought vs File Cabinet System
- Things to Keep in Mind Before Getting Started with Roam Research
- Getting Started with Roam Research
- Roam Research Some Useful Tips
- Roam Research Pricing: The Elephant in the Room
- Roam Research: Final Thoughts
What You Will Learn from This Article
This is an article of the first steps. My goal with this writeup is to get you started on the journey of Roam Research. You are not going to learn everything here. You are not going to learn most things. Your understanding of Roam will evolve with your experience. This is a place to get familiar with Roam Research; Learn its ways, its idiosyncrasies, and its tools. This article will help you with the first steps in adapting Roam to your needs.
What is Roam Research
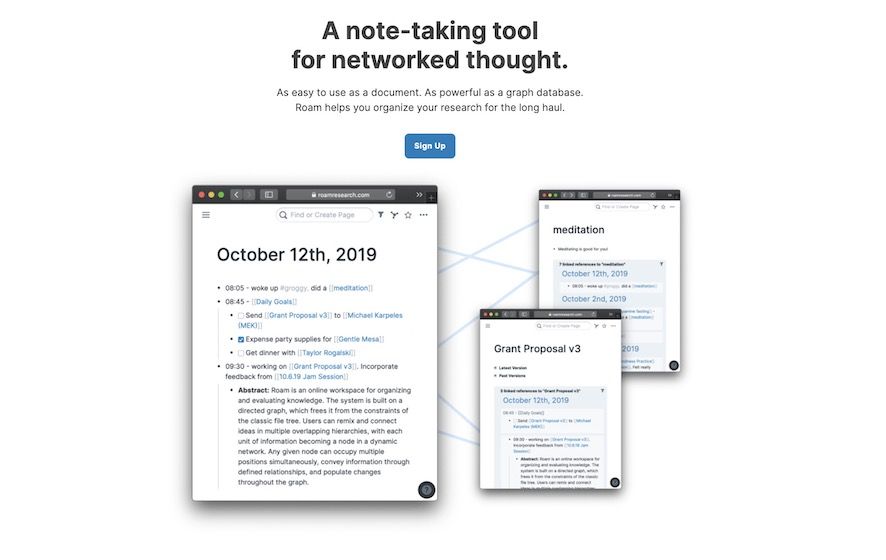
The tagline of Roam Research explains the tool in the best and most succinct way possible. Roam is a "note-taking tool for networked thought". But what does one mean by networked thought? To put it simply, it’s a tool that lets you connect ideas. Roam does that by allowing you to link notes with each other.
We will talk about linking notes in detail in an upcoming section. For now, think of it as your own personal Wikipedia. You read about a topic and create a note on it. You can link that note with other notes on similar topics. That’s a basic example of creating linked notes. Let’s understand this concept in a little more detail in the next section.
Networked Thought vs File Cabinet System
It’s been proven in several studies that our brain stores information in a network that’s scattered throughout many regions of the brain. We don’t learn linearly. Our present experience may rekindle an old memory and interact with it to change an old opinion or foster it. That in turn may connect with some other dots in our brain.
The point is that what you observe or learn today is not only connected to a previous day or year’s learning, but interconnected with our thoughts and experiences we have had since we started sensing and noticing the world around us. The structure of our thoughts in the brain resembles a web of ideas. There’s no filing cabinet system.

So, even on the surface, it feels like a good idea to create our external knowledge-base in a similar vein. We have been using notebooks and note-taking apps that force us to think linearly. And while we have made it work, it’s not optimal.
The Inherent Problems of File Cabinet System
Most of us think of writing as a tool for jotting down and storing information. This thinking has been enforced by the file cabinet systems that we have been using for taking and storing notes. The problem with this approach is that we become hoarders of information. We collect and collect and collect, and end of not using most of it. Also, as you add more and more information to your system, it gets harder to get specific information back out.
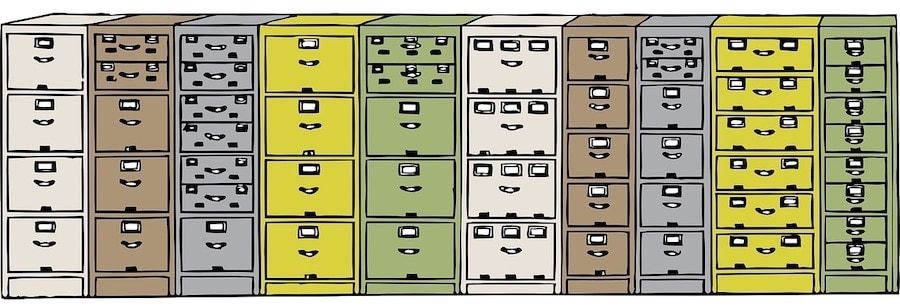
It’s because the file-cabinet system is incapable of organizing a large amount of data. No matter how robust a search tool your file-cabinet has, you can’t look for things when you don’t have the exact query. The final big problem with the file cabinet system is that it forces you to think where an idea will go even before you have properly formed it. Ideas don’t belong to a single category. They are fluid and develop over time. If you put them in a category, they die in their silos.
The system forces you to think where an idea will go even before you have properly formed it.
Benefits of Networked Thought System
When you use a system that lets you generate a networked thought process, you realize that writing is not only a tool for storing knowledge. It’s a tool for thinking and creating. When we write, we are not just entering information. We are thinking.
By writing down our thoughts, we are having a discussion with ourselves. Our working memory is limited. If you want to form a coherent argument or study a complex topic, it will fail you. We need a tool that can assist us. And while we want our end product to have a linear structure, the process of creating it doesn’t and shouldn’t be linear.

A networked thought system allows the intermingling of ideas. It doesn’t confine them in a category. You explore ideas and form individual connections that slowly reveal the larger picture. And as you keep adding more information and creating logical connections, you never lose an important idea.
One of the biggest benefits of a networked thought system is the concept of reusable ideas. Generally, when we are done with a project, we archive it and forget all about it. This system ensures that all the important ideas are still on your web, and you can reuse them when they fit in other projects. If you are a creator, this simple fact will increase your output over time.
Writing is not merely a tool for storing knowledge. It’s a tool for thinking and creating.
Things to Keep in Mind Before Getting Started with Roam Research
We have now come to the part where we will start learning the basics of Roam Research. But before we get started, there are two points I want to address.
The Bottom-up Approach
People find Roam Research daunting. The first thing you should do to prevent this feeling is to stop looking at the graphs or databases of expert users. The second is to understand the bottom-up approach. Nobody created their knowledge database in one day. As the saying goes, “Rome wasn’t built in one day”. And your Roam won't either.
The bottom-up approach tells us that we should start with the specific and work our way up to a complex knowledge management system. So, when you start working with Roam Research, don’t import all your notes at once and start tagging and interlinking them.

Start small with the projects you are working on or the things that you are learning, and form the connections between those notes. Work this way and your knowledge-base will evolve naturally.
This approach solves two major problems. First, you are not daunted by the task of re-organizing all your notes and finding connections. Second and more importantly, all the connections and relations that you create between the notes are meaningful. You are not creating links just for the sake of it.
You Don’t Need to Be An Expert
There are no pre-requisites for learning or using Roam Research. You don’t need to be a scholar, or a researcher, or a villain convoluting an evil masterplan. You don’t need to be familiar with the concept of Zettelkasten or atomic notes; concepts that you may have seen floating in Roam’s hemisphere. All that will come to you in due time. Right now, all you need is an inquisitive mind and the adherence to the philosophy of life-long learning.
Getting Started with Roam Research
Before starting the next section, make sure to sign up for Roam Research. There’s a 30-day free trial to get you started without paying anything. Keeping your Roam database open when reading this article will help you understand everything in a better way.
Roam’s User Interface
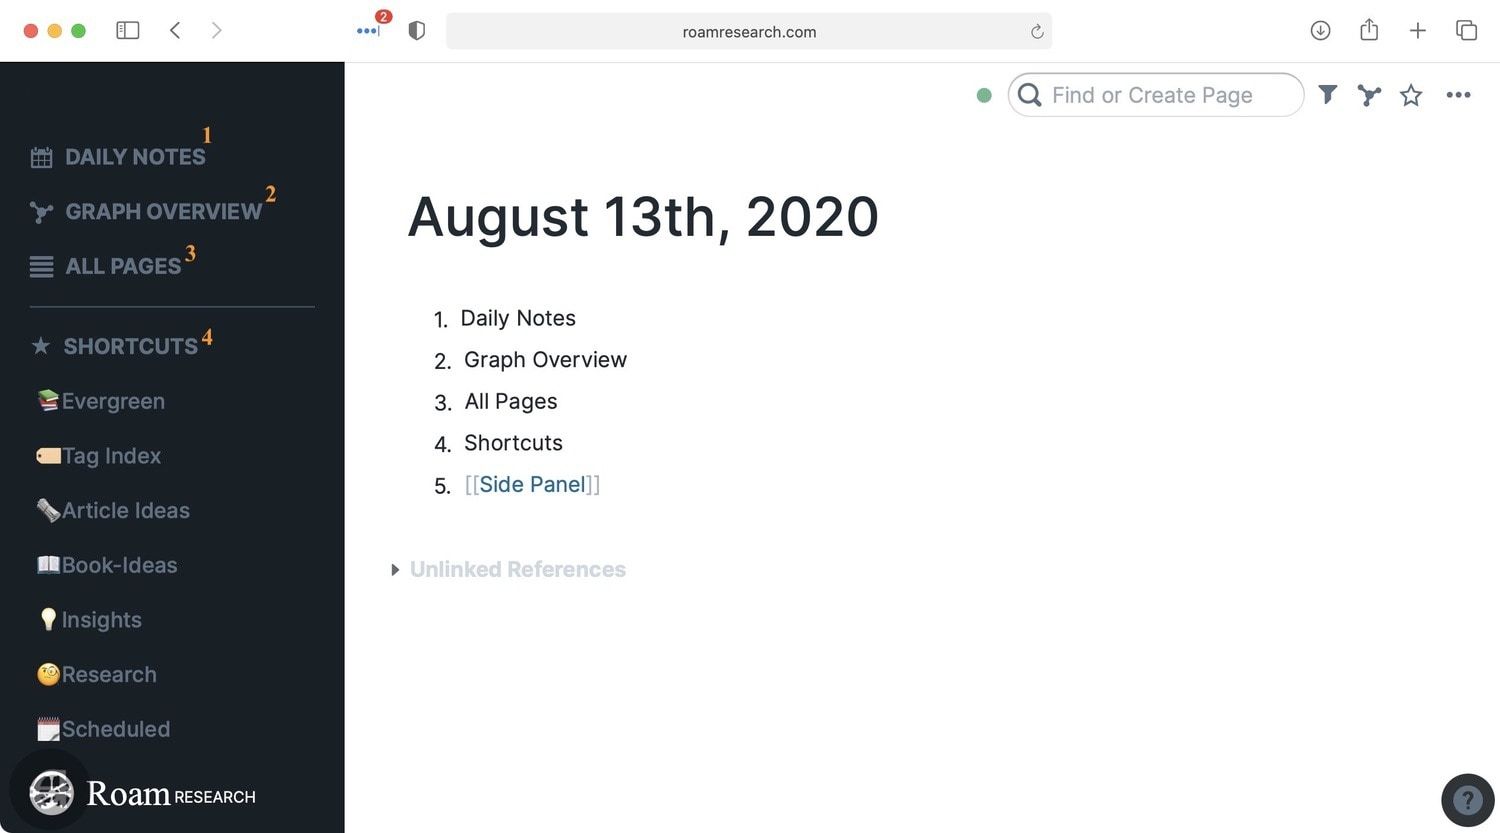
There are five main parts of Roam’s user interface: daily note, graph view, side panel, all pages, and shortcuts. We will go through them one-by-one.
The Daily Note
The daily note is where everything starts in Roam Research. Everyday Roam generates a note for the day. The blank page at the start of the day may seem daunting. When I started using Roam, the daily note felt like a challenge, asking me to form thoughts and write them down. It was difficult, and I lost that battle many times. But that’s the point. The beauty of the daily note is that it forces you to write something, anything.
My suggestion is that don’t overthink it. Use the daily note as a place of beginnings. Every new idea you have or a project you are working on, mention them in your daily notes. If you find something worth reading or watching, add them too.
As time passes, you will develop your workflow for daily notes. Many people use it for journaling or for logging their daily routine. Others use it for managing and planning their tasks. Every user you ask will give you a different answer.
If you still feel that the daily note is too daunting, start by using it as a place for Interstitial Journaling. The idea is pretty simple. Every-time you start a task, add a time code, and write it down. If you wasted an hour on YouTube and starting your work late, mention it.

I started this way. Not only it removes the pressure of filling the daily notes, but you also end-up creating a time-tracked journal of your day. It is a good way to become more proactive and mindful. And as an added benefit, you will start using your daily notes dependably.
But remember, that’s an idea that I am putting forward. If you don’t like it, or some other routine works better for you, go for it.
Roam Graph Overview
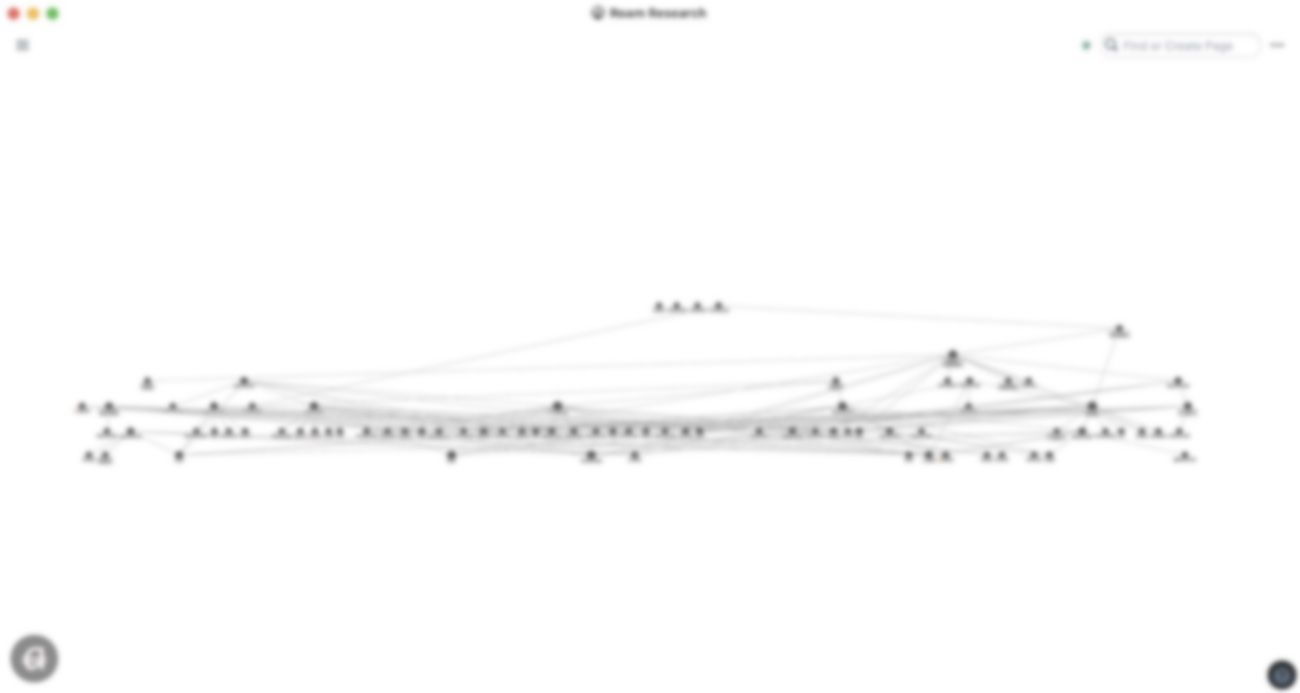
Understanding the Graph Overview page is easy. It shows you all the connections that you have formed between notes by linking them. This is where you get an overview of your knowledge-base. Every node on this graph represents a note, and the lines connecting it to other nodes show the connection.
You can click on a node to highlight the connections to that specific note. You will also notice that some nodes are bigger than the others. The nodes become bigger as they form more connections. The bigger the node, the more connections it has. This is a nice way to find your areas of interest, as presumably you will read and write more about things that you find more interesting.
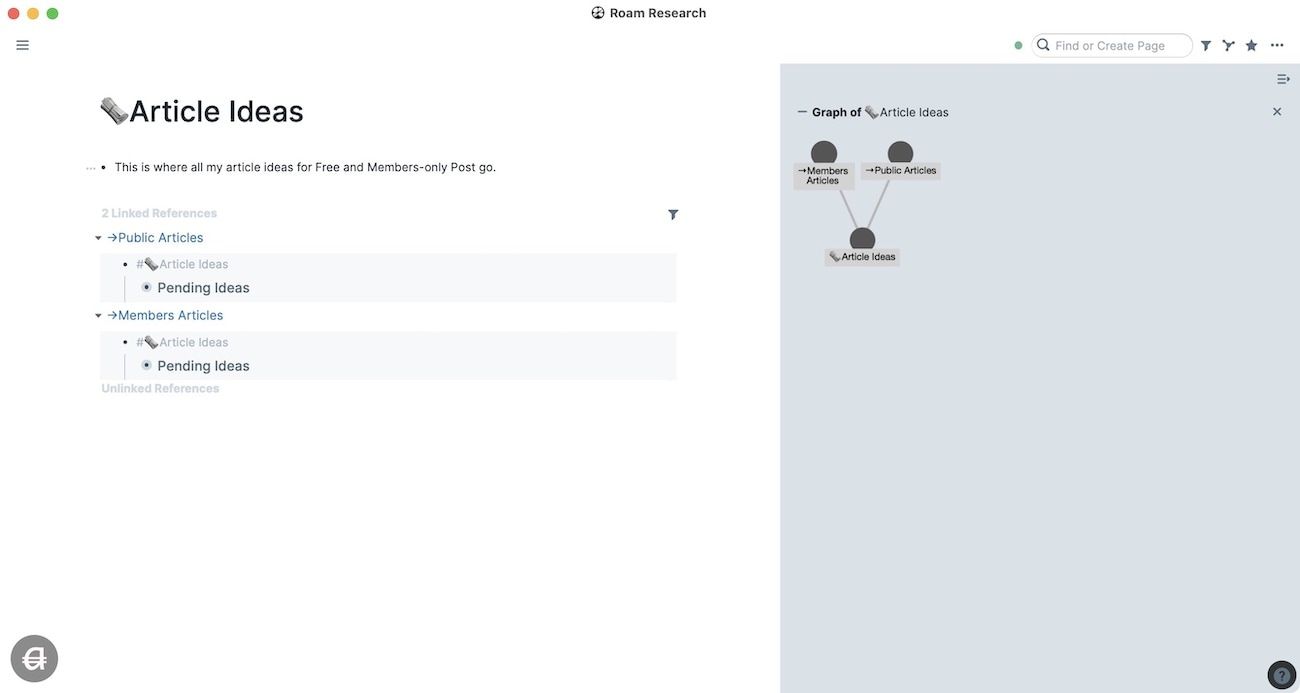
Note that there are two graph views in Roam Research. The first is the main Graph Overview that you can see in the left menu. It shows you the connection graphs of all the notes in your database. The second is the graph overview for individual notes that you can access by clicking on the graph icon on the top-right. This only shows the connection to note that is currently open. I love the note-based graph overview as it allows me to dig deeper into connections of a note or idea that I am working on.
Since you are reading this article, I am assuming that you are just starting. I will suggest that you forget about the main Graph Overview for the first few weeks. It takes time to develop your knowledge-base, and you might feel a bit dejected comparing your graph to others on the internet.
It might even compel you to add links forcefully to get your graph bigger. Avoid that at all costs. Remember, we are taking the bottom-up approach. A single meaningful connection is better than dozens of forced ones.
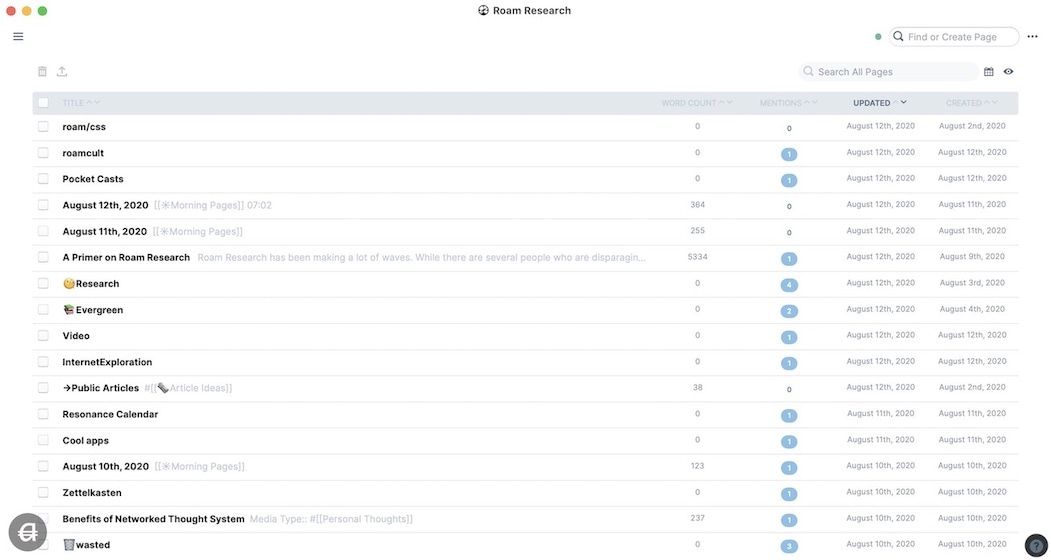
All Pages
This is where you can find a list of all the pages that you have created. You can see the word count for each page, the dates when the page was created and updated, and the number of connections for each page. You can also perform bulk operations for deleting and exporting pages.
Shortcuts
The Shortcuts section is for pages that are most important in your database or the ones that you are currently working on. To add a page to the Shortcuts tab, click on the star ☆ icon at the top-right of the page. Shortcuts are there to help you get quickly to a page. It’s totally up to you which pages you want to add.

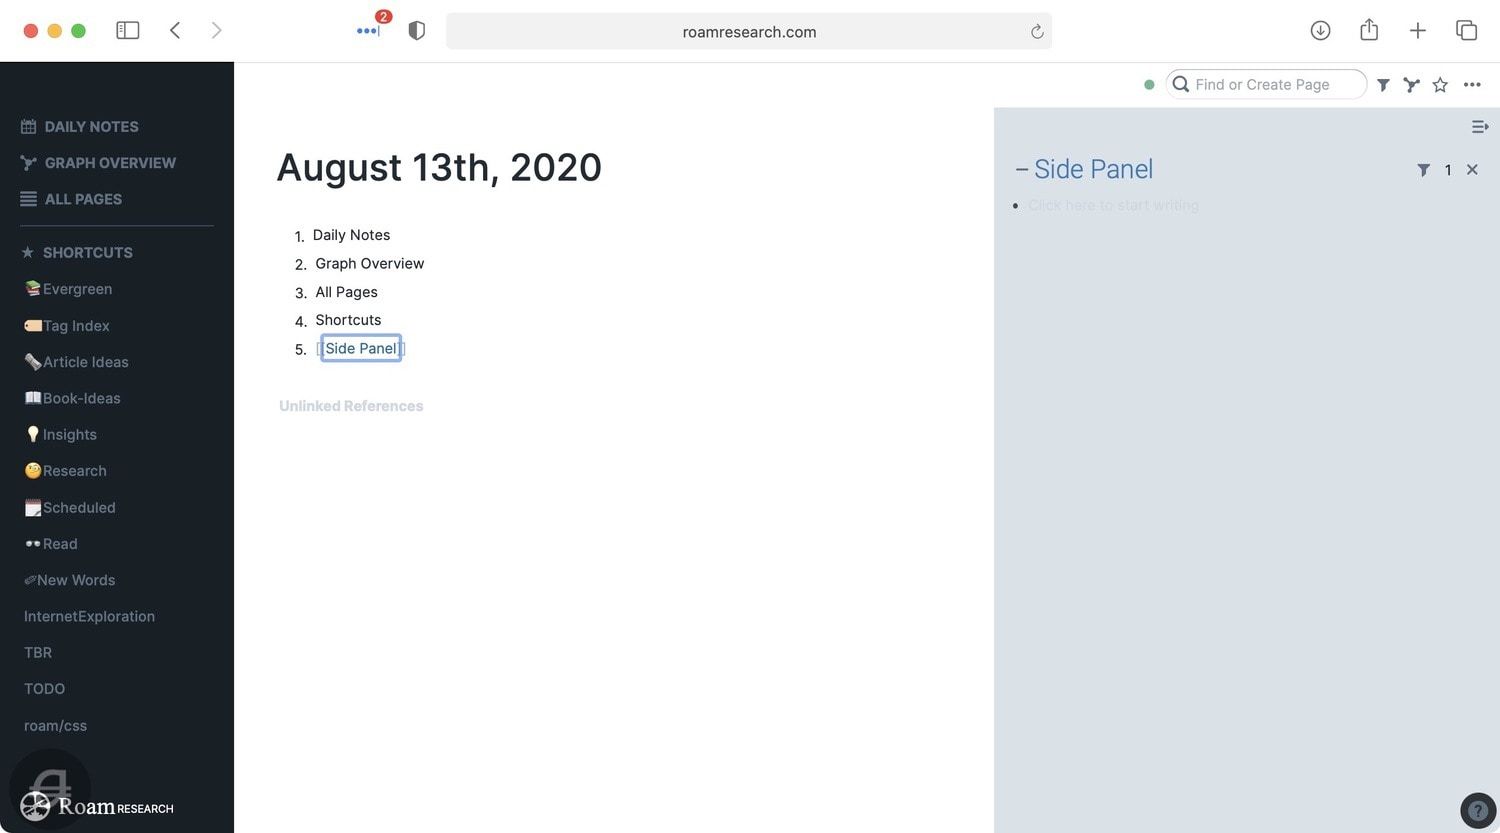
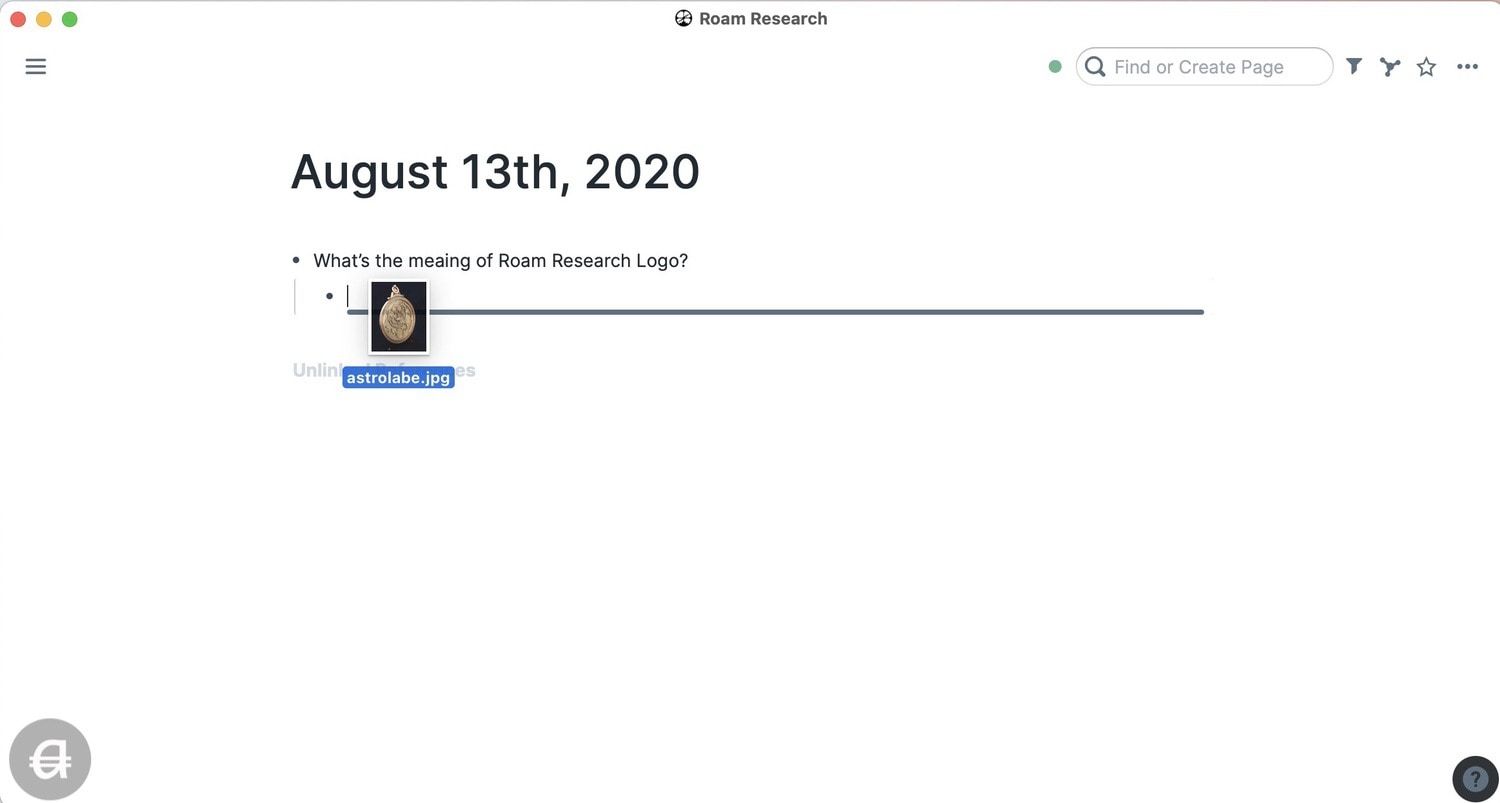
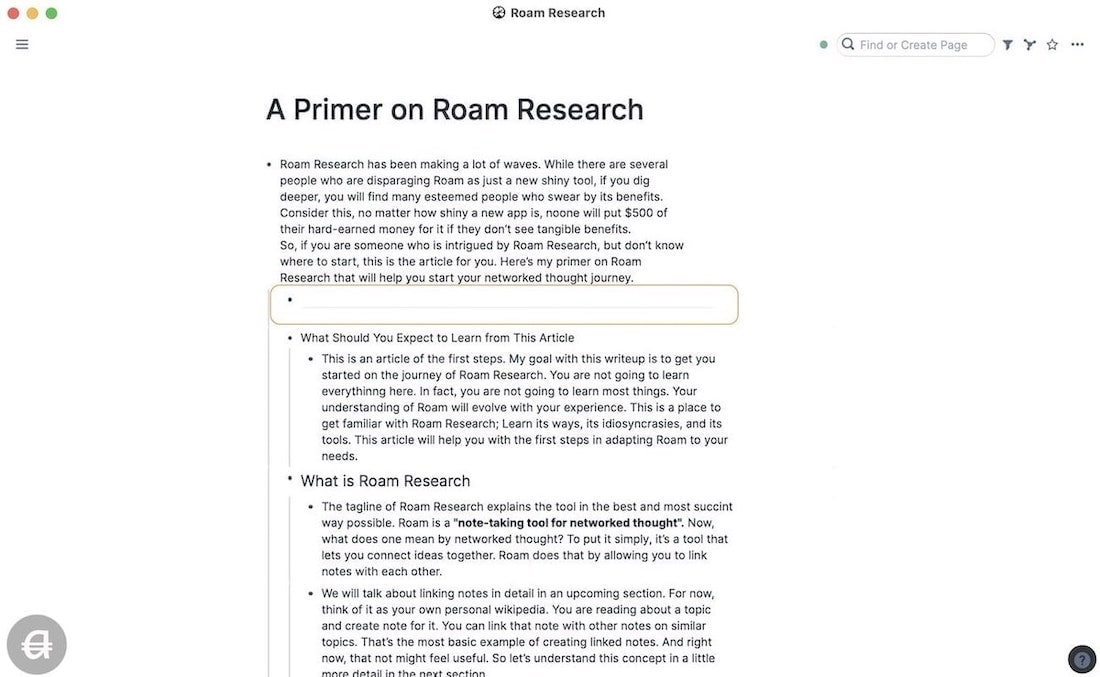
Roam Side Panel
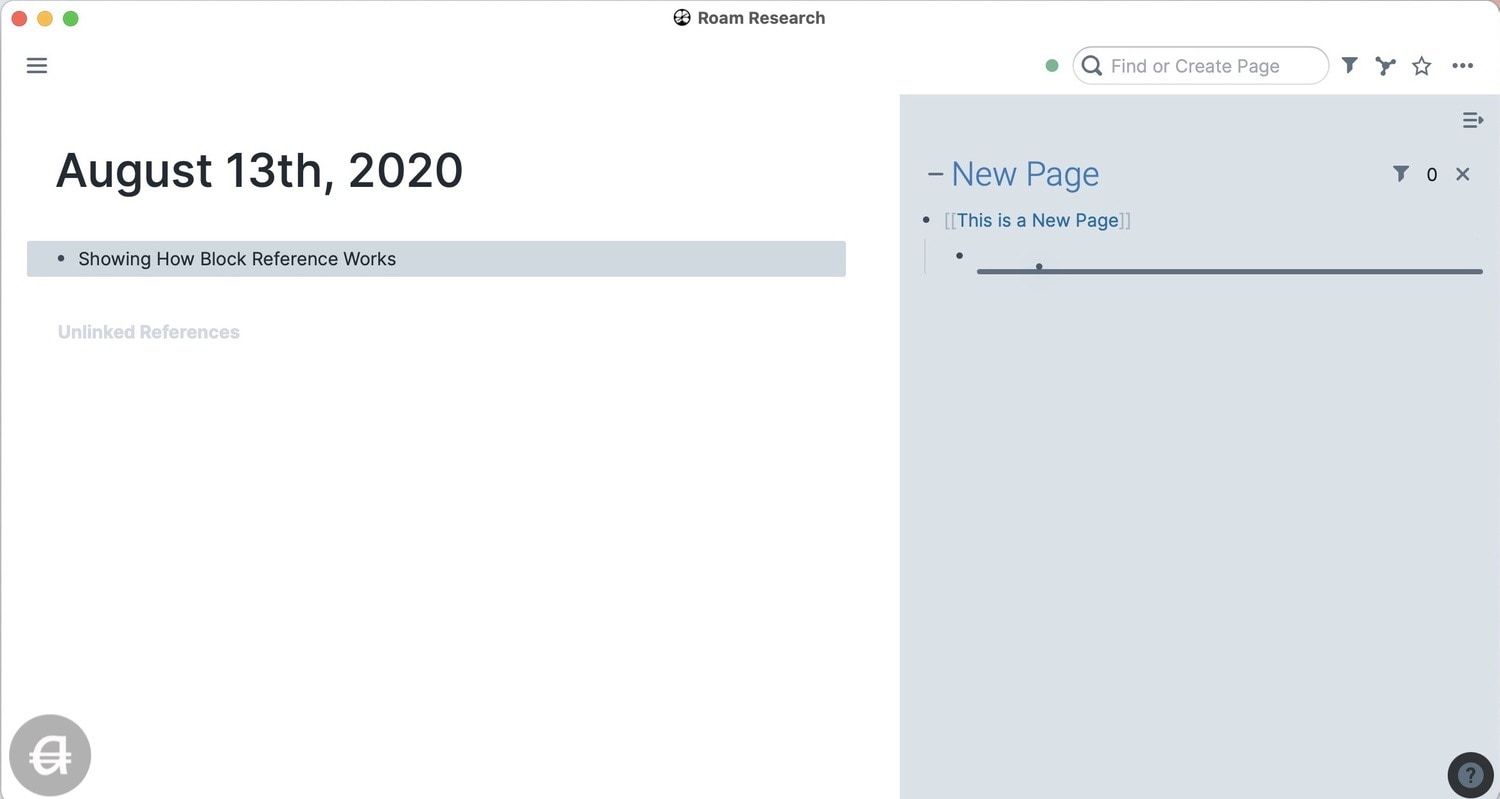
One of the best features of Roam Research is the ability to work on two documents at once. You can Shift+click on any document to open it in the side panel as shown in the picture below. This comes in handy when you are referencing something. Just open the reference in the sidebar and write in the main-panel or vice versa. We will talk more about the side panel in the interlinking section of this article.
Writing in Roam Research
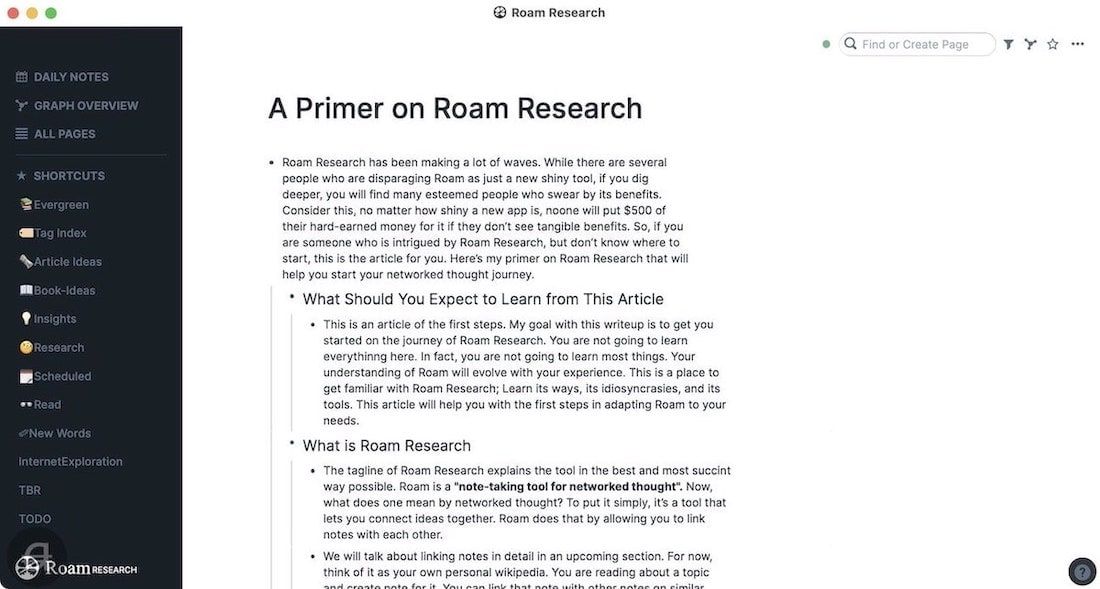
Writing in Roam Research differs drastically from other popular note-taking apps. First, instead of a document view that you get in other writing apps like Evernote or Ulysses, Roam gives you an outline view with bullets.
Every return key hit will start a new bullet point. You can use the TAB key to indent bullets and create your multi-layer outline. If you have used any outlining software before, you will get the hang of it pretty quickly. If not, it might take you a few days to adjust to Roam’s style.
Roam does this because bullets offer multiple advantages. The biggest advantage is that all blocks have a unique ID. This allows you to link to specific blocks inside the note.
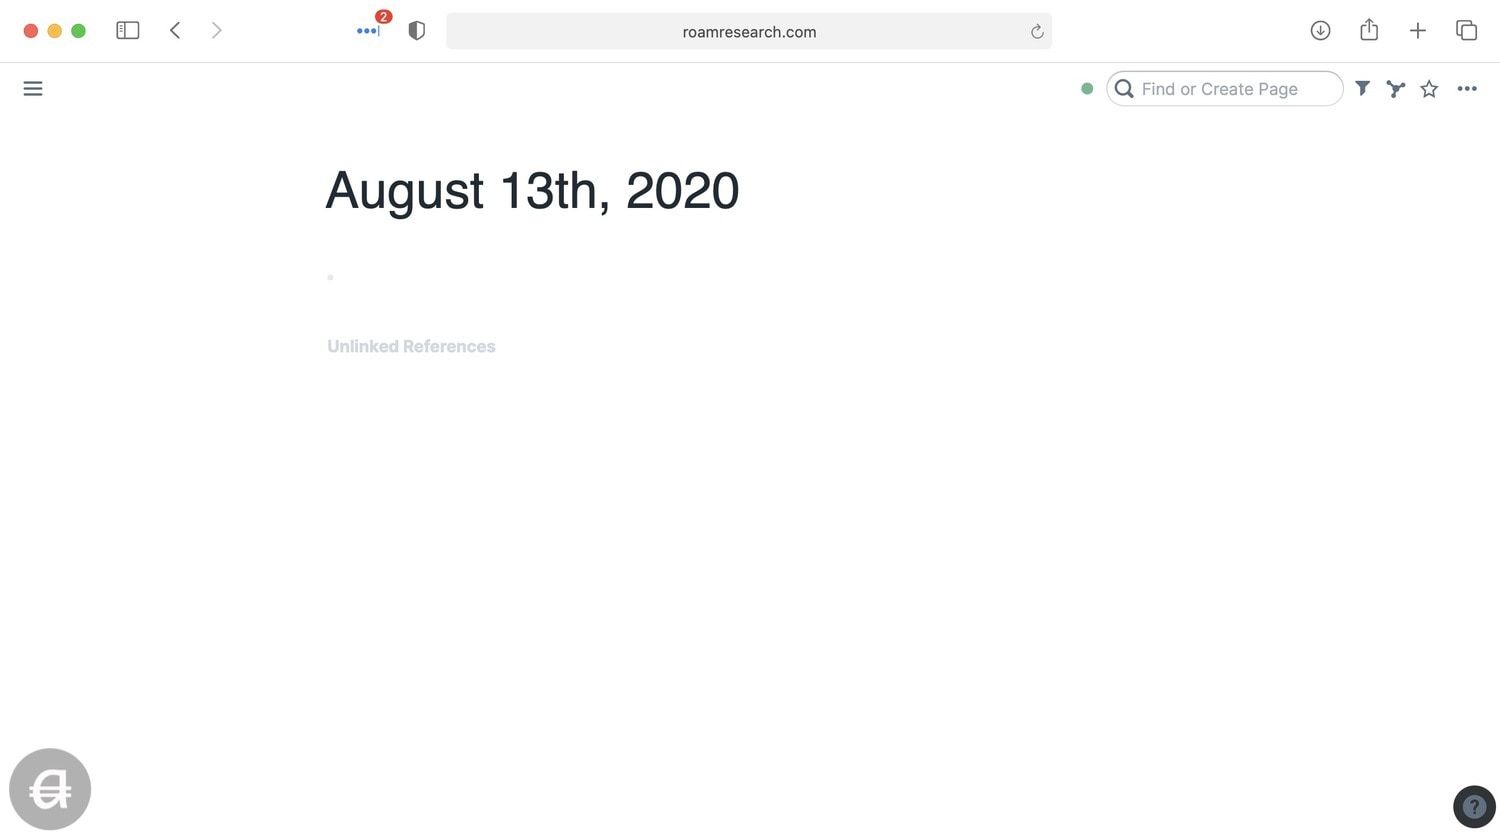
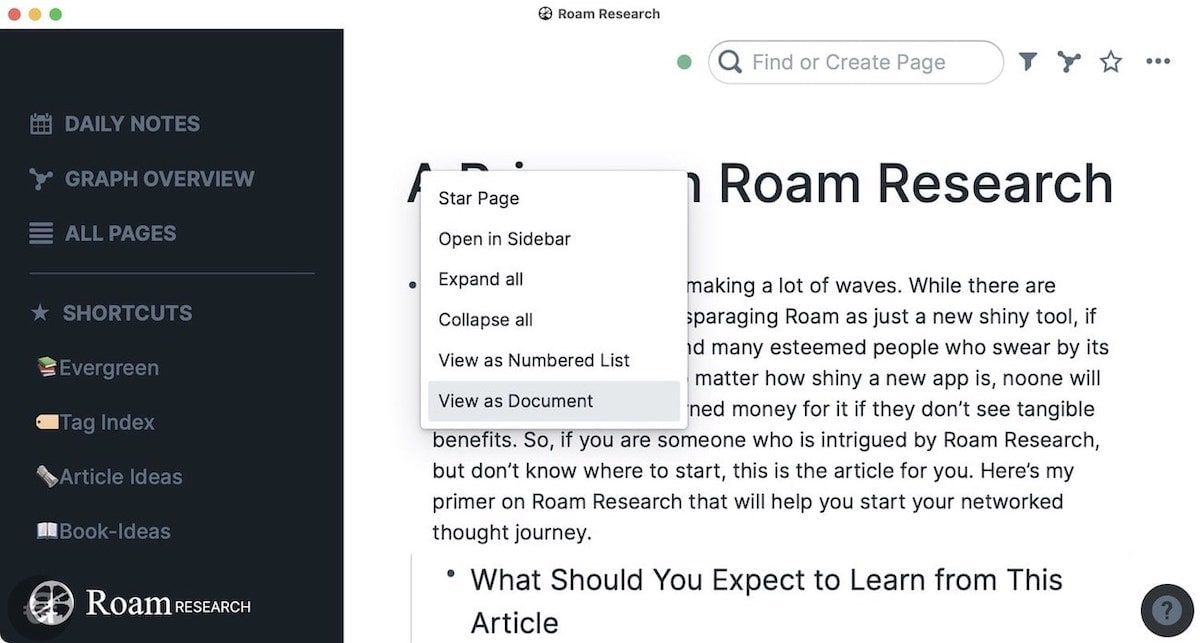
That being said, Roam understands that working on long documents in bullet lists can be difficult. So, it gives you an option to convert a page into a document view. To do that, right-click on a page title and choose the document view. The bullet and corresponding blocks are still preserved, you just don’t see them anymore. You can right-click on the document header to change back to the bullet list whenever you want.
For formatting text, Roam uses the plain-text language of Markdown. You can emphasize your text (bold, italics, bold, and italics), add highlights, mark strikethrough, and use headings and sub-headings. For the most part, you don’t need to remember the Markdown syntax, as all the usual keyboard shortcuts (CMD+B for bold / CMD+I for italics, and so on) for formatting work.
I have added a handy guide for formatting in the Essential Commands section. If you ever forget them, you can always click on the help menu at the bottom-right to find them.
Roam Research Networked Thought Approach (Interlinking)
In this section, we are going to see how you can interlink pages and blocks and what happens when you do so.
Interlink Pages in Roam Research
There are several ways to interlink pages in Roam Research. The easiest way is to envelop the text inside double square brackets to create a link to that page. To do that, select the phrase or word you want to link and tap the left square bracket key twice.
If the page already exists, Roam will create a link to that page. If it doesn’t exist, it will create a blank page with the interlinked text as its title. Remember that the pages you create are case-sensitive. So linking to the words "Project" and "project" will link to two different pages.
You can also create a link to a page using #. Tags and links both behave in the same way in Roam. Most people use Roam tags for higher-level topics and links for individual ideas and notes. I do the same because it makes sense and works with old habits. That said, there are no rules, so you can use them however you want.
One good feature of Roam Research is that you don’t have to remember if you have created a page for a specific topic or not. Roam gives you the suggestion for existing pages as soon as you start typing after putting double-open square-brackets or #.
If you are creating a new page using tags (#), remember that it will only work with a single word. If you want to create a multi-word tag, you will have to use double-square brackets too - #[[multi-word-tag]]. You only have to do this when you are creating a new page. Linking to old pages will apply the square-brackets automatically.
The final method of creating a linked page is by using attributes. Attributes work reliably at the start of the block. After typing the text or name of the page you want to link, put :: in-front of the text like this Page I want to Link to::
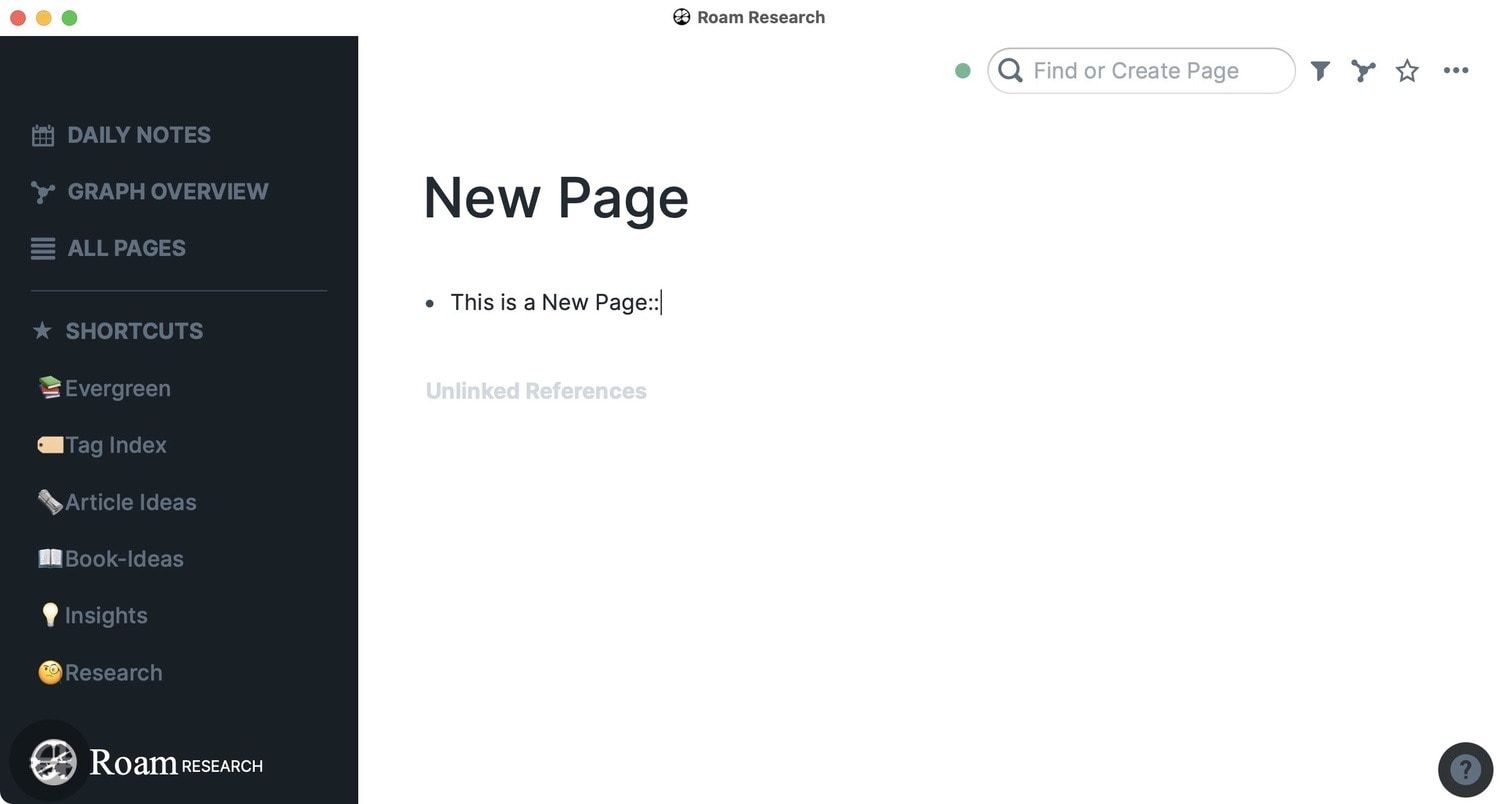
Currently, Attributes work the same way as links and tags. You can do more with them, and hopefully, they will become more powerful in the future. I rarely use them, and you certainly don’t need to at the start. I just mentioned them so you know they exist.
Backlinks
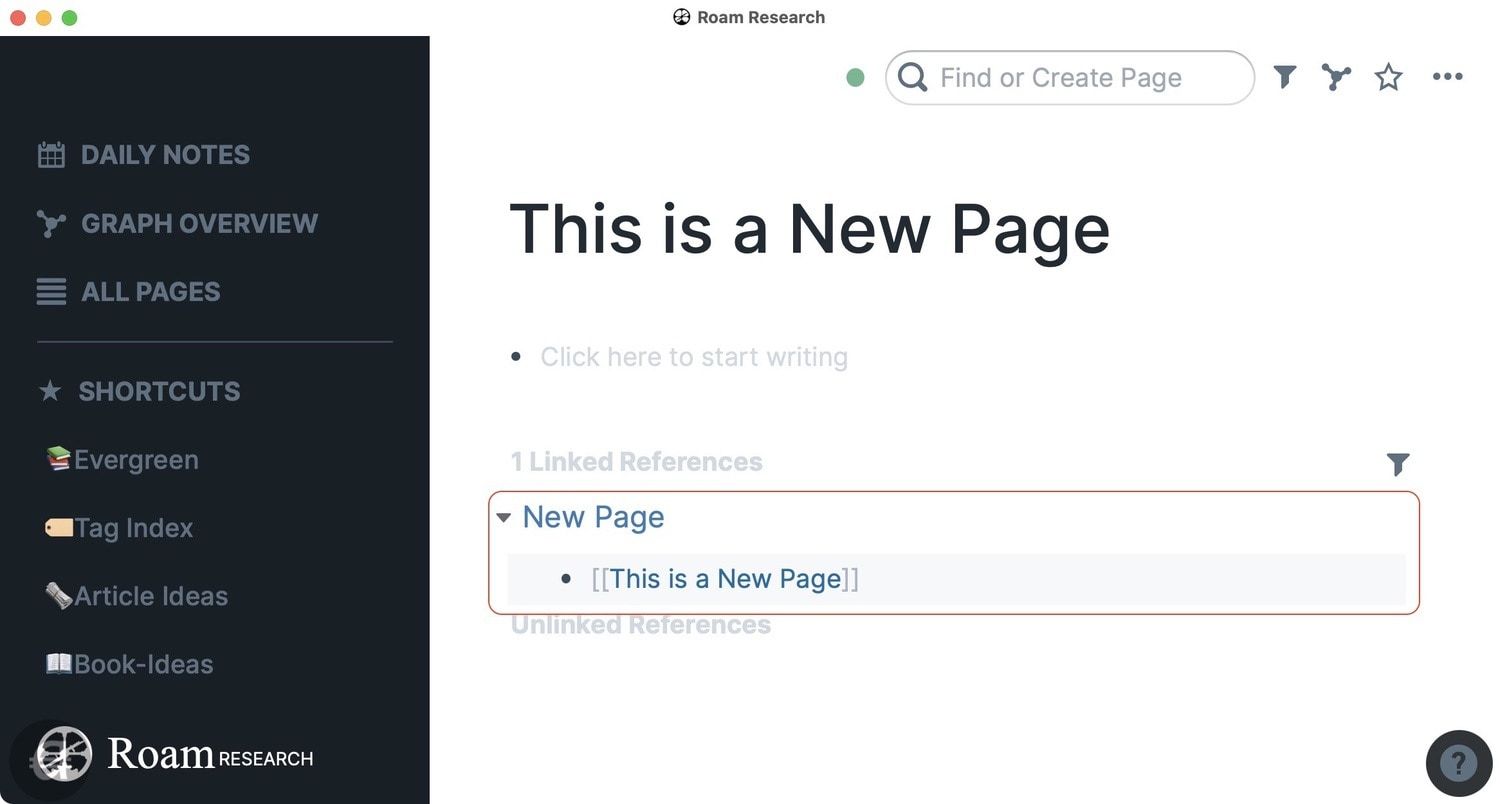
Backlinks make Roam special. When you are working on “Page A”, and link it to “Page B”, Roam will automatically create a reference backlink to “Page A” on “Page B”. This is extremely useful. It helps you see which pages you have referred to while working on a particular page. All the backlinks to a page appear at the bottom of that page.
What I love about backlinks in Roam is that they not only show the name of the reference page, but also any content that is associated with the block. This gives a context to why a page was linked on another page.
Backlinks can also help you in creating resource pages. For example, every time I find a topic that I want to learn more about, I mention it in my daily notes with a #Research tag. Now, whenever I have time, I open the Research-tag page and find all the things that I have collected.
Linked and Unlinked References
Roam Research knows that links are its strongest feature, so it helps you find them even if you are not diligent about creating them. It does that by giving you linked and unlinked references.
As we learned in the backlink section above, when you link to a page, it automatically generates a reference backlink on the linked page. You can find all the backlinks at the bottom of the page under the “Linked Reference” section.
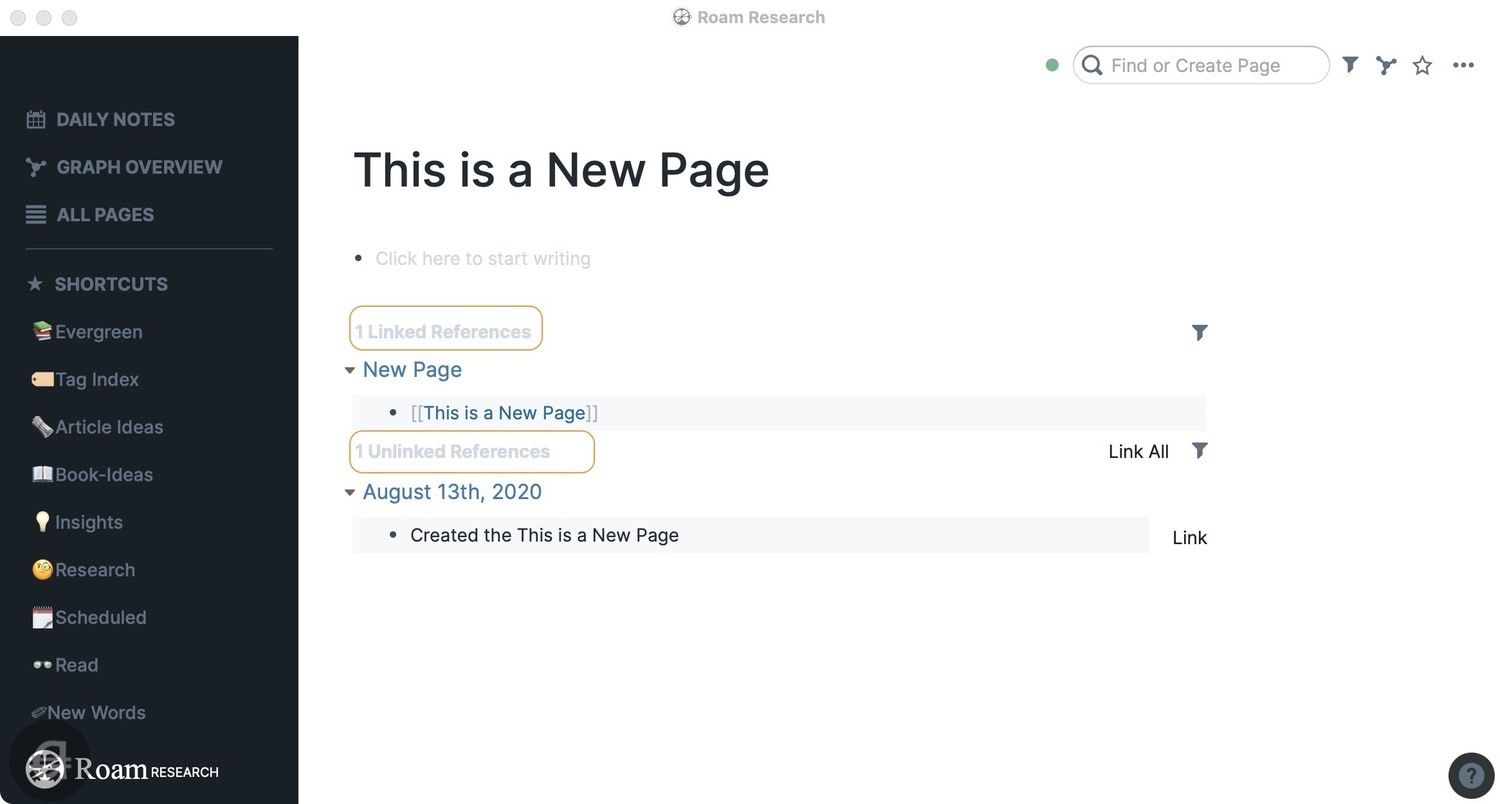
But that’s not all, if you look below it, you will see that there’s also an “Unlinked Reference” section. This houses all those instances where you have mentioned the page title, but not actively created a link for it.
I find this section handy as it helps me discover places where I have mentioned a page without even thinking about it. I suggest you check your unlinked reference section every other week to see if you can form any missing connections.
Block Reference
If backlinks make Roam special, Block reference is what takes Roam into hyperdrive. And this is where the use of bullets or blocks in Roam starts making sense. In Roam Research, not only you can link to pages, but also individual blocks.
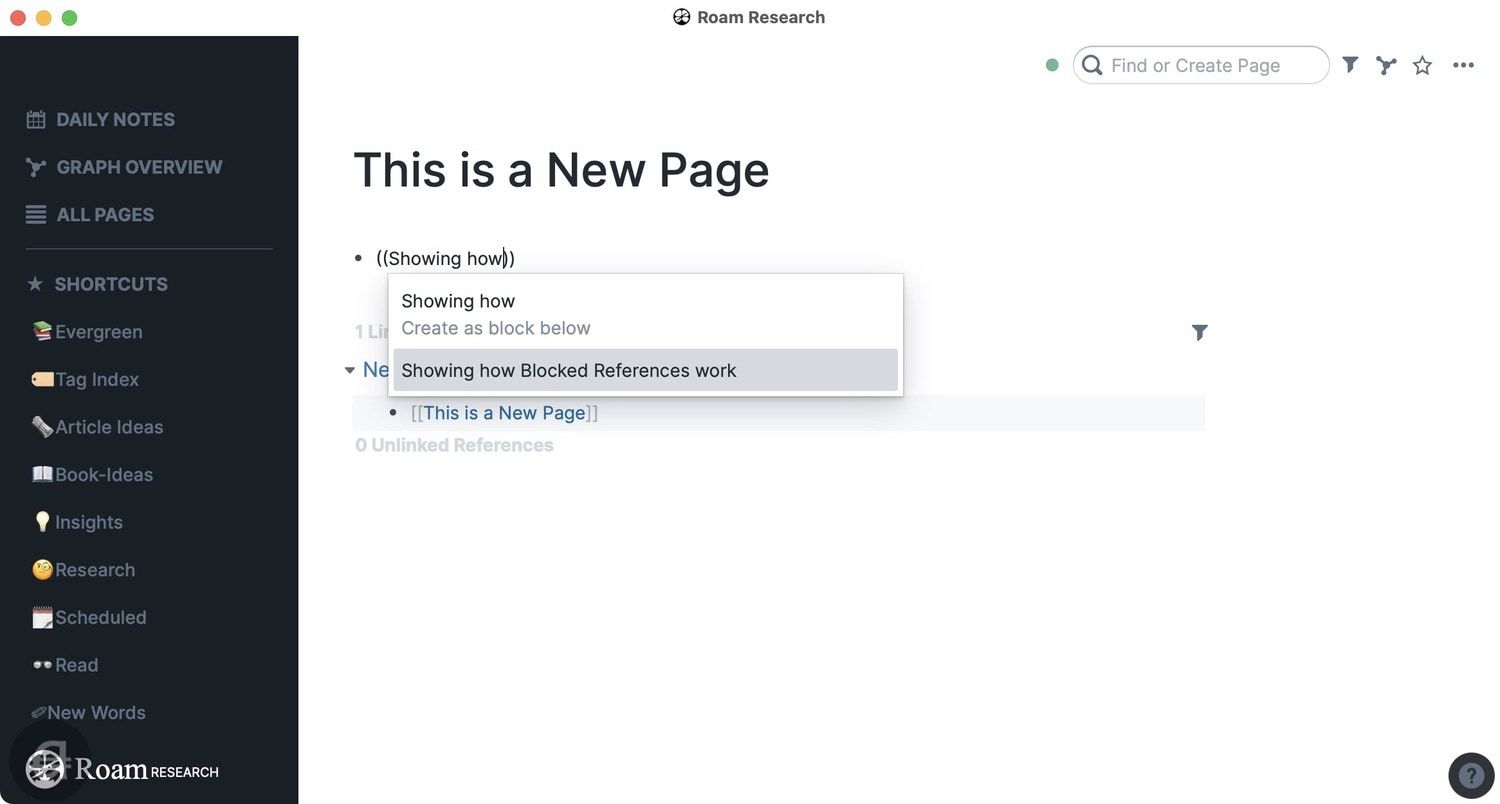
To create a Block reference, instead of using double-open square brackets, we will use the double-open parentheses. After typing the parentheses, start typing the content of the block you want to refer to, and Roam will give you the matching suggestions.
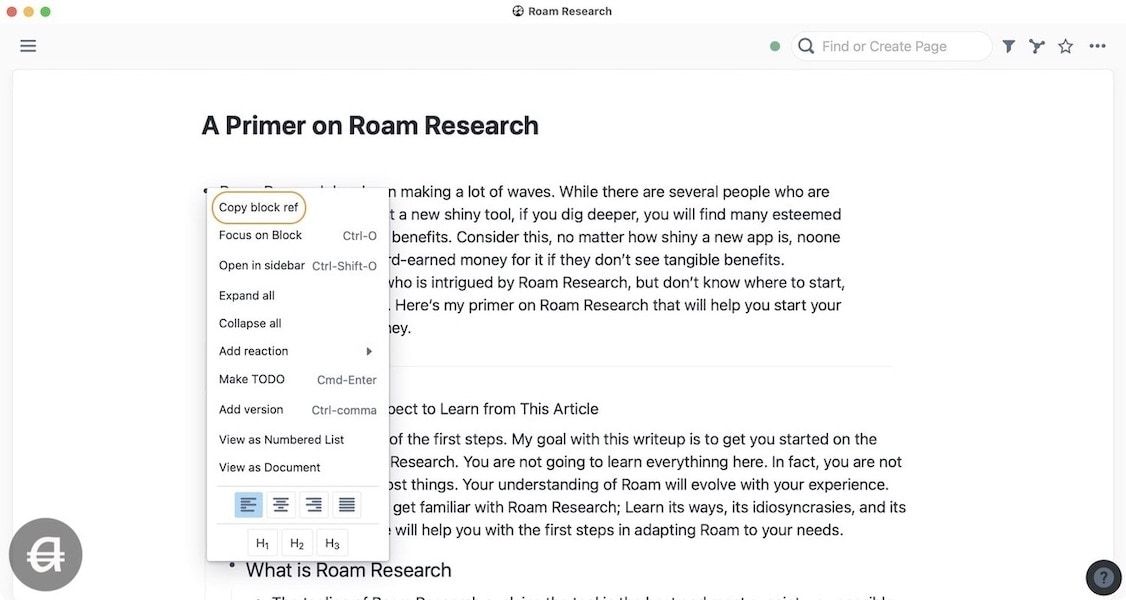
You can also create a block reference by right-clicking on the original block and selecting the "copy block ref" option. This will copy the block reference code of the block. Now, paste the reference code where you want to refer the block.
The final way to create a block reference is to open the page you are working on and the page that contains the block side-by-side (using the side panel feature) and hold Option(Alt) and drag the block. Once you create a block reference, like backlinks, the block will keep track of its references. You will see a number on the right of the block. Click on it to show where the block is referenced.
The uses of block references are endless. You can use it as a reference to your ideas, as a further explanation, or for fetching information from a master page. The benefit of using a block reference, instead of simply copy and pasting the information, is that when you make changes to the original block, it automatically reflects everywhere that block is referenced.
As per my experience, you won’t be using this feature much at the start, but as you develop your Roam graph and get familiar with the software, you will start using it more and more.
Block Embeds
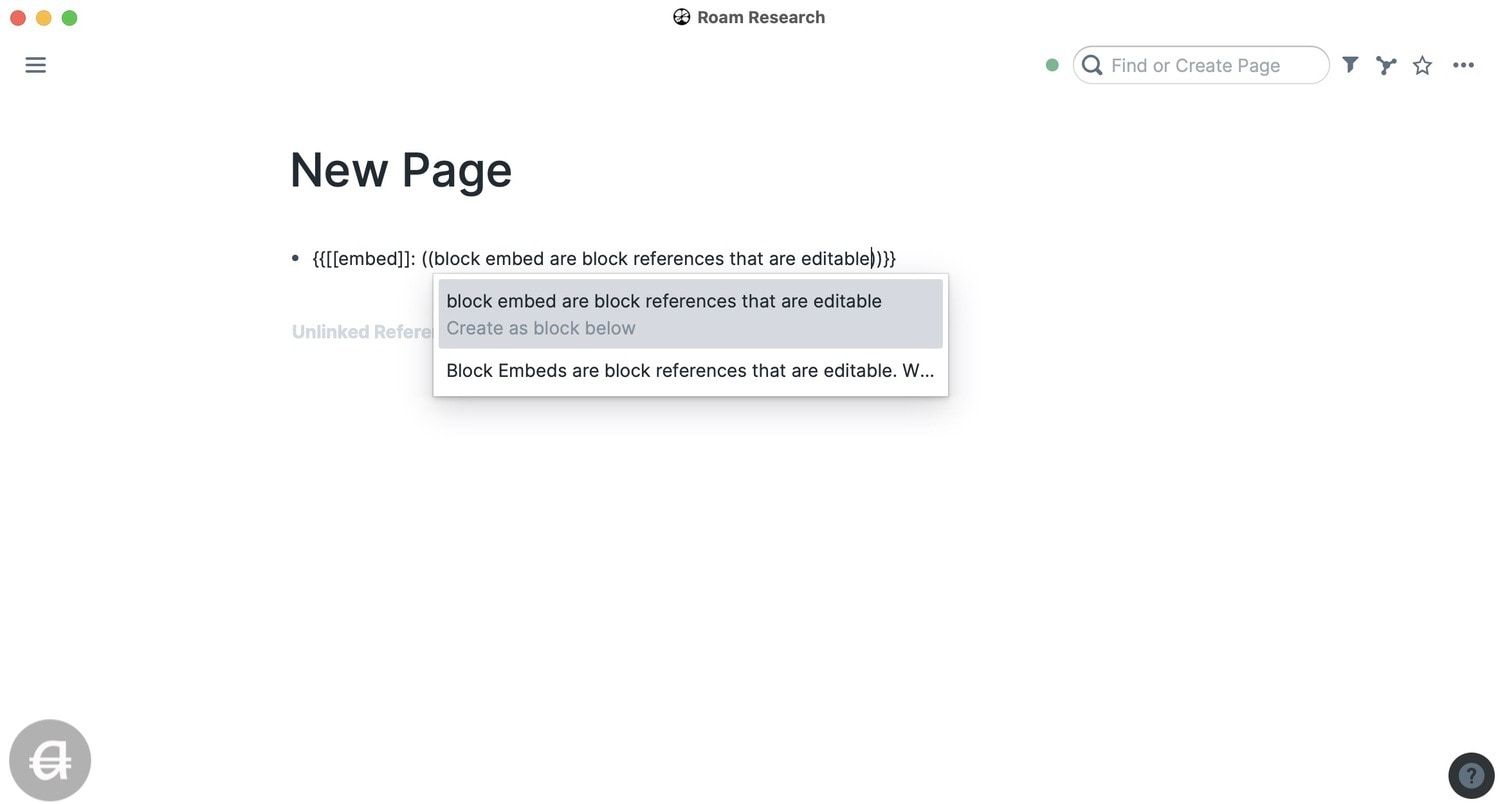
Block Embeds are block references that are editable. When you use a block reference, you are only referring to a block so you can’t edit it. But sometimes you want to use a block on two or more pages with the ability to edit them anywhere.
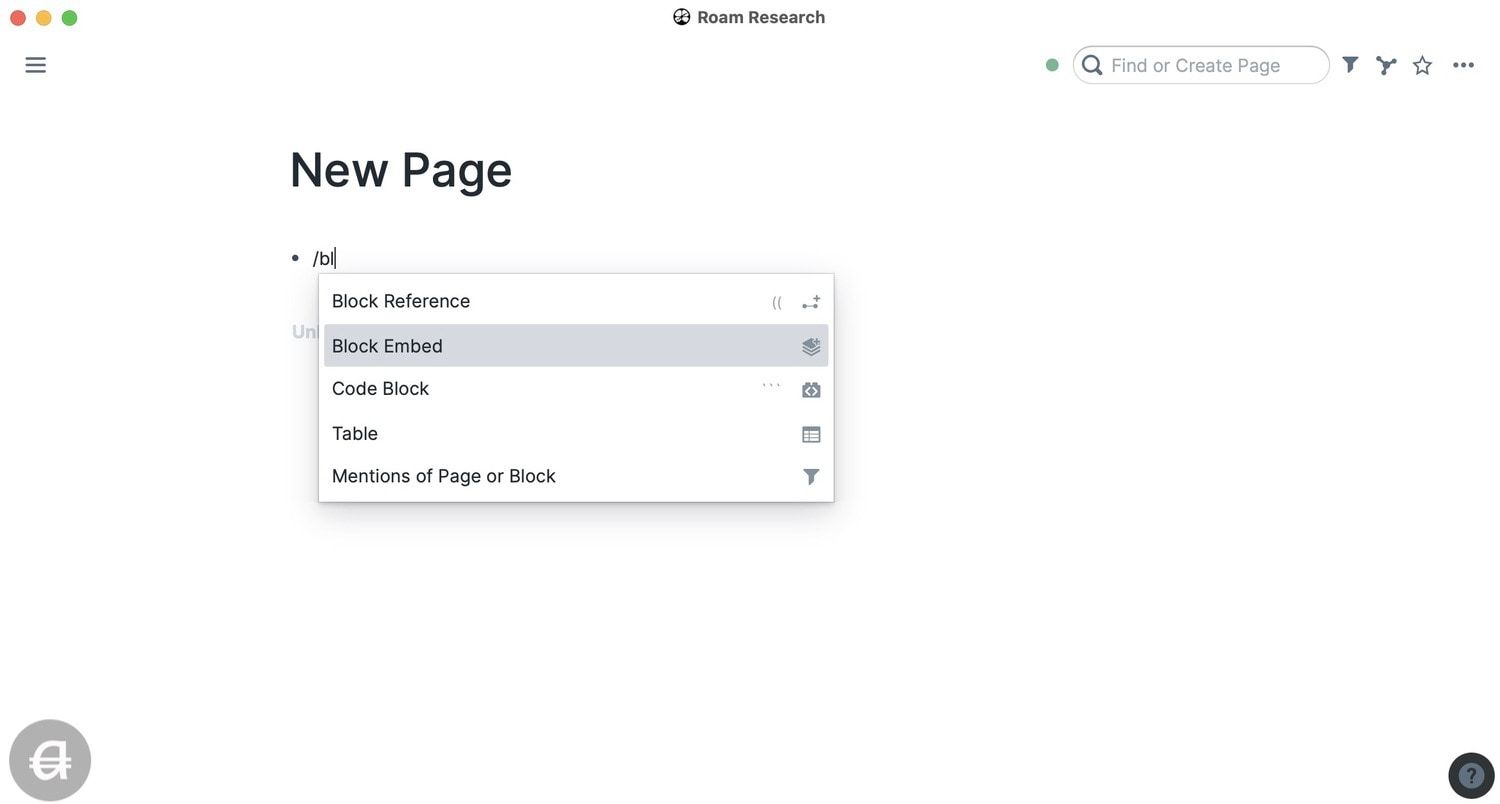
In such cases, we use Block Embeds. The easiest way to use Block embeds is to use the Slash “/“ command (more on this in a later section). Just hit "/" and select block embeds. Then start typing the content of the block and Roam will give you suggestions. Select the one you want to embed and hit enter/return.
This is all you need about interlinking in Roam Research. Now, let us move on to other sections.
Working with Pictures and PDFs
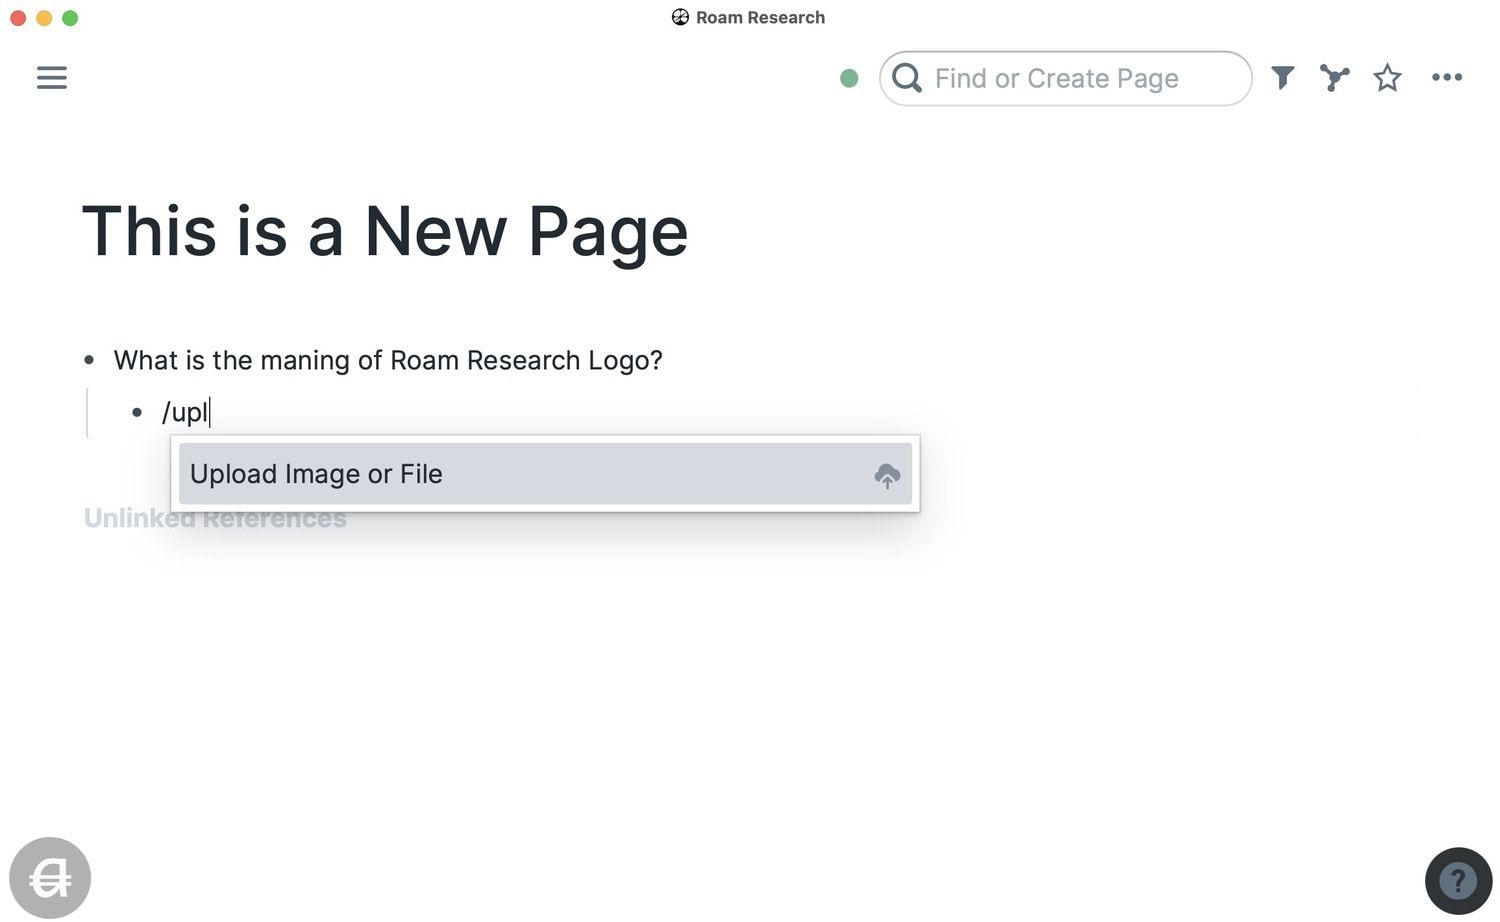
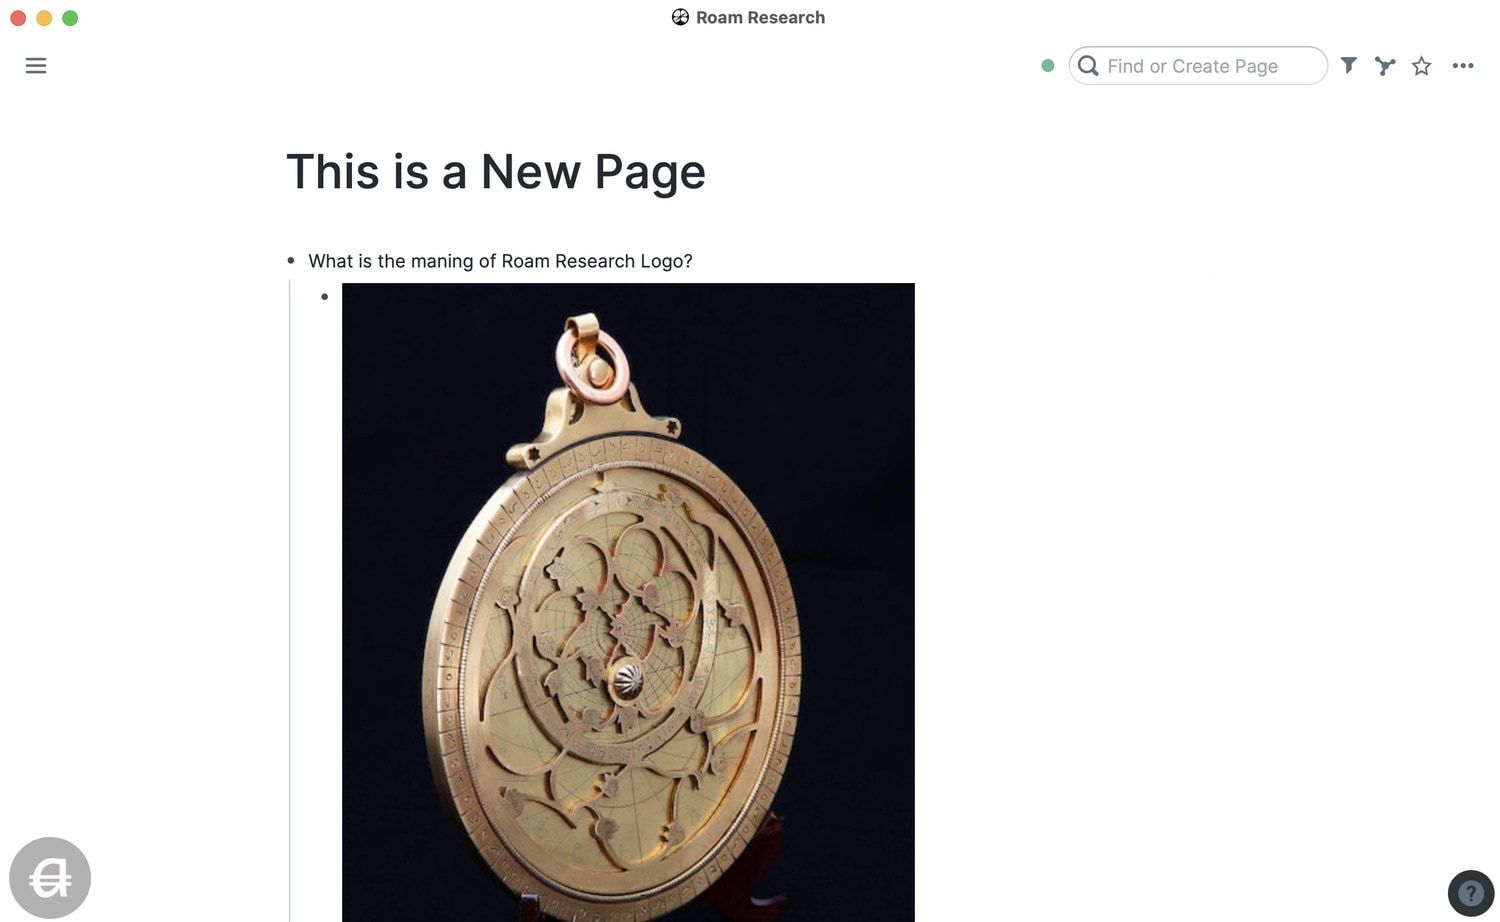
Apart from text, Roam Research can also handle images and PDFs. The easiest way to upload a picture of PDF is to drag and drop them in the place where you want.
The second way is to use the “/“ command and use the “Upload a File” feature.
I don't typically insert images and PDFs into my Roam database. Instead, I use DevonThink for storing the files and add the local links to those files in my database. I do this because files, especially PDFs, look out of place in Roam.
Roam Research the Essential Commands
In this section, we are going to learn some essential commands that will help you use Roam Research effectively.
The Slash "/" Command
The Slash “/“ command is the multi-purpose tool to get to all the hidden features of Roam. Type it, and you will get a list of actions that you can use. Once you learn the name of the commands, you don’t have to go looking for them. Hit slash and start typing the name of the action, and Roam will filter it out for you. Here are some examples of slash commands for things that we have already learned.
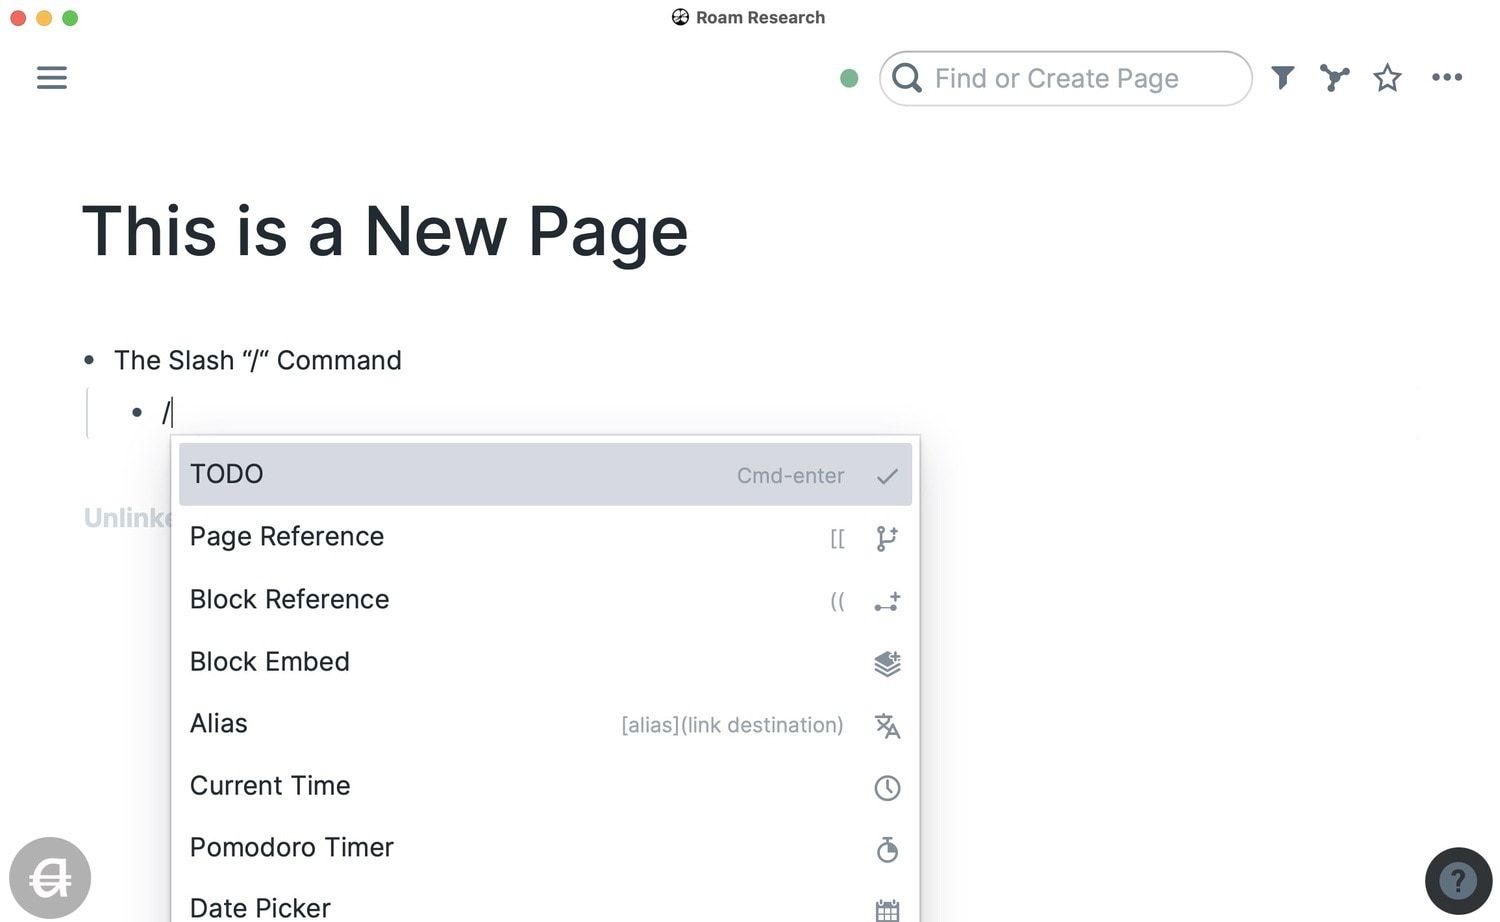
- TODO
The first command is the TODO command. You can use it to turn any block into a task. An easy way to turn a block into a task is using the CMD+Enter (Ctrl+Enter for Windows) keyboard shortcut.
- Page Reference
If you cannot remember the double-open square-bracket command, use this to link to a page.
- Block Reference
If you cannot remember the double-open parentheses command, use this to link to a block.
- Block Embed
As discussed in the Block Embed section of the article, you can use this command to embed a block on a page.
You can go inside the slash command to see what all you can do. Just remember, whenever you forget anything you get to it using the slash “/“ command.
Markdown
Roam Research uses simple markdown syntax for formatting the text. If you are not familiar with markdown, don’t worry. All the basic commands that you use in writing apps like Microsoft Word or Apple Pages work here. I am going to mention some common ones here, so you can see how it works:
- **Bold** → (double asterisks on both sides) or CMD+B
- __Italics__ → (double underscore on both sides) or CMD+I
- ^^Highlight^^ → (double caret on both sides) or CMD+Shift+H
- ~~Strikethrough~~ → (double tilde on both side) or CMD+Y
- [Link text](example.link.com) → (Linked words in square-bracket followed by link URL in parentheses) or CMD+K
Note: Replace CMD with Ctrl if you are a Windows user.
Keyboard Shortcuts
Apart from the above formatting keyboard shortcuts, there are a few more keyboard shortcuts that you should learn for convenience. If you want the full list of keyboard shortcuts, open the help menu at the bottom right.
CMD+U: Opens the Find or Create Page
Ctrl+Shift+D: Jump to today’s daily note
Tab: Indents the selected block
Shift+Tab: Unindents the selected block
Shift+Click: Open link in side-panel
Roam Research: Some Useful Tips
In this section, we are going to discuss some useful tips for using Roam Research.
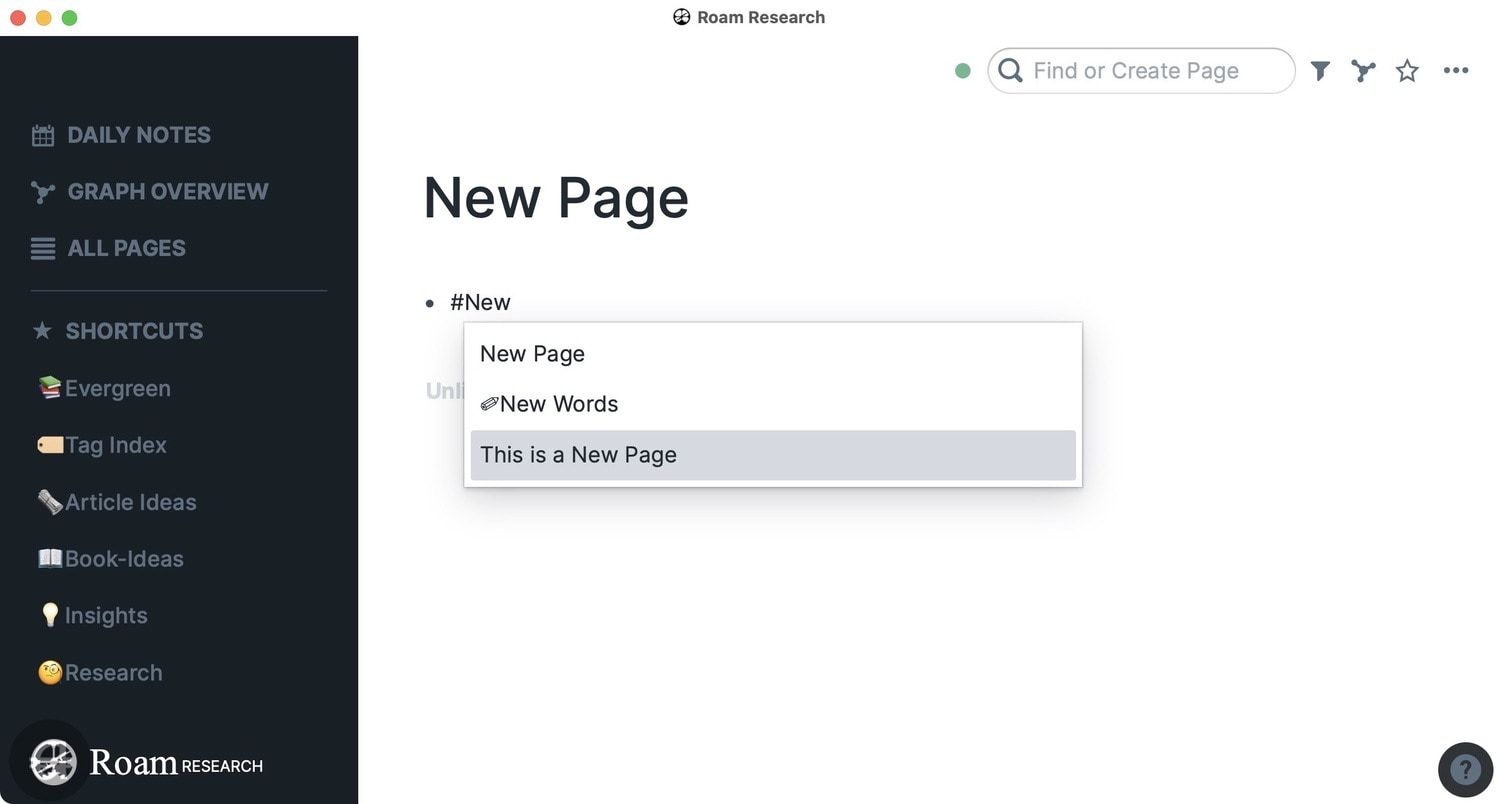
Create a New Page
There’s no obvious way to create a new page in Roam Research without linking it to an existing page first. Well, if you look closely at the caption in the Search field at the top-right, you will see that it reads “Find or Create Page”.
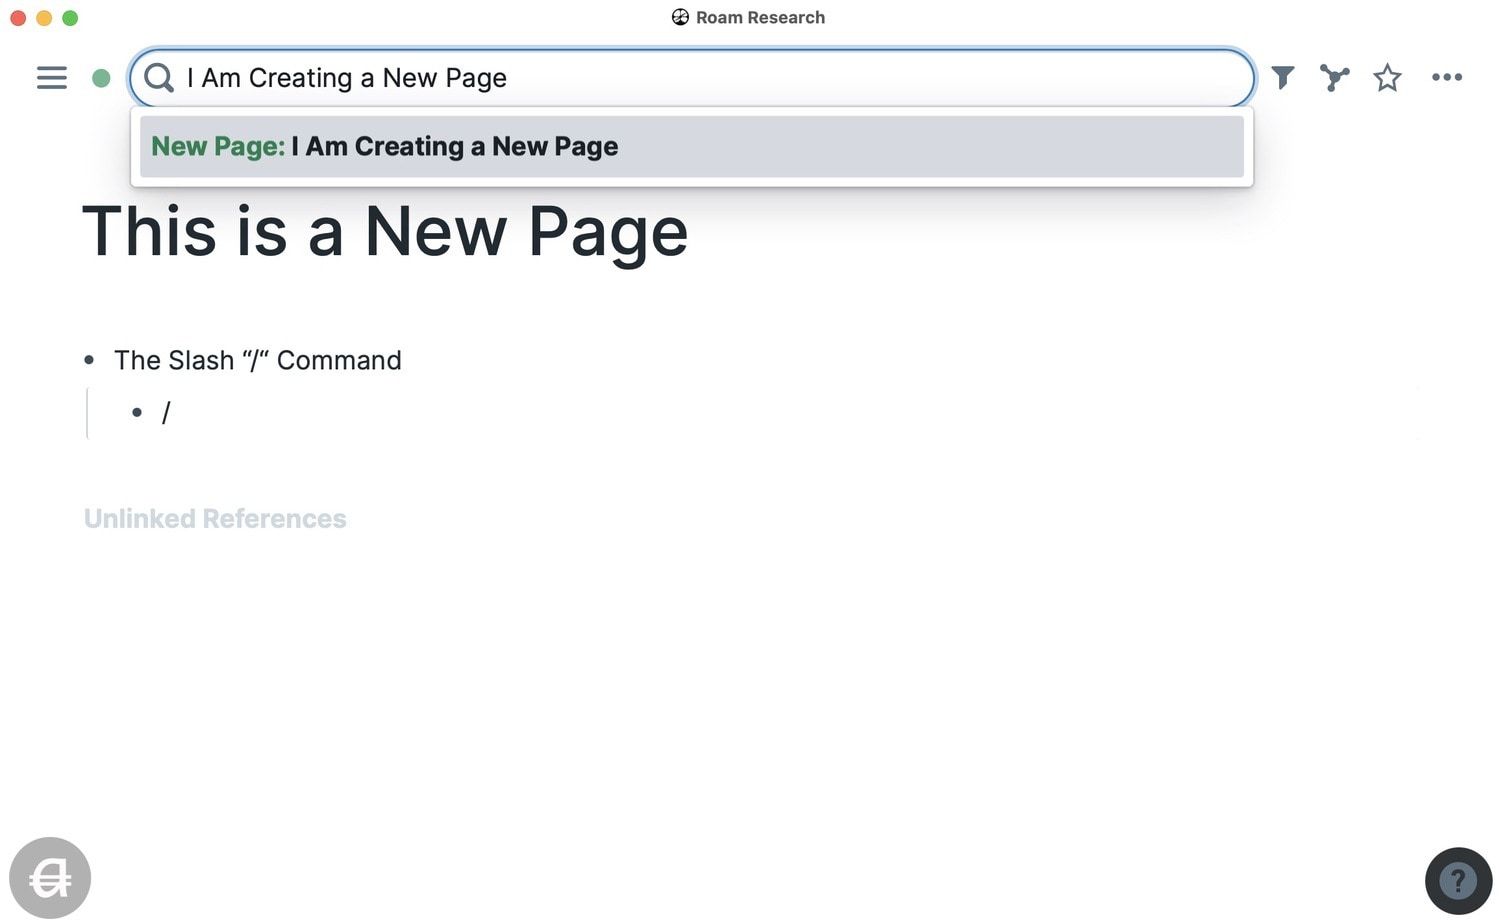
To create a new page, click on the field (or hit CMD+U) and start typing the page name. The first option will be to create a new page with that title. Hit return/enter to create the page.
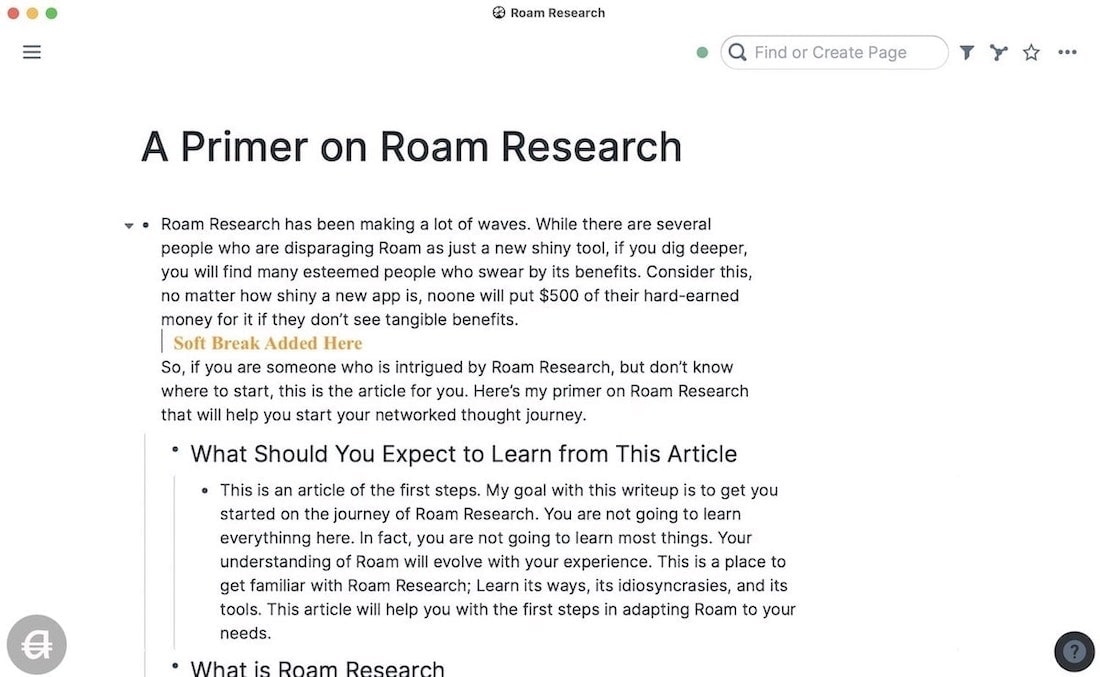
Add Soft Break
As you know, hitting enter results in the creation of a new block in Roam. But what if you just want to change paragraph and don’t want to create a new block. If that’s the case, instead of hitting enter, hit Shift+enter, and it will create what Roam calls a soft line-break. It’s the same as changing paragraphs without adding a new block.
Add a Divider
For adding a divider in Roam Research, copy and paste this code in a new block in Roam :hiccup [:hr]
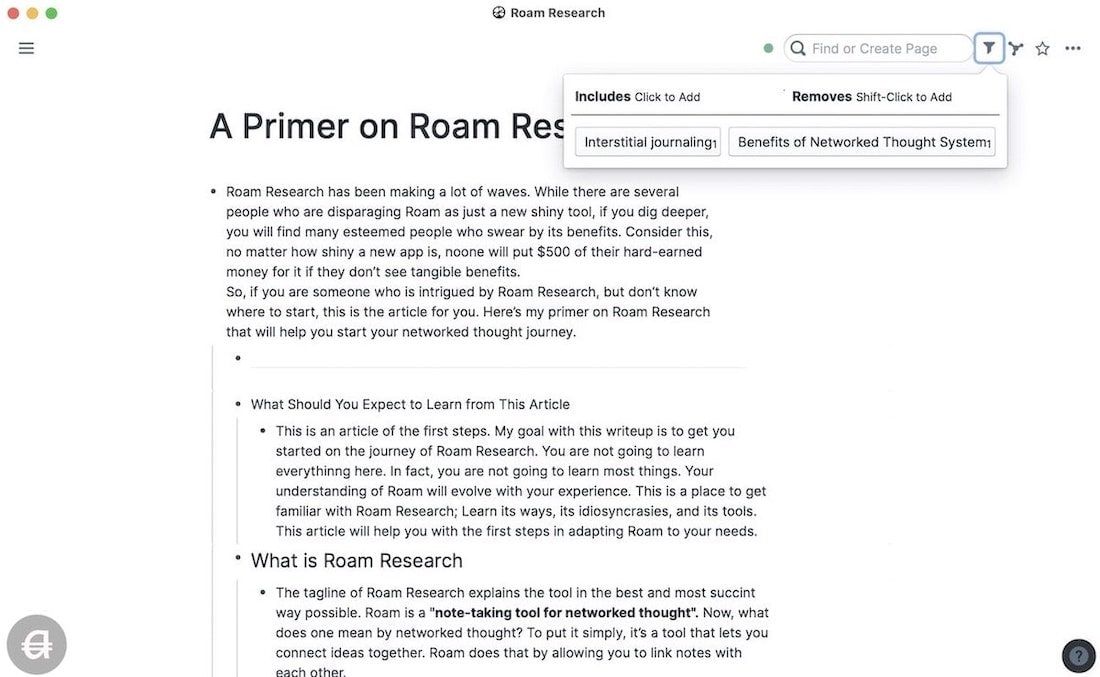
Filtering
Roam lets you filter pages using tags and linked pages. To filter a page, click on the filter icon. Then to filter by a tag, click on the tag name. To filter pages by removing a tag and keeping all the other tags, Shift-click on the tag name.
Add and Manage Tasks
To create a task, you can either use the “/“ command and select TODO or hit CMD+Enter. Hitting CMD+Enter again will mark the todo as done. Hitting it again will remove the todo.
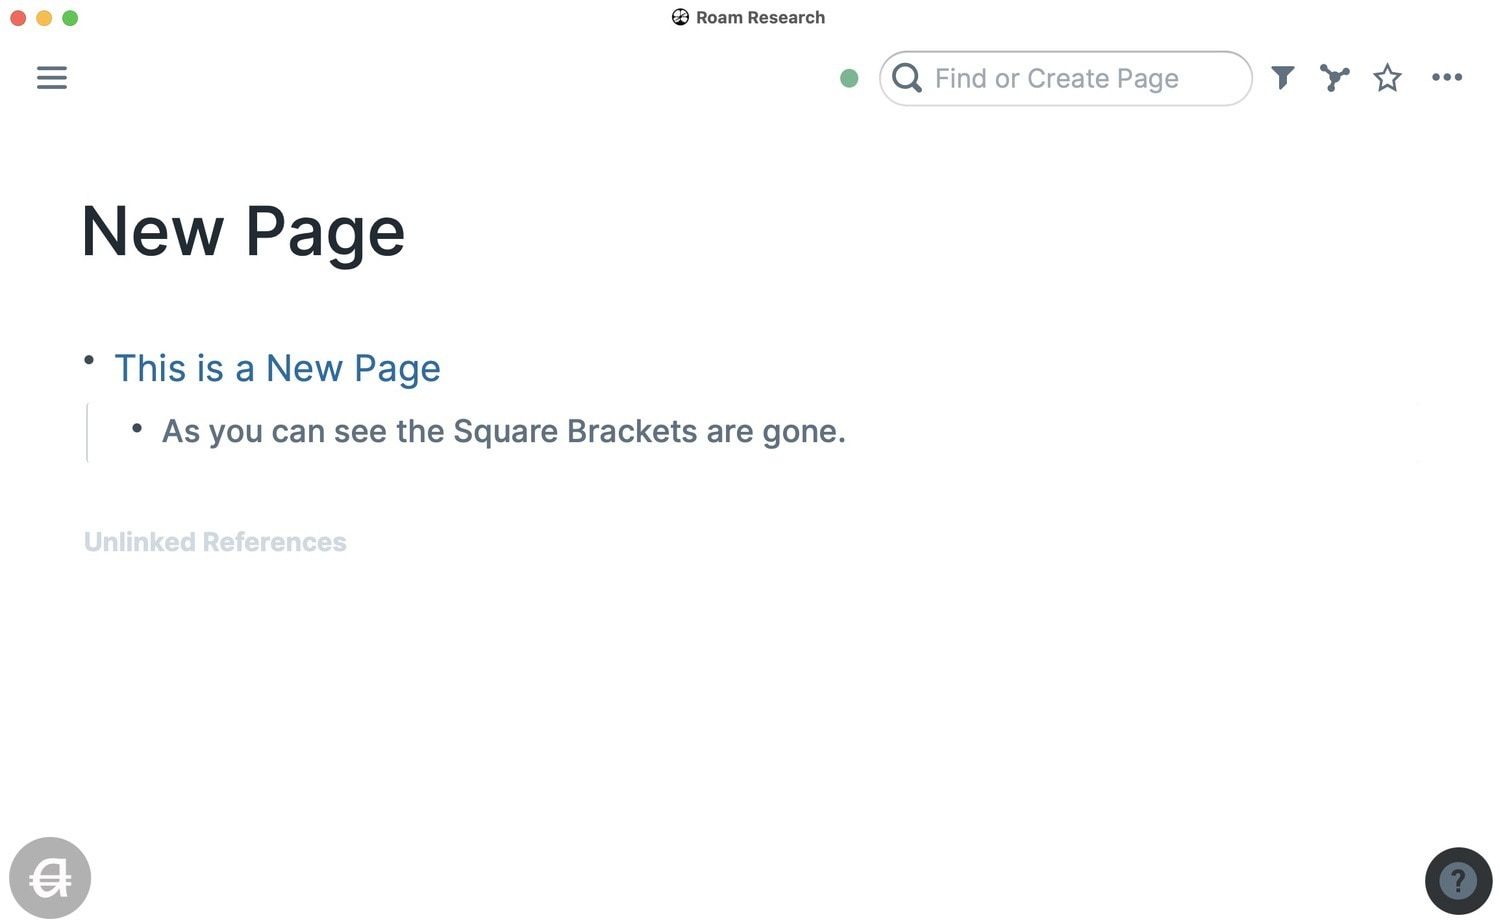
Remove the Square Brackets
By default, Roam Research shows you square brackets around a linked page. To remove the brackets, hit Ctrl+c+b. Hit it again to bring the brackets back. If you forget the command, you can find it in the help menu.
Roam Research Themes
I like the default Roam Theme, but there’s an easy way to change it if you want a different look. You can change Roam Themes either by using a Chrome Extension (Roam Themes Extension) or using the built-in CSS.
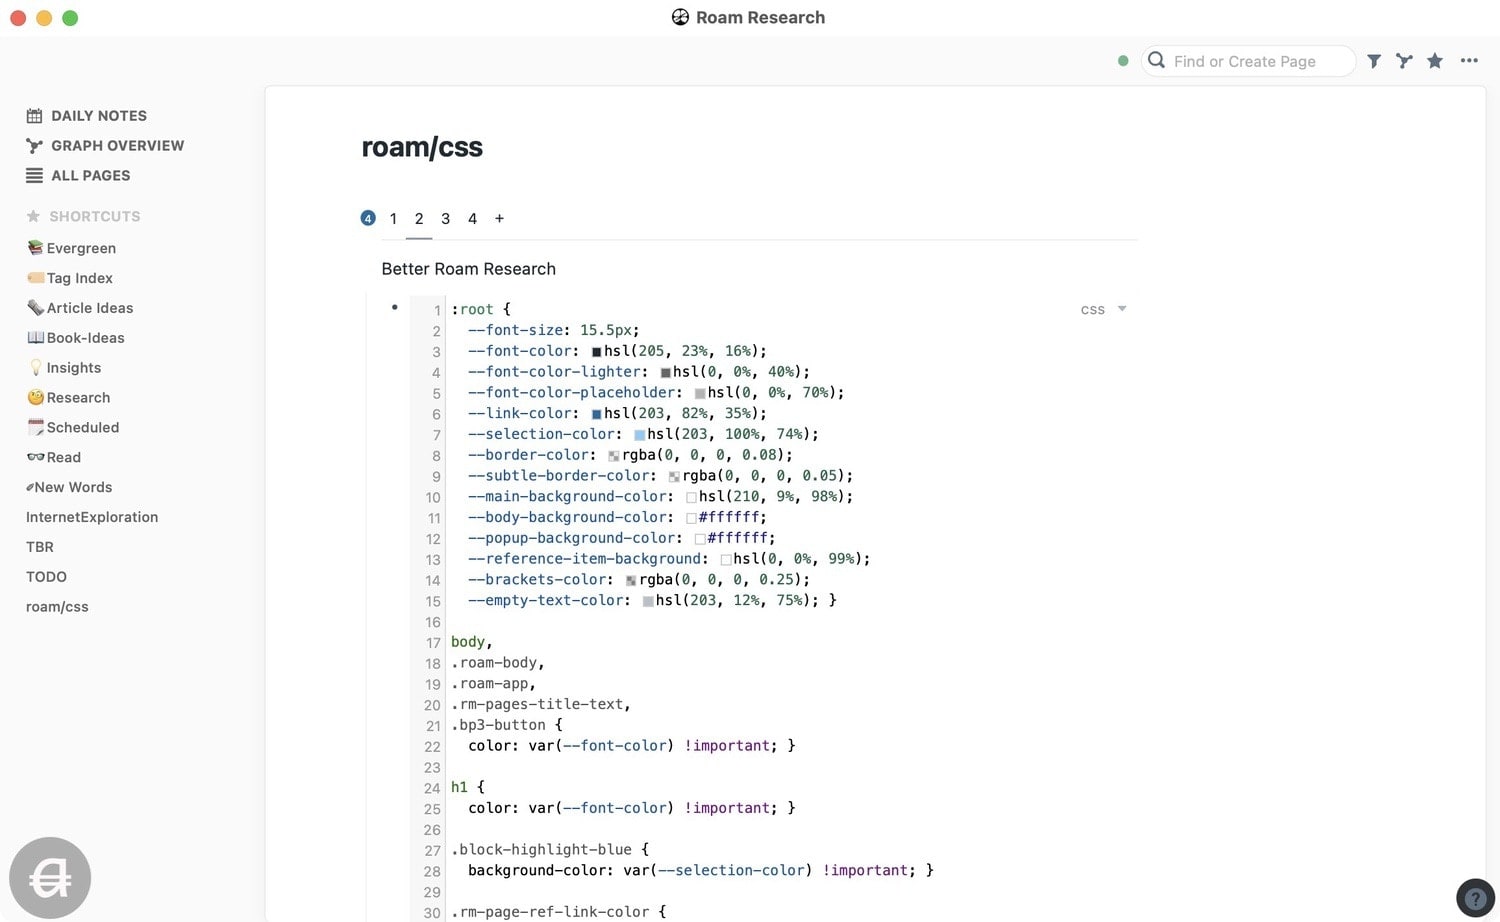
Using built-in CSS to apply custom themes will be a tutorial in itself. I have already run long in this article, best you watch this simple YouTube video that shows you all the steps.
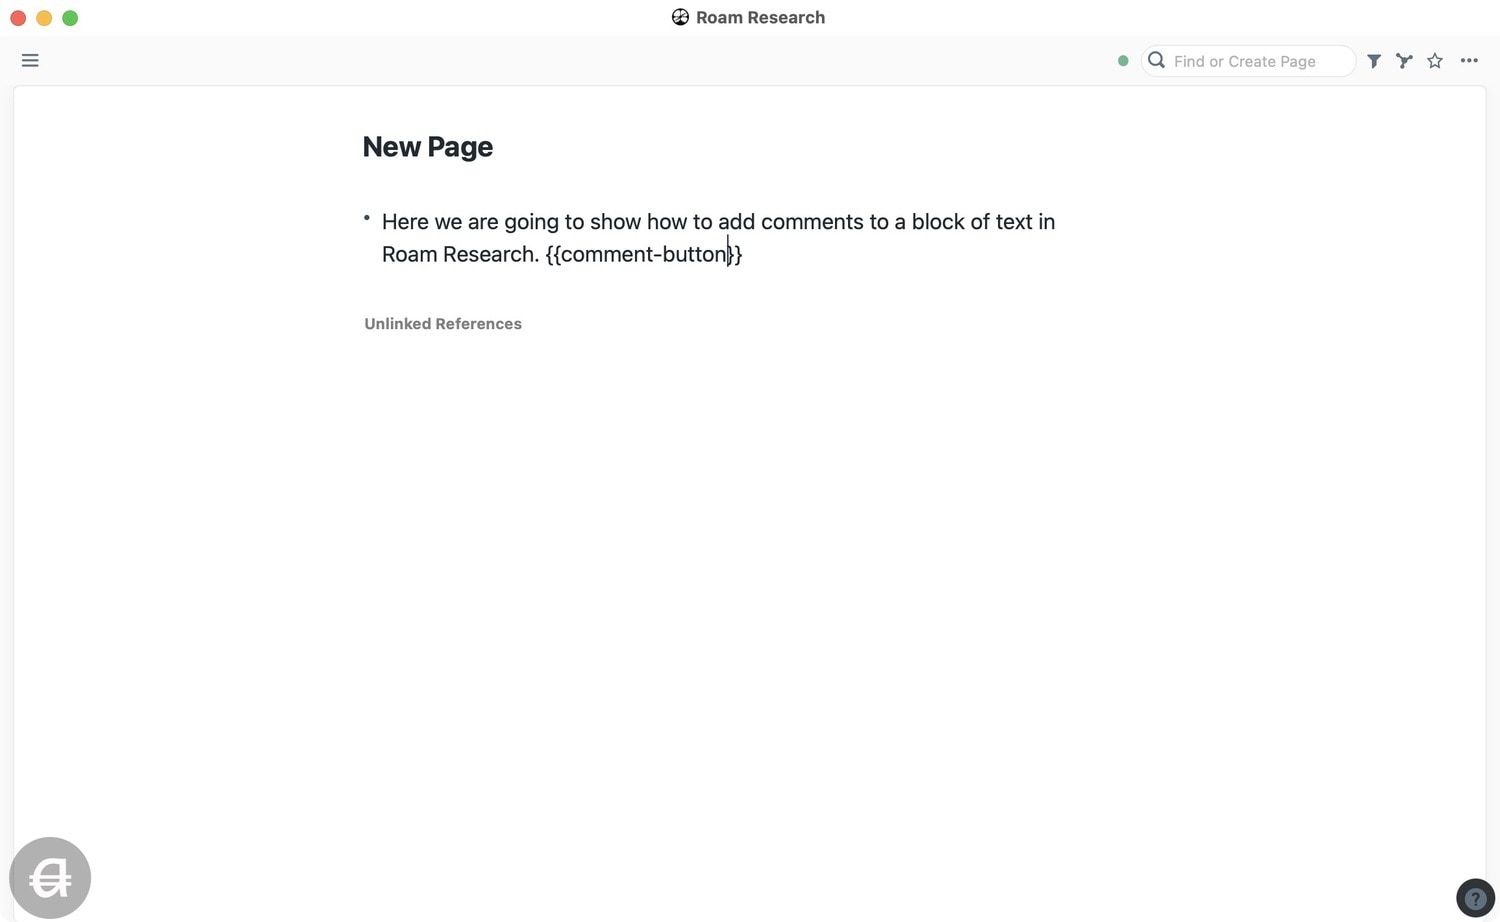
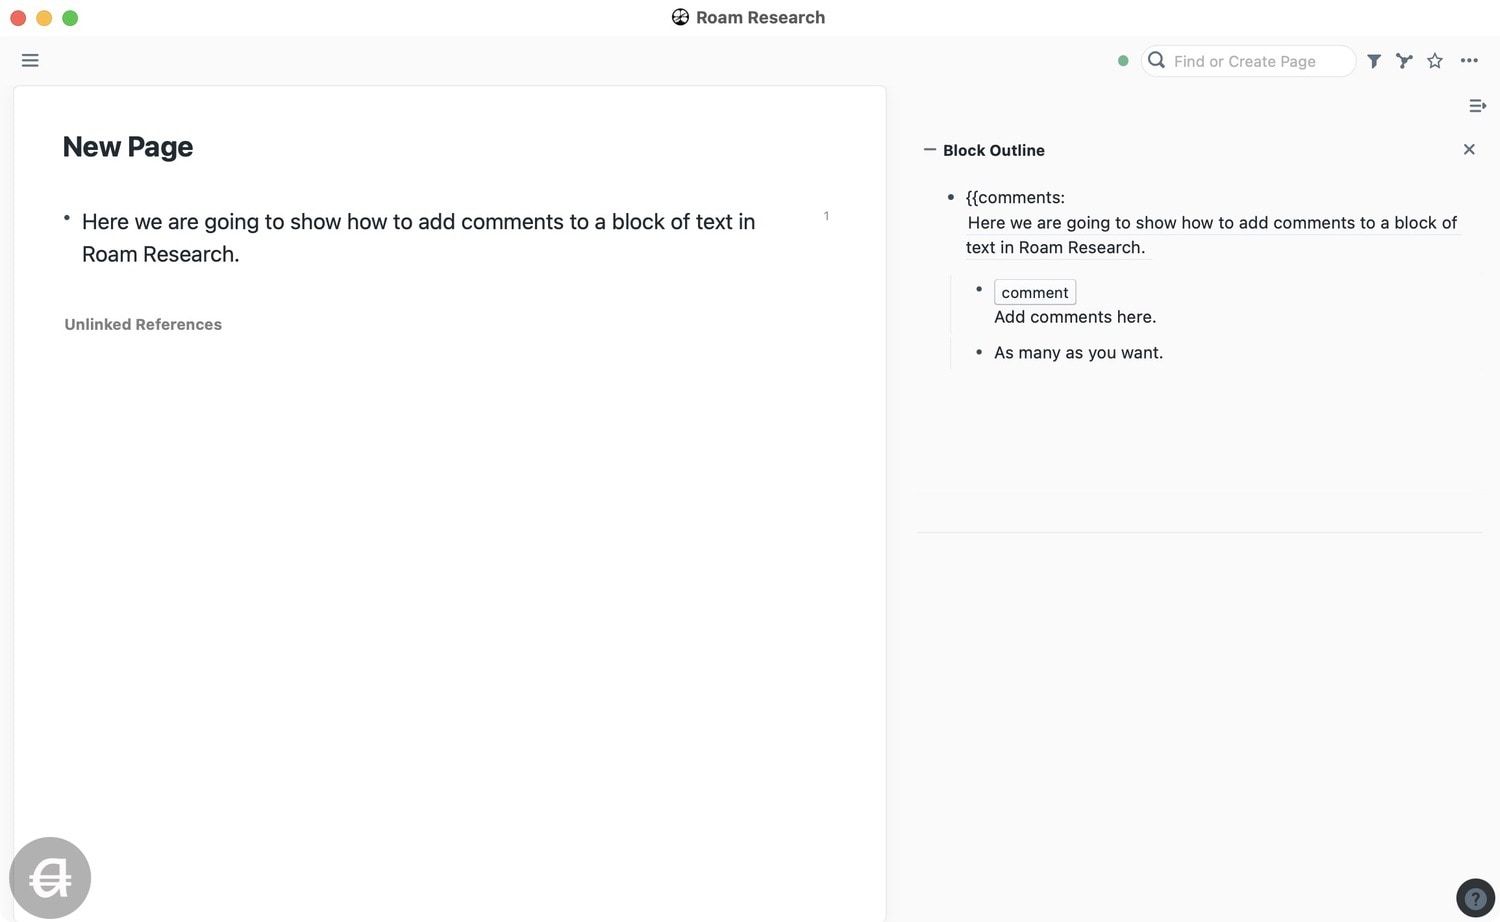
Add Comments to Blocks
Adding comments to a block is a good way to add a reminder to yourself for any changes that you want to make. It’s a hidden feature that is not accessible using the “/“ command. So, either remember the command or save it somewhere. To use comments in a block, type the below command at the end of the block.
{{comment-button}}
After you add the command, you will see a comment bubble (If you can’t see it, hover over the block and it will become visible).
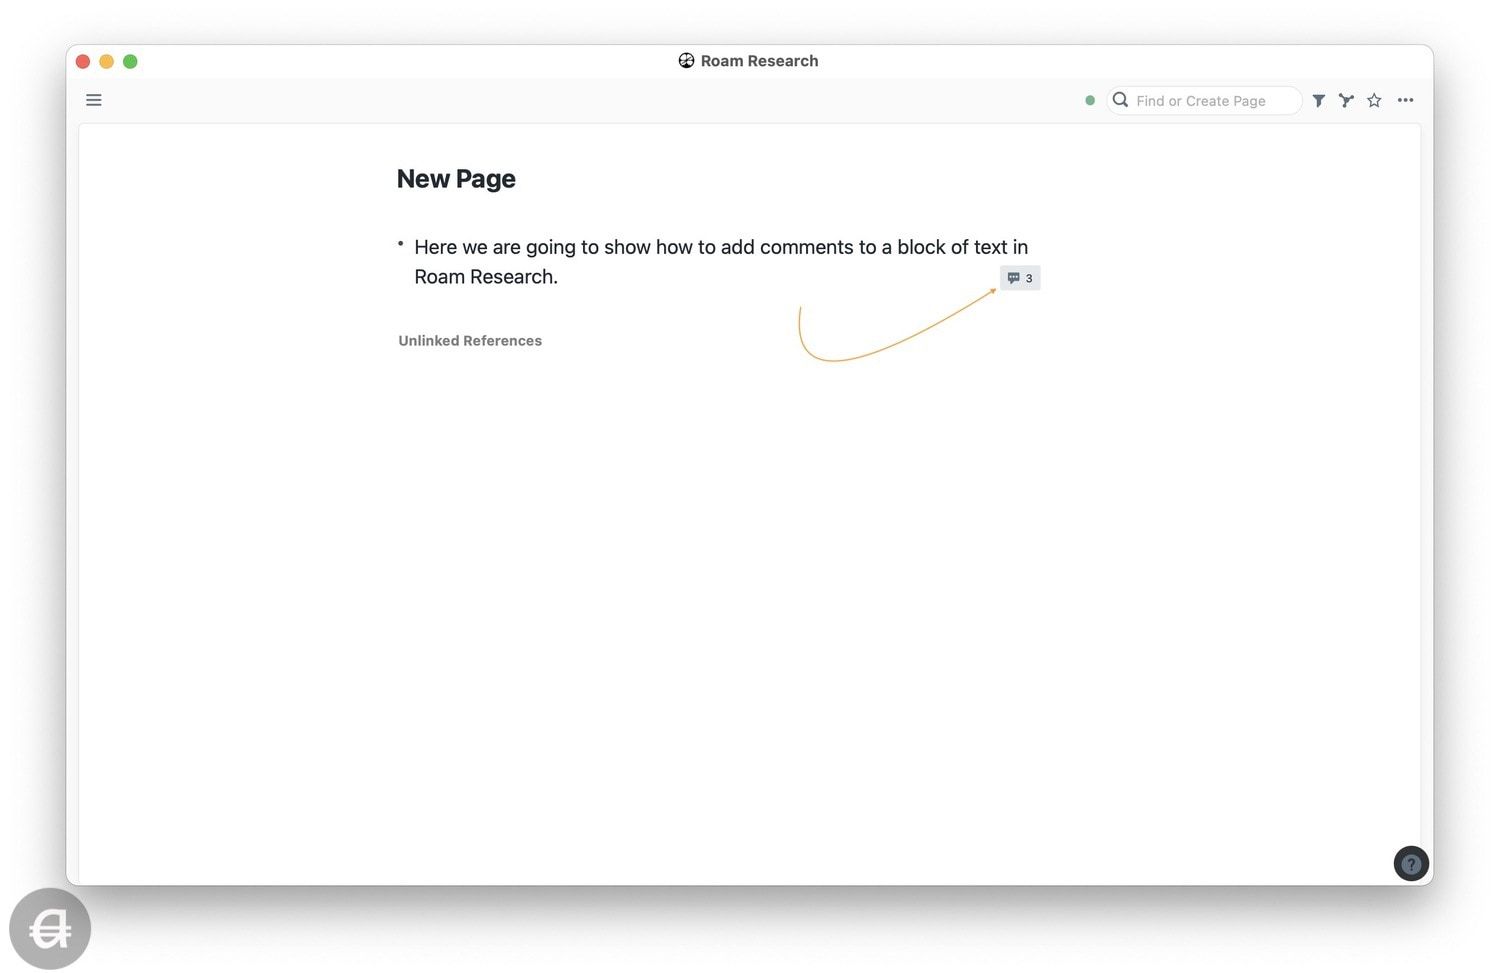
Click on the comment bubble to open it in the side panel. Add any comments you want to add, and you are done.
Add Versions to Blocks
When editing a piece of text, sometimes we might want to keep track of the changes that we have made. You can do this in Roam Research by using versions. To add a new version to block, use the keyboard shortcut (Ctrl+,). This will add a version, and you will see a number appear on the block.
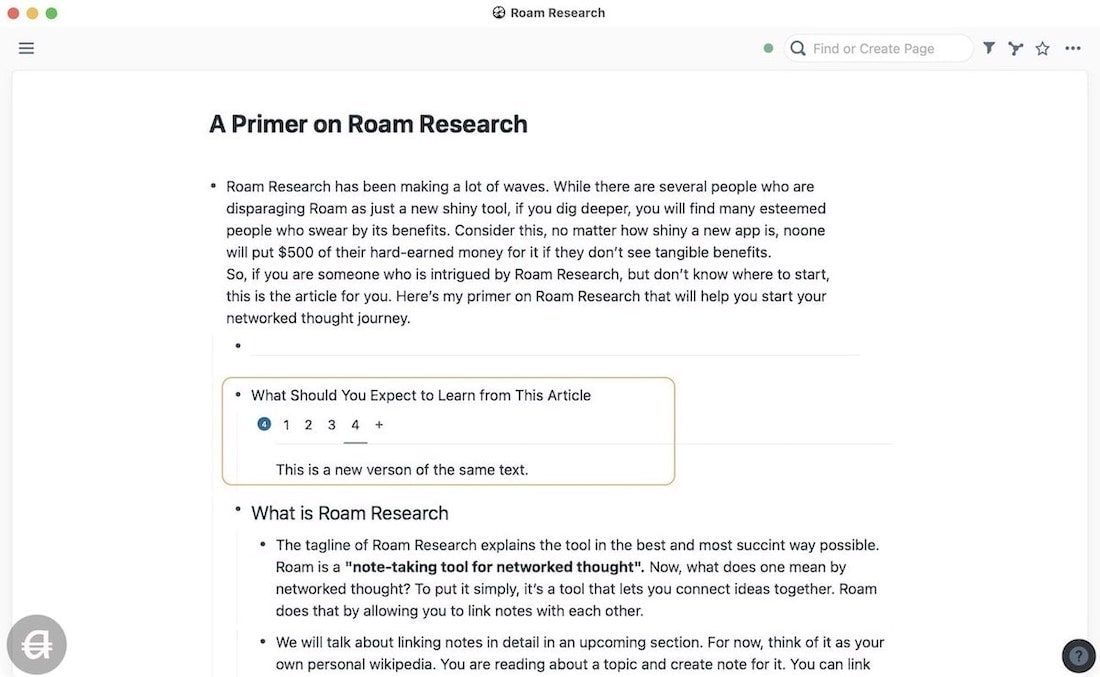
To navigate between different versions, use the "Ctrl+→" and "Ctrl+←" keyboard shortcuts. You can also click on the number to expand the versions and navigate using the mouse. Currently, the versioning system is a bit finicky, so always take care while using it.
Check out Roam Research Extensions
Like the theme extensions I mentioned above, there are many browser extensions for Roam Research that can help you add extra features. You can add spaced repetition, use templates, extract highlights from articles, and more. Here are some important extensions to check out:
Use the PWA
Roam Research doesn’t offer desktop or.mobile apps yet. If you don’t want to use it in a browser, you can install its PWA (progressive web app). To install the PWA, click on the 3-dots menu at the top-right and select install PWA option.
Roam Research Pricing: The Elephant in the Room
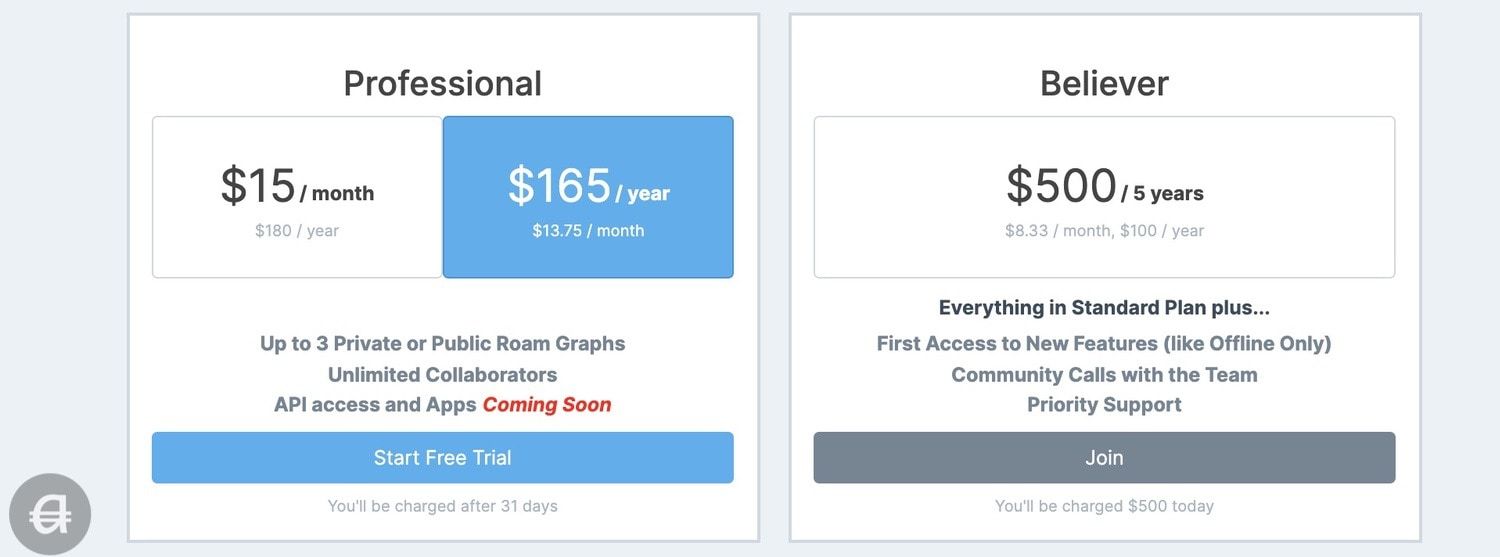
The biggest hurdle to cross for using Roam is its pricing. So, it’s only fair we talk about it. Roam costs $15/month or $165/year. Right now, you can also join under a believer plan that costs $500 for 5 years. That cuts down the monthly price in half, but you will have to pay $500 in one-go.
Other than that, if you are a full-time researcher or under 22 years of age or having serious financial difficulty, you can get Roam at half the price (or even lower). You will have to submit a form on their website for this.
So, before you start learning or using the software, be sure that you can afford it. If you cannot afford it, apply for the discounted price, and see if you can get it.
If you can’t afford it, I have mentioned some alternatives that you can use. But keep in mind, none of them offer all the Roam Research Features.
Other Similar Note-taking tools
If you can’t afford Roam’s steep pricing or are looking for an alternative for any other reason, you have several options. None of them offer all the features that Roam does, and they surely don’t look as refined, but you can make them work.
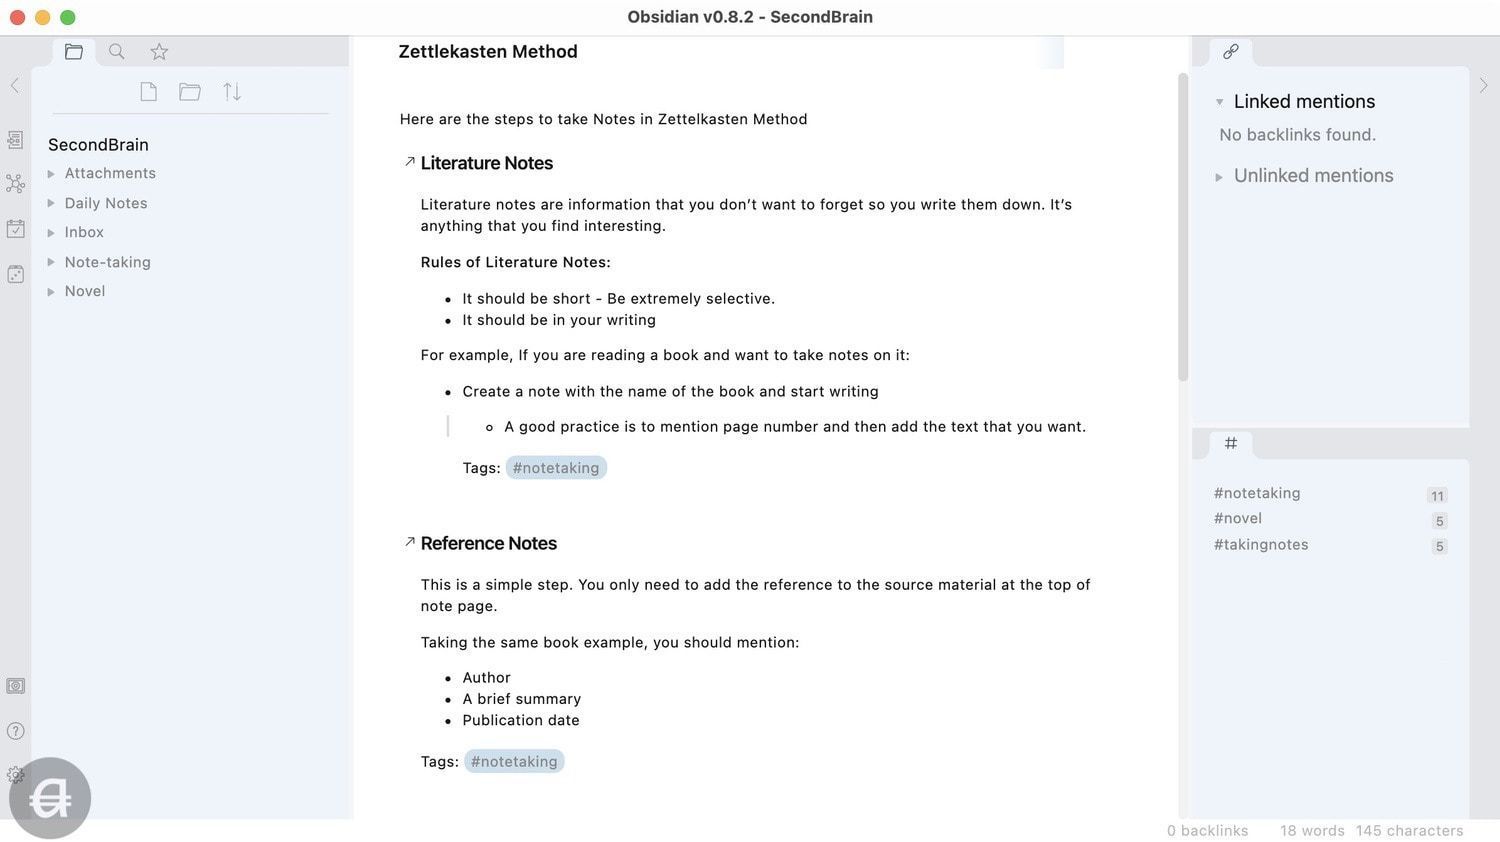
Obsidian is the first app that comes to mind. It has most of the features of Roam, and it's free to download and use. The features include page links, backlinks, tags, graph overview, and more. Obsidian doesn’t do block embeds and block references. It does let you link to sub-headings inside a note. Another benefit of Obsidian is that all your files are in plain-text. So, yes check it out.
Many other apps are vying to replace Roam. Some kind folks have created an awesome resource page that lists all the apps that are working or are in development. Click on the link to check them out.
Roam Research: Final Thoughts
Roam Research is a tool that can enhance your thinking. The idea of the second brain has been around for a while, but none of the apps could help you build it. Roam Research is the first such app that lets you truly create your second brain.
I have benefitted immensely from Roam. If it was not clear from the screenshots, this whole article was outlined, drafted, and written in Roam Research. And it all started with one note.
As I said at the start, you don’t need to go all-in on Roam Research on day one. Start slow, take notes everyday, and in no time, you will have a database that will help you think better, learn faster, and produce more.


