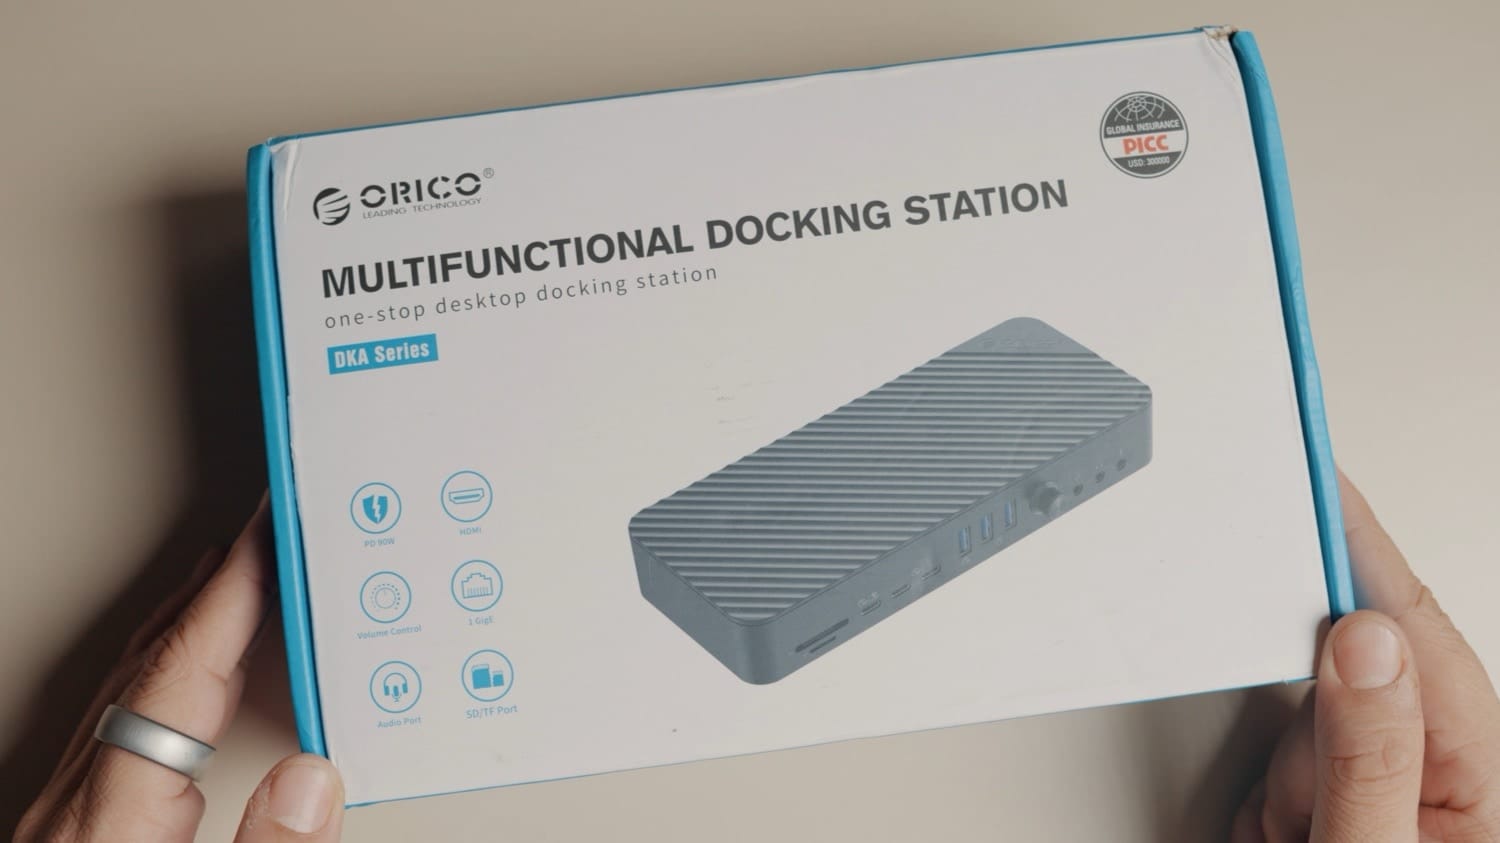
Best Affordable Docking Station for MacBook (ORICO DKA20 Review)
Affordable 20-in-1 ORICO Docking Station for MacBook with USB-C PD 60W, 4K video outputs, Ethernet, multiple USB ports & SD/TF slots, headphone/mircophone jacks — perfect hub for productivity.

If, like me, your laptop is your primary workstation, investing in a good docking station is well worth it. There are three major advantages of using a docking station. You get access to all the ports you need, can connect your MacBook to multiple monitors, avoid using dongles, and eliminate dangling wires.
That said, most docking stations cost upwards of $200, taking them out of reach of most users. But what if I told you there’s a laptop docking station you can get for around $100, which gives you access to 20 ports?
Today, I will review the ORICO 20-in-1 laptop docking station and explain why it’s the perfect affordable docking station for your Mac, if youare willing to make a few compromises.
Use coupon code 16ORICODKA to get 20% Off
ORICO 20-in-1 docking station unboxing
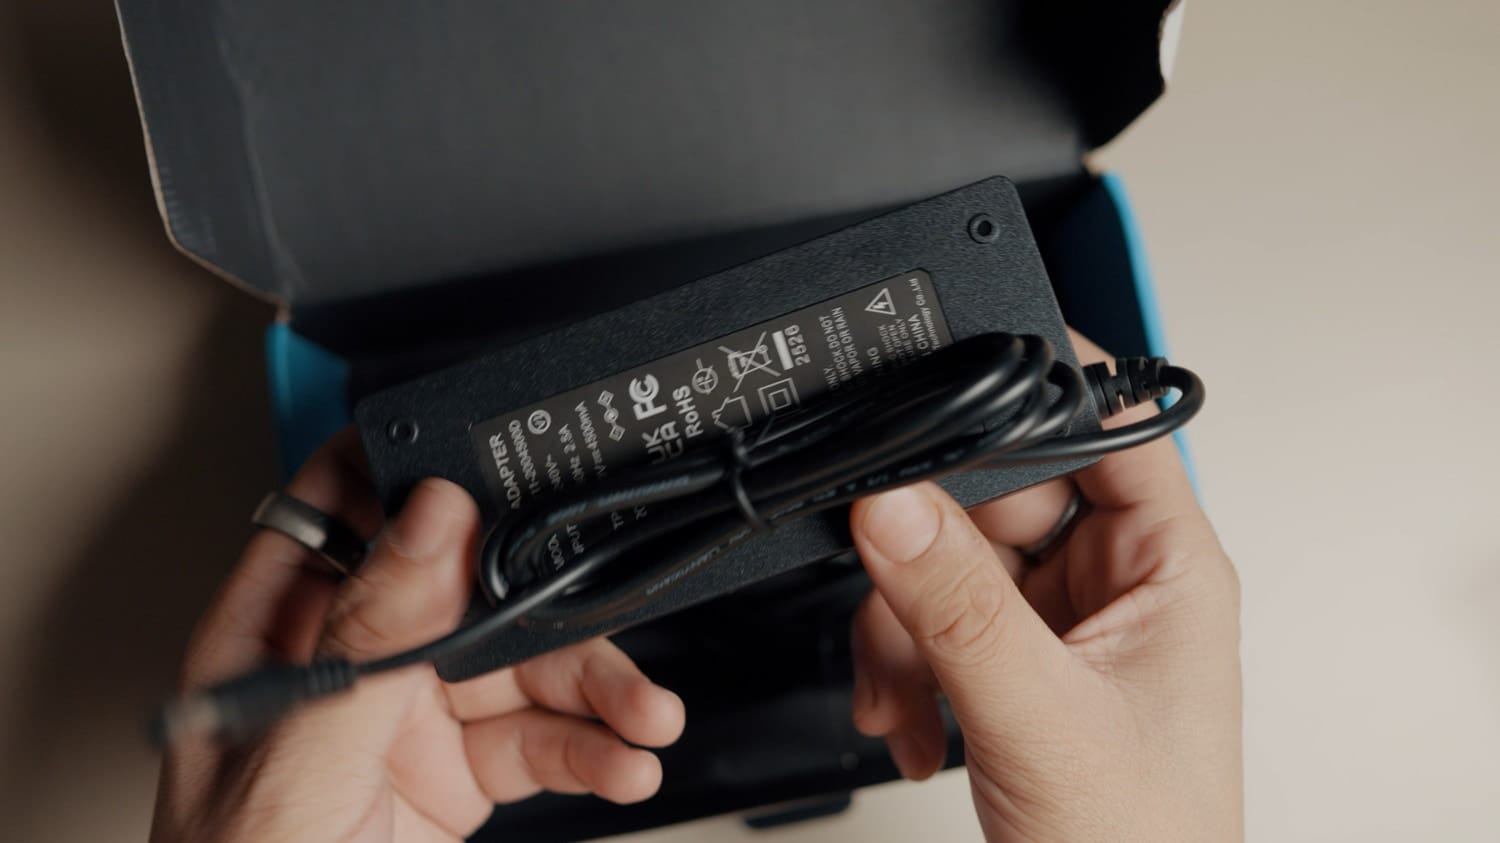
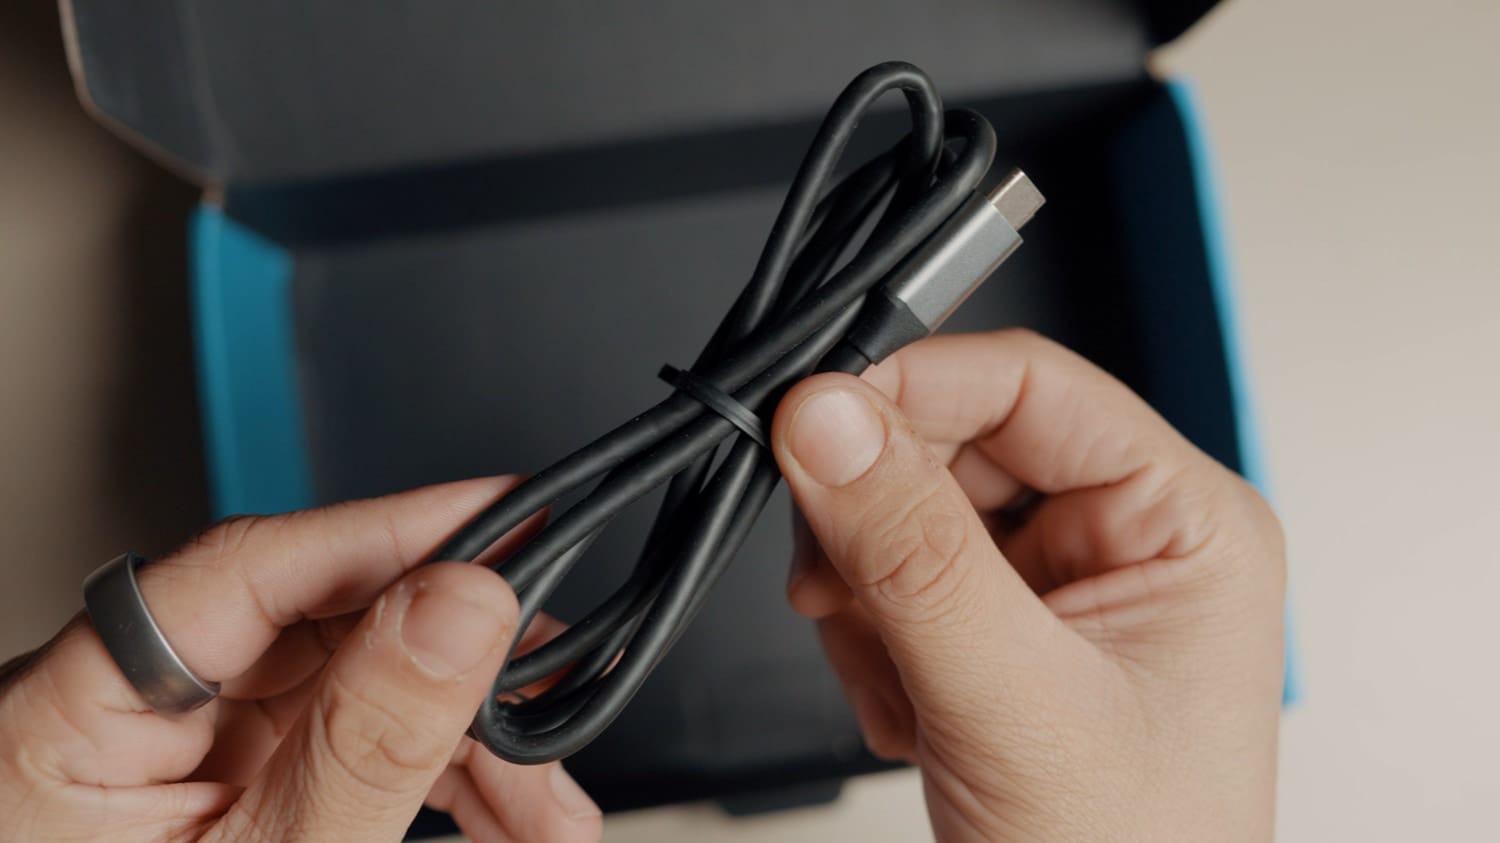
The ORICO docking station comes in a regular cardboard box. Inside the box, you get the docking station, some paperwork, the power adapter, and a USB-C to USB-C cable.
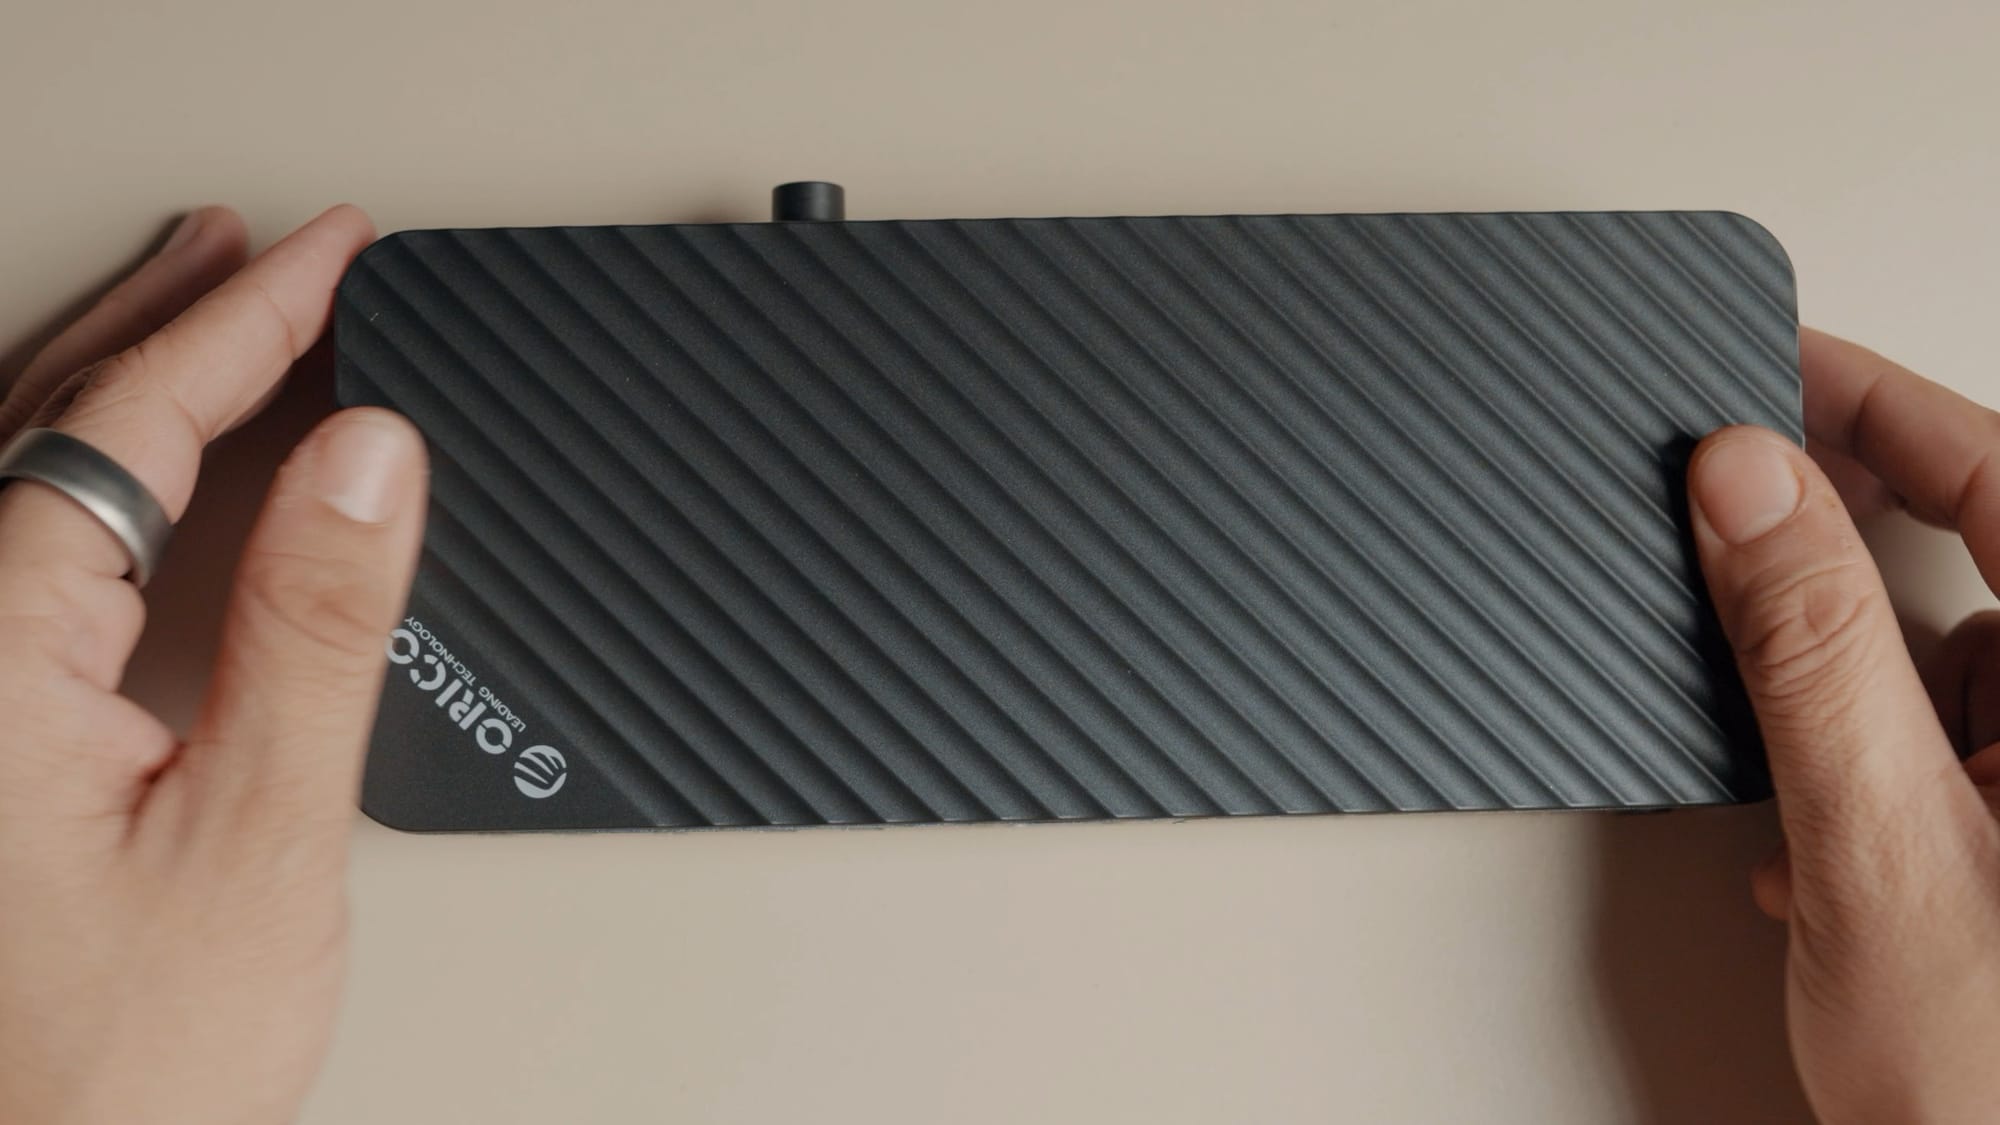
The docking station isn’t the most compact, but it’s solidly built and not overly heavy. It features bottom vents for cooling and offers plenty of ports on both the front and back.

I like the port layout here, which I’ll discuss in more detail later. For now, here’s a look at the ORICO docking station from all sides.
ORICO docking station 20 ports
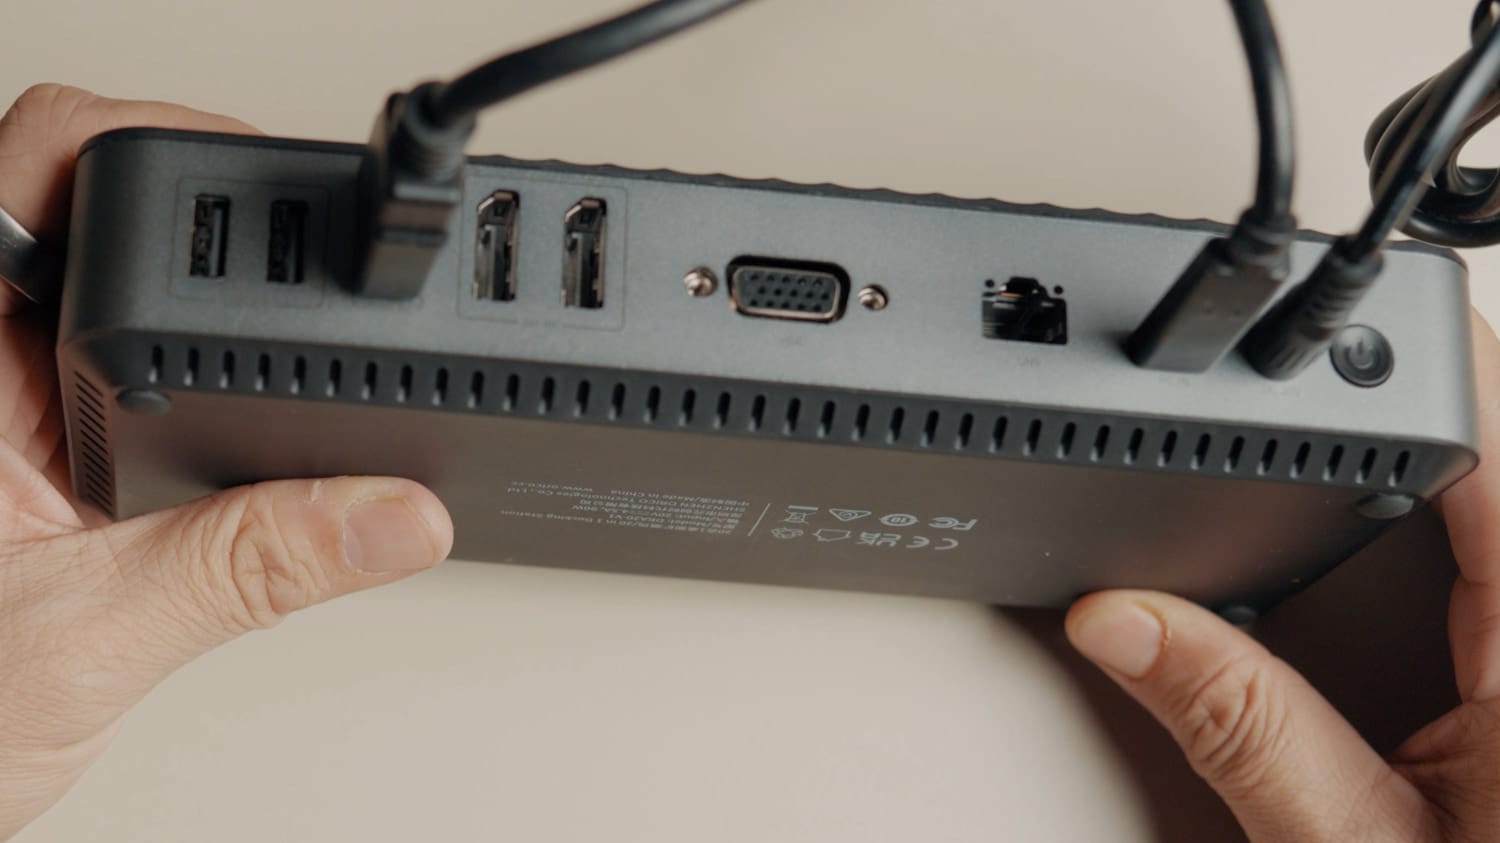
Now, it’s time to talk about all the ports you get with this docking station. I will start with the back.
From left to right, you get two USB-A 2.0 ports. I love this as it’s perfect for attaching your mouse and keyboard wireless dongles and keeping them out of sight.

Then you get one HDMI port and two Display ports, all of which can output 4K resolution at 60Hz. Note that for macOS, the display ports will output mirror images, so even if you connect three displays, two of them will mirror each other.
Next to these ports is a VGA port capable of outputting to a 1080p monitor at 60Hz. If you’re still using an older VGA monitor, the dock has you covered.
To the right of the VGA port, there’s a 1Gbps RJ45 LAN port for high-speed internet, a USB-C PD port that connects to your laptop for data and delivers up to 60W of passthrough charging, the dock’s power input, and a power button.
The 60W max power delivery means that the docking station is not suitable for Apple Silicon Max chips, as they can draw upwards of 100W of power under full load. The dock will still work, but it won’t be able to keep your MacBook charged.

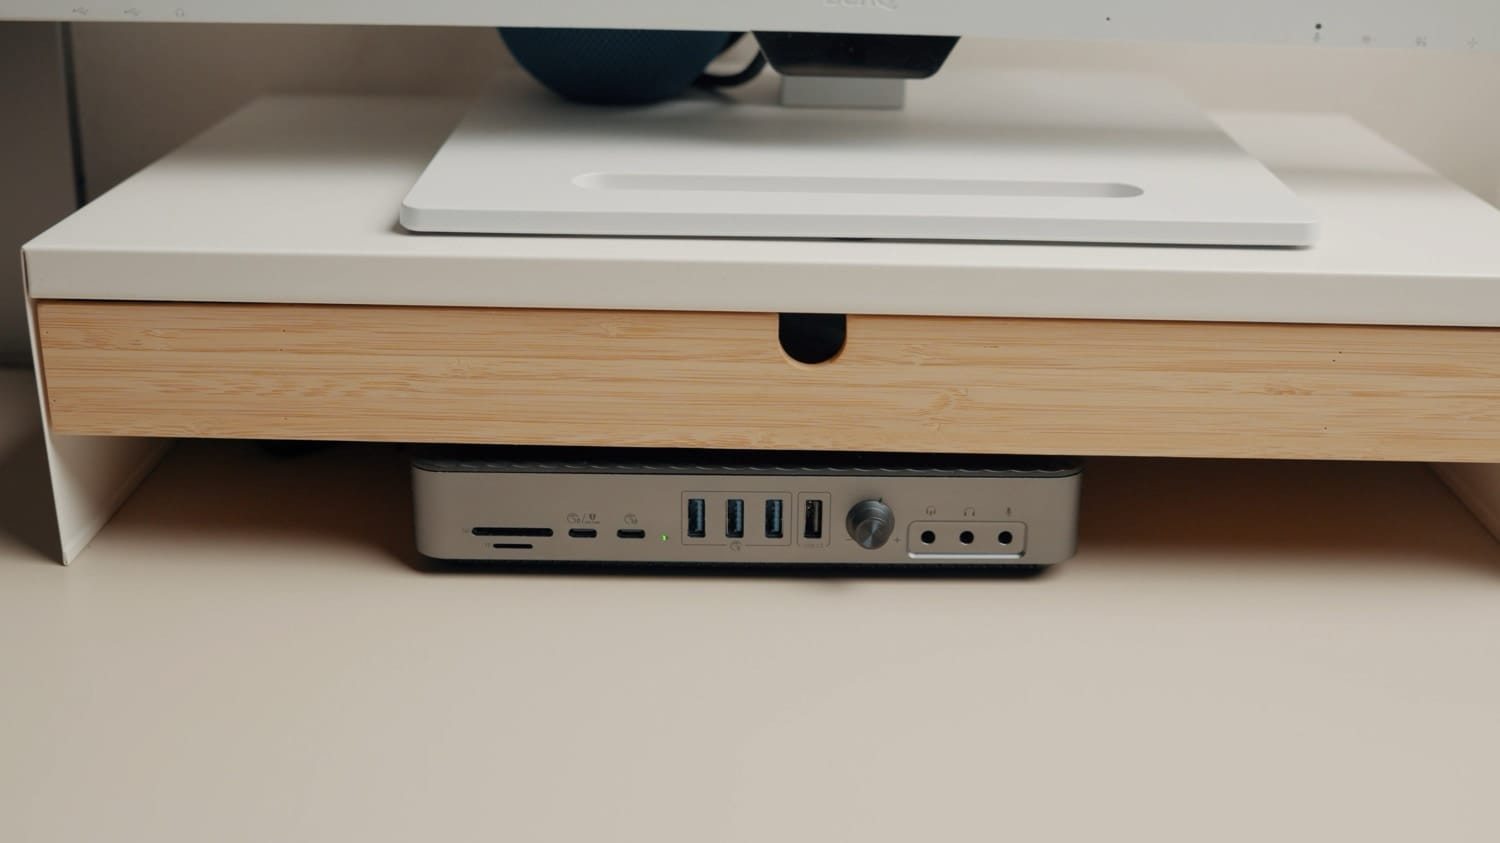
At the front, the dock features a full-size SD card slot and a TF card slot with 480 Mbps transfer speeds. To the right, there are two USB-C 3.0 10Gbps ports, one of which can deliver 18W of power, perfect for charging your iPhone or iPad.
Next are three USB-A 3.0 ports with 5 gigabit transfer speed and a USB-A 2.0 port. Finally, there’s a volume knob to control the volume of the headphones connected to the dock.
I like that the dock includes separate headphone and microphone jacks, as well as a combined headphone/microphone jack, ensuring compatibility no matter what headphones you use.
Connecting the ORICO dock to Mac
Now that we have looked at all the ports, let’s connect and see how it works. The first step is to connect the dock to its power supply. Then connect the display or HDMI ports to the external monitors. Finally, connect the laptop via the USB-C port and the included cable.
Since I have only one external monitor, I have connected it via HDMI. If you have a fast internet connection, you can take advantage of a wired connection. Since my internet connection tops out at 100Mbps, it doesn’t make sense for me to run the wire.
With everything set up, when you are ready, hit the power button, and the dock should start functioning.
ORICO docking station in action
In the introduction, I discussed three benefits of using a docking station, one of which was cable management. Since the ORICO docking station has all the connectivity ports at the back, I can run all the wires from behind my desk via the cutout in the Ikea Elloven desk stand. As you can see, all the cables are hidden, giving my desk a clean look.
At the front, I get access to all the ports I need. I can connect my SD card to transfer camera footage, my USB-C external SSD to archive files I don’t need, and a USB-A pen drive for quick file transfers. My desk is clean and devoid of dongles.

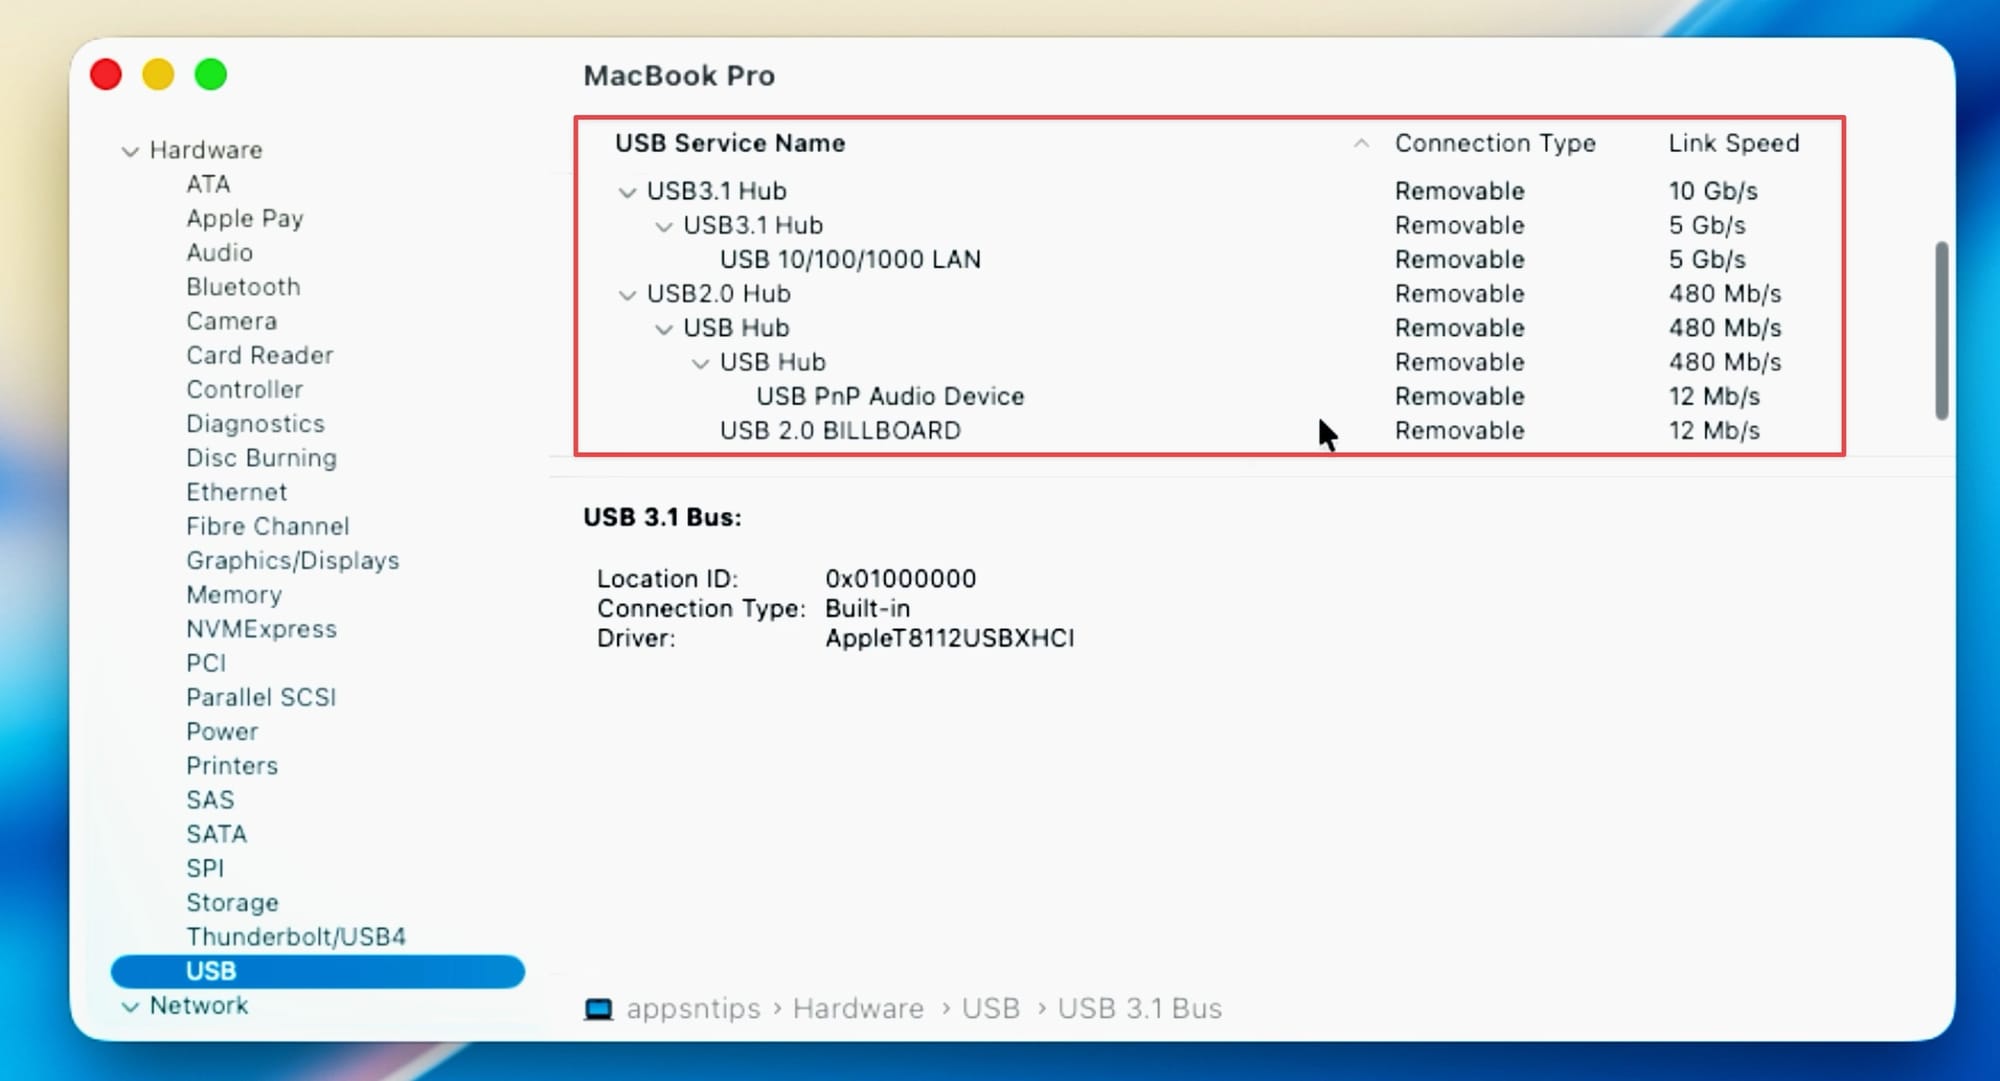
Finally, let’s see how macOS is reading the ORICO dock’s transfer speeds.
To do that, click on the Menu while holding the Option (⌥) key, and open the System Information window.
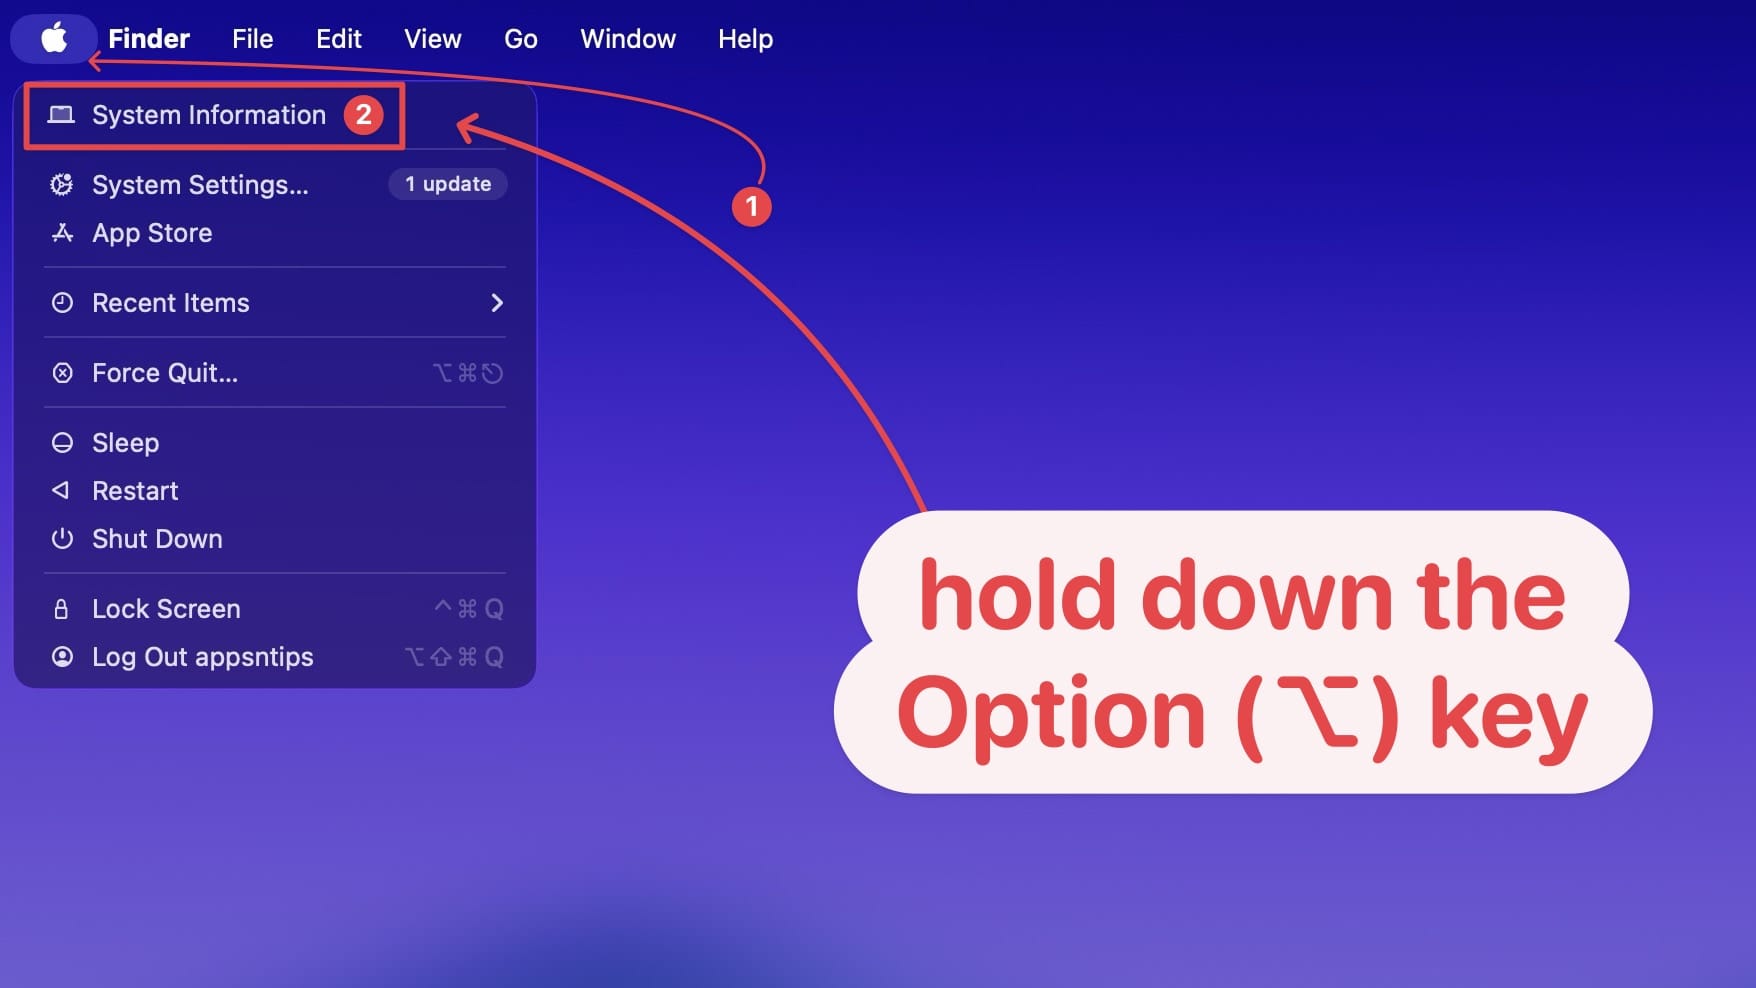
Now, click on USB under Hardware, and it should list the dock, and yes, it does. See the removable USB hubs, this is the ORICO dock, and it is showing the 10 gigabits and 5 gigabits ports, and the 480 megabits SD card and USB-2.0 ports.
ORICO 20-in-1 docking station: compromises
You can get the ORICO docking station for around $100, so of course, there will be some compromises. Firstly, the dock only supports 60Hz output, so you will not get a 120Hz high-refresh rate.
It’s not a big issue for Mac users, but if you want to use this dock with your gaming PC, you won’t get the smoothest gameplay.
Secondly, it only delivers 60W passthrough charging, which is not enough for 16-inch MacBook Pros.
Finally, the SD card transfer speeds are slower. ORICO could have built a faster SD card reader.
Use coupon code 16ORICODKA to get 20% Off
ORICO 20-in-1 docking station review: final thoughts
The ORICO 20-in-1 docking station is not perfect. But it is a value-for-money purchase. If you can live with its compromises, you will get an excellent MacBook dock for about $100, which is a steal in my opinion. What do you think about this dock? Let us know in the comments below.