How to Set Battery Charge Limit on MacBook
Change this one simple setting to add years to your MacBook's battery life.
If you use your MacBook as your main desktop and keep it connected to power for the entire workday, there is some good news for you. With its latest macOS 26.4 update, macOS finally allows you to set a battery charge limit on your Mac. Here’s how to do it.
Set your MacBook battery charge limit to 80% or higher
Now, you no longer need to install a third-party app to set a battery charge limit on your Mac. To do this:
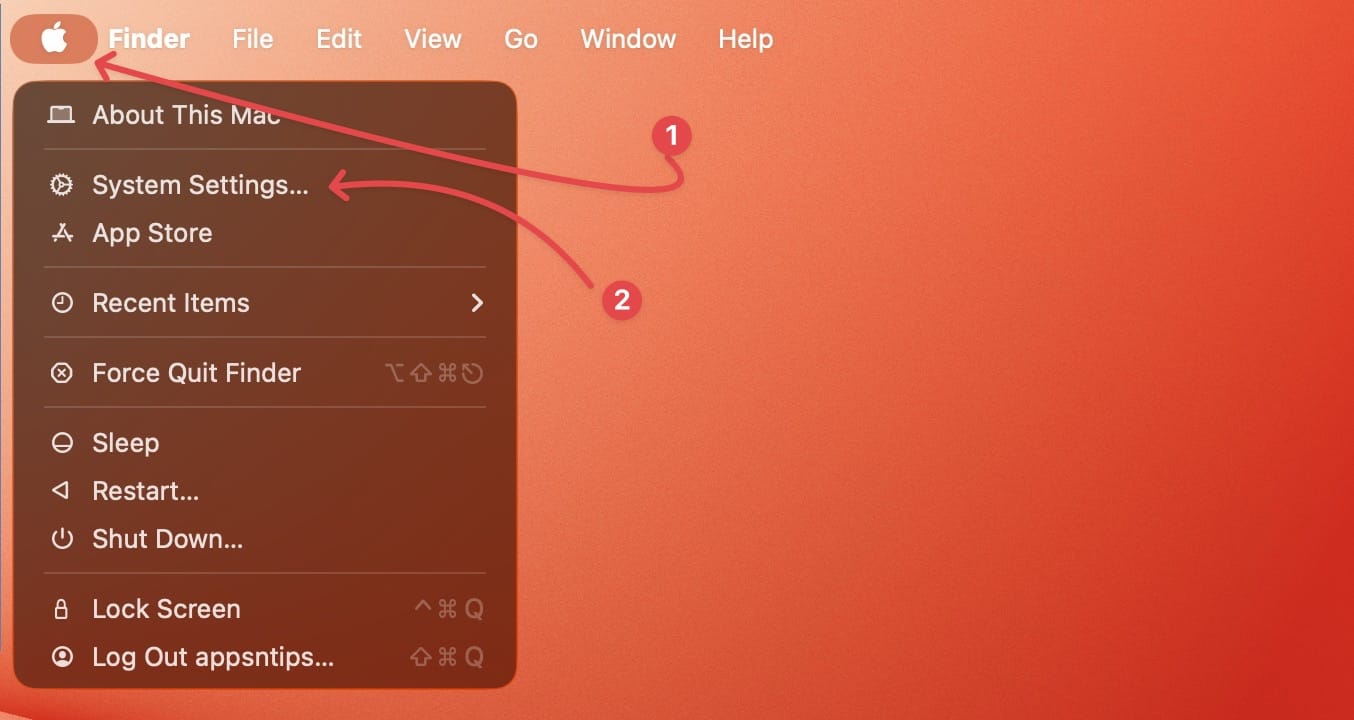
1. Use the Apple () Menu to open the System Settings on your Mac.
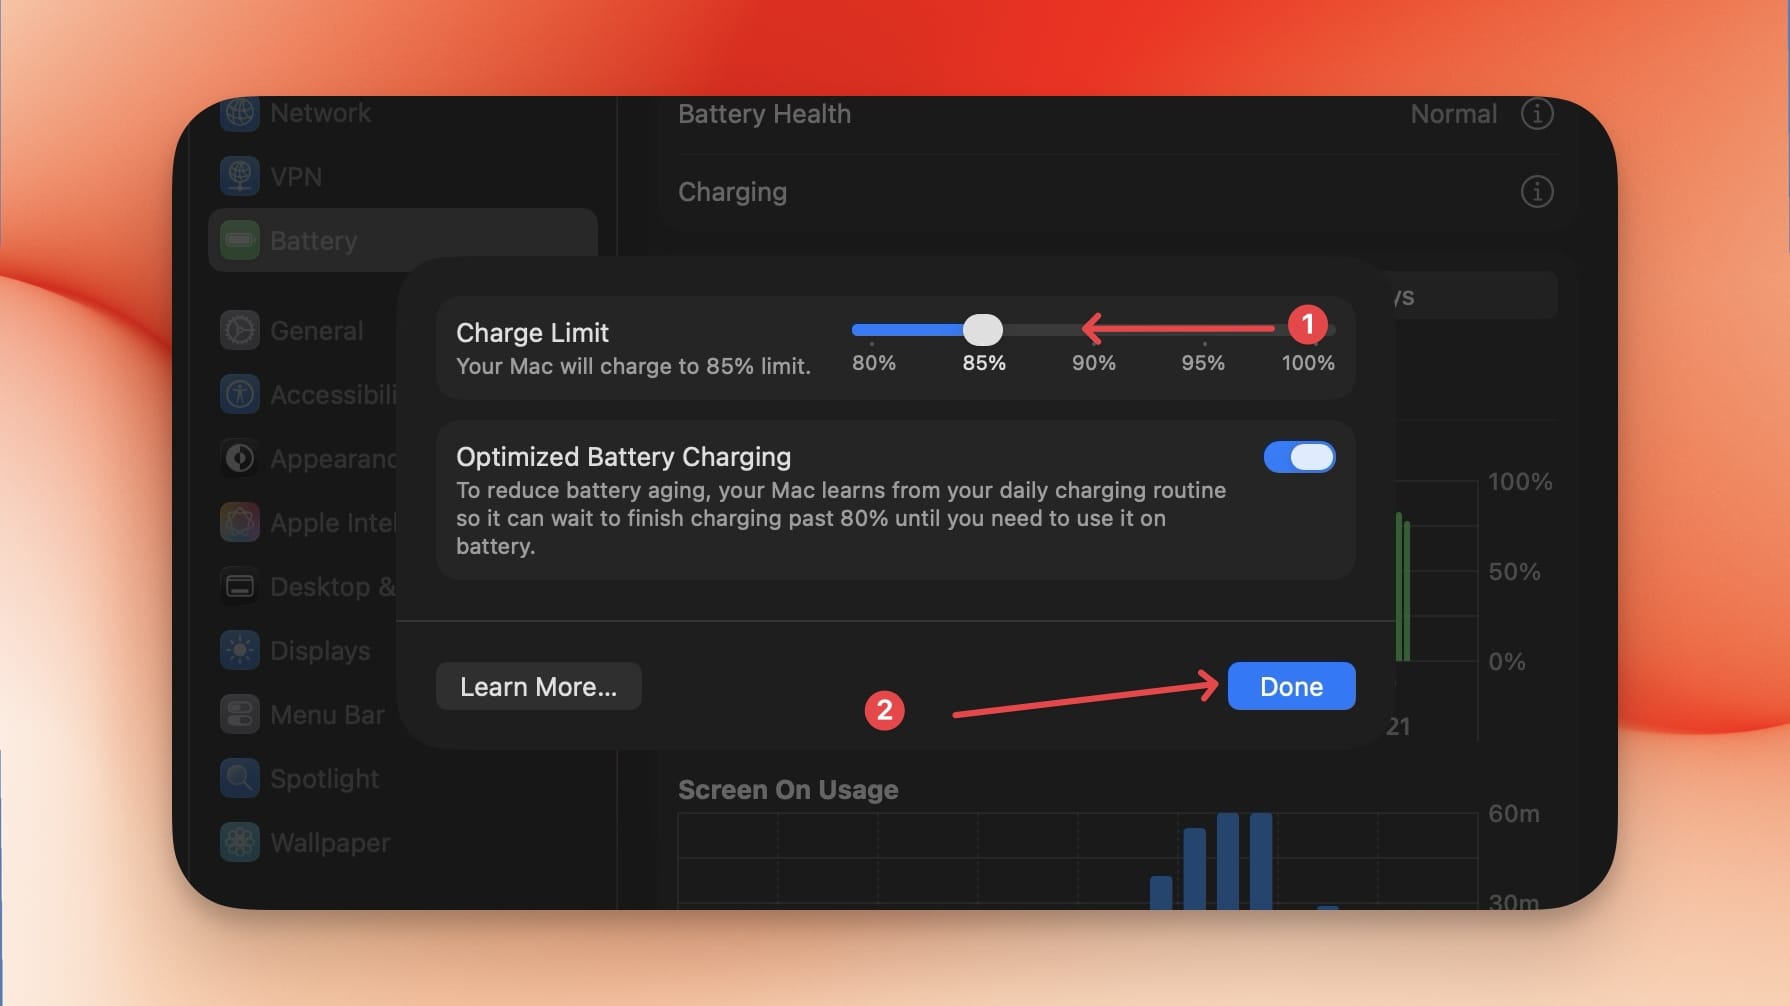
2. Now, open the Battery settings and click the (i) button next to the Charging option.

3. Use the slider to set the battery charge limit anywhere between 80 and 100% and hit the Done button to save changes.
That’s it. You have now set your battery charge limit on your Mac.
Why do this?
Leaving your MacBook plugged in for long durations can stress your battery. Research conducted into lithium-ion batteries has proven that charging the battery to 100% and keeping it plugged in reduces the overall lifespan of the battery.
While I don’t recommend doing this for your iPhone (understand iPhone battery graph), as you are mostly using it on the move and require all the juice you need, things are different for your MacBook if it’s your main desktop machine.
Is there a low battery charge limit to follow?
Setting the charge limit to 80% is a great first step, but there are a few other things worth keeping in mind. It is also recommended to never let your battery drop below 20%, either, as deep discharges can be just as damaging as overcharging.
That ends our guide on setting MacBook Charge limit. Before you go, click here to read our guide on how to show battery percentage in Mac menu bar. It will help you keep any eye on your Mac's battery.