
How to Turn on Do Not Disturb on Mac
Here is how to turn Do Not Disturb on Mac. Learn to enable, customize, and schedule macOS Do Not Disturb feature.
One of the best things about being in the Apple ecosystem is that all your devices talk to each other. For example, the calls and messages you receive on your iPhone or synced to your Mac, and you get access to features like Safari extension syncing across devices, FaceTime handoff, Universal Control, and more. While this is excellent, you don’t want to receive distractions while working on your Mac. Whether you are receiving your iPhone notifications or notifications from apps on your Mac, it is advisable to turn off notifications for creating a distraction-free working environment. Here’s how to turn on Do Not Disturb on Mac to silence Mac notifications.
- What is Do Not Disturb on Mac
- How to turn on Do Not Disturb on Mac
- How to schedule Do Not Disturb on Mac
- How to customize Do Not Disturb Mode on Mac
- How to turn on do not disturb on Mac but not iPhone
What is Do Not Disturb on Mac
As the name suggests, Do Not Disturb is a feature on Mac that silences all notifications. Previously, it used to exist as a separate feature, however, since the launch of the Focus Mode feature on Mac, iPad, and iPhone, the feature has now become a part of it. We will show you can how you can turn on, customize, and schedule Do Not Disturb Mode on your Mac.
How to turn on Do Not Disturb on Mac
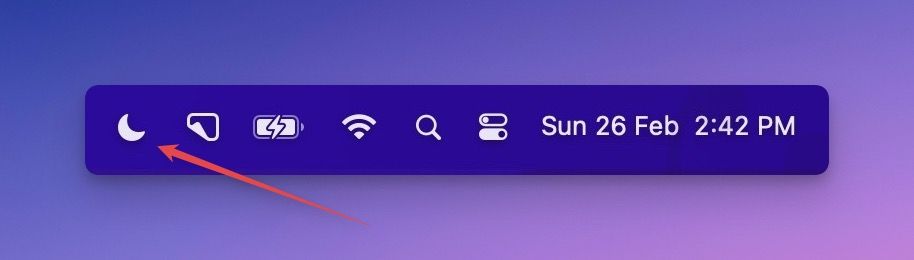
The quickest way to turn on Do Not Disturb on your Mac is via the Control Center in the Menu Bar on your Mac. You can use it to turn on Do Not Disturb mode for an hour, until this evening, and forever.
1. First, click on the Control Center icon in the Menu Bar and choose the Focus option.
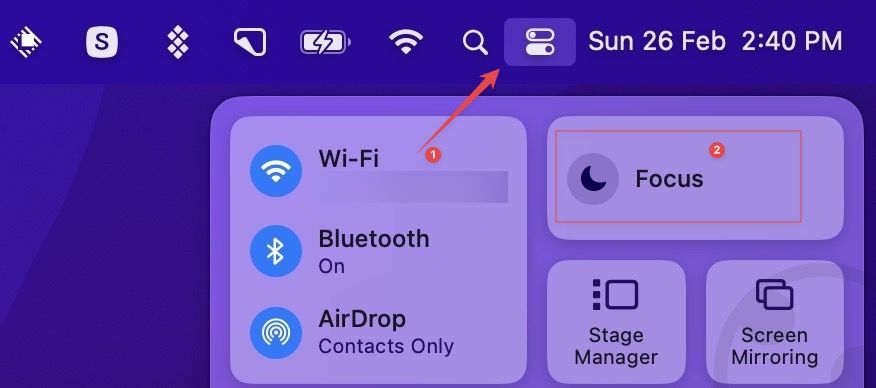
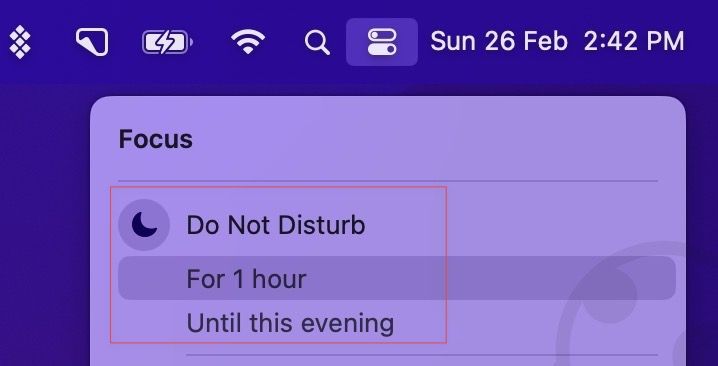
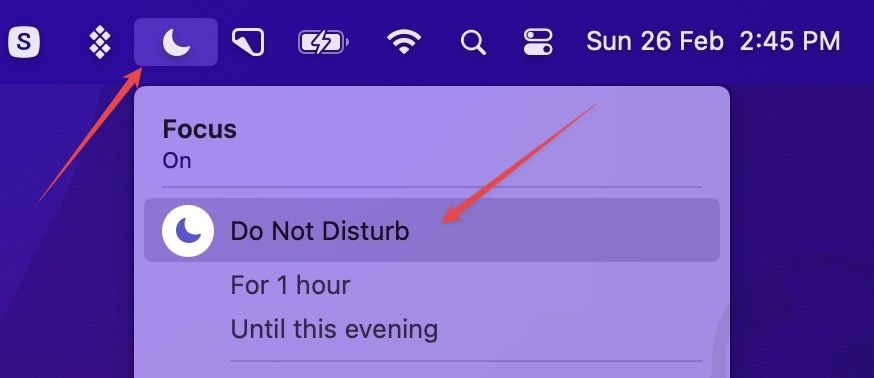
2. Now, click on Do Not Disturb to turn it on. You can also choose the For 1 hour and Until this evening options if you don’t want to remember to turn it off.
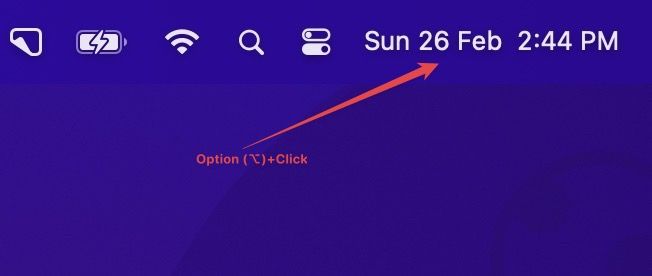
3. A quicker way to enable DND on your Mac is to hold down the Option (⌥) key on your Mac and click on the Time and Date section.
4. Once you turn on Do Not Disturb, you will see a half-moon icon in the Menu Bar.
5. To turn off Do Not Disturb, click on the DND icon. Now, click on the Do Not Disturb option. You can also hold down the Option (⌥) key and click on the Date and Time section to turn it off.
How to schedule Do Not Disturb on Mac
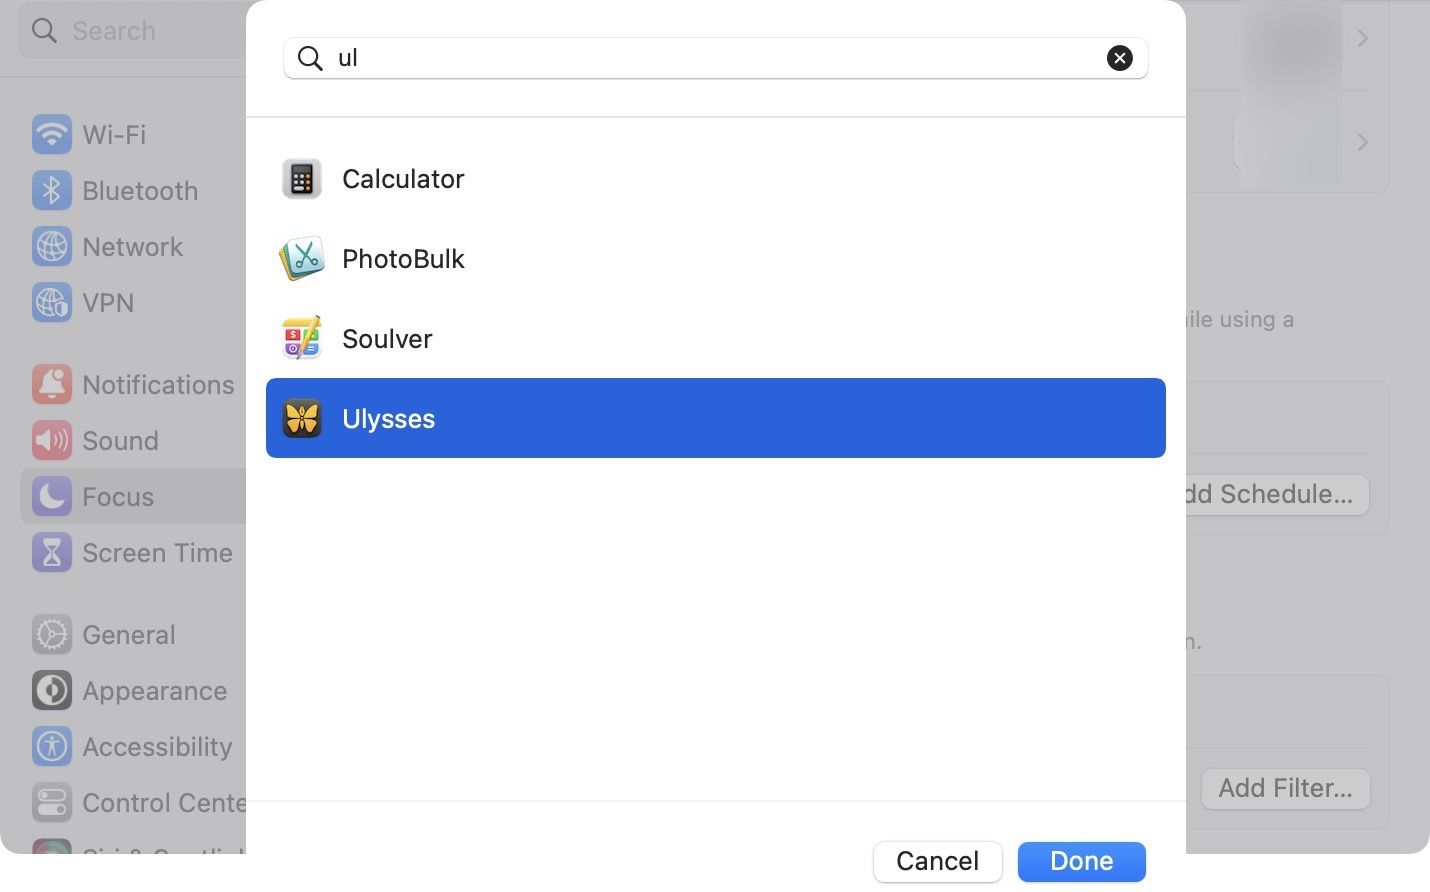
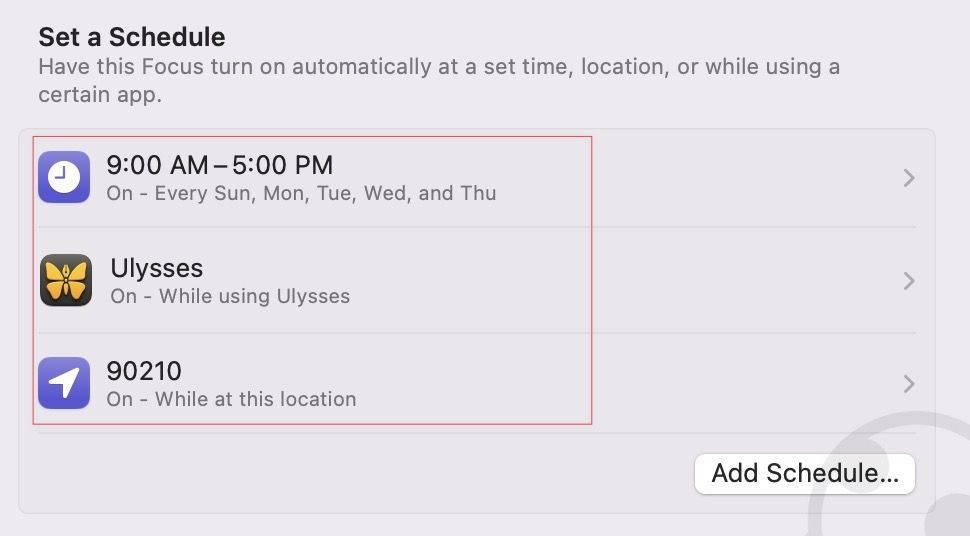
If you have a set work schedule and you want your Mac to automatically activate Do Not Disturb mode, you can schedule it. You can also schedule DND mode based on the app launch or your location. I use the app-based DND activation as I work from home and have no set time for the office. That’s why, I have set the Mac to turn on Do Not Disturb mode when I launch Ulysses, which is my choice of the best writing app on Mac.
Similarly, you can use time, location, or app launch as a trigger for activating Do Not Disturb on your Mac. Since you can also set multiple schedules, you can also use a combination of these to trigger Do Not Disturb mode on your computer.
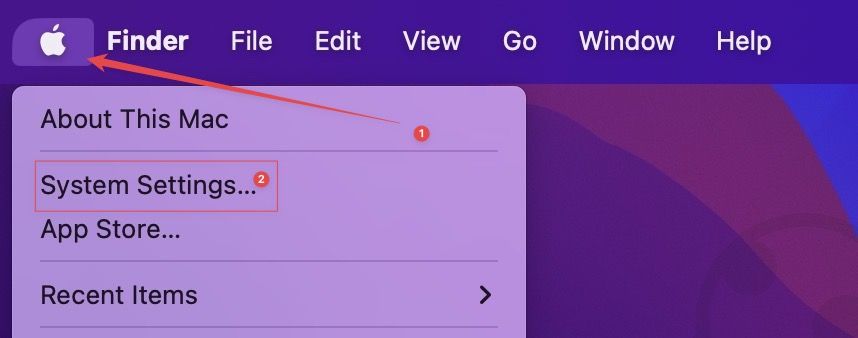
1. Use the Apple Menu to open the System Settings option.
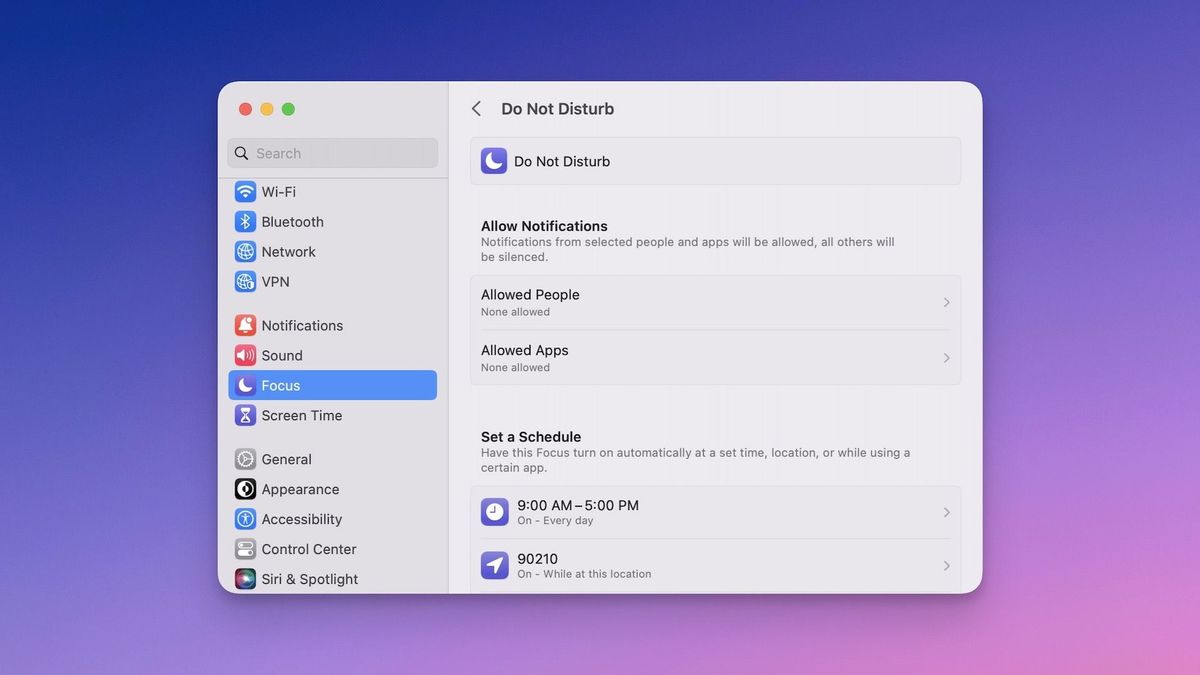
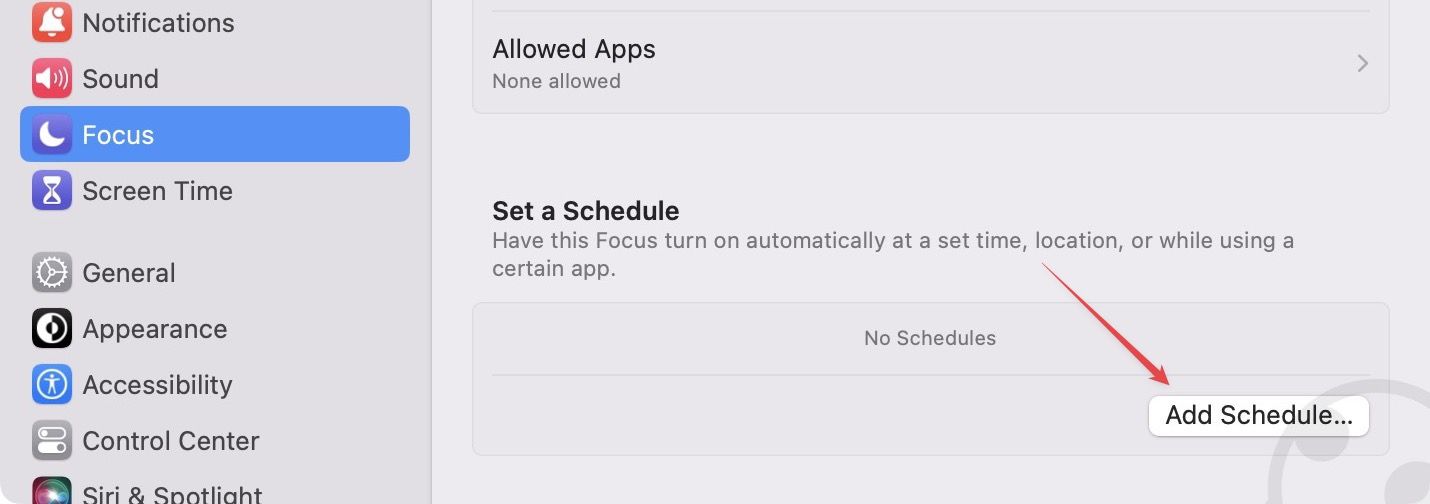
2. In the left-hand side bar, click on Focus and then choose the Do Not Disturb option.

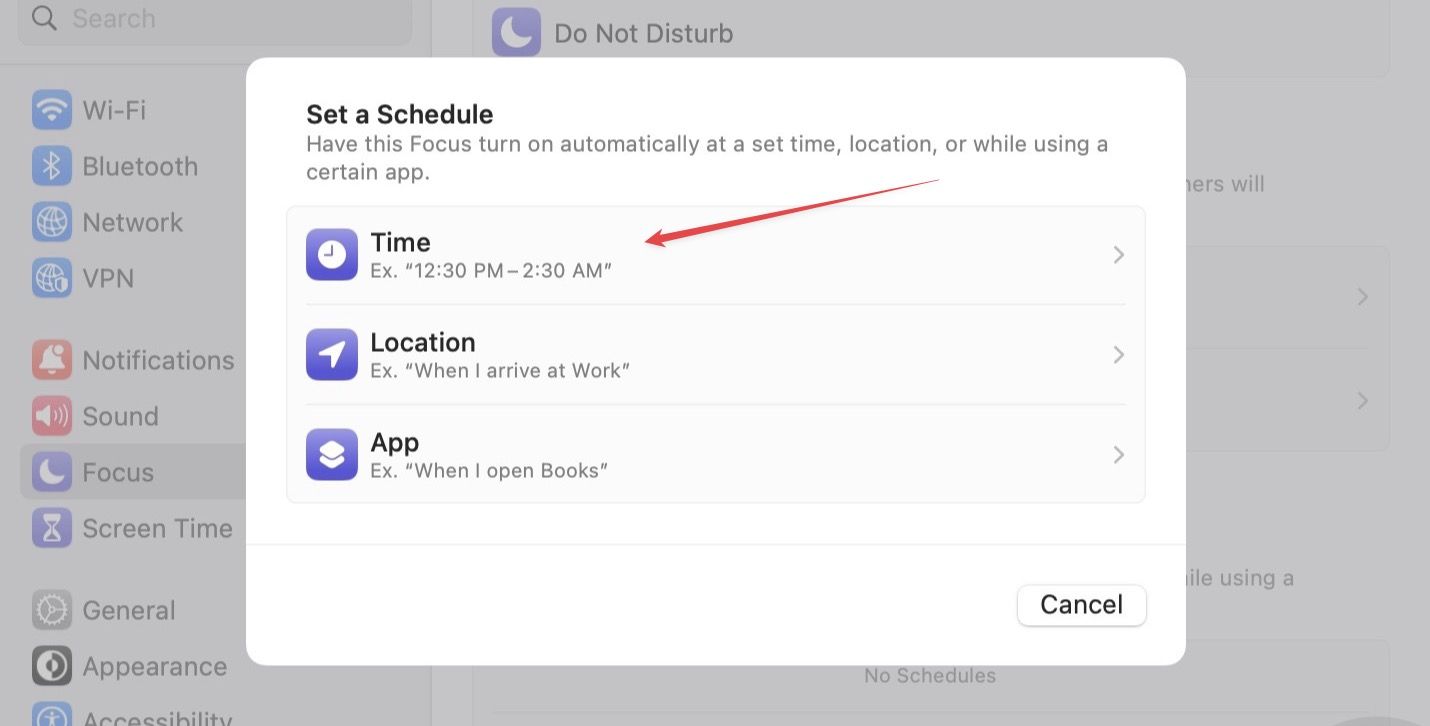
3. Click on the Add Schedule button at the bottom-right corner.
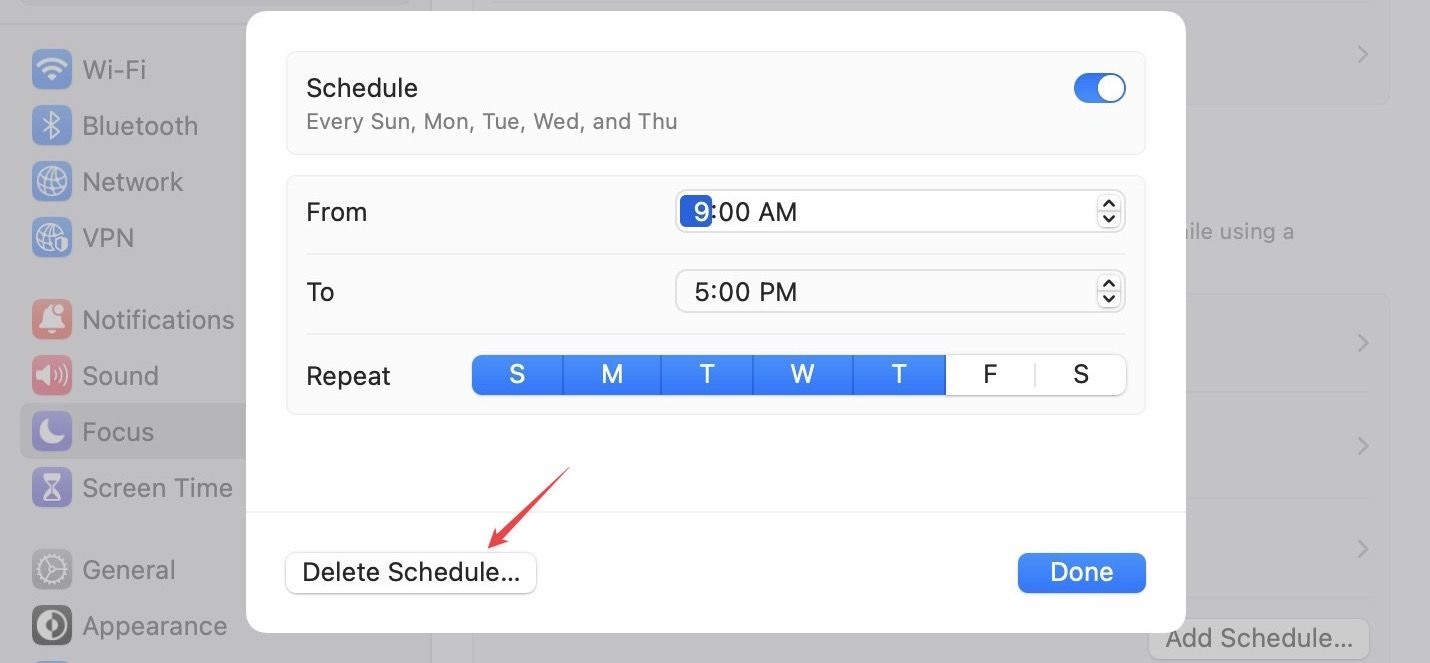
4. To schedule Do Not Disturb mode based on time, choose the Time option.
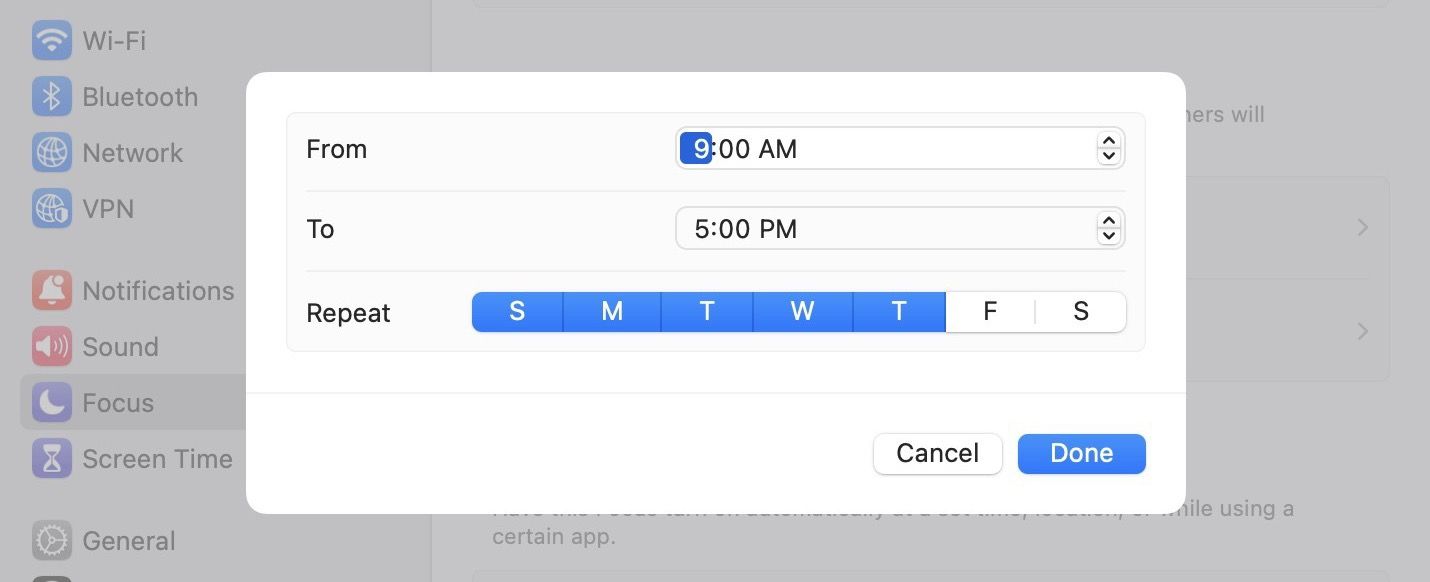
5. Now, choose the start and end times and days you want the Do Not Disturb to be active. Click on the Done button to save changes.
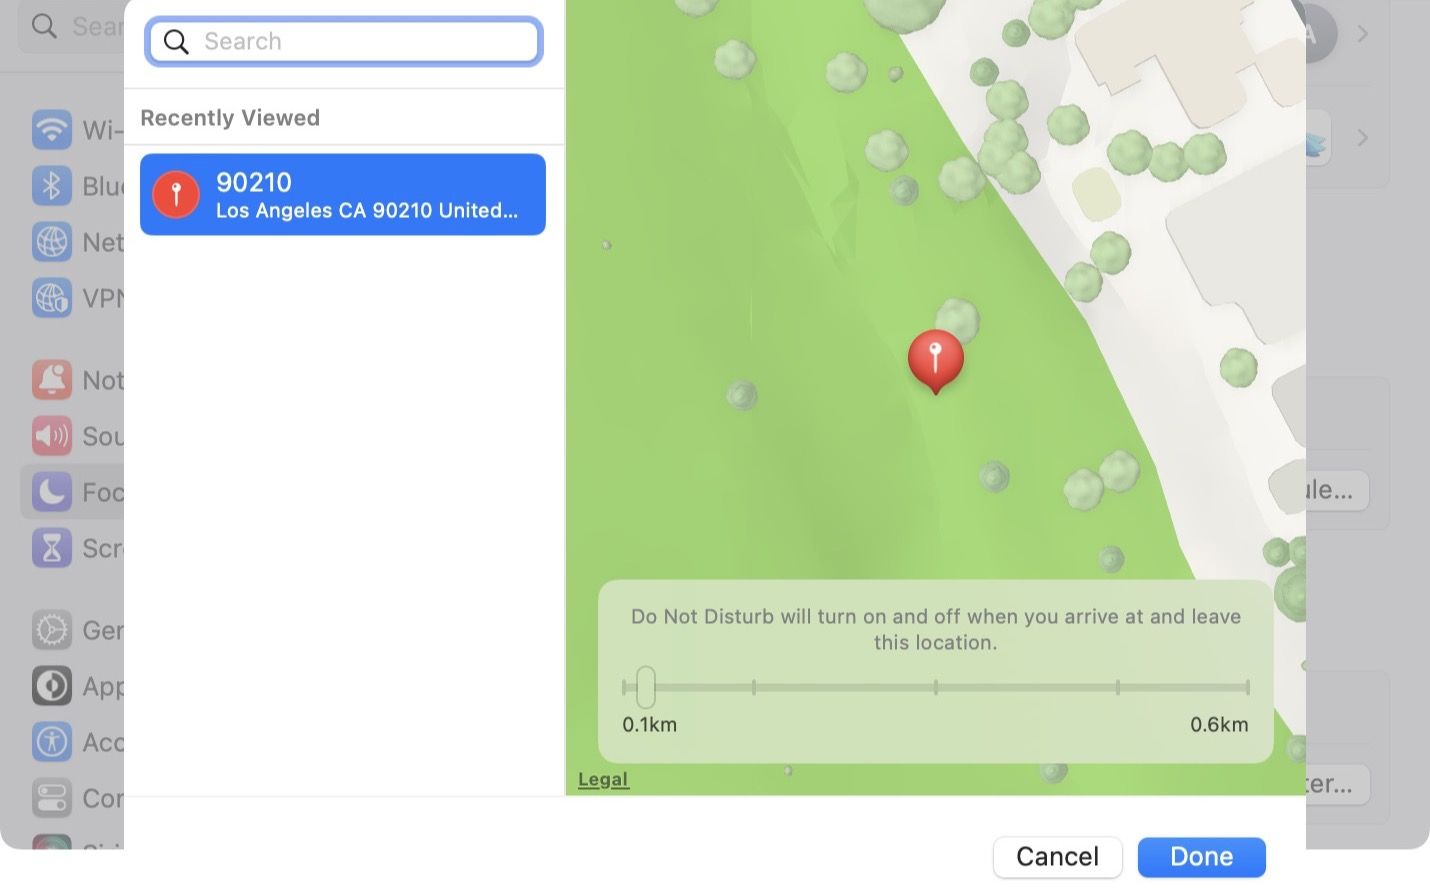
6. Similarly, you can choose the location and app options to set triggers for DND mode.
7. To delete a schedule, click to open it.
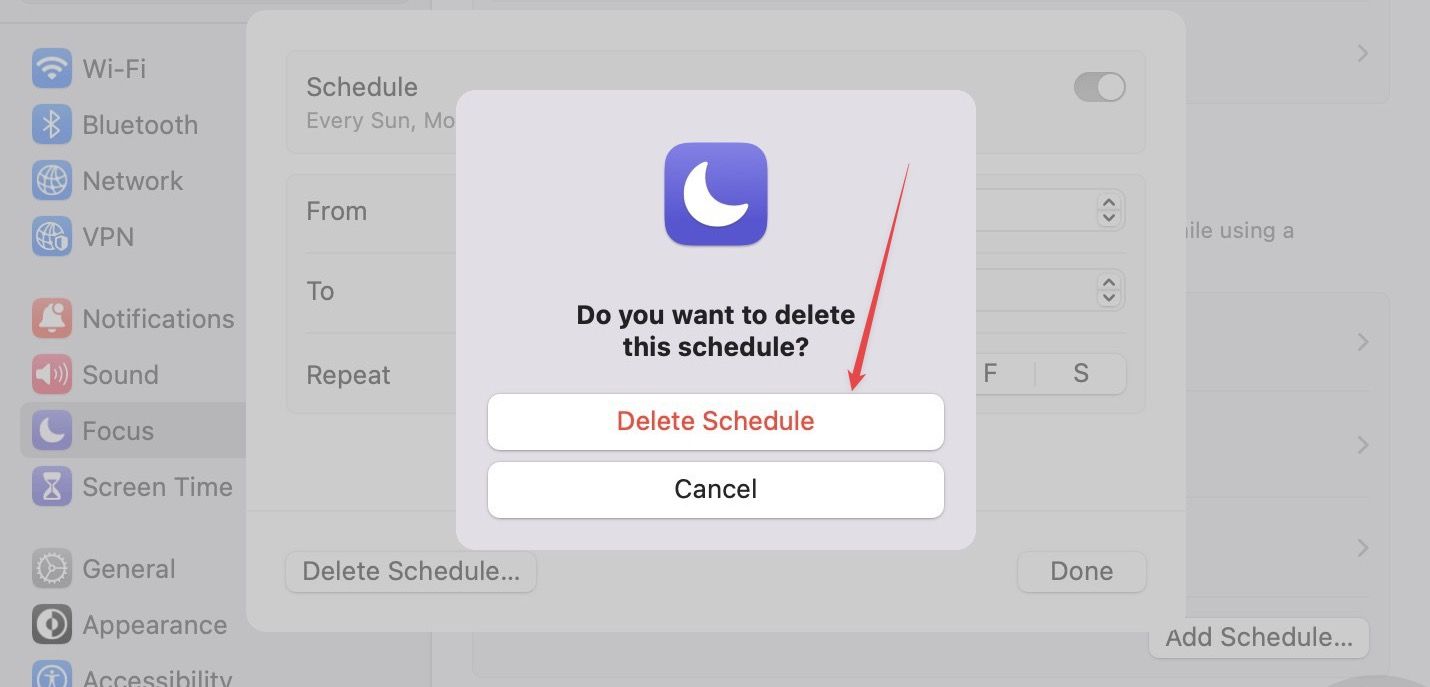
8. Now, click on the Delete Schedule… option and confirm on the prompt.
How to customize Do Not Disturb Mode on Mac
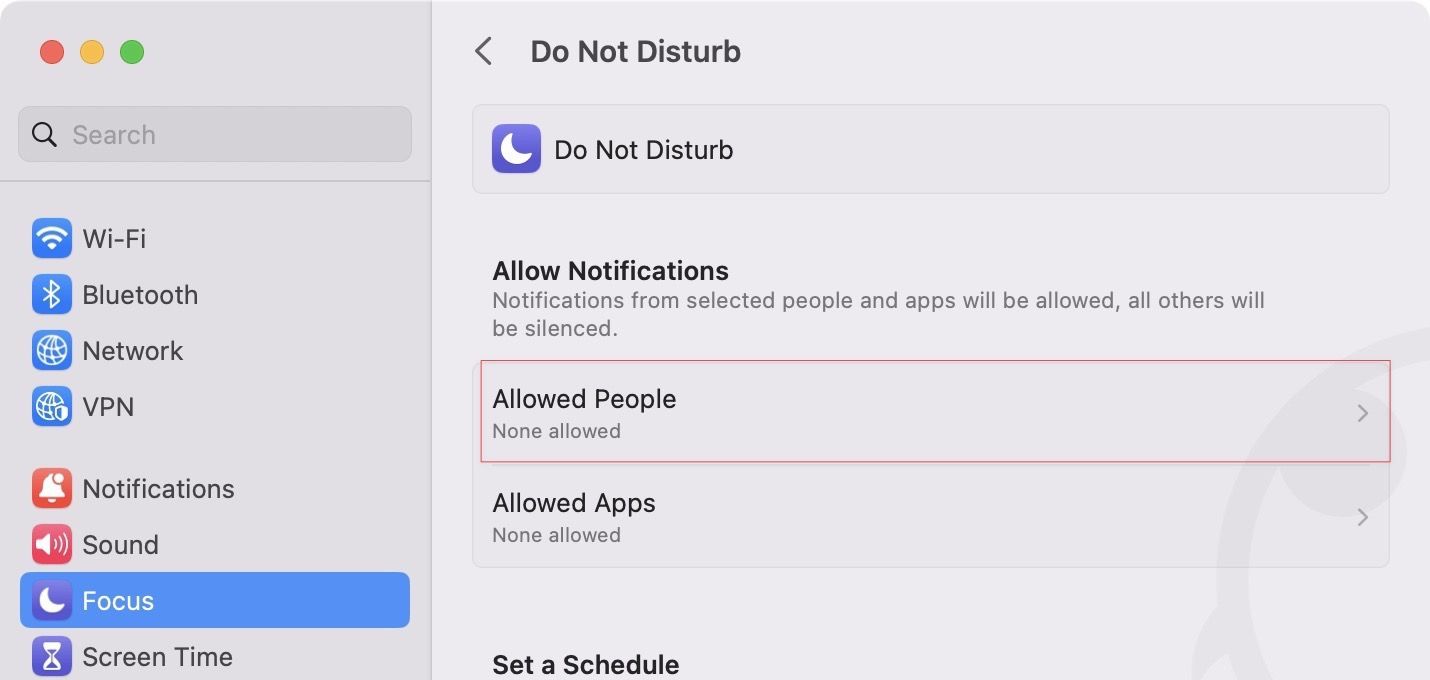
The Do Not Disturb mode on Mac is also customizable. By default, when it is active, it blocks all app notifications. However, calls and messages from your favorite contacts and repeated calls (within 3 minutes) can go through. You can change this behavior by customizing the Do Not Disturb mode.
1. Use the Apple Menu to open the System Settings app.
2 Open Focus and choose the Do Not Disturb option.
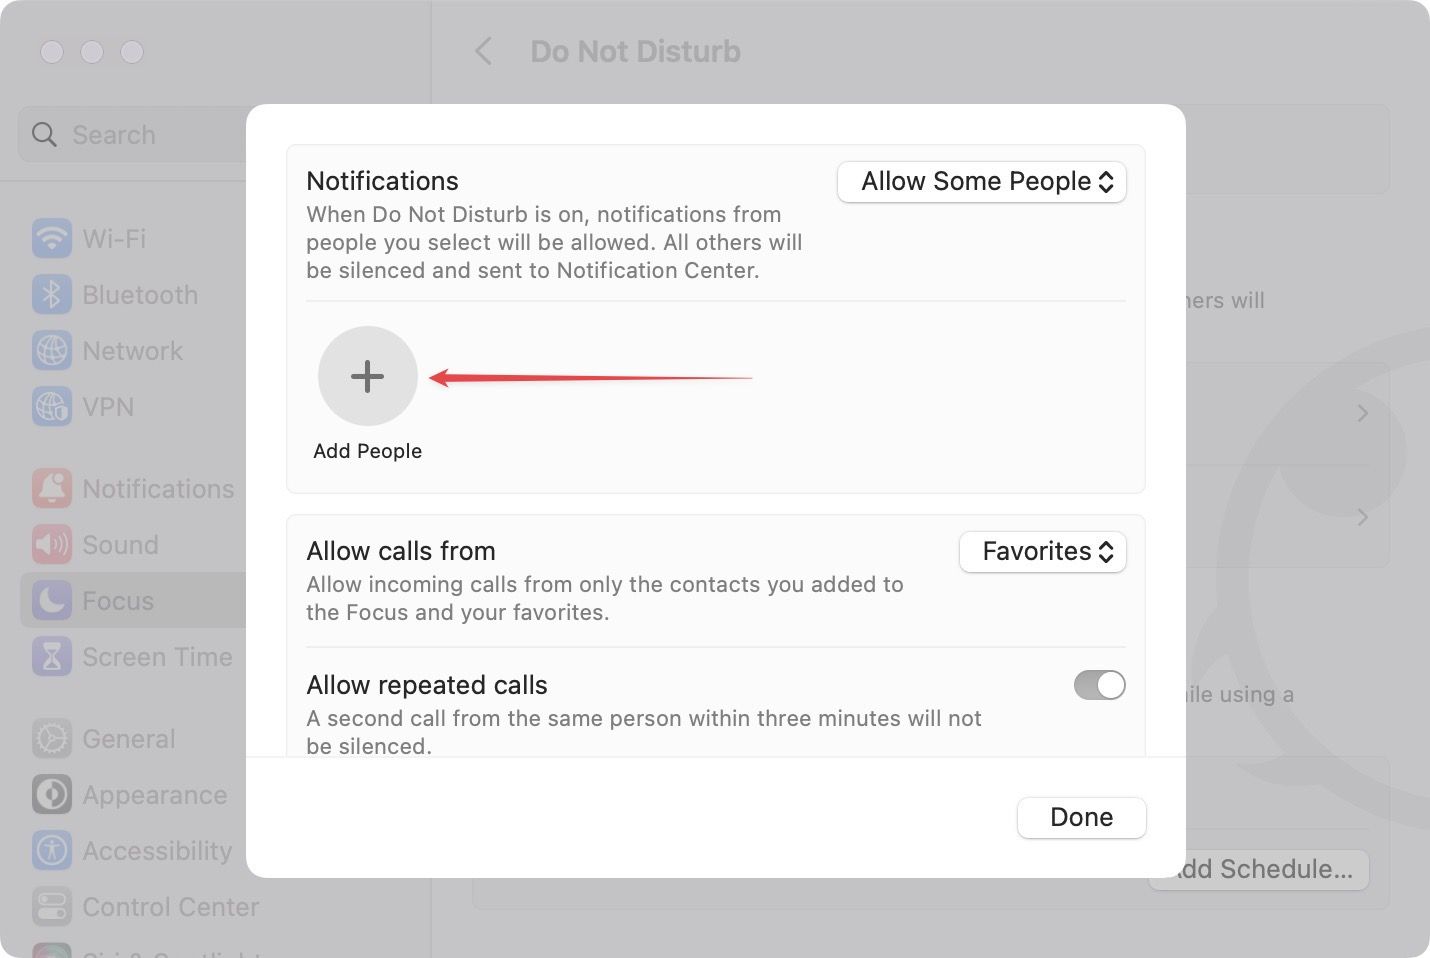
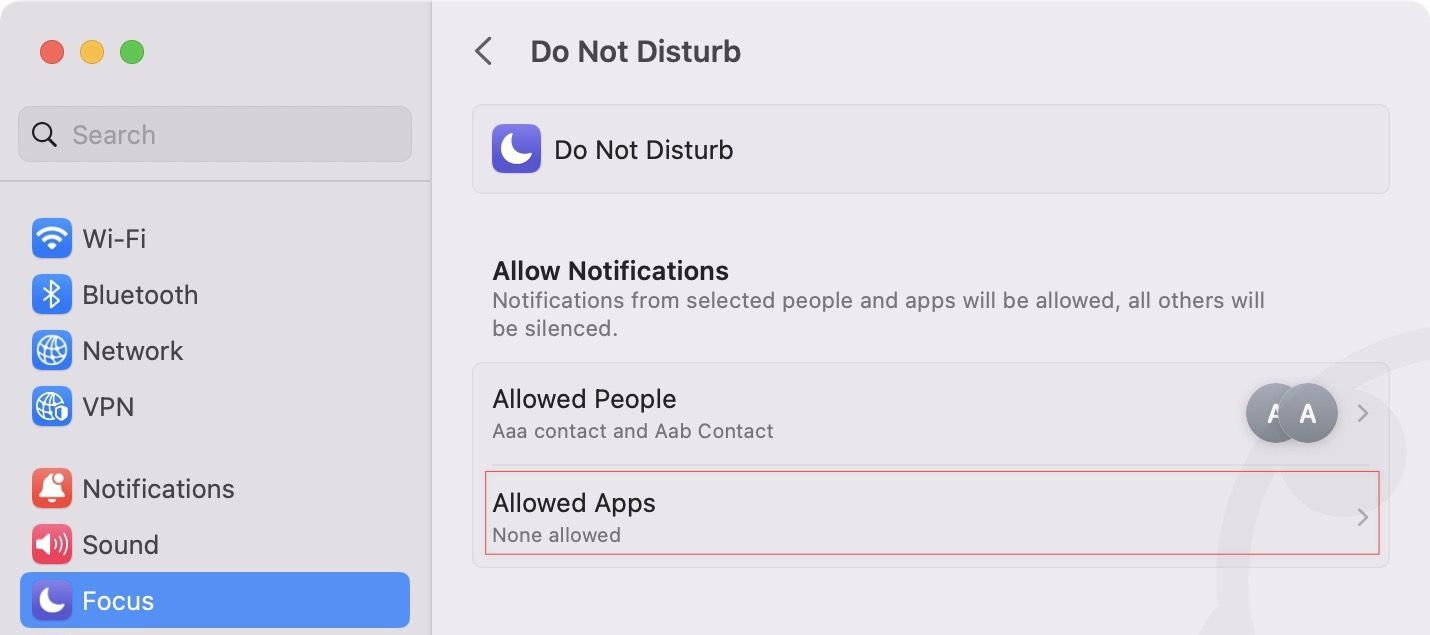
3. To add people who can reach you even in DND mode, click the Allowed People option.
4. To allow specific people from your contact, click the Add People button.
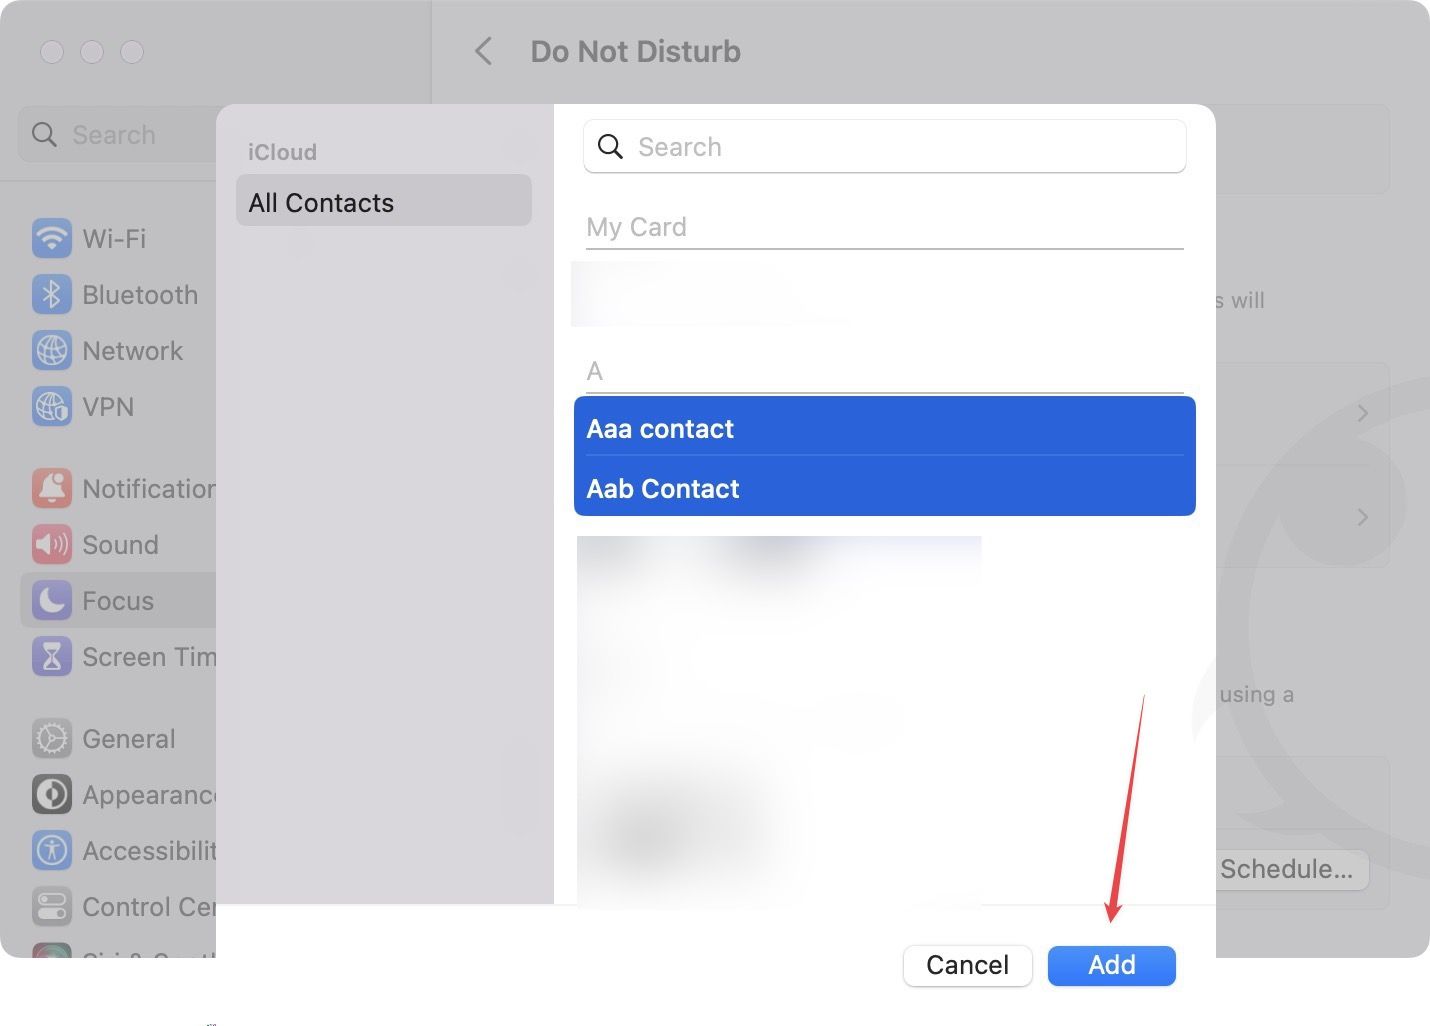
5. Now, choose the contacts you want to allow and click the Add button to add them. You can hold the Command (⌘) button and click and select multiple contacts.
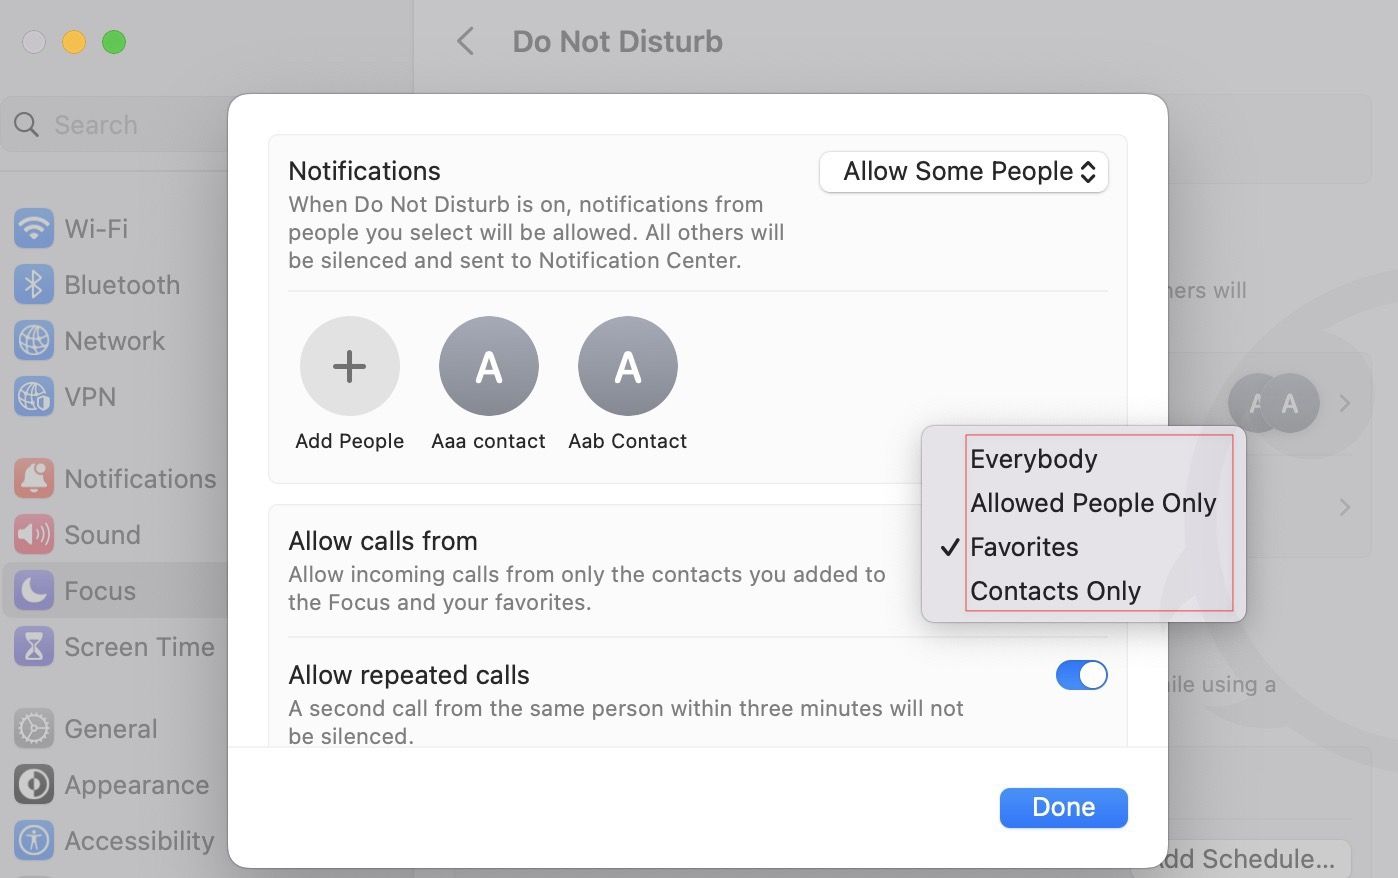
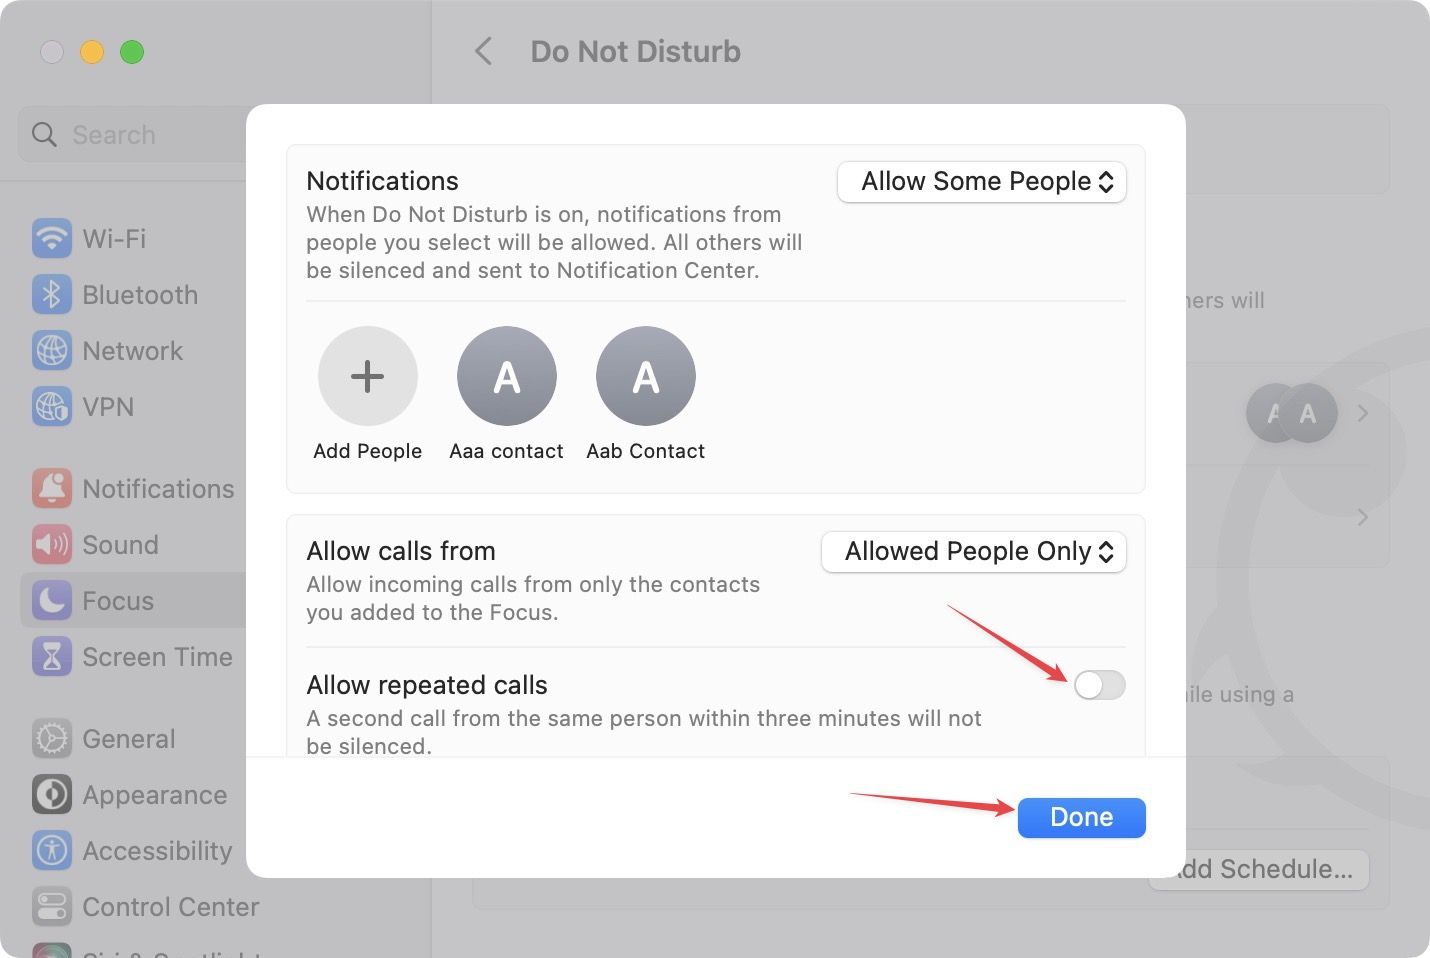
6. To choose who can bypass the Do Not Disturb, click on the drop-down menu next to Allow calls from and choose the relevant option.
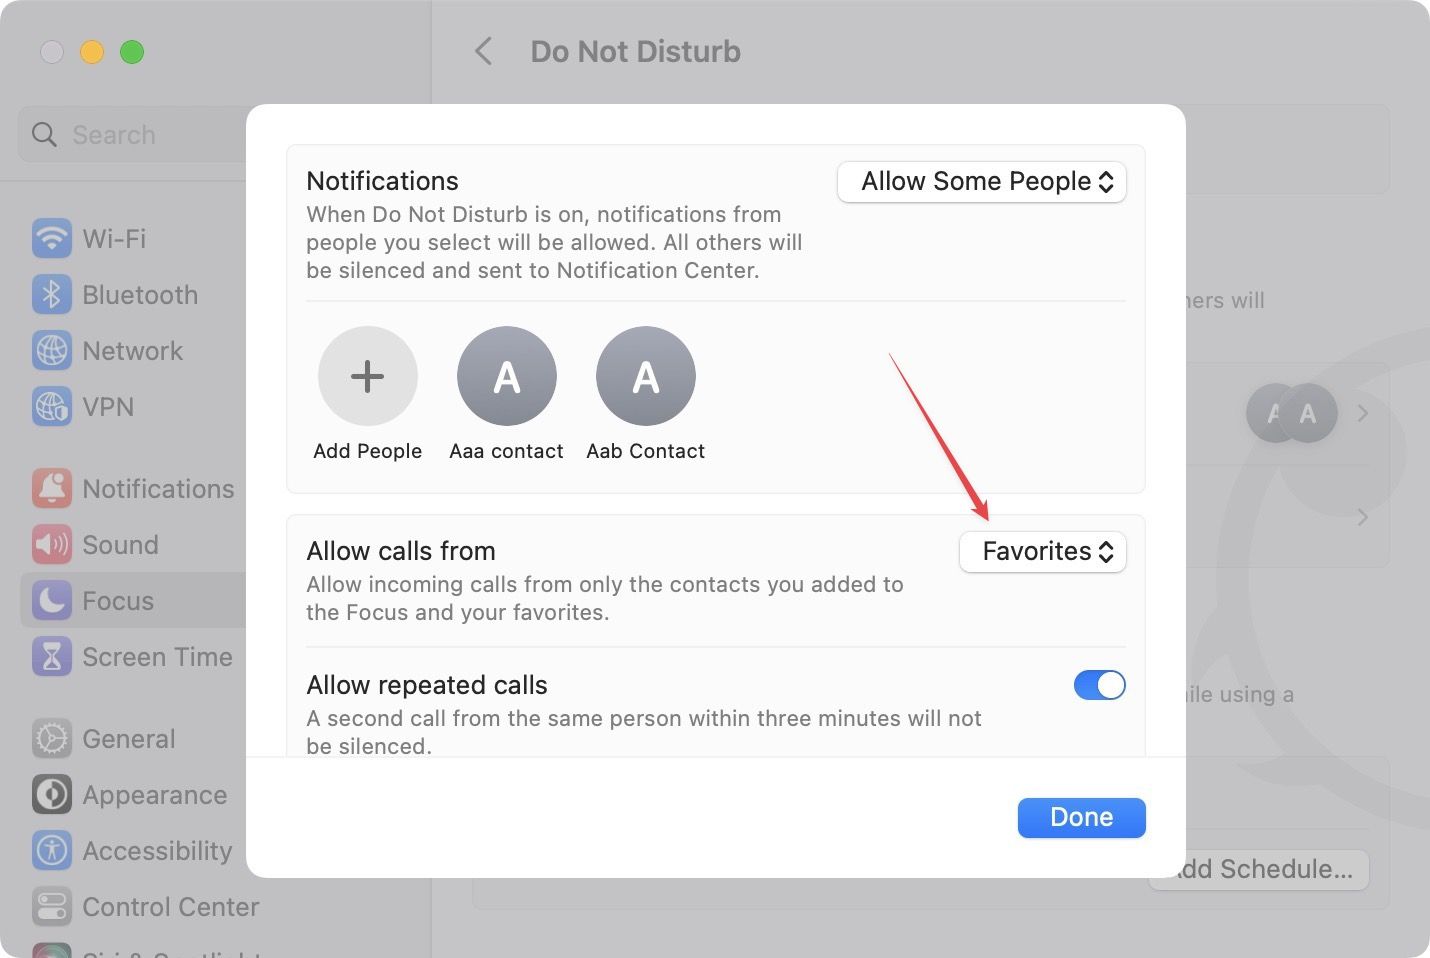
7 If you don’t want to allow repeated calls from any number, disable the toggle next to the Allowed repeated calls option.
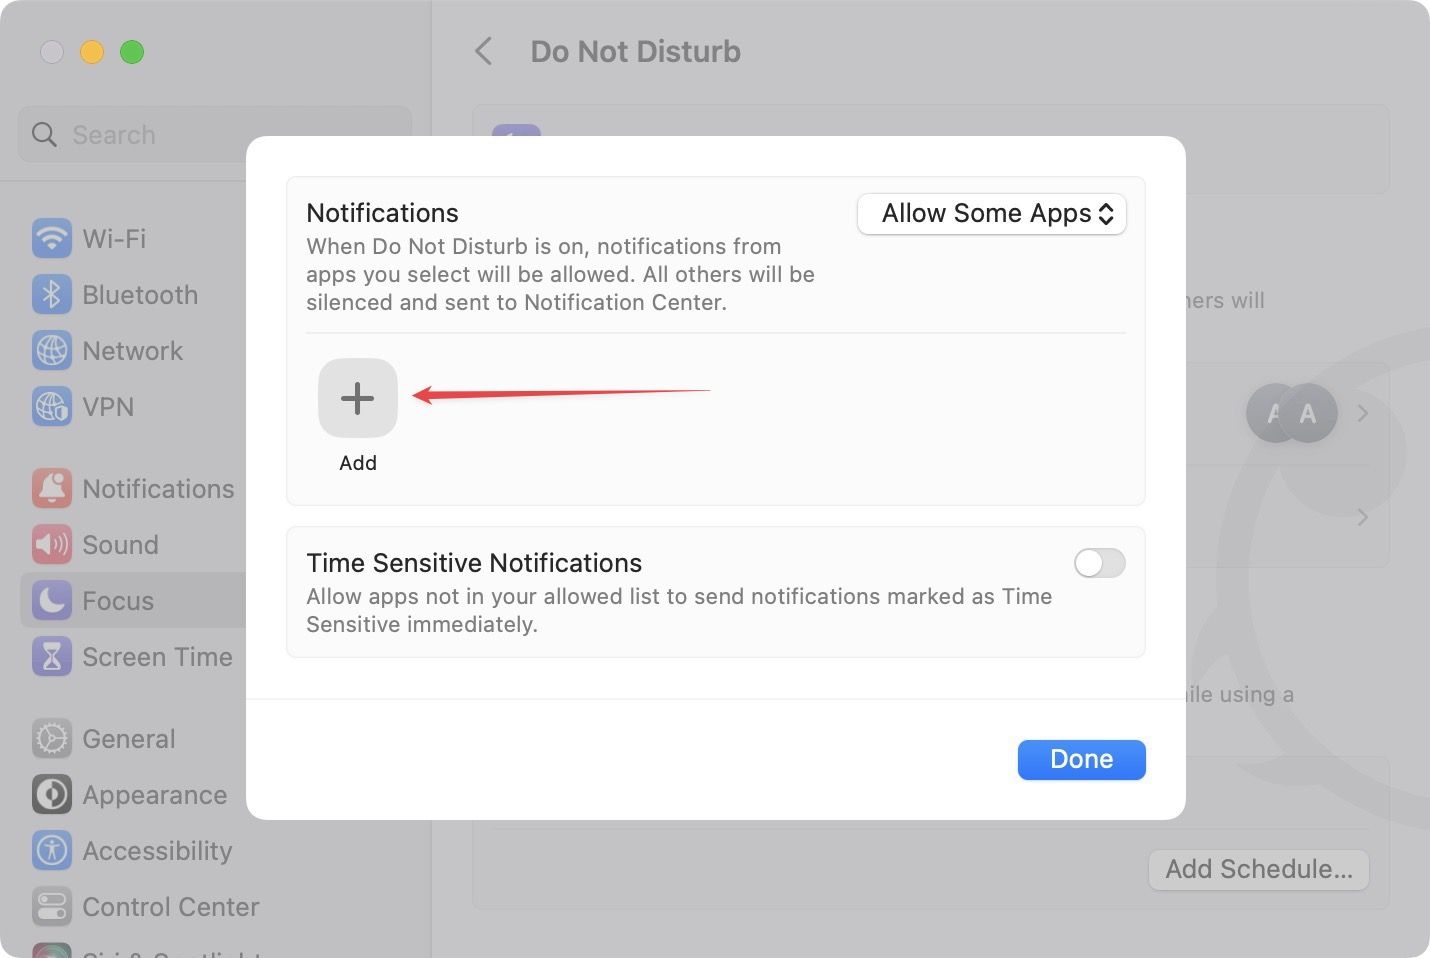
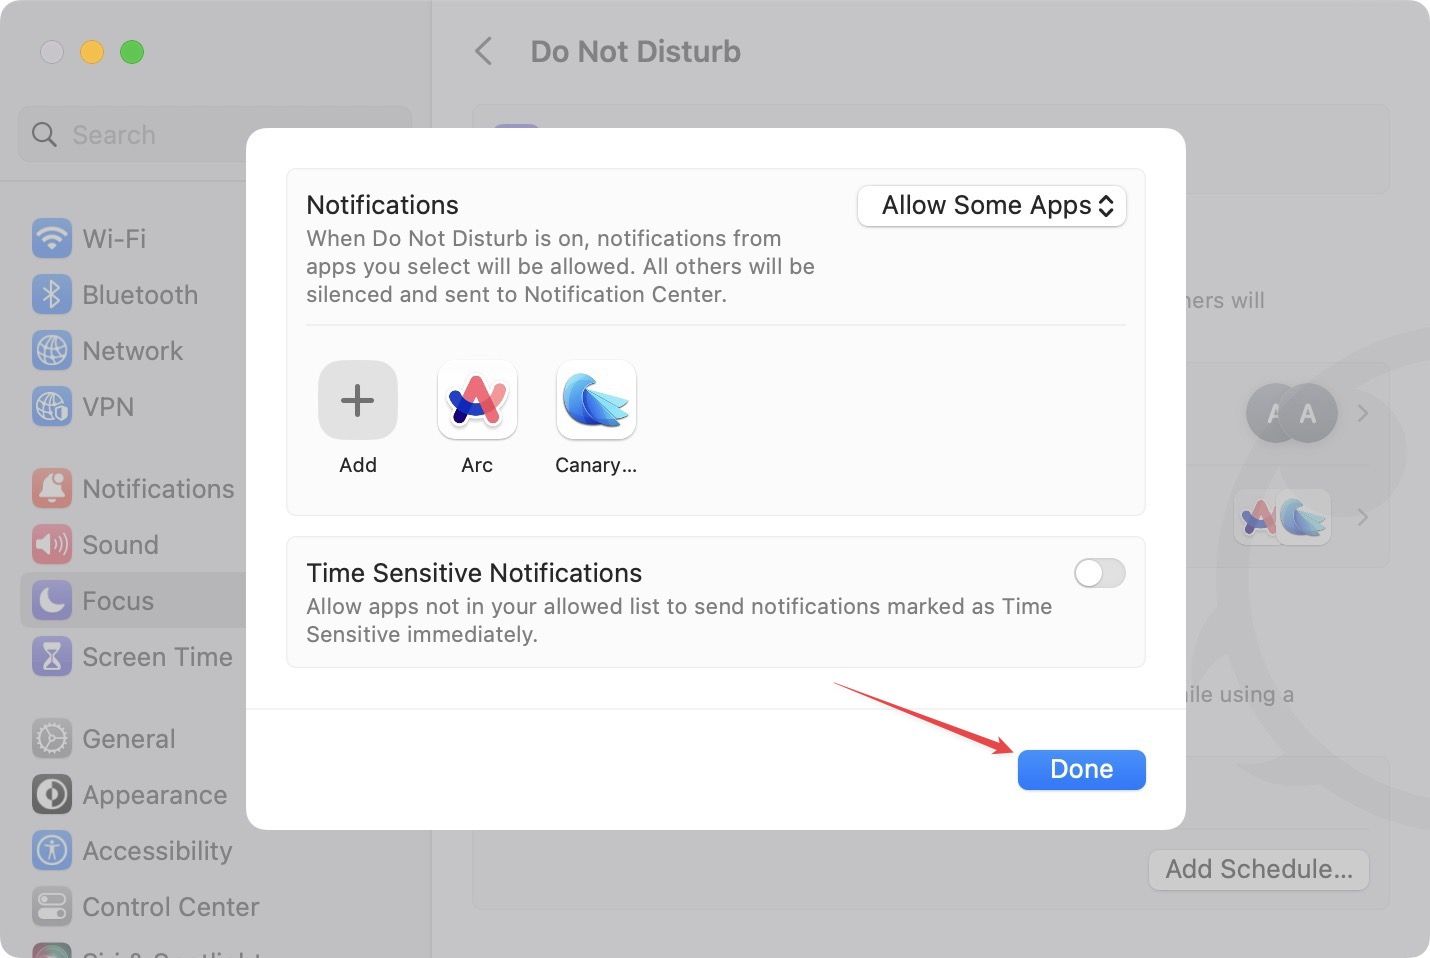
8. To allow notifications from specific apps, click on Allowed Apps.
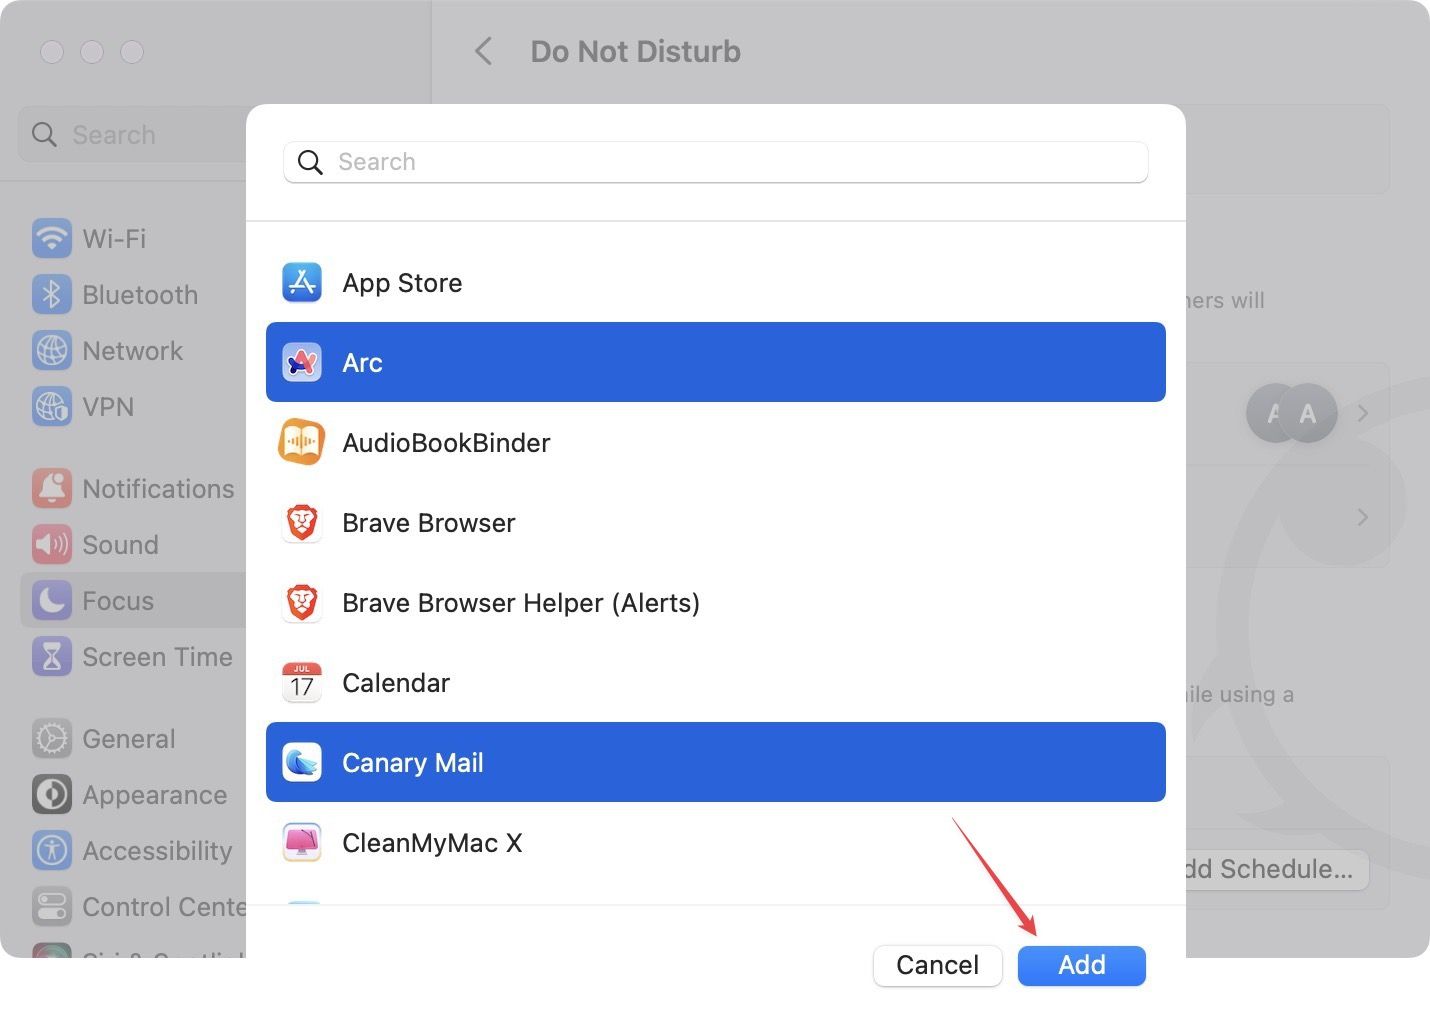
9. Click on Add and choose the apps. You can select multiple apps using the Command (⌘)+click selection method.
10. Finally click on Done to save changes.
How to turn on do not disturb on Mac but not iPhone
Since the Focus Mode feature is a continuity feature, any changes you make are synced across devices. When you turn on Do Not Disturb on Mac, your iPhone will automatically go into DND mode. However, that is something you might not want. In such a case, you can disable the sync feature, so you only turn on do not disturb on your Mac and not your iPhone.
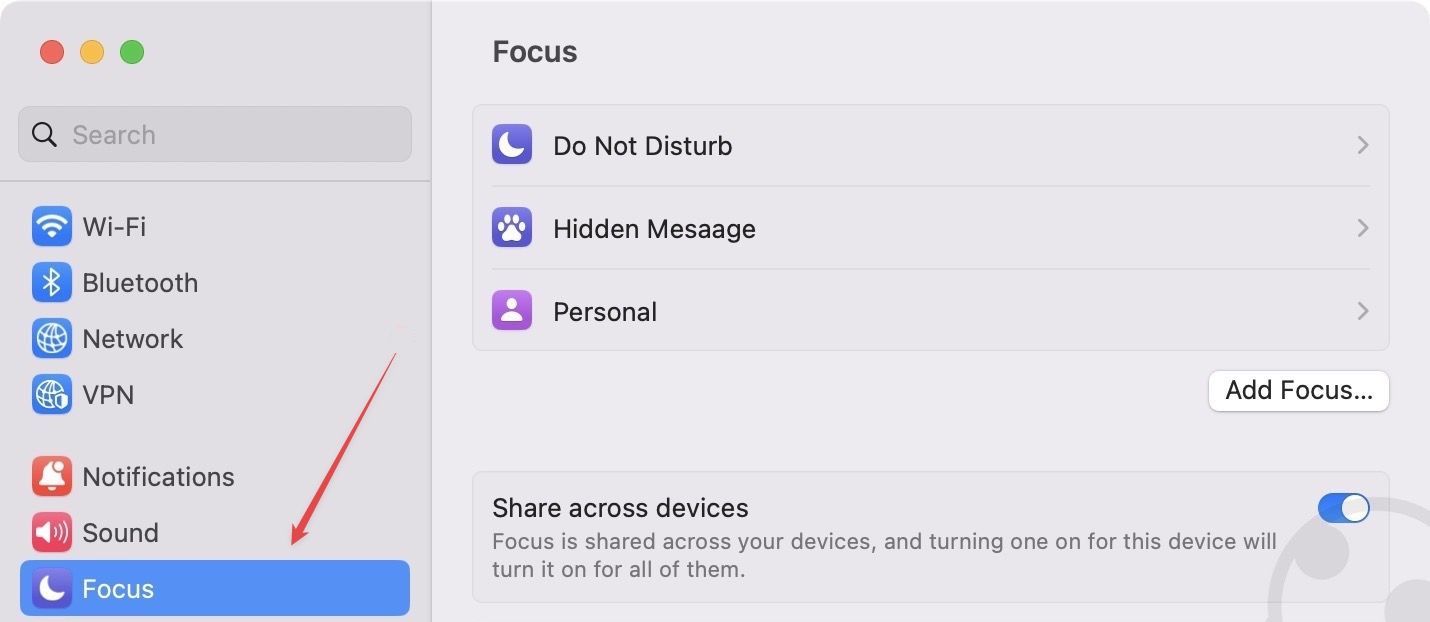
1 Use the Apple Menu to open the System Settings app.
2. Click on Focus in the left sidebar.
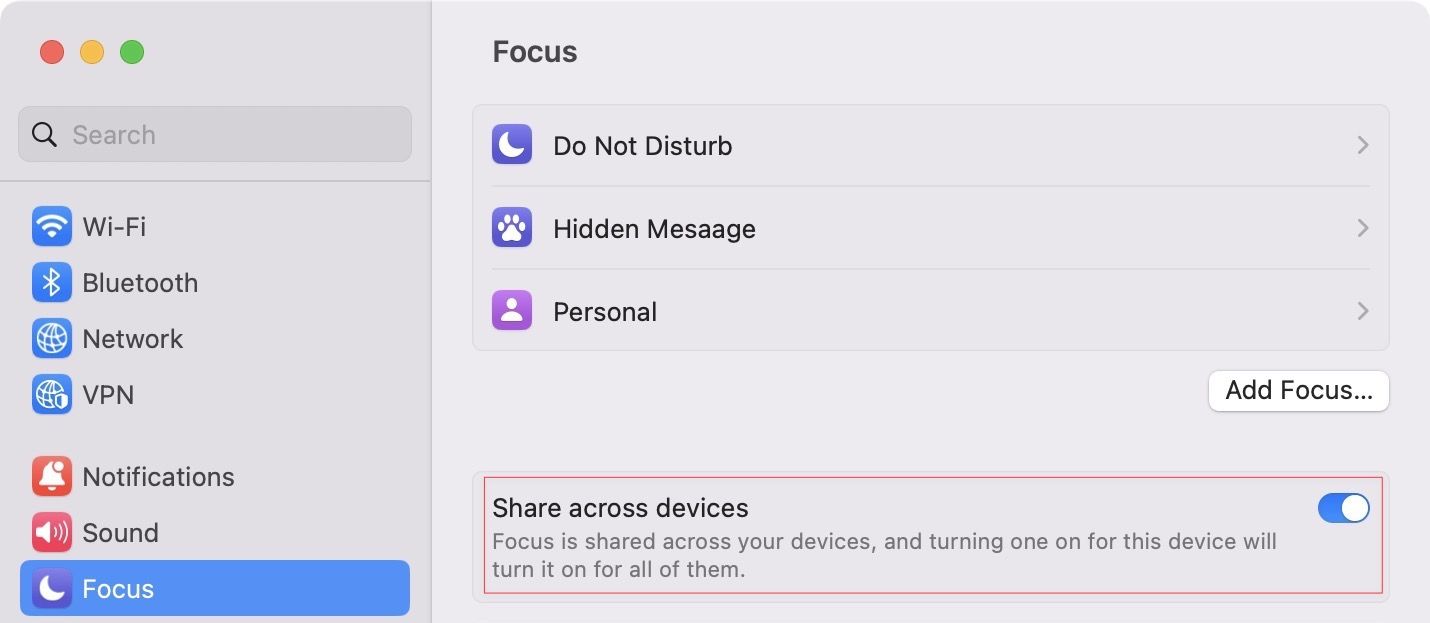
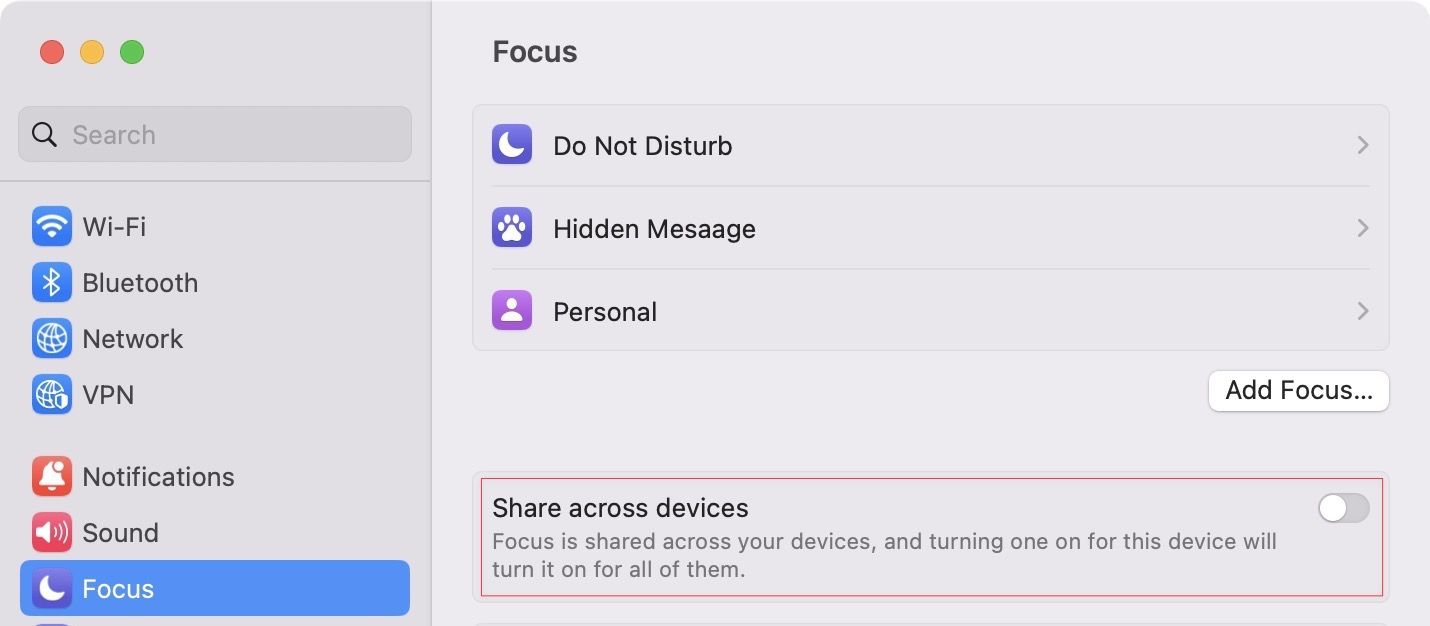
3. Now, turn off the the toggle for Share across devices option.
Enable Do Not Disturb mode on Mac
The upgraded Do Not Disturb mode on Mac is rich in features. You can enable and schedule it based on time, app, and location. You can customize it to allow specific people or apps to send you notifications. You can even use the Shortcuts app to trigger it. While that is beyond the purview of this article if you want to use the best Siri shortcuts on iPhone and Mac, click on the link to learn more about them.


