
Ulysses App Review and Tutorial for 2022 - Best Writing App for Mac?

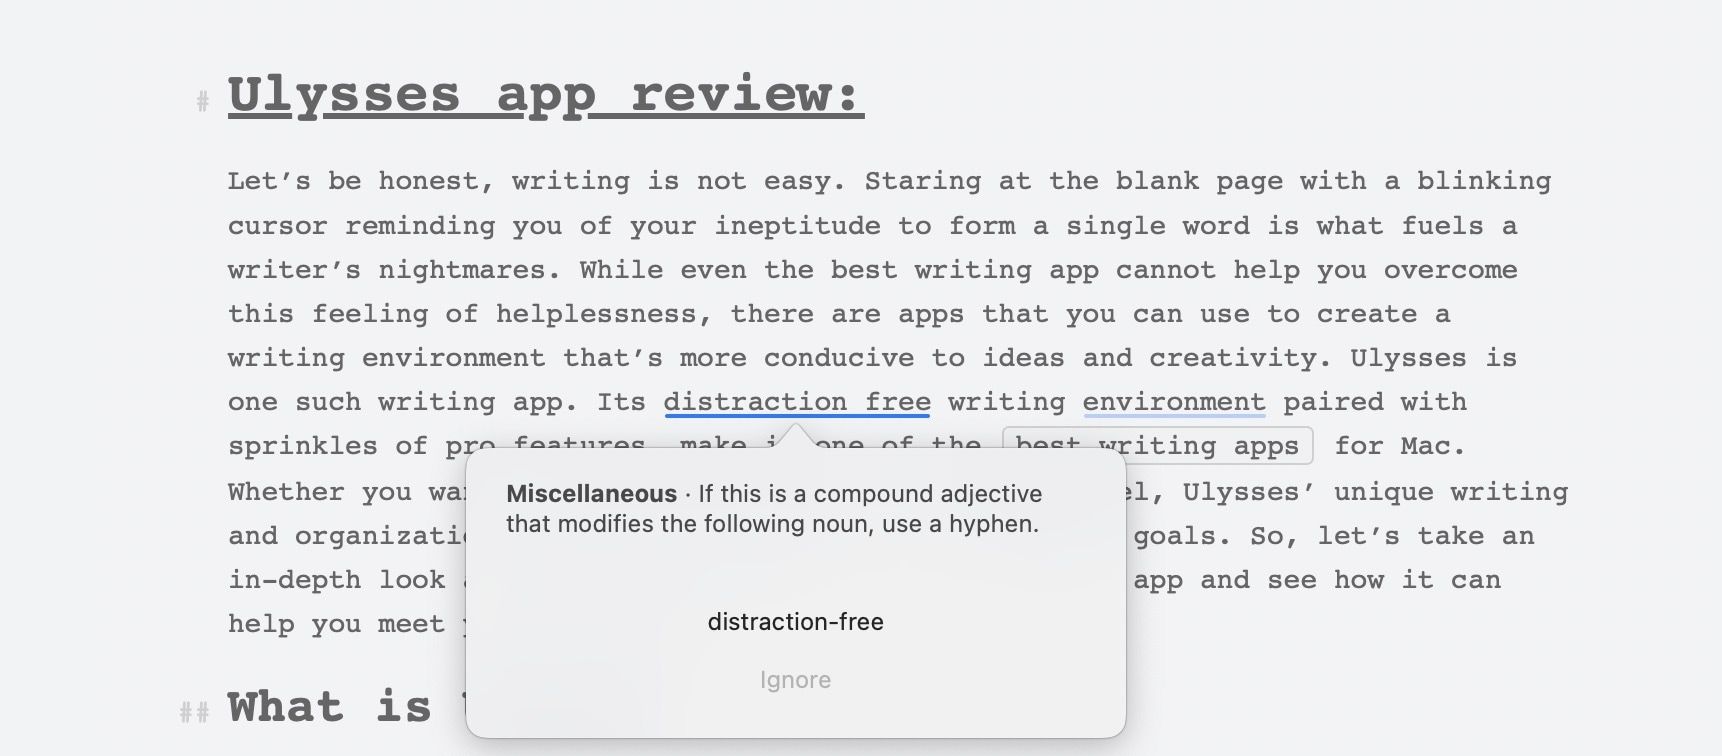
Let’s be honest here; writing is not easy. Staring at the blank page with a blinking cursor reminding you of your ineptitude to form a single word is what fuels a writer’s nightmares. While even the best writing app cannot help you overcome this feeling of helplessness, there are apps that you can use to create a writing environment that’s more conducive to ideas and creativity. Ulysses is one such writing app. Its distraction-free writing environment, paired with sprinkles of pro features, makes it one of the best writing apps for Mac. Whether you want to write a blog post or an entire novel, Ulysses’ unique writing and organization structure can help you achieve your goals. So, let’s take an in-depth look at the app in our review of Ulysses and see how it can help you meet your writing goals.
 Editor
This is going to be a long article. You can use the table of content below to skip to any section you want.
Table of content
What is Ulysses?
In its most basic definition, Ulysses is a plain text editor which uses Markdown, a lightweight markup language, for formatting and enhancing the plain text. Ulysses allows writers to format their texts without lifting their fingers away from the keyboard. The app also brings a clean writing interface which keeps the distractions at bay allowing users to focus just on the writing.
However, Ulysses’s clean and beautiful user interface must not be confused and correlated with lack of features. On the contrary, the app brings all the tools a user will ever need to write, organize, and complete their writing projects. From writing short notes to essays to a full-blown 100,000 words novel, Ulysses has enough power to handle everything one can throw at it.
We love how Ulysses has managed to strike the perfect balance between power and simplicity. In the next sections, we will see how powerful Ulysses actually is and how it manages to keep it hidden until you need them, ensuring that you are receiving one of the cleanest writing environment possible. Okay, so now that you have a basic idea about Ulysses, let’s get to the tutorial-cum-review of the app.
Ulysses: first looks, basics, and preferences configuration
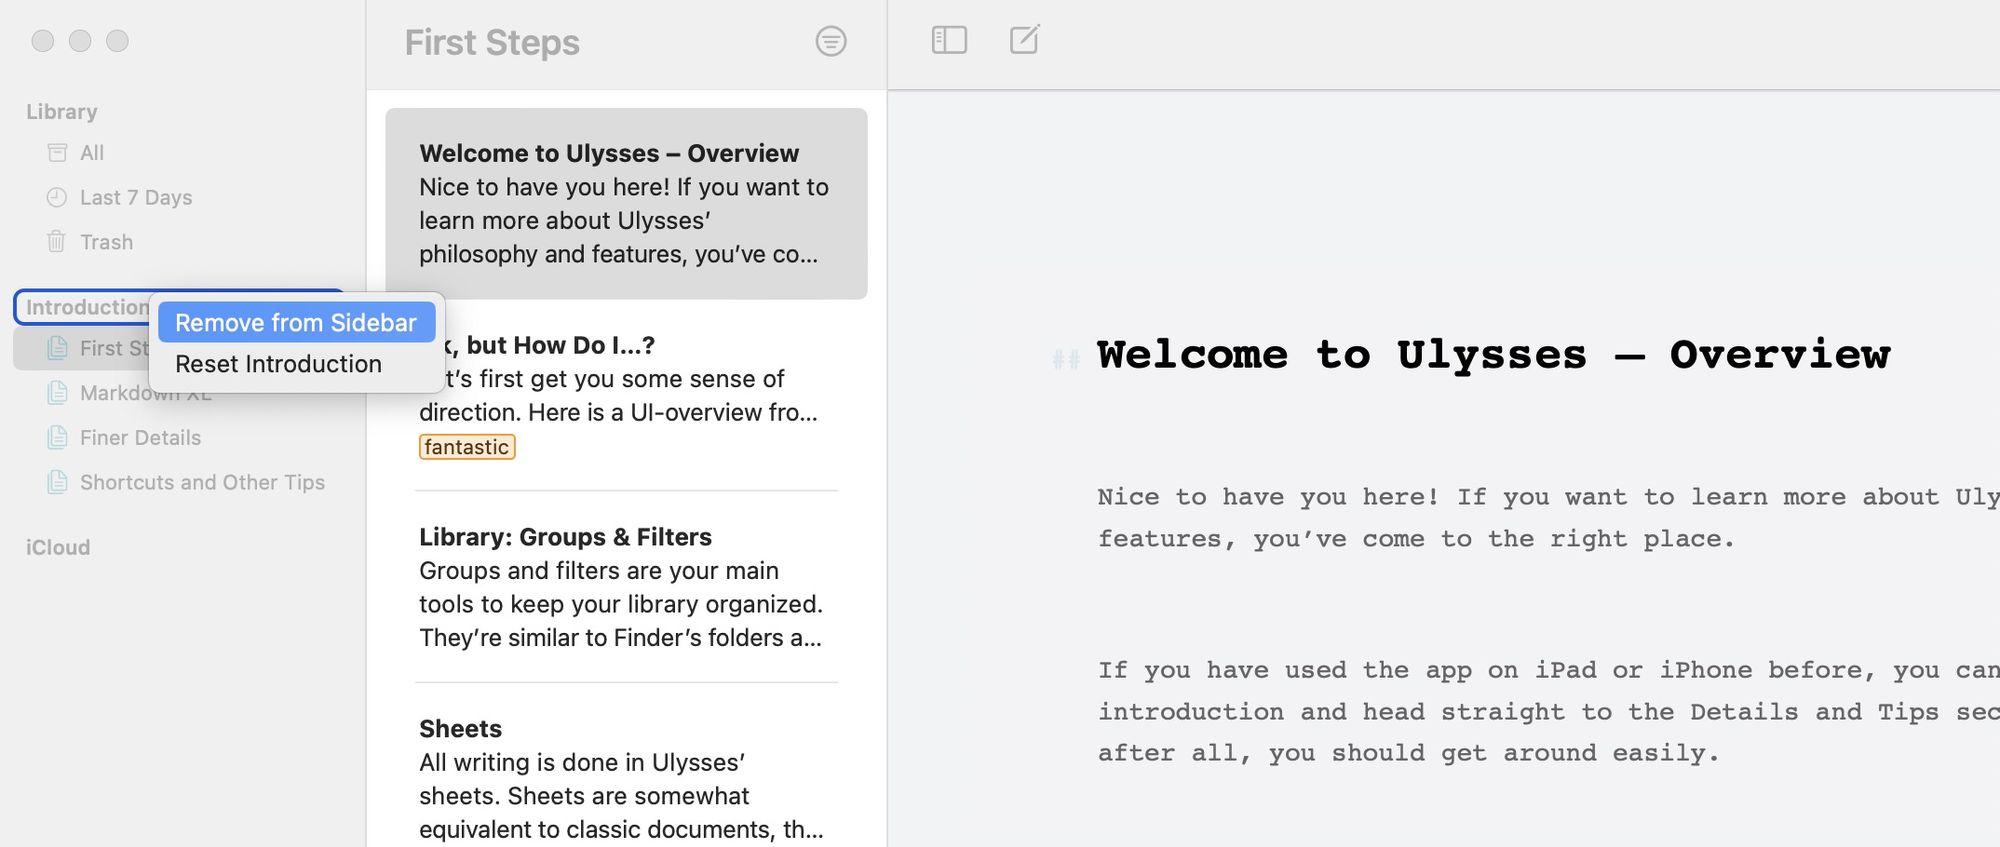
When you first launch the app, you will see a three-pane view which from the left to right houses your libraries and folders, documents, and the main content editor. There’s a fourth pain which is hidden, but we will talk about that later. On the first launch, Ulysses provides you with an “Introduction” library which details all the features that are packed inside the app. For our purposes, we will remove the Introduction library and start afresh.

To do that, right click on the library name and select remove from the sidebar. If you want to bring the Introduction library back, you can easily do that by going to preferences panel of the app. You can learn more about that in the “Libraries and Group Hierarchies “ section of the review.
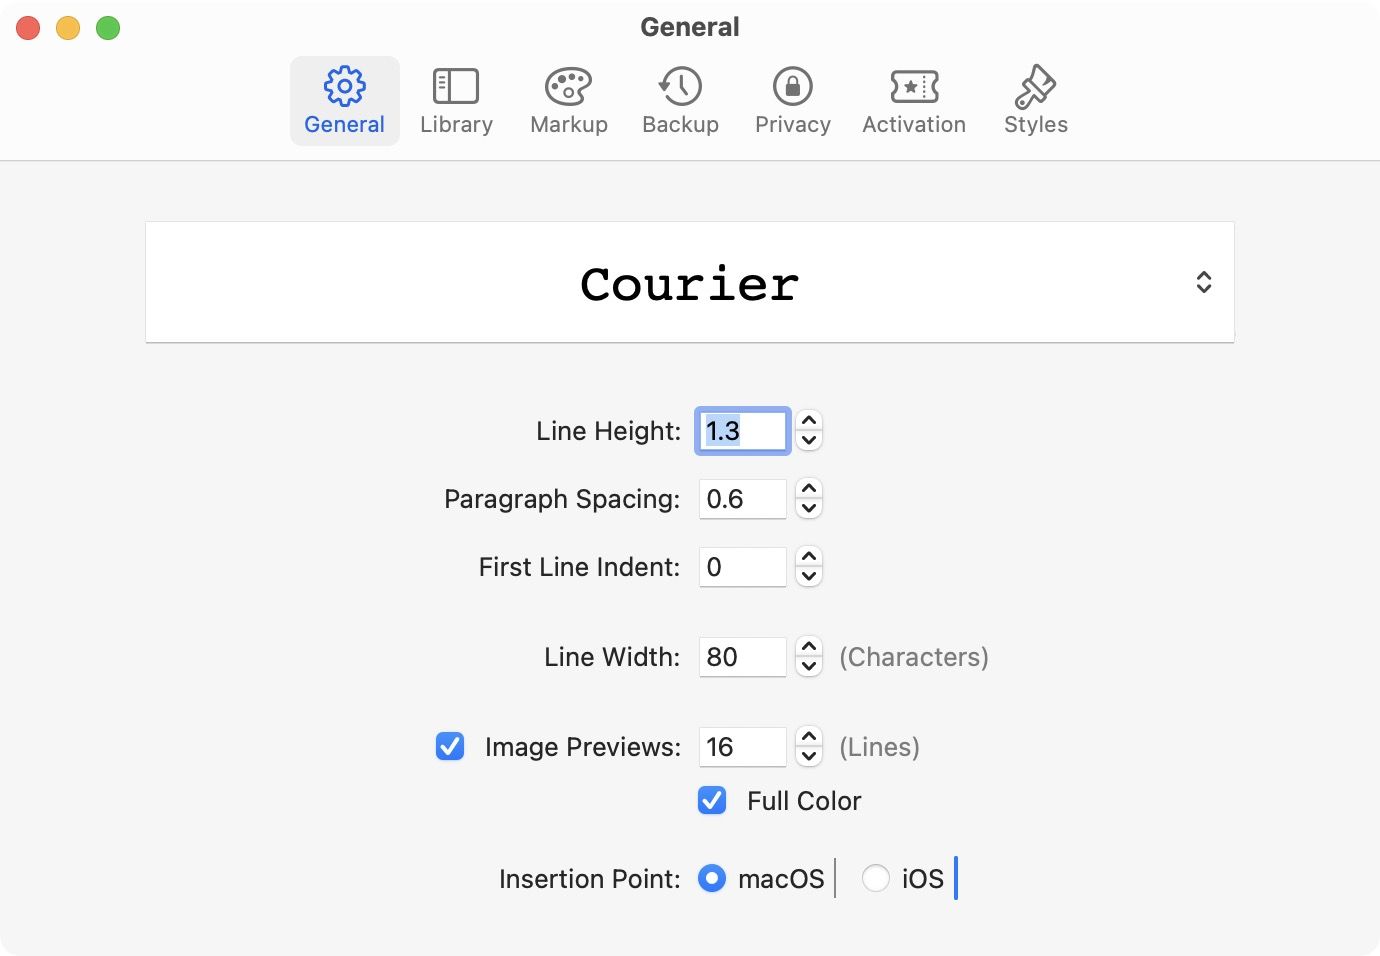
Before we start to get to know our app, let’s configure some of the basics to our liking. To do that, open the Preferences panel and click on the General tab. As you can see, here you can configure the basics of your editor including the properties like font type, line height, paragraph spacing, and more. Feel free to play with the settings and make the editing environment just as you prefer it. That’s all we need to do for now as we will look at the other section of preferences in the coming sections.
Ulysses: getting to know your editor
By now, you know what your app looks like and made some basic changes to the preferences panel. Now, we are going to take a deep dive and look at all the features that Ulysses can offer us.
Libraries and Group hierarchies
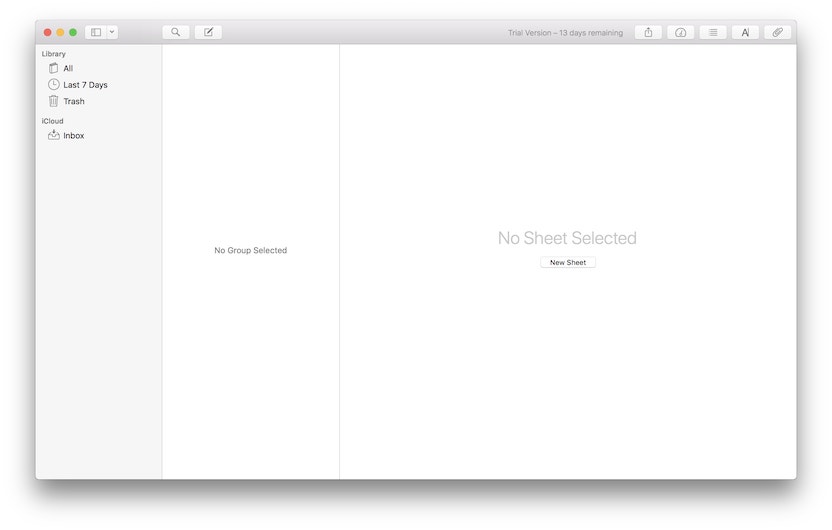
The leftmost panel of your app’s window is the place where your libraries and folders (which is called Groups in Ulysses) live. This is where you can manage all your documents (called Sheets in Ulysses) and organize them neatly in different groups. As you can see, right now there’s just a single library call iCloud with a single group called Inbox. The main feature of the iCloud library is that everything that’s in there is synced across all your devices. However, if you want to keep your documents or sheets offline you can create another offline library.
To create a new library go to Preferences → Library. Here, you can bring back the Introduction library that we deleted or you can choose to add the “On My Mac” or “External Folders” library. The On My Mac library is an offline library which allows you to keep all your work offline while the External Folders allows you to create and save a Ulysses library either offline or in any other cloud storage folder (like Dropbox or Google Drive). The External Folder is a good option if you want to create more libraries than the default iCloud and On My Mac libraries.
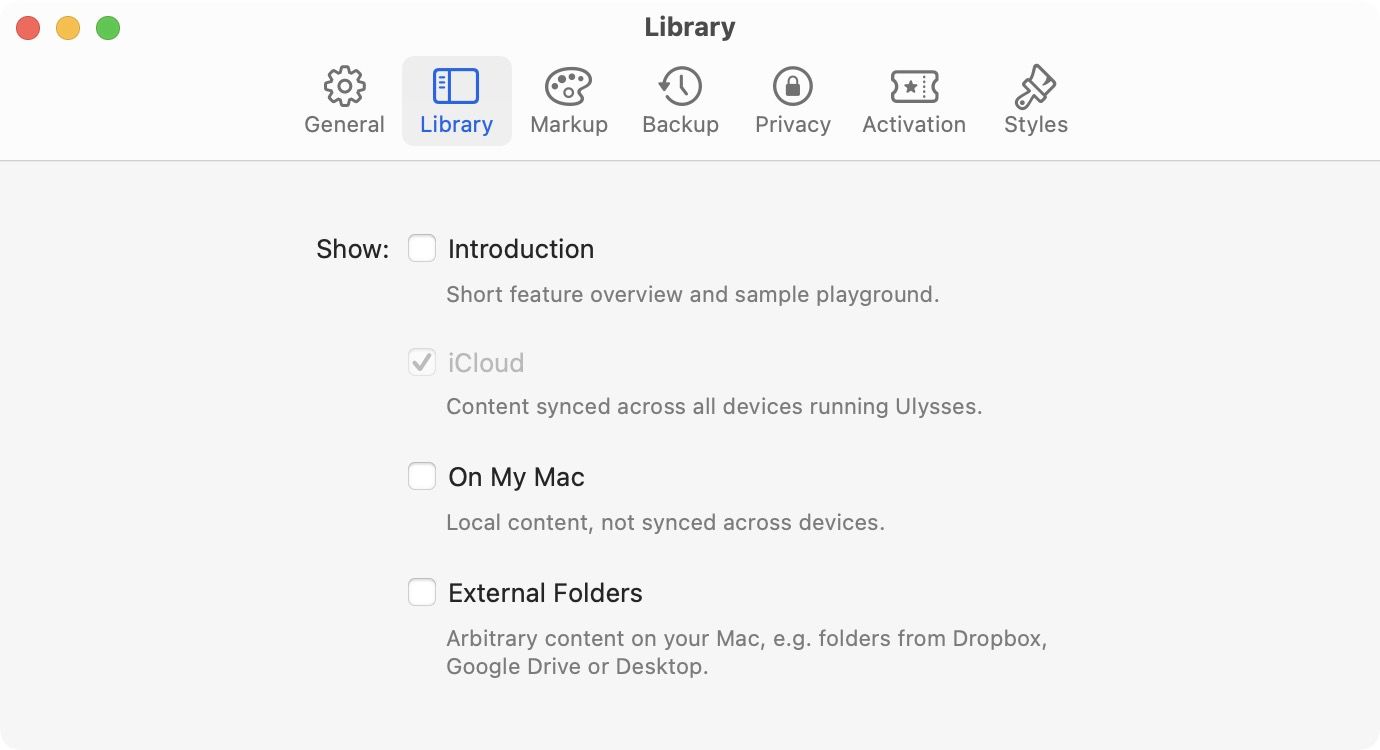
To add an external folder, click on the “Add Folder” button and choose the one where you want to save your Ulysses files. For the purpose of this article, I am going to remove the external and on my mac libraries just to keep things clean. The Library is at the top organizational hierarchy which is followed by Groups. There are a couple of ways to create a new Group (think folder). You can hover over near the iCloud library to bring the + button which can be used to add a Group or click on the File menu and select the new group option or remember the keyboard combo ⌘⇧N.
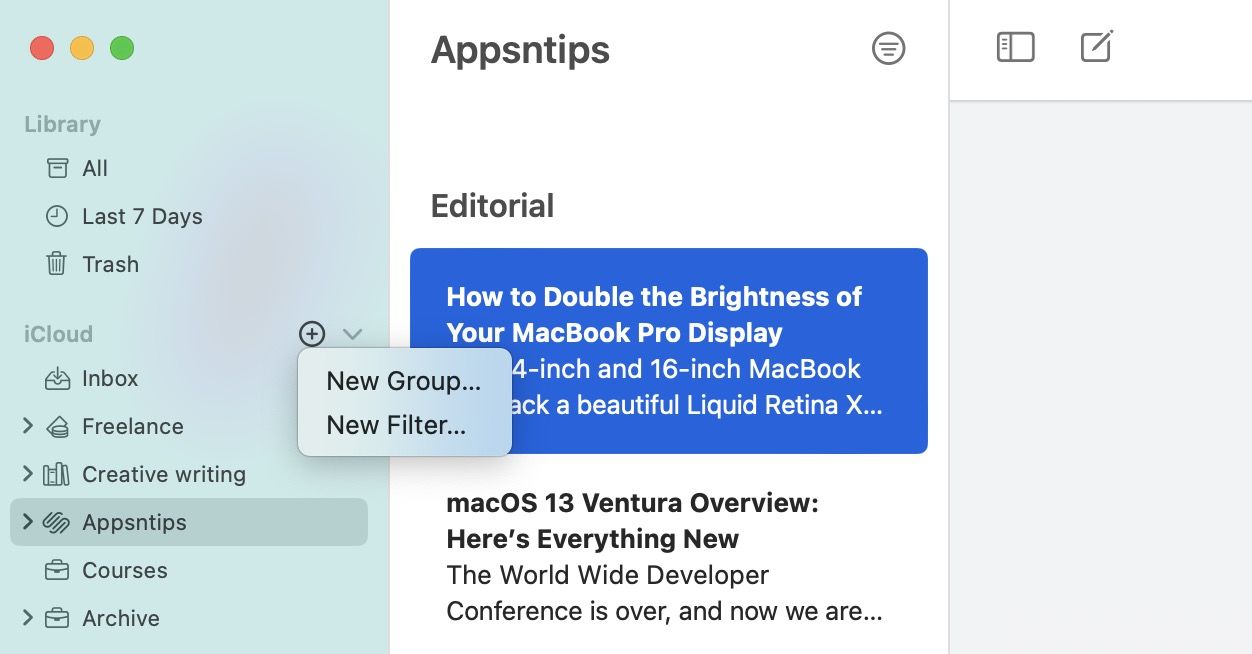
Once you create a new group you can rename it and also change its associated icon. Ulysses provides a lot of different icons so that you have a great visual way to differentiate between the groups. If you want to edit either the name or icon of a Group after you have created it, just double-click on its name the relevant options will appear.
You can also nest a group inside other groups and create multiple levels of organization. To nest groups just drag and drop one on top of another. Another way to create a nested group is by right-clicking on a parent group and creating a new group.
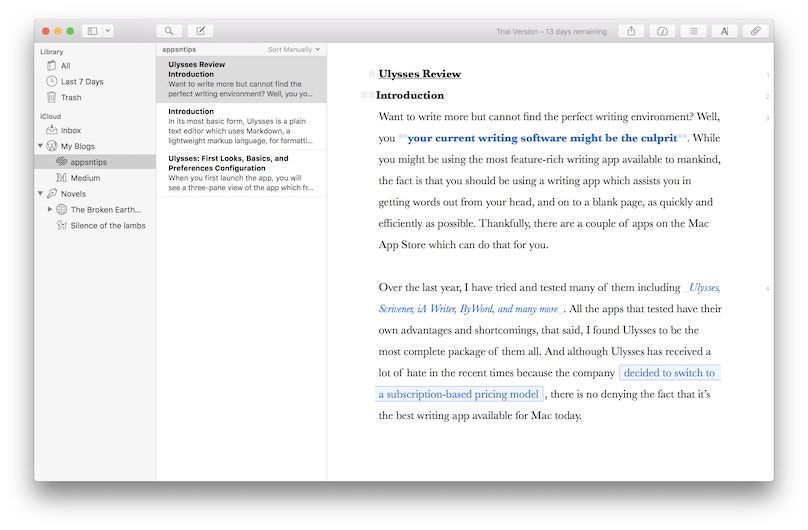
In the above example, you can see that under the 'My Blogs, group I have nested two other groups; one for our website and one for our Medium blog. In the Novels group, we went even a step further and nested group under an already nested group. I also chose different symbols for each of them to give the groups a unique look. There is no limit of the number of subgroups you can create so you can organize everything as per your desire.
Creating and managing sheets
Sheets are what Ulysses calls it individual documents. You can create a new sheet by either going to the File menu and selecting the new sheet option, or you can just hit ⌘N on your keyboard.
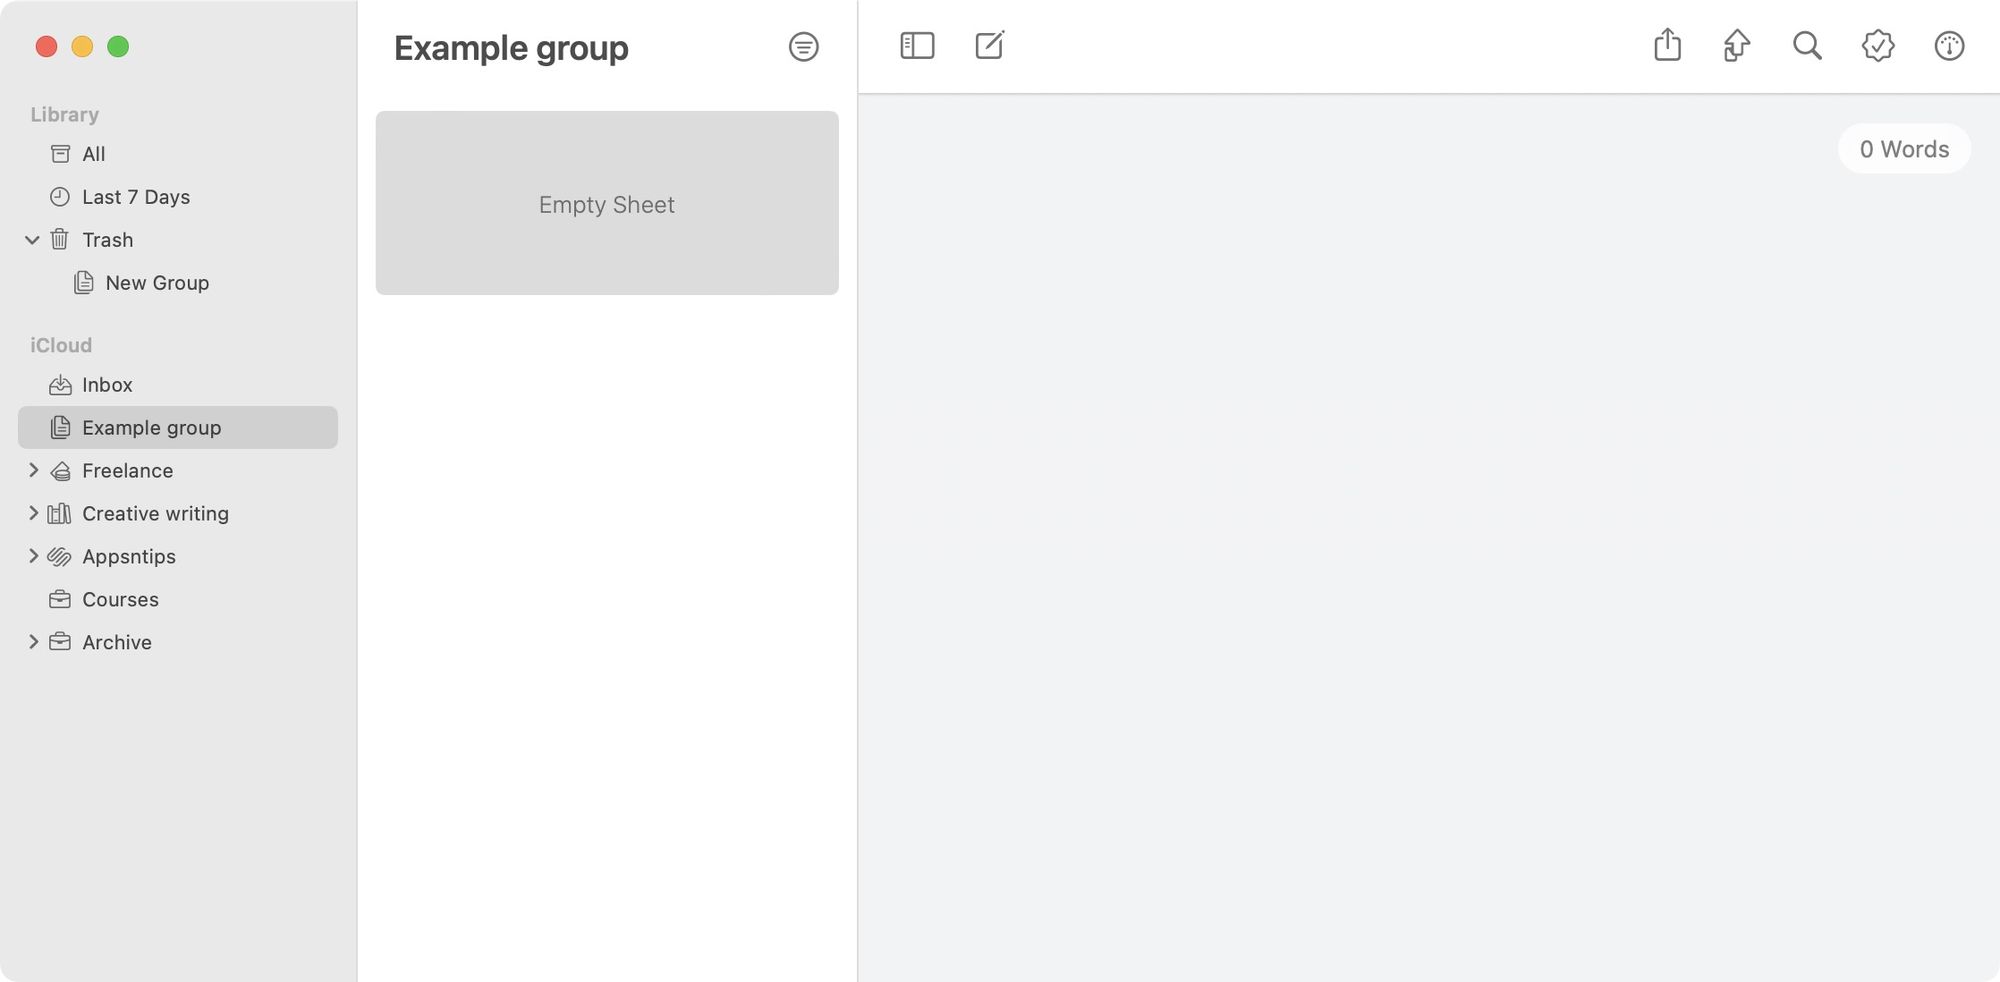
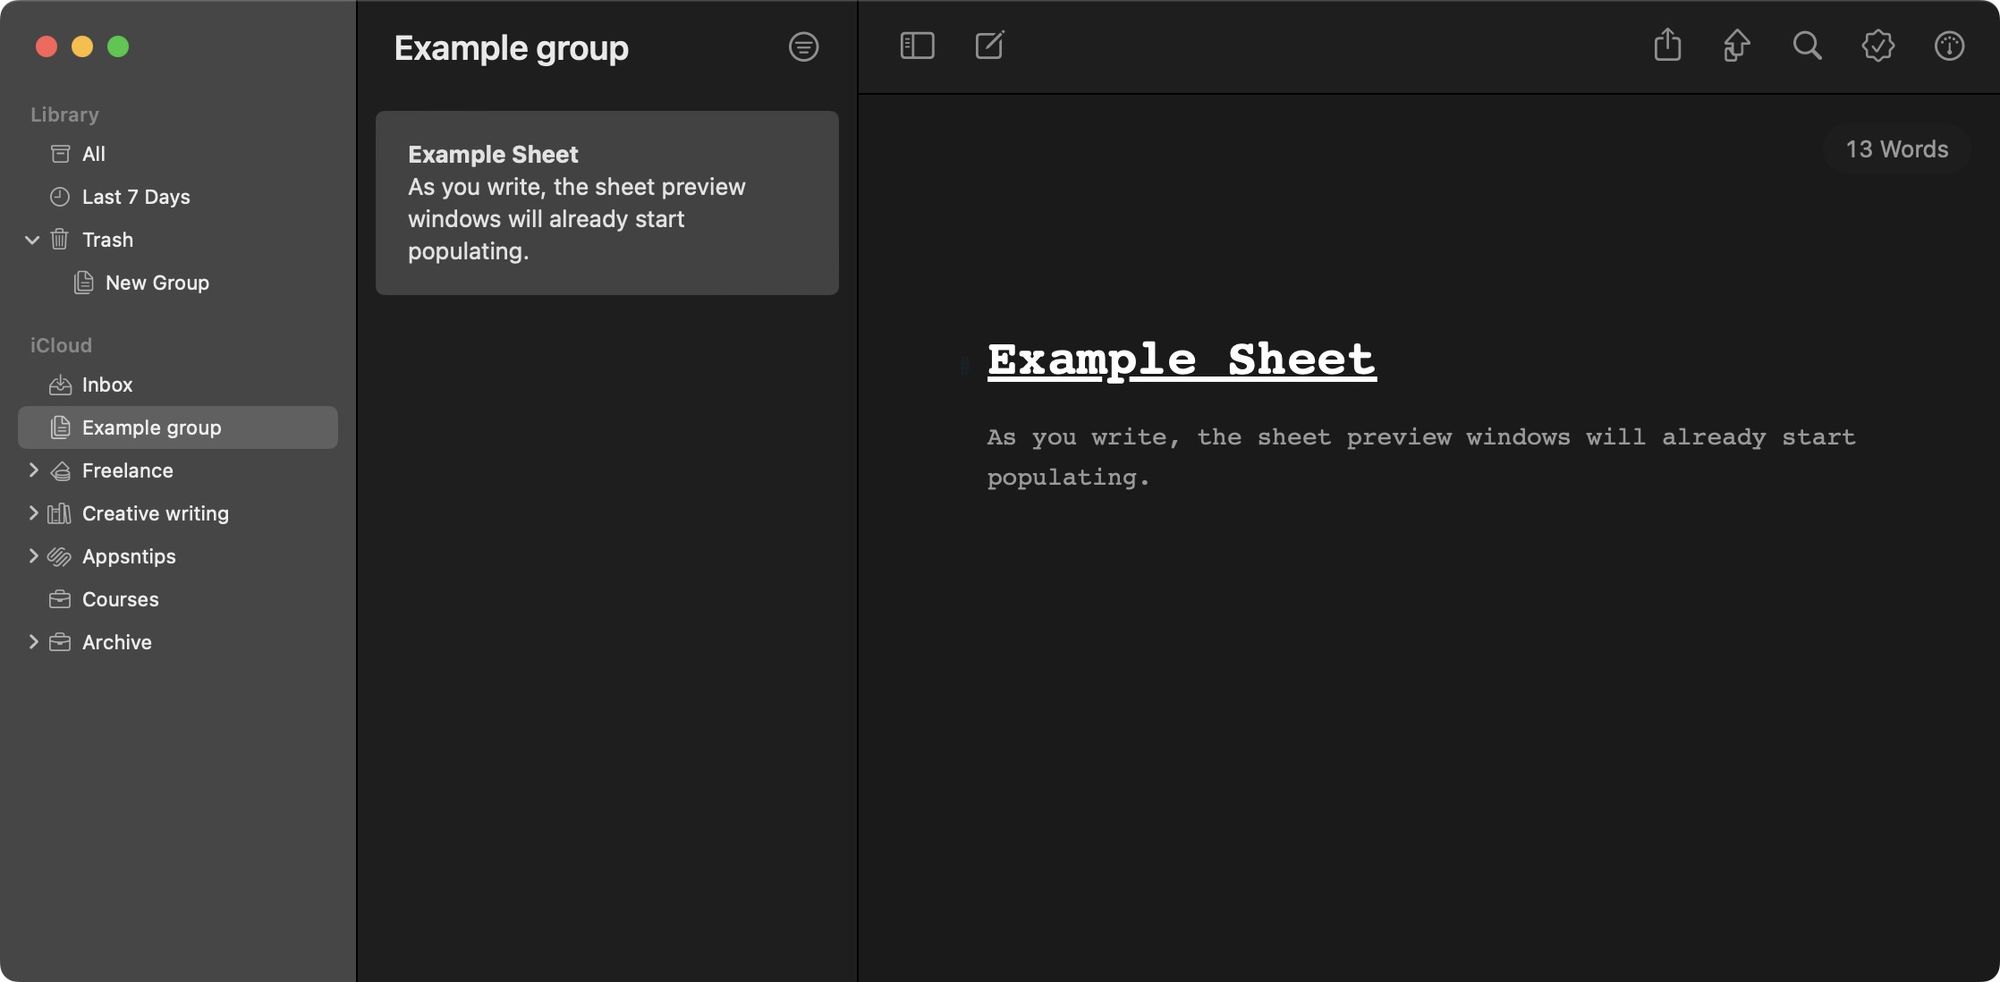
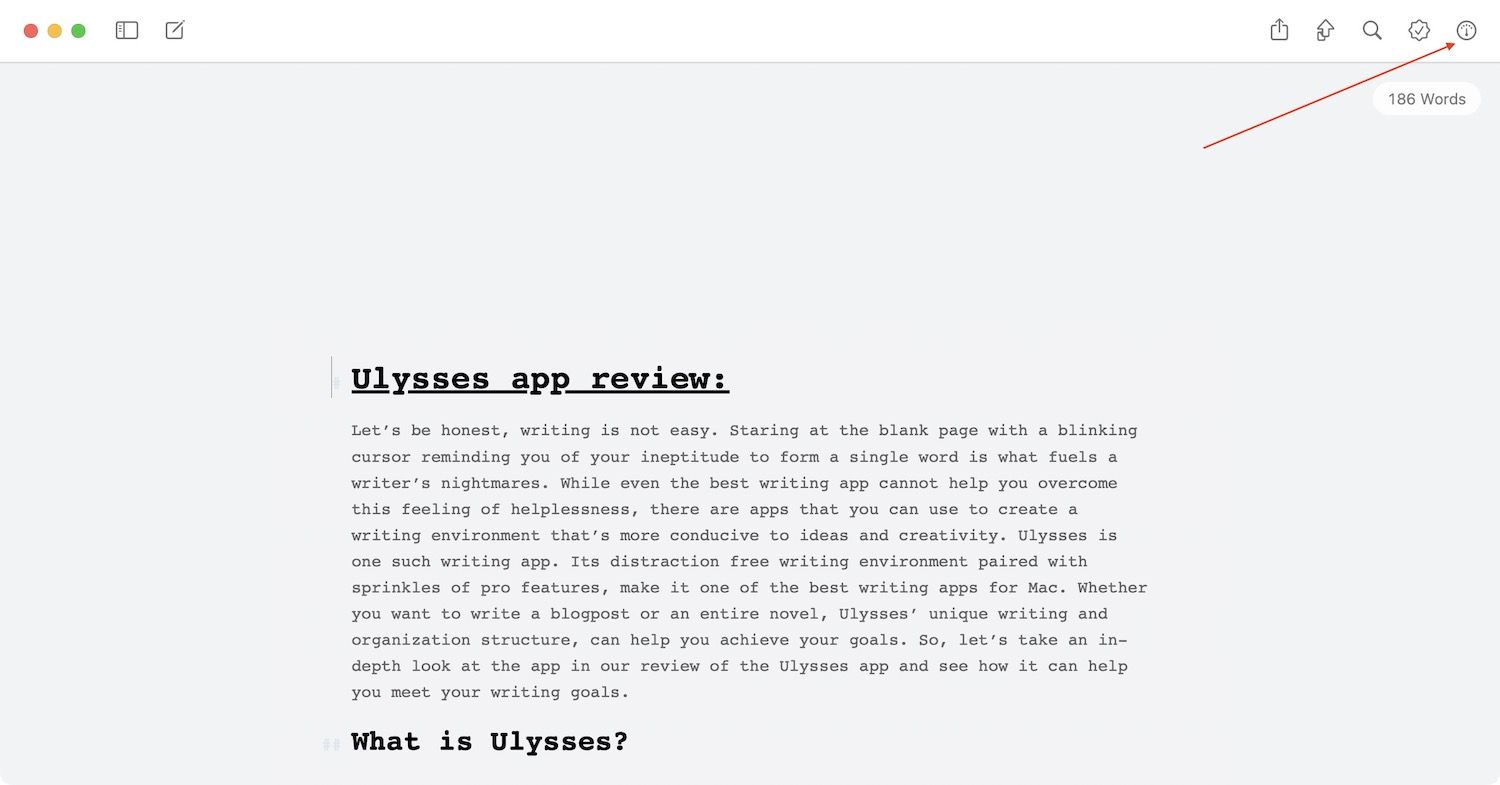
One thing to remember here is that the new sheet will be created inside the folder you have selected. For example, if I select the Example Group folder, the new sheet will be created inside that folder. By default the sheets are empty and don’t show anything but as you start typing in the text, it will also populate the sheets preview window.
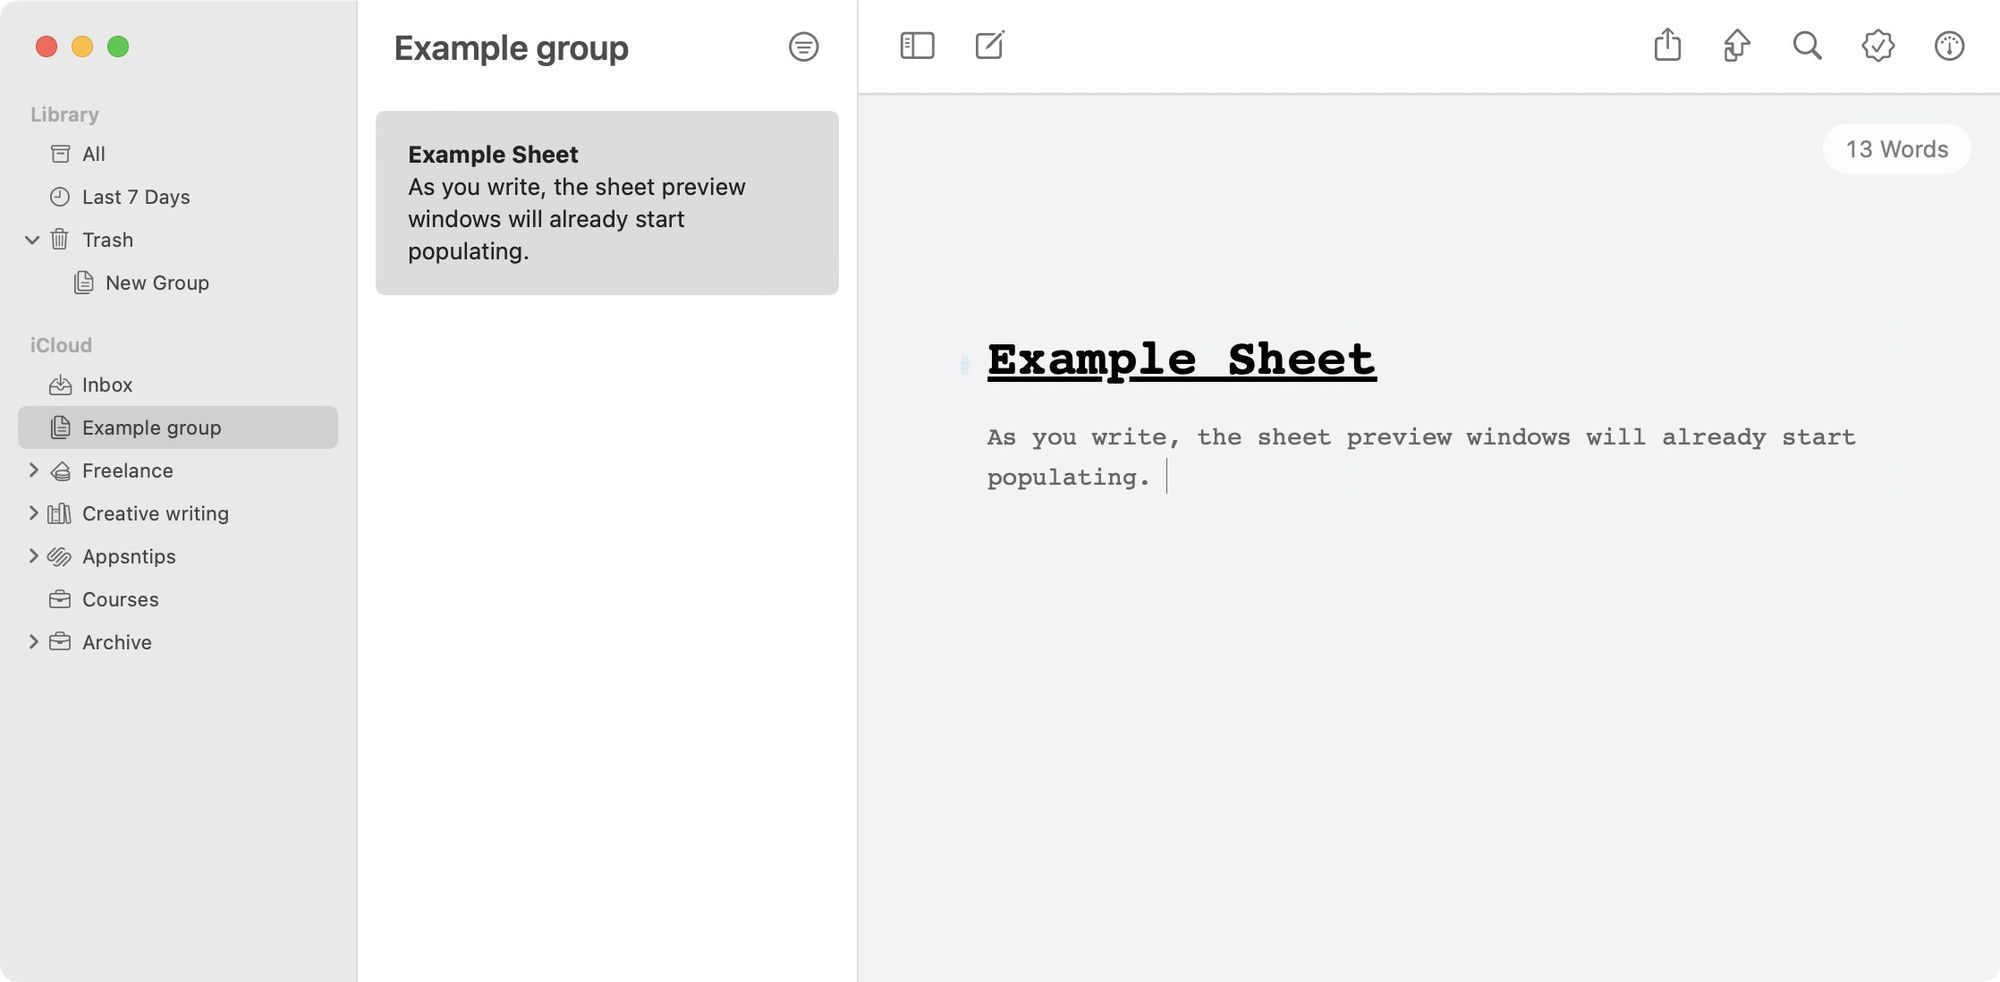
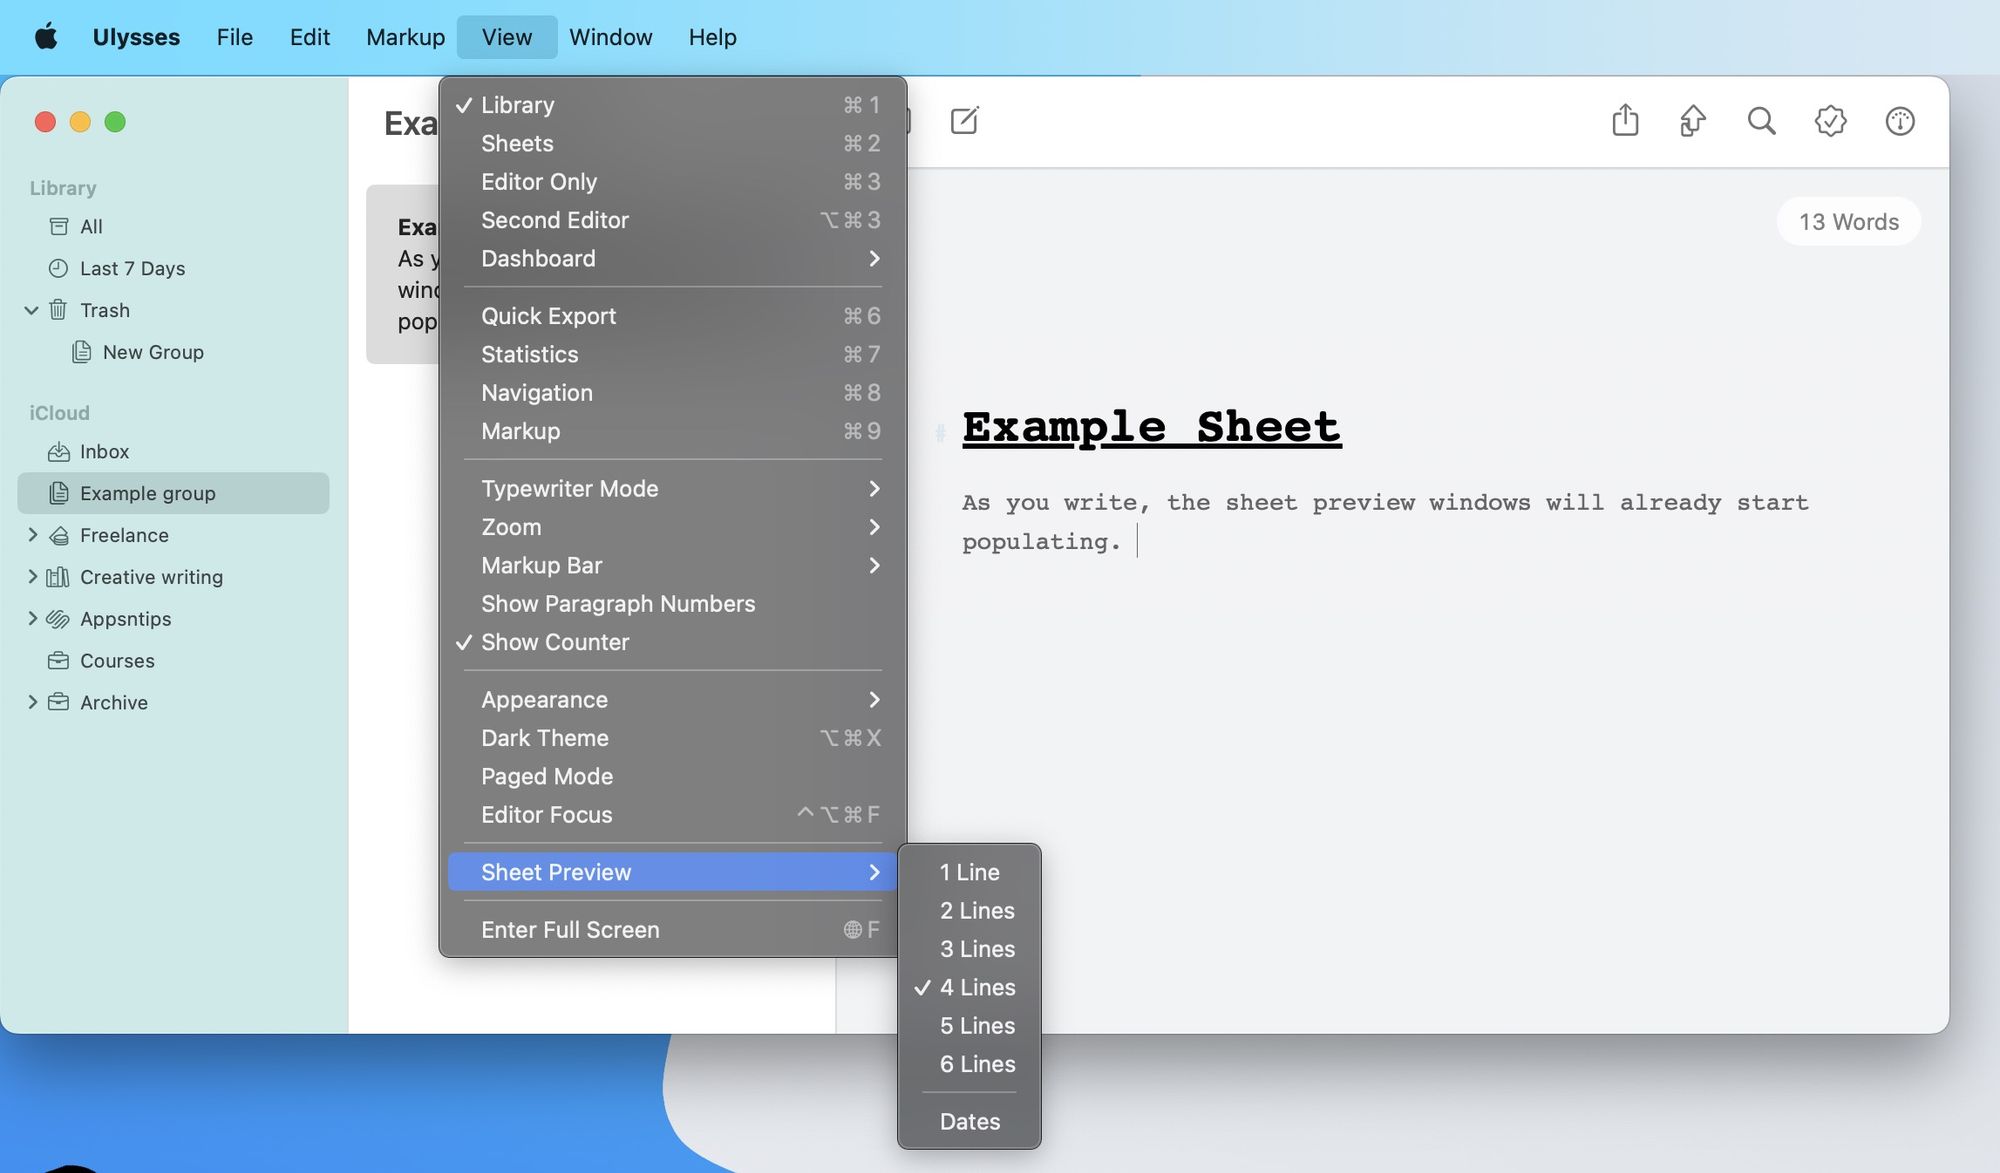
You can also manage how much of the content the sheets preview window can show you. To do that, go to View → Sheets Preview and select the appropriate option. Whenever you add a new sheet inside a group, it will be automatically added to the top of the sheet, however, you can easily drag and drop to rearrange their order.
Learning markdown
As I mentioned above, Ulysses is not your average word-processor like Apple Pages or Microsoft Word, instead, it is markdown editor which uses the markup language to help you format your text. In the the picture below you can see that the first line of the text looks like a title. That’s because I used a hashtag #️⃣ symbol before it. In Markdown #️⃣ denotes a title. Similarly, you can use #️⃣ #️⃣ to create a secondary level heading and so on. The best part about using markdown is that it allows you to export your document in any format that you desire. We will learn more about exporting in a later section.
However, just because Ulysses uses markdown, it doesn’t mean that all your common keyboard shortcuts are of no use. In fact, you can use all the common shortcuts like ⌘B for bold, ⌘I for italics, and ⌘K for link insertion. It’s just that Ulysses will show all these commands in its own markdown format. The markdown language might seem a little intimidating at first, but, it will only take you a couple of days to get the hang of it.
There are some really cool things that you can do with the markdown. You can add comment blocks, footnotes, highlight text, delete text, and much more. I would suggest that you ease into the language starting first with creating titles, sub-titles, bolding, and italicizing text, and then move on to the more advanced markups.
Live preview of markdown text
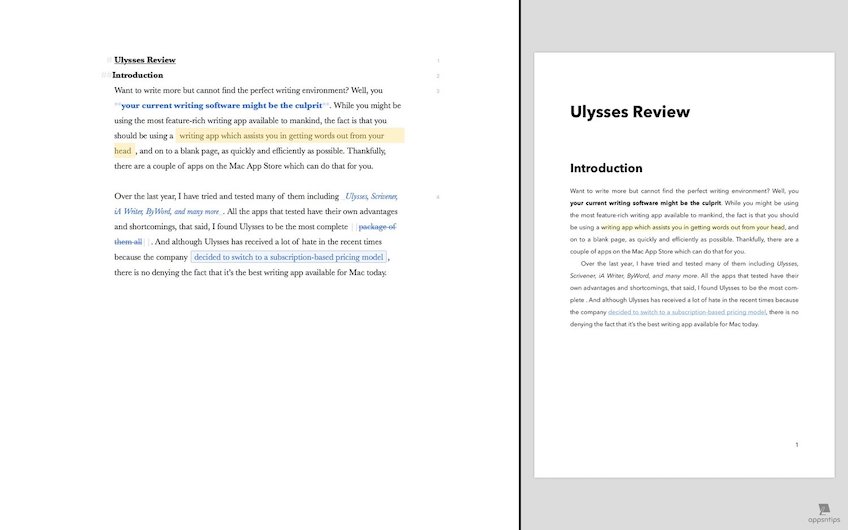
Markdown is awesome, that said, it can be disorienting for someone who is used to seeing his text in rich format. That’s where Ulysses’s live preview feature can help you. I don’t need to use the live preview feature anymore as I am accustomed to the markdown language, but if you are just starting out, this tip will come really handy. To see a live preview of any sheet right-click/control-click on the sheet and then select the Preview option.
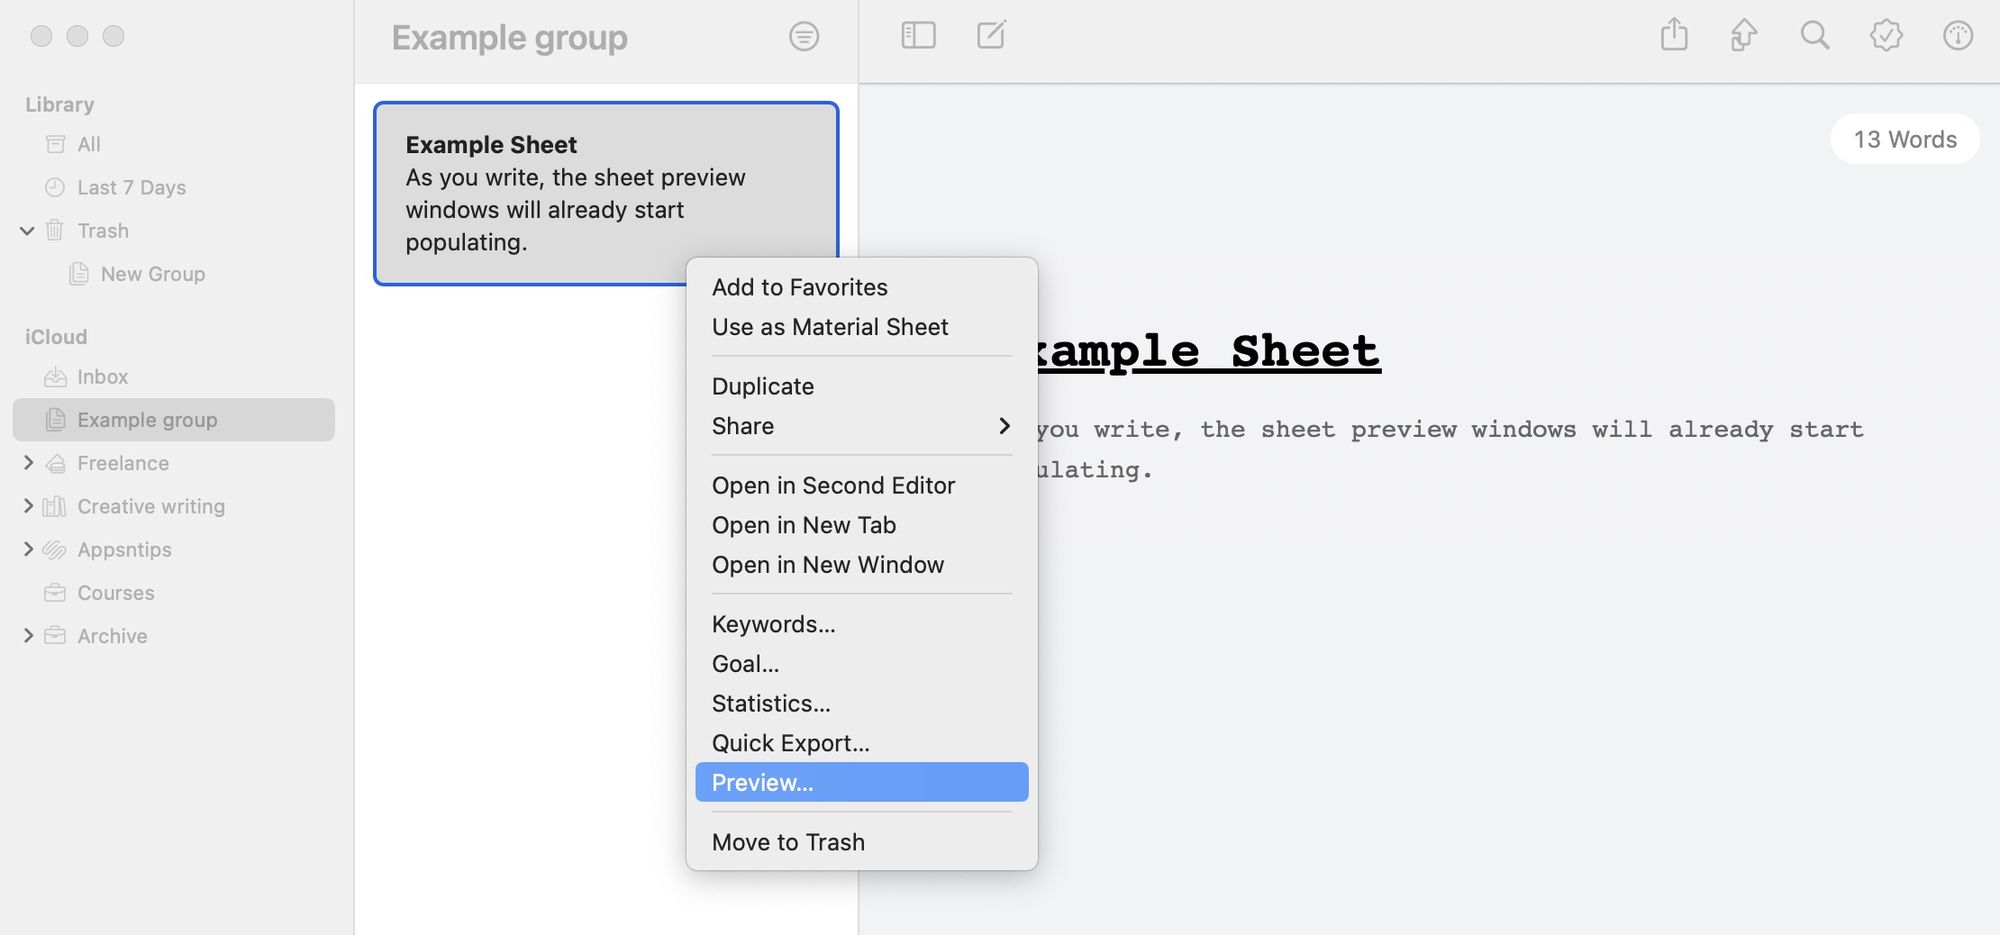
Once you do that, Ulysses will open a live preview window as shown in the picture above. This shows how your text will look once you export in different formats such as rich text file, PDF file, HTML, Docx file and so on. By default, the preview shows you the HTML version but you can change the view by clicking on the version name present at the top of the preview window.
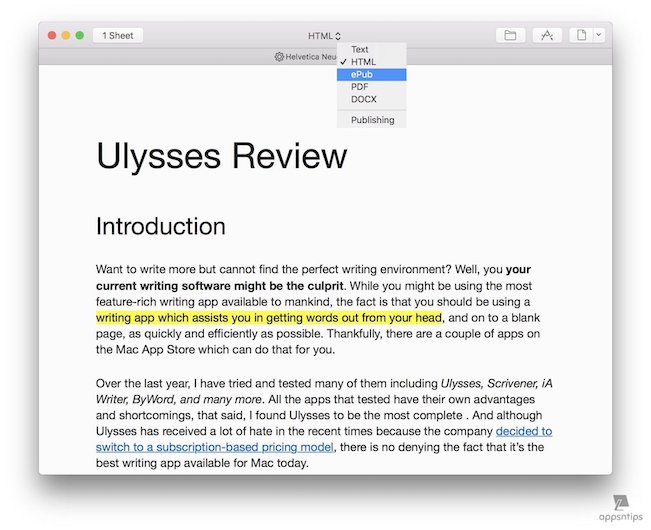
When you start out, you can use your Mac’s split screen feature to keep both the files side by side and look how markdown text looks in a normal file format.
Dark theme and Typewriter mode
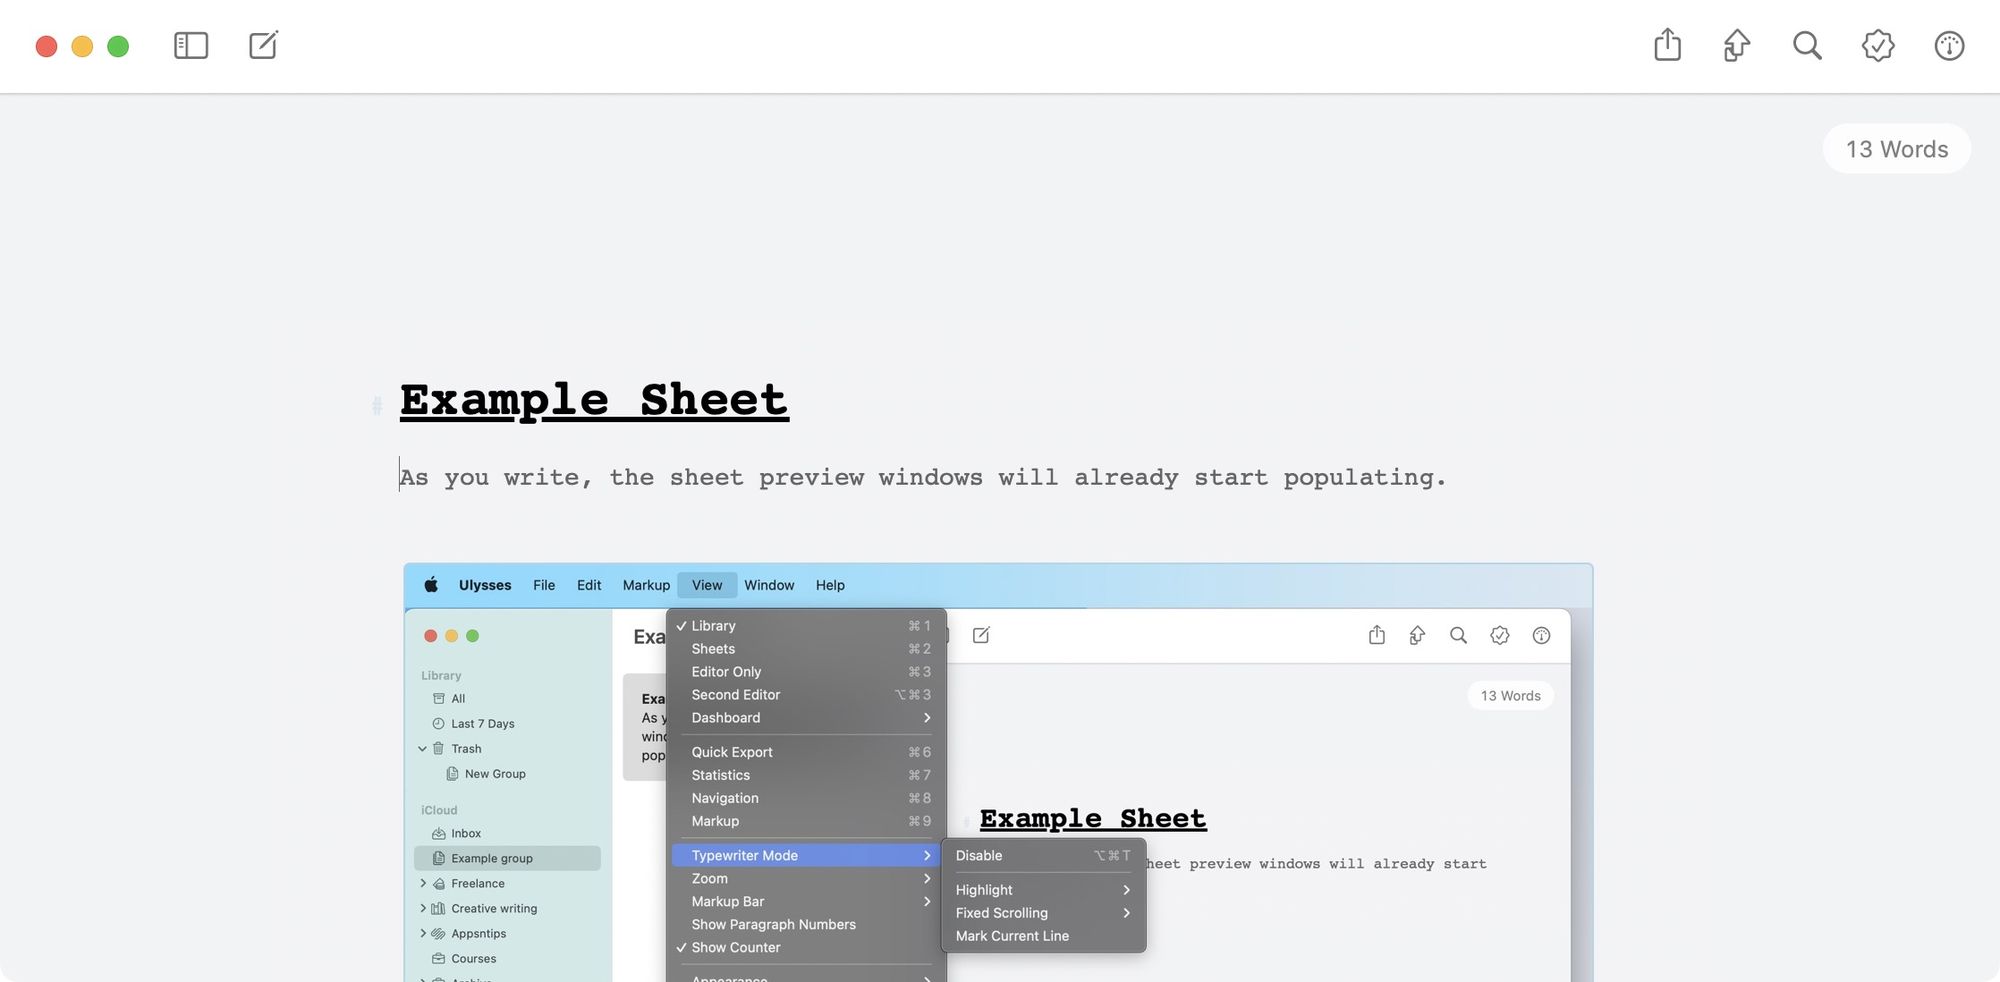
Ulysses might pack a punch but at the end of the day, I like it the most because it gives me one of the cleanest and most distraction-free writing environment. First, you can easily get rid of the side panels and enter into the focused editing mode where only your editor page will show up. You can do that by going to the view menu or just using the keyboard shortcuts ⌘1, ⌘2, and ⌘3 to switch between the modes.
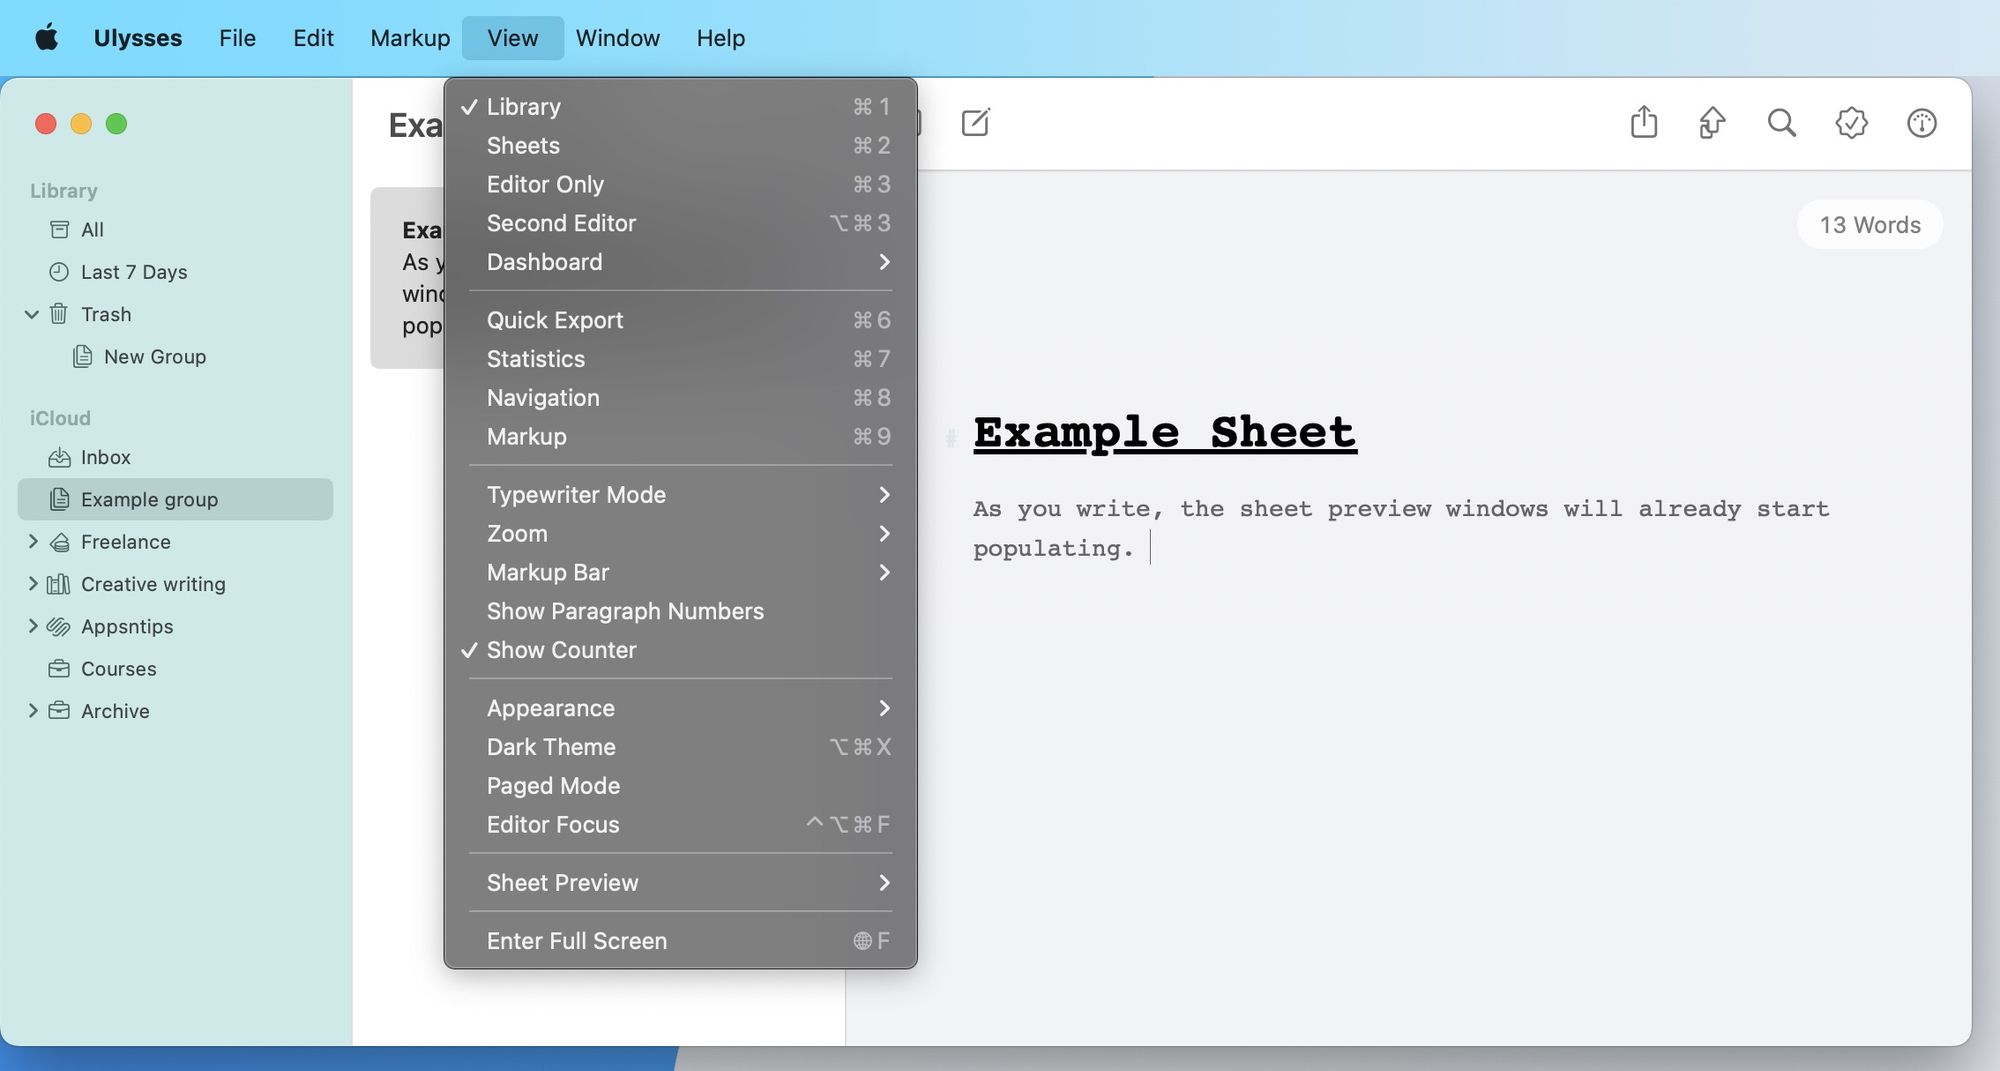
While you are in the view menu, you can also see that Ulysses also comes with a dark mode and a dark theme. The dark mode applies the dark mode to all of the Ulysses other than the editor panel while the dark theme does the opposite. If you want to apply the dark mode to the whole app select both the options.
Our favorite feature of Ulysses's editor is the typewriter mode. The feature allows you to use the editor in a way that your current line always remain in the middle of the page while the text you wrote is pushed back upwards. It’s a great way to concentrate on your writing. You can also enable the option to highlight the line, sentence, or paragraph you are own which basically fades away all the other writing material allowing you to fully concentrate on the words that you are writing.

You can also check out the fixed scrolling option inside the typewriter mode which allows you to set the focus point of the typewriter mode either in the middle, top, or bottom of the page. Once you have configured it, the typewriter mode is just a ⌘⌥T hit away.
6. Inline image previews
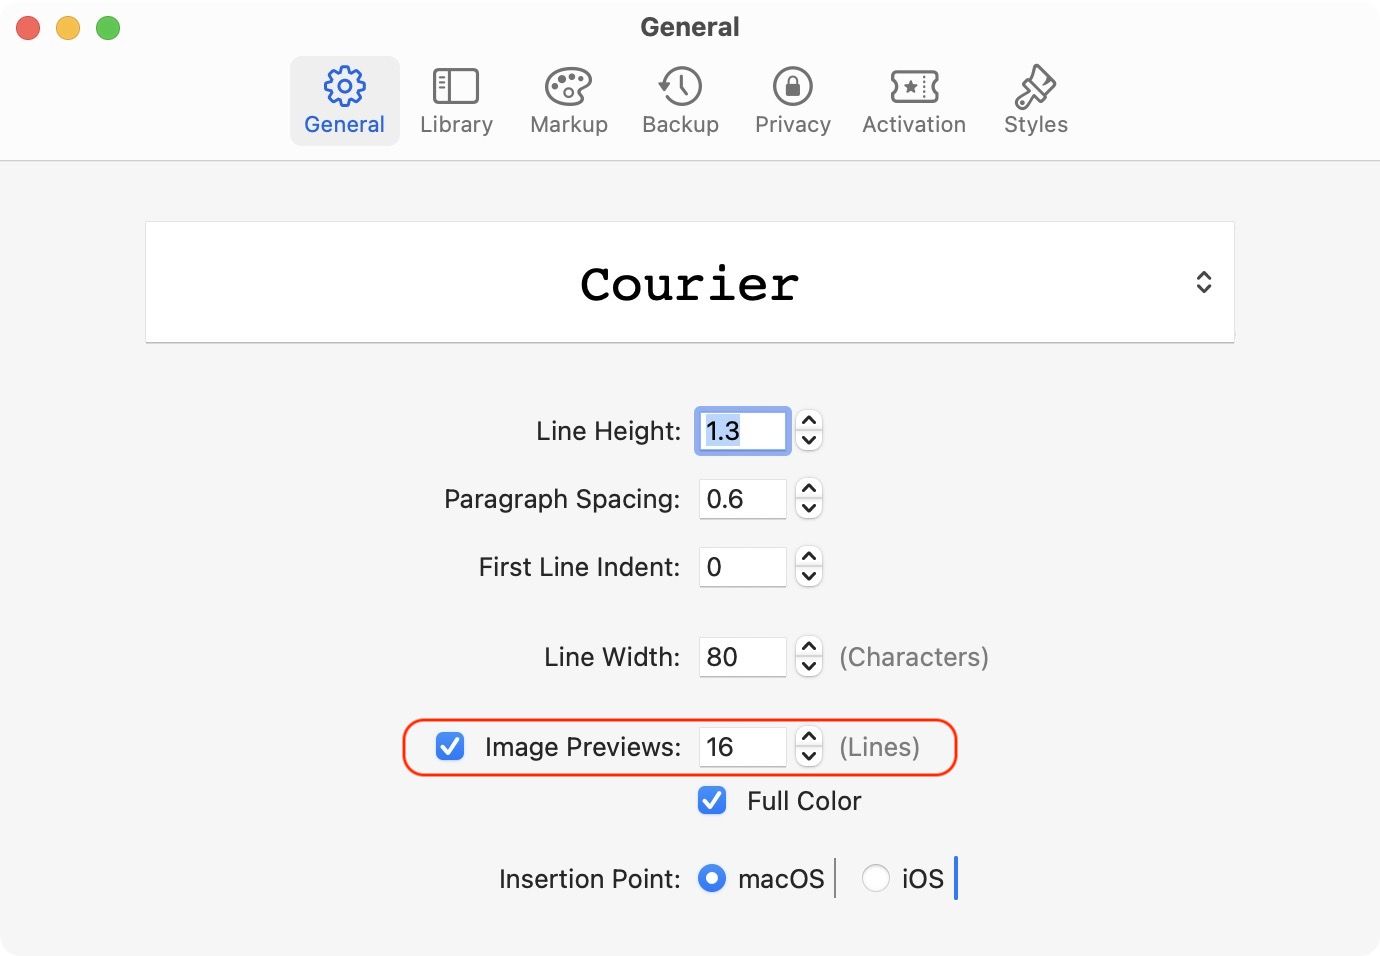
One of the biggest features that Ulysses introduced after going the subscription route was the ability to view inline image. To add an image, just drag and drop the image and Ulysses will show the thumbnail preview of that image.
You can choose the size of the image preview by opening the Preferences panel and going to General. Here, next to Image Previews, you can increase or decrease the size of the preview.
Ulysses: the hidden dashboard
As you might have noticed, we have only talked about Ulysses’s first three panes, but there’s also a hidden fourth pane which we have not looked at till now. Over the years, Ulysses has released several updates for this pane and now it serves as a full-fledged dashboard. You can access it by clicking on the Dashboard button or by using the ⌘4 keyboard shortcut.
The Dashboard hides all the extra features of Ulysses. You can access your document's outline, set goal, check word and character count, and even check the grammar of your written text.
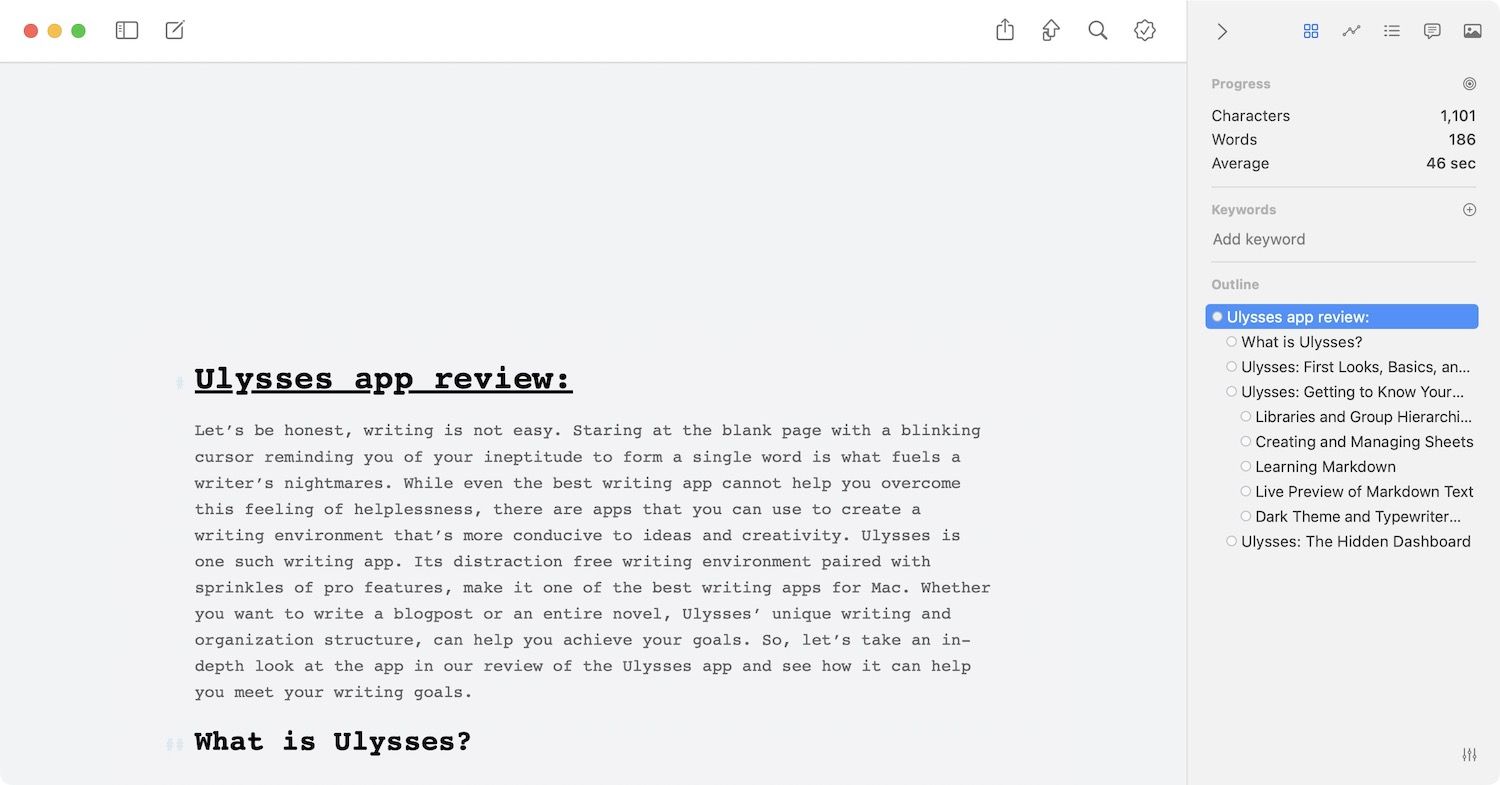
Overview
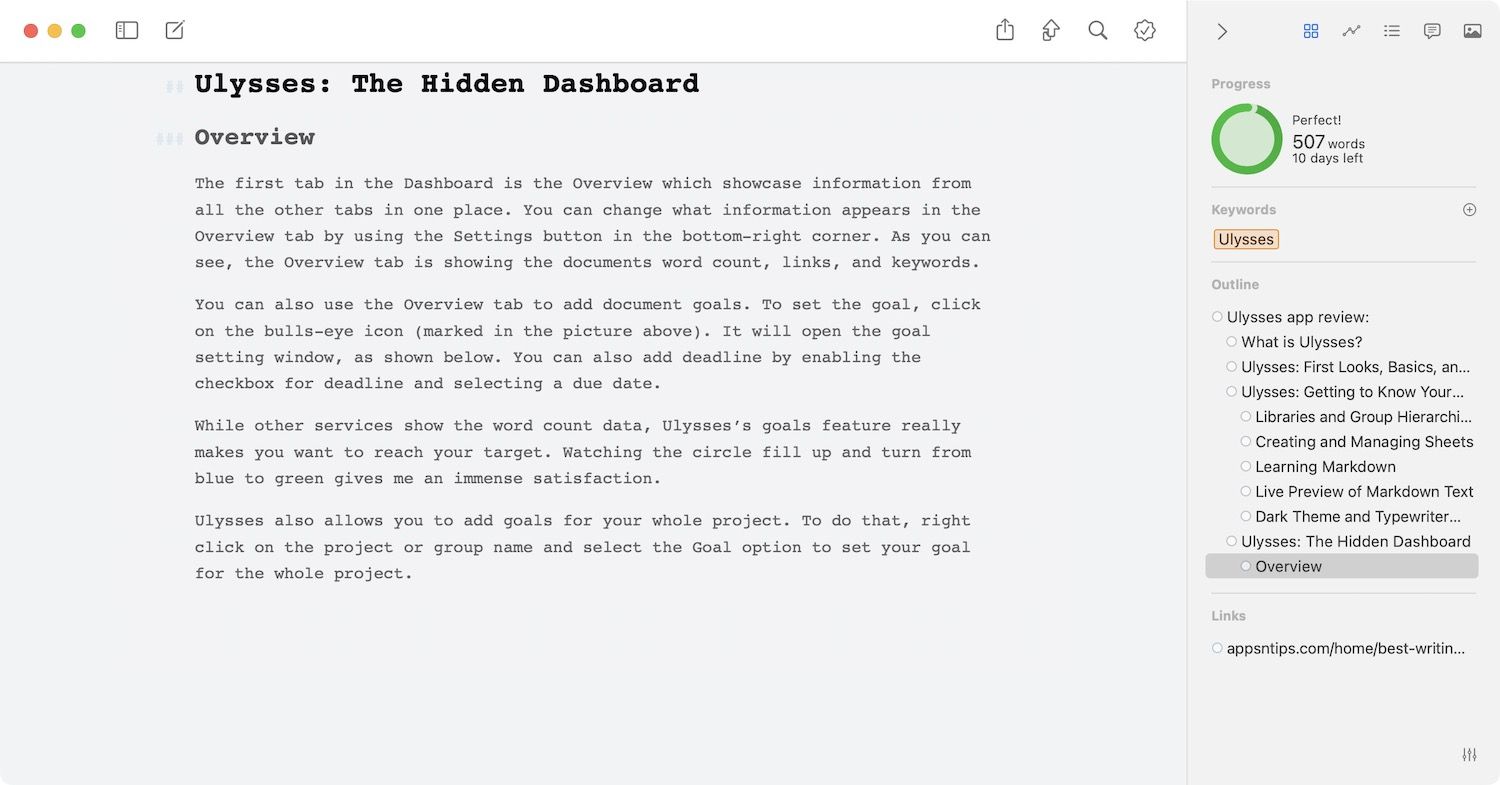
The first tab in the Dashboard is the Overview which showcases information from all the other tabs in one place. You can change what information appears in the Overview tab by using the Settings button in the bottom-right corner. As you can see, the Overview tab is showing the document's word count, links, and keywords.

You can also use the Overview tab to set a document goal. To set the goal, click on the bulls-eye icon (marked in the picture above). It will open the goal-setting window, as shown below. You can also add a deadline by enabling the checkbox for deadline and selecting a due date.
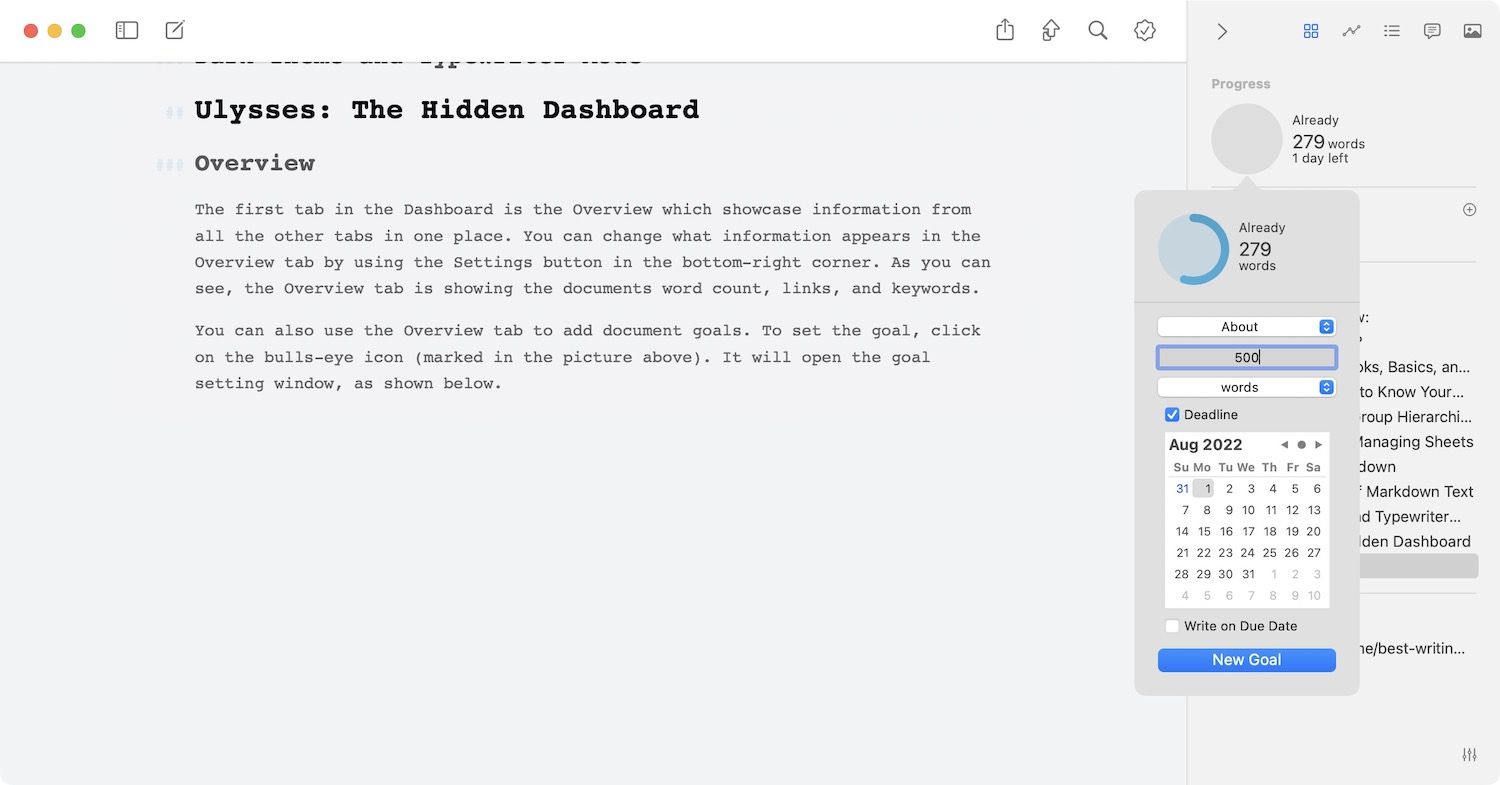
While other services show the word count data, Ulysses’s goals feature makes you want to reach your target. Watching the circle fill up and turn from blue to green gives immense satisfaction.
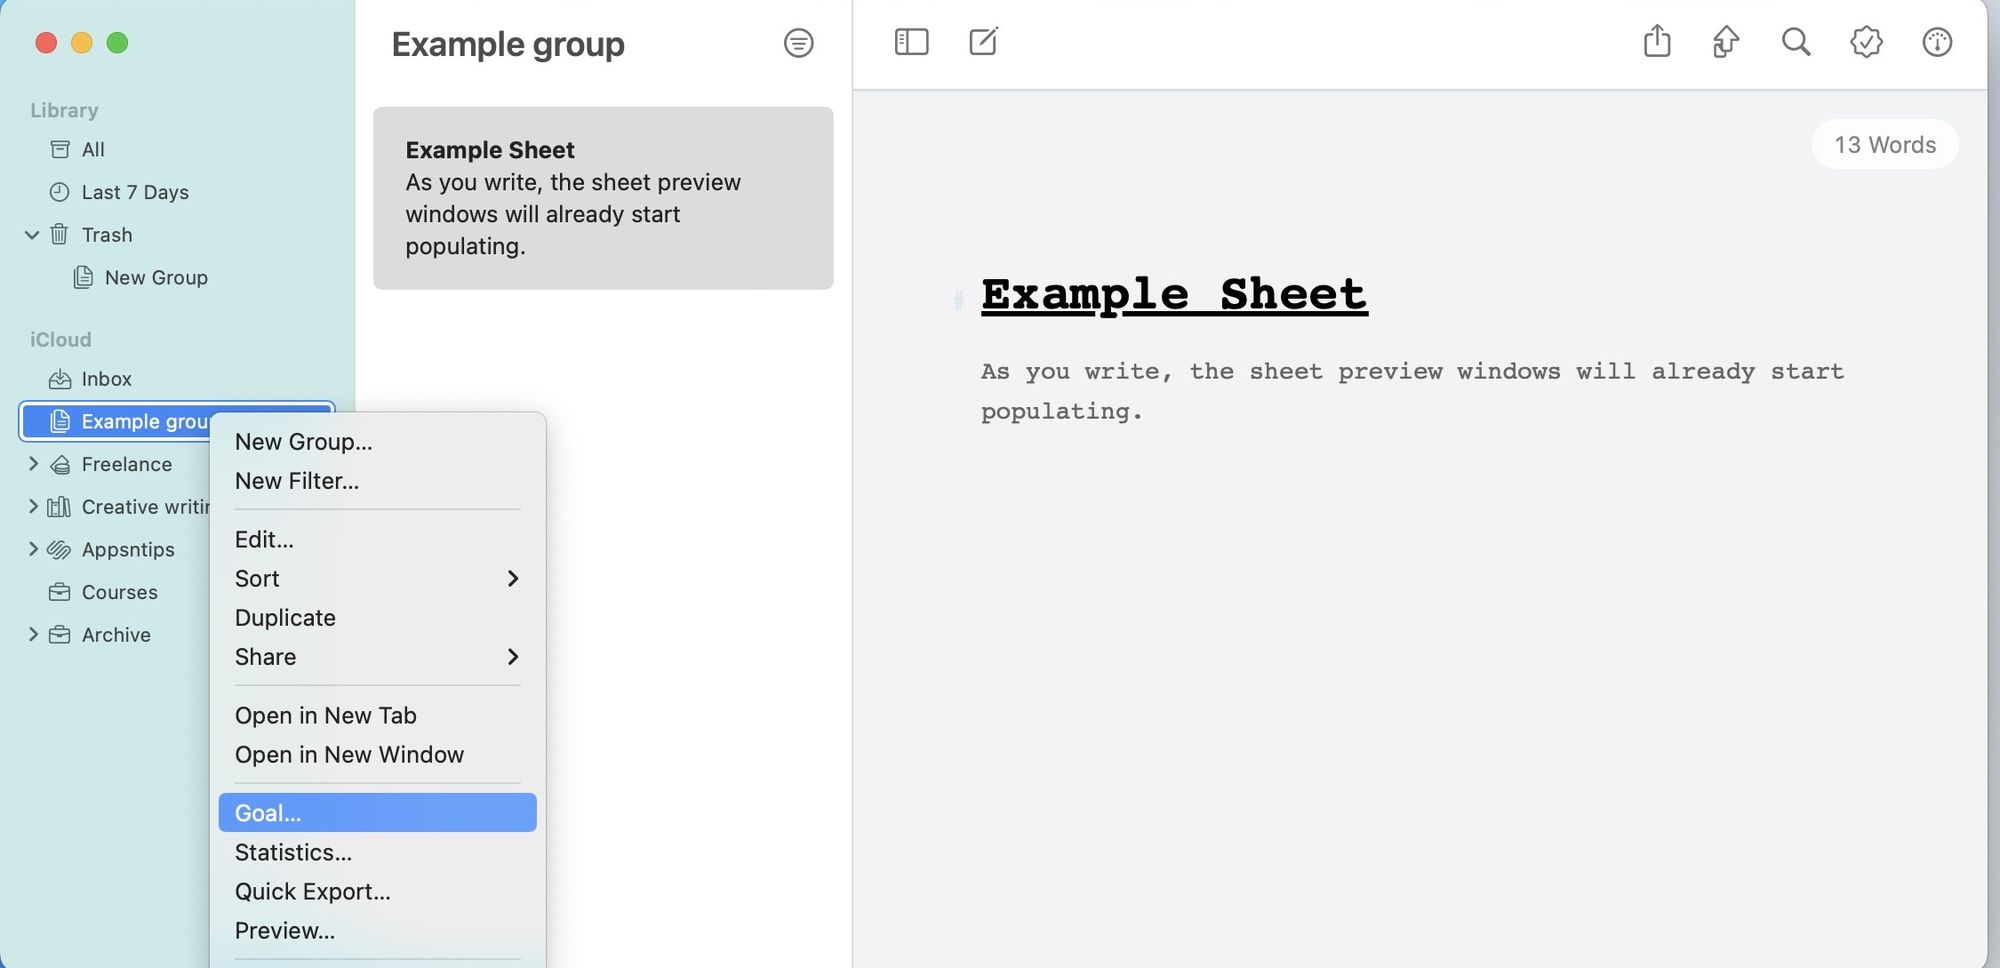
Ulysses also allows you to add goals for your whole project. To do that, right-click on the project or group name and select the Goal option to set your goal for the entire project.
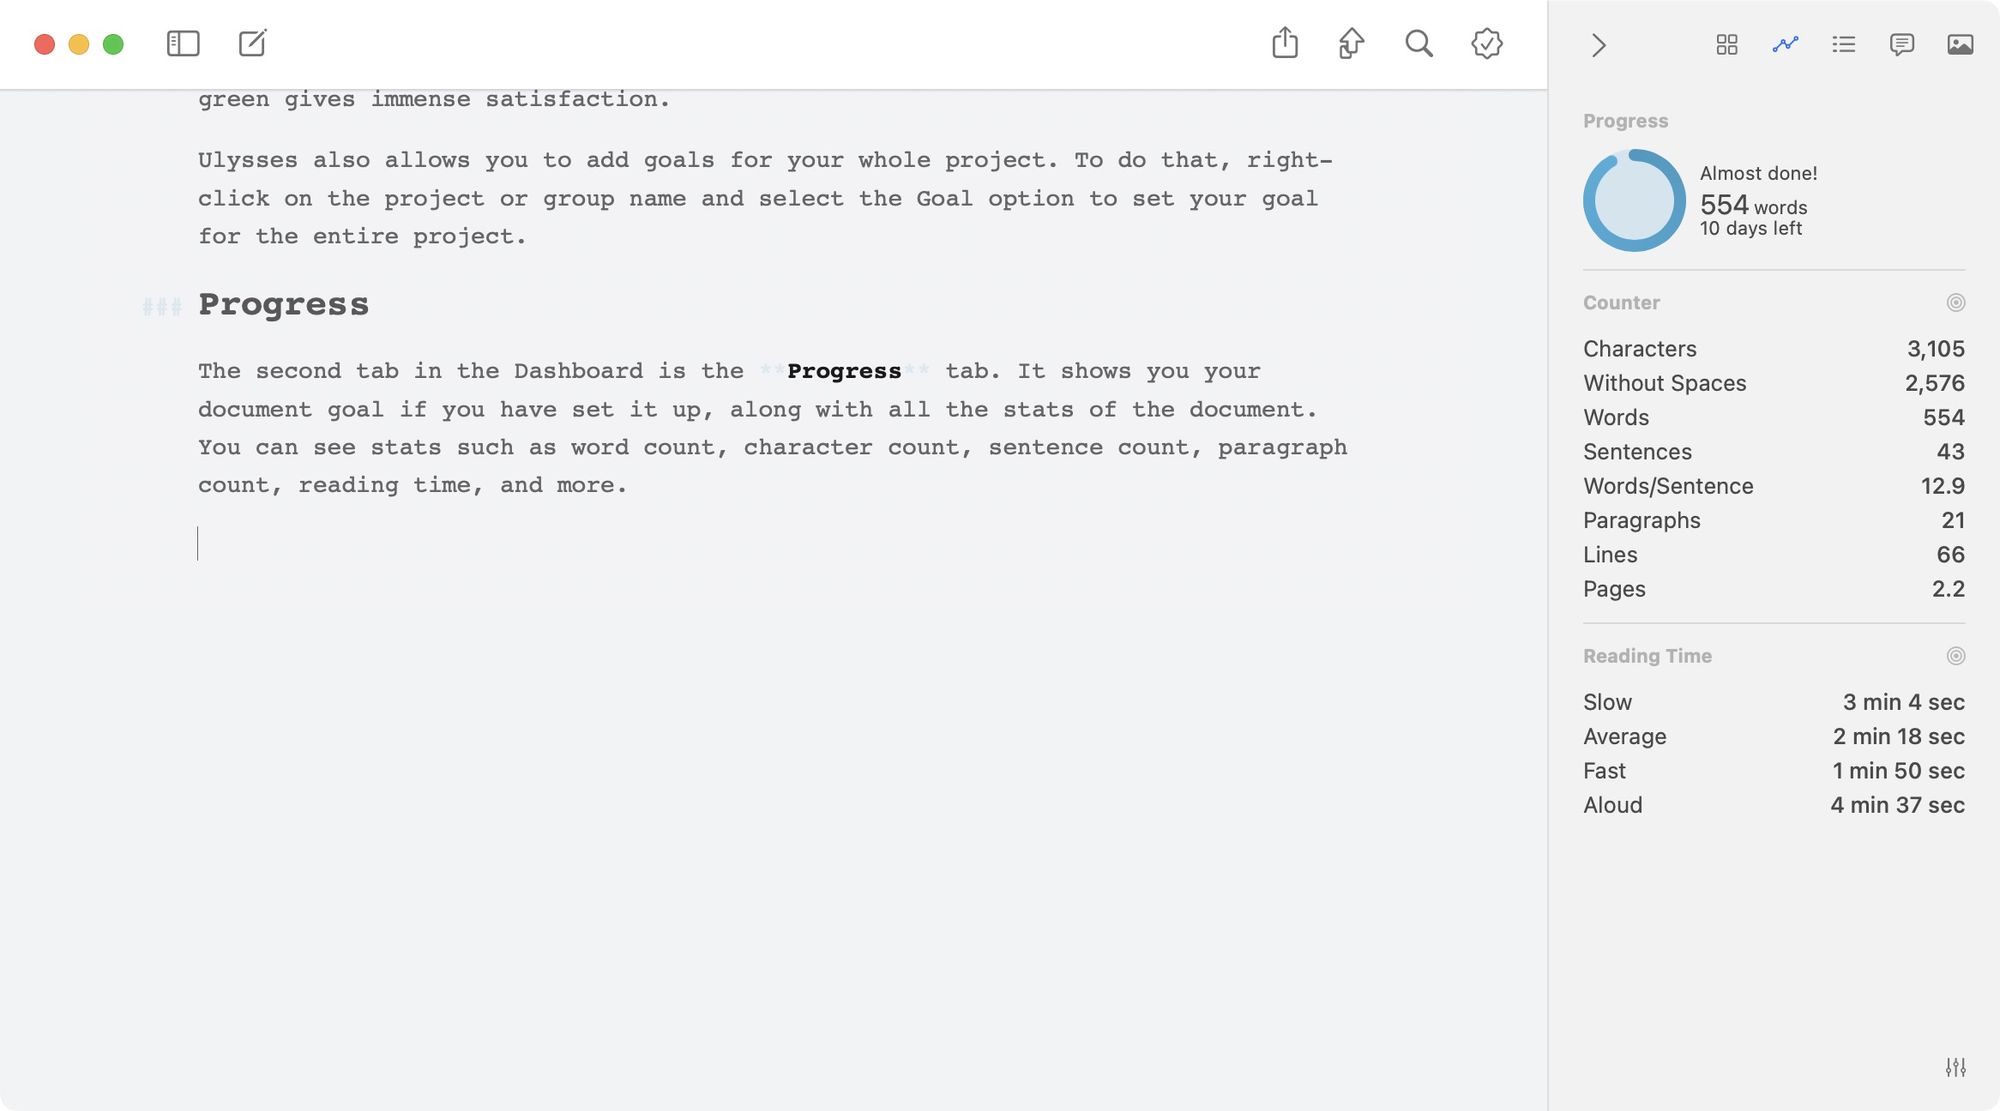
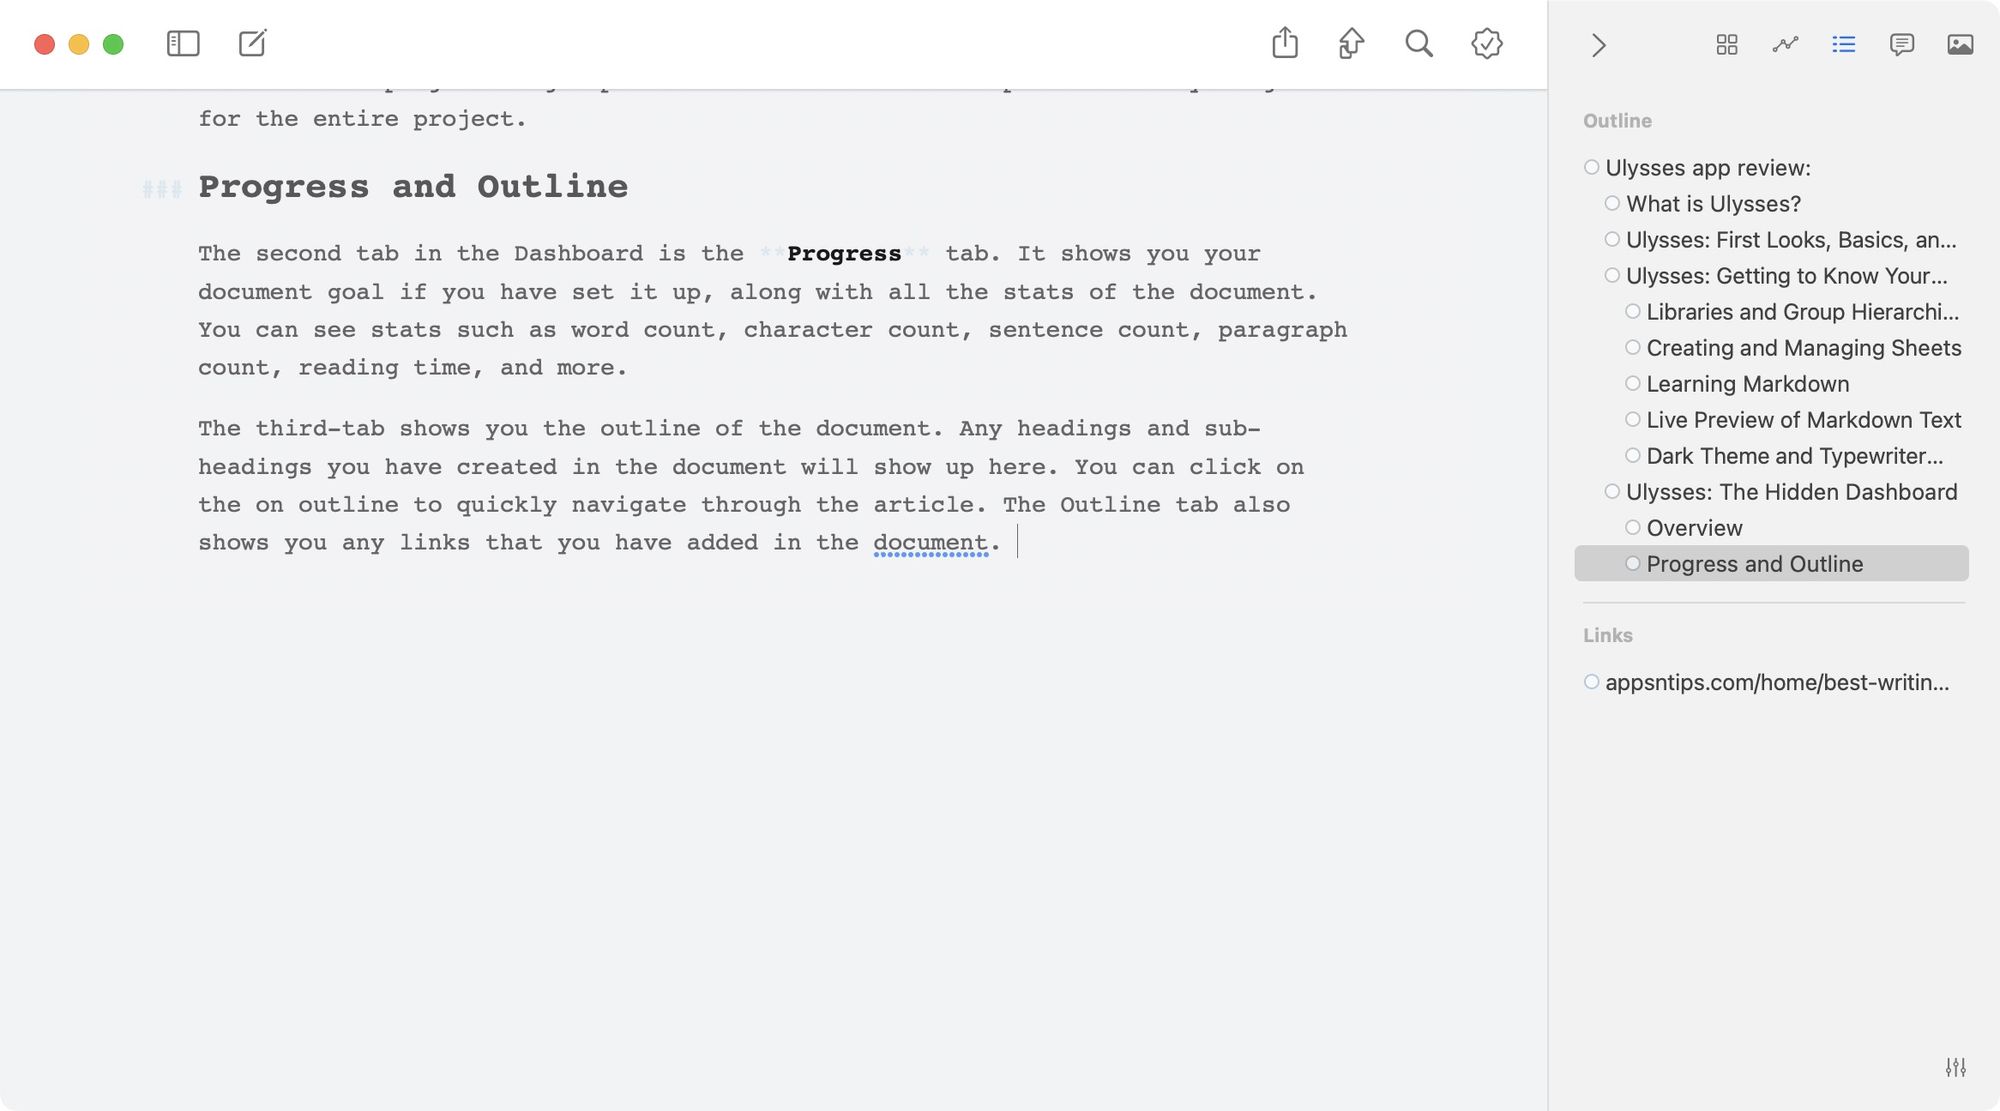
Progress and outline
The second tab in the Dashboard is the Progress tab. It shows you your document goal if you have set it up, along with all the stats of the document. You can see stats such as word count, character count, sentence count, paragraph count, reading time, and more.
The third tab shows you the outline of the document. Any headings and sub-headings you have created in the document will show up here. You can click on the outline to quickly navigate through the article. The Outline tab also shows any links you have added to the document.
Reference notes and images
Moving on, the next two icons in the extension panel allow you to keep you reference material you might need for your writing project. You can click on the notes icon and save your reference notes there and click on the picture icon to save pictures.
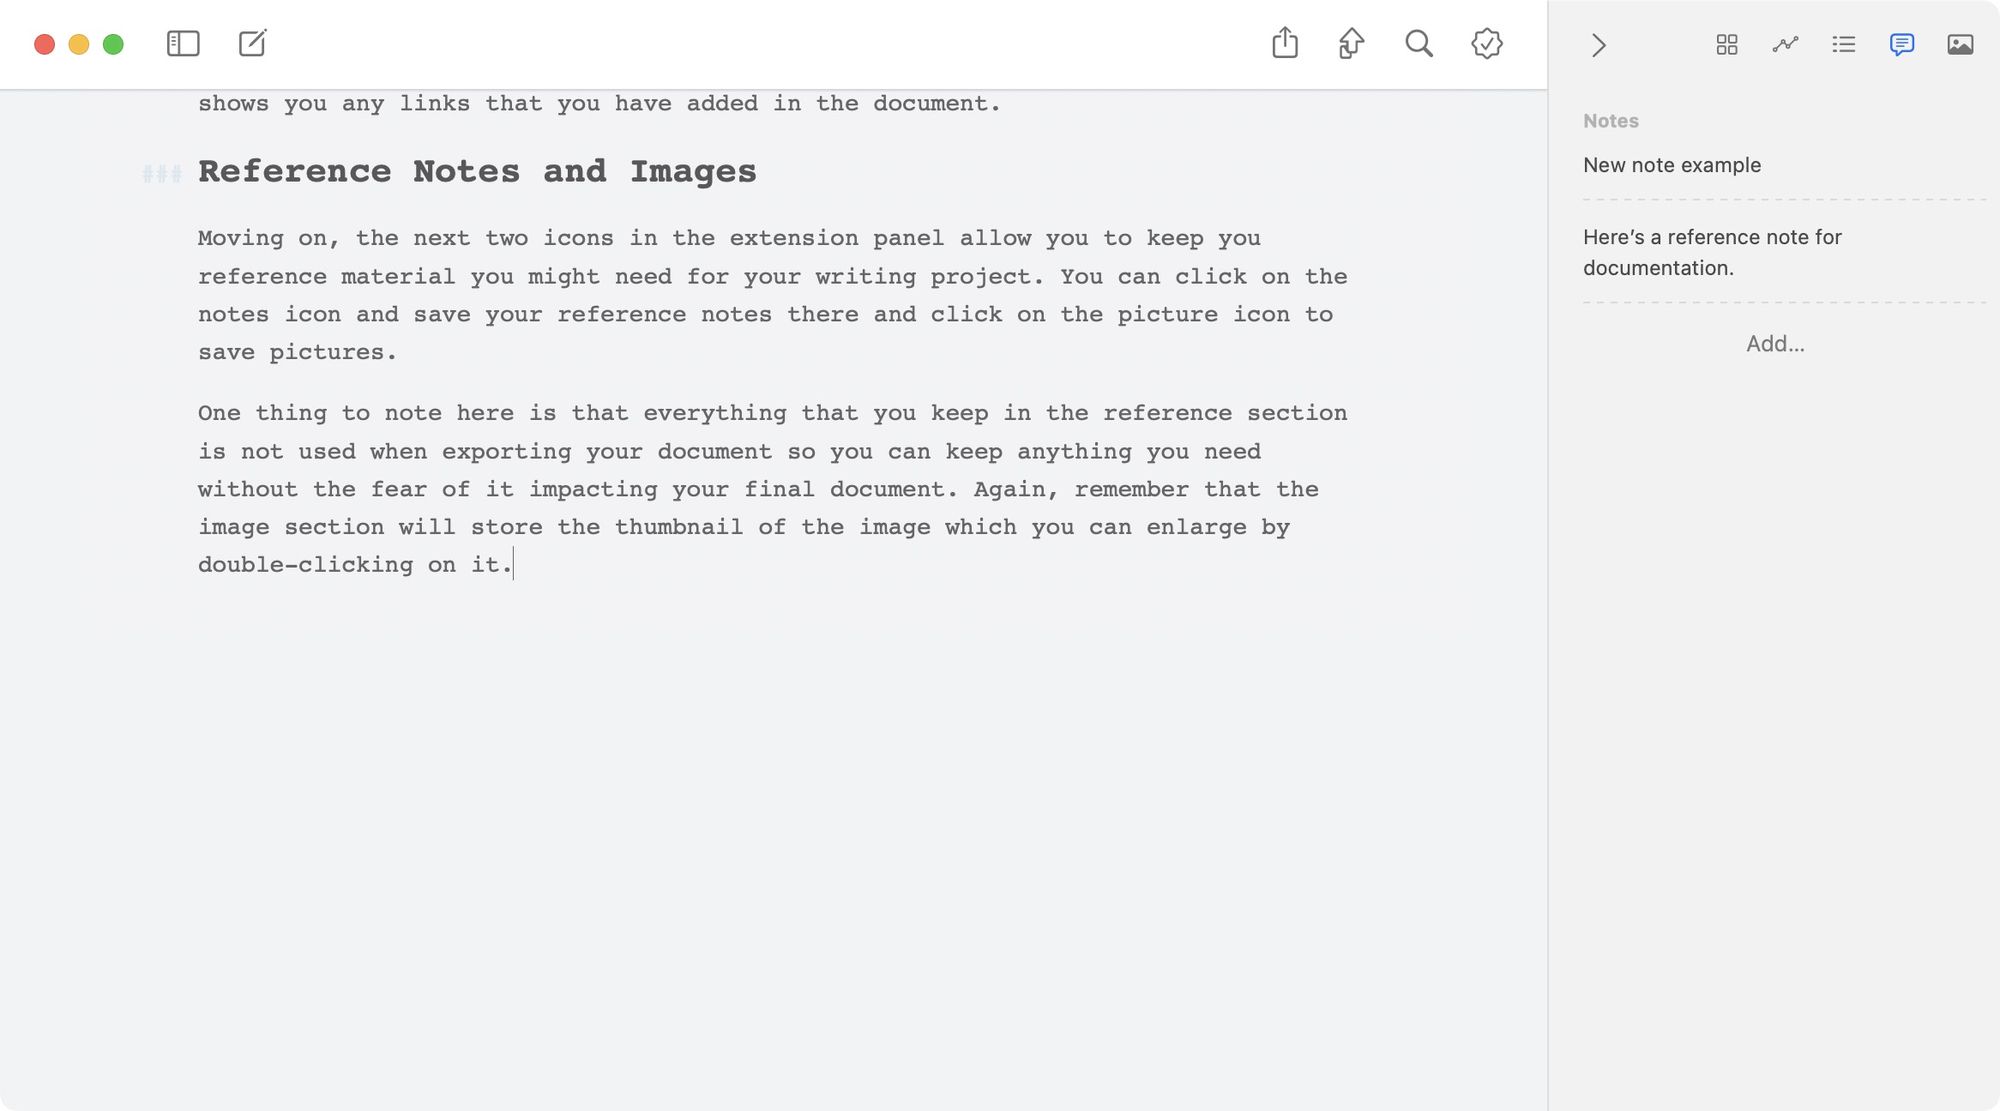
One thing to note here is that everything that you keep in the reference section is not used when exporting your document so you can keep anything you need without the fear of it impacting your final document. Again, remember that the image section will store the thumbnail of the image which you can enlarge by double-clicking on it.

Ulysses: keywords, filters, and search
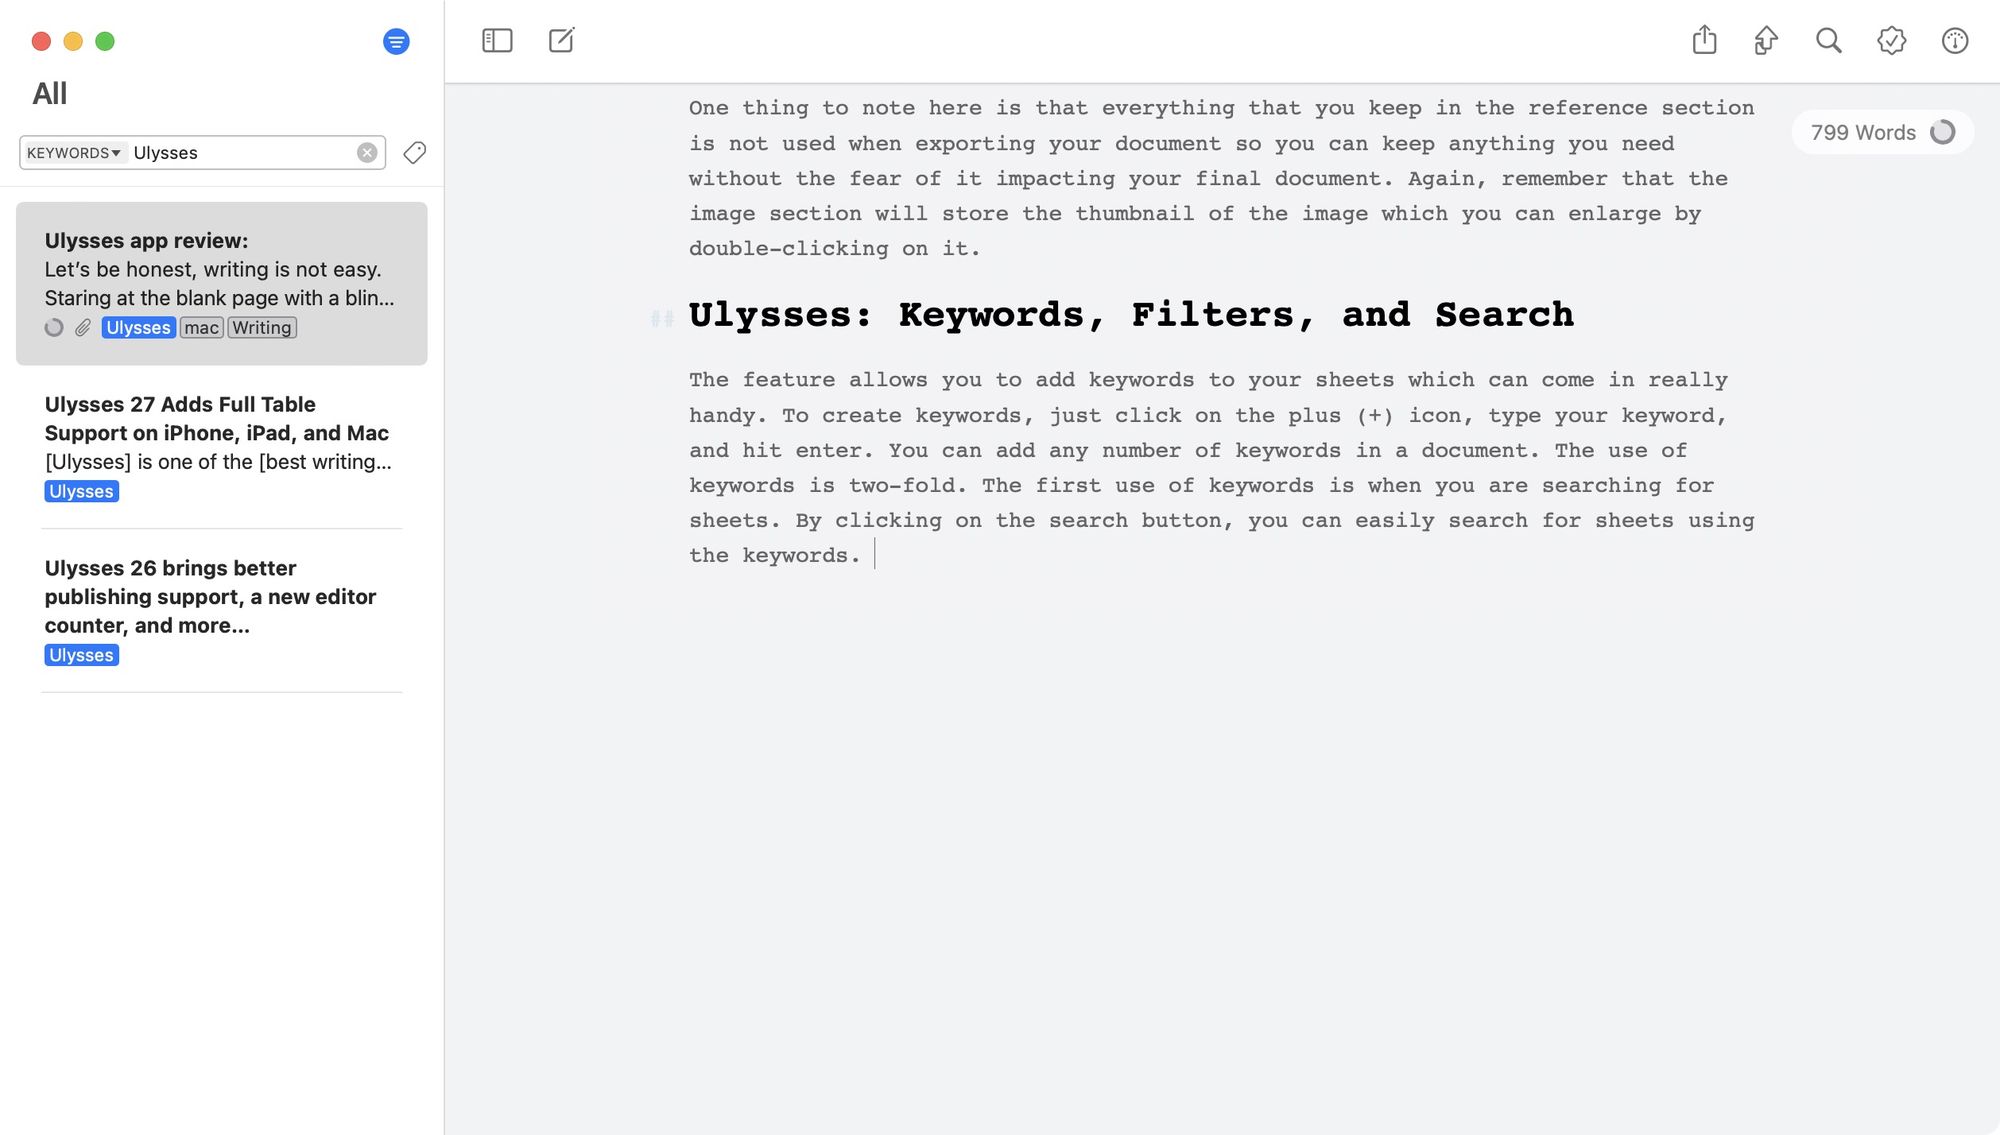
We have discussed almost all the features of Ulysses barring its export feature which we are going to look at in the next section. However, before we do that, let us briefly talk about Ulysses’s non-linear organizational structure which comes in really handy when the related documents are spread across different groups and libraries. First, there’s the Keywords option. The Keyword menu can be accessed using the Dashboard.

The feature allows you to add keywords to your sheets which can come in really handy. To create keywords, just click on the plus (+) icon, type your keyword, and hit enter. You can add any number of keywords in a document. The use of keywords is two-fold. The first use of keywords is when you are searching for sheets. By clicking on the search button, you can easily search for sheets using the keywords.
Another use of keyword is when you are creating a filter. A filter is just like a group of sheets but rather than hosting its own sheets you can use a filter to group related sheets which are present in other groups. To create a filter go to File → New Filter or hit the ⌘⌃N keyboard shortcut.
Here you can select the different criteria and create your own filter. As you can see, I have created a filter which pulls in all the articles which are marked with keyword “Ulysses”.
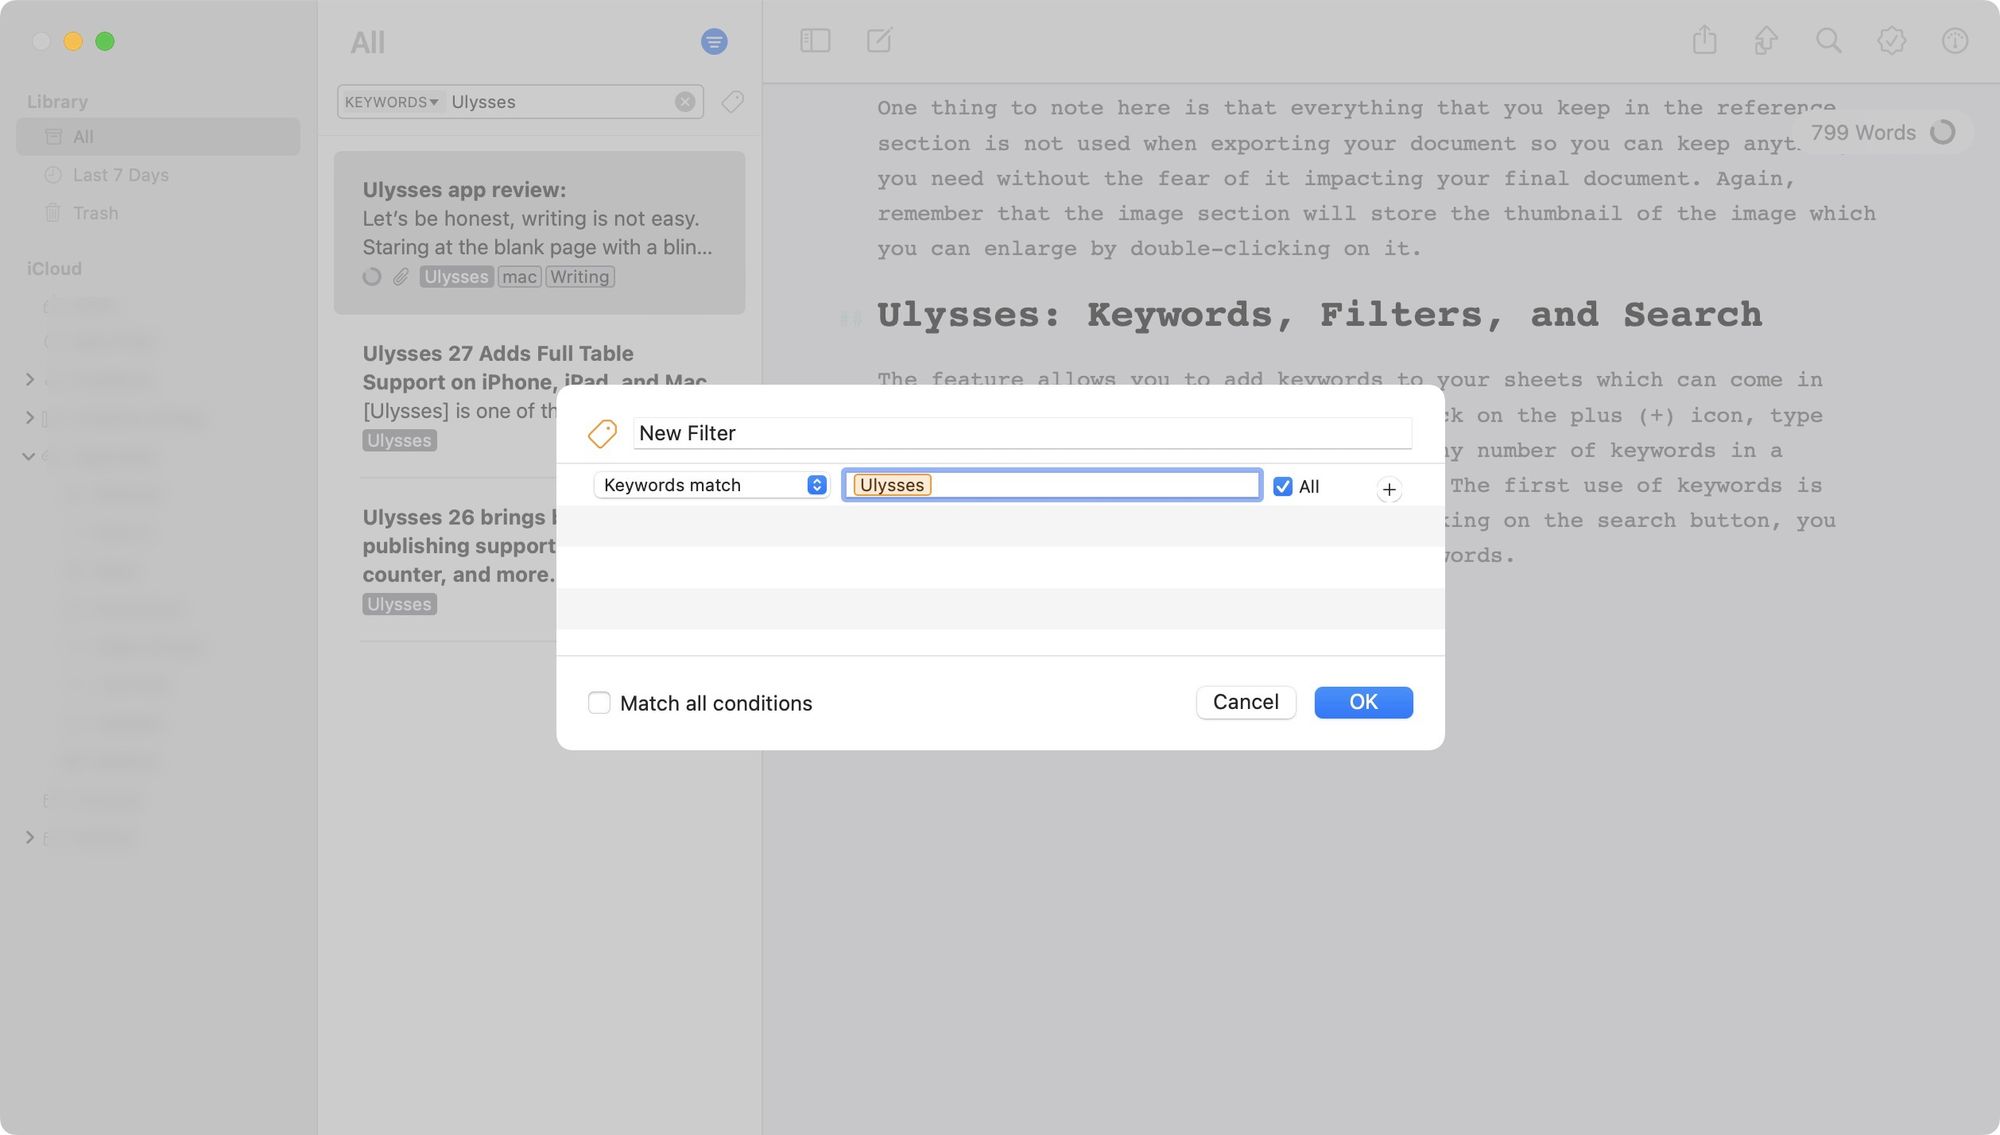
Hence even though the sheets are housed in two different groups, they all are showing up inside one filter.

Ulysses: exporting and publishing
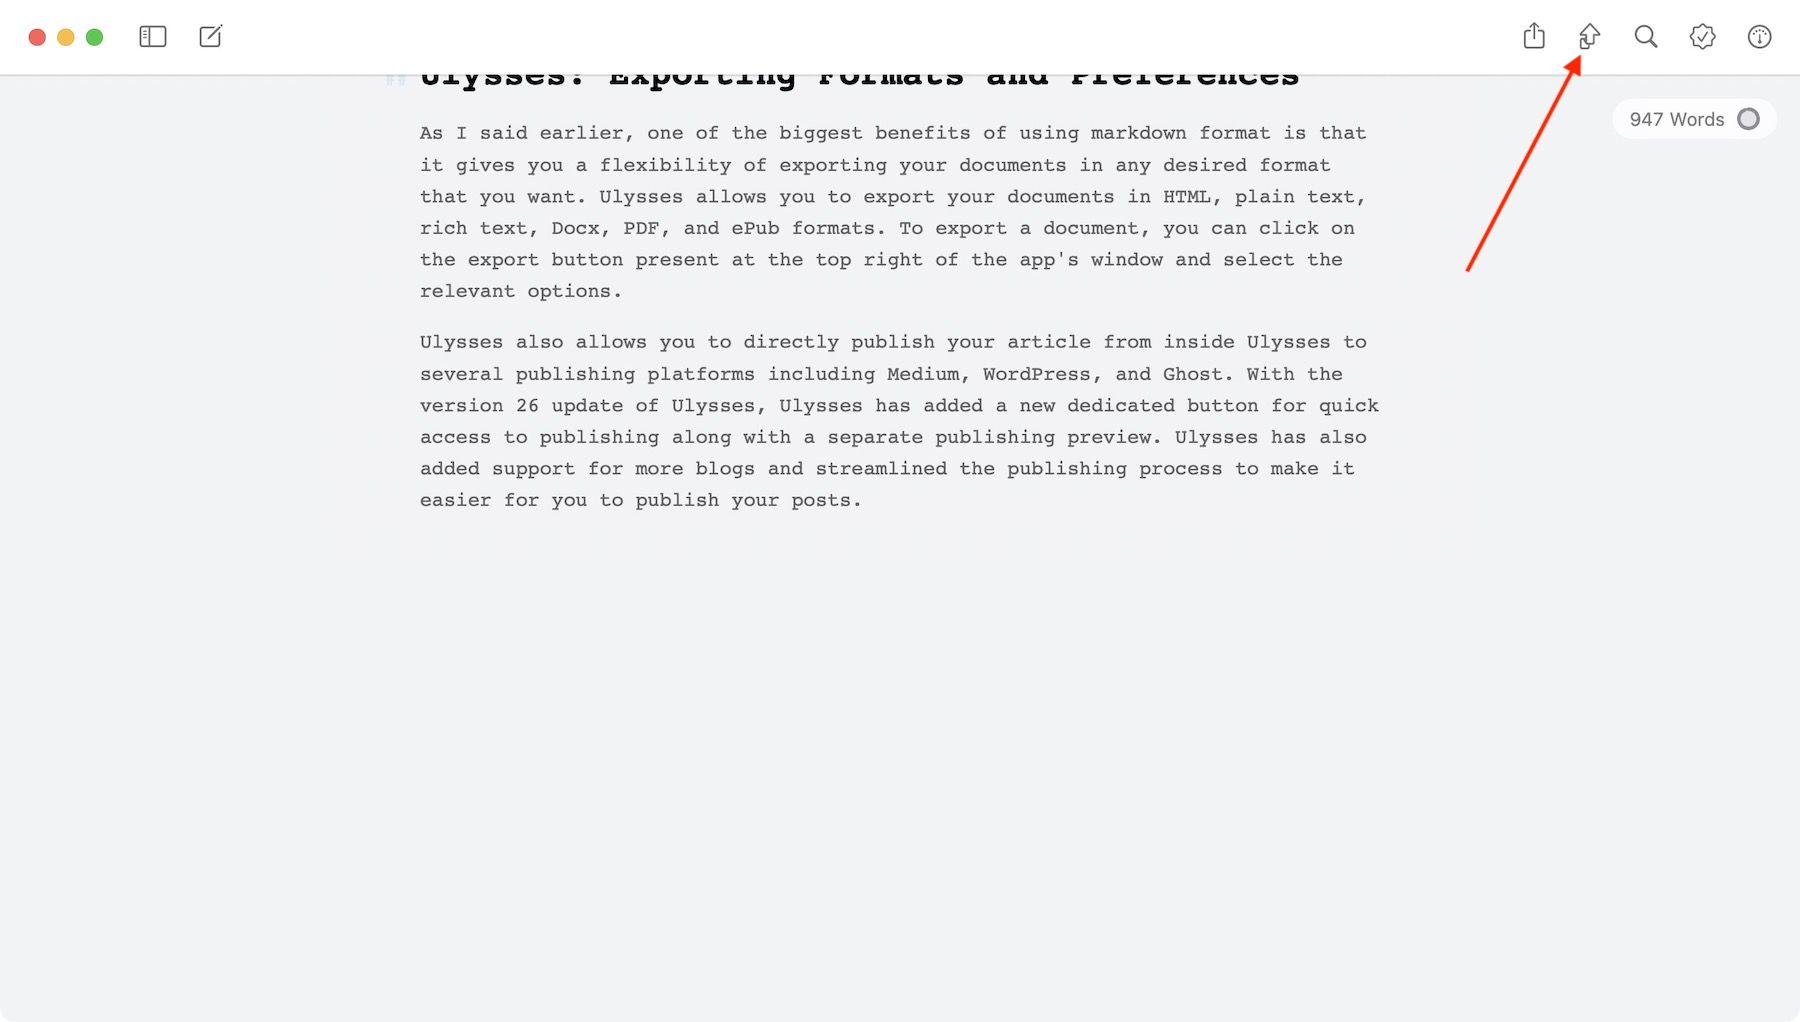
As I said earlier, one of the biggest benefits of using markdown format is that it gives you a flexibility of exporting your documents in any desired format that you want. Ulysses allows you to export your documents in HTML, plain text, rich text, Docx, PDF, and ePub formats. To export a document, you can click on the export button present at the top right of the app's window.

It will open a preview windows showing you how your exports look. You can click on the file menu to select the export file type. Similarly, click on the Style settings menu to choose between different styles.

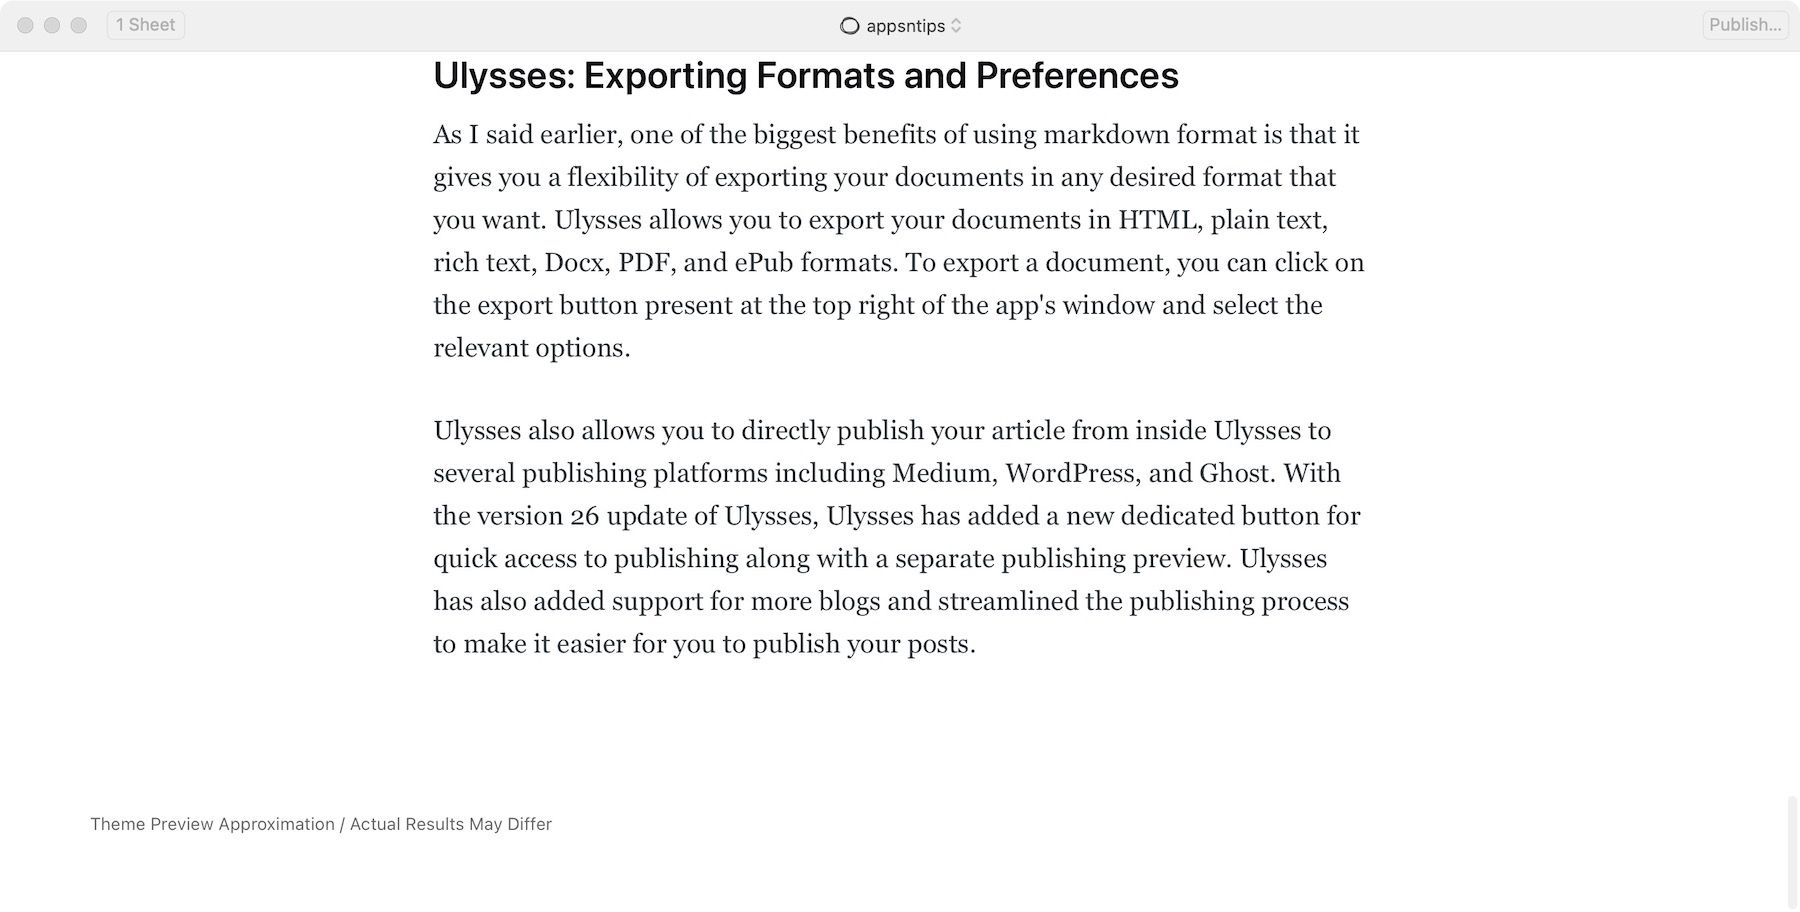
Ulysses also allows you to directly publish your article from inside Ulysses to several publishing platforms including Medium, WordPress, and Ghost. With the version 26 update of Ulysses, Ulysses has added a new dedicated button for quick access to publishing along with a separate publishing preview. Ulysses has also added support for more blogs and streamlined the publishing process to make it easier for you to publish your posts.
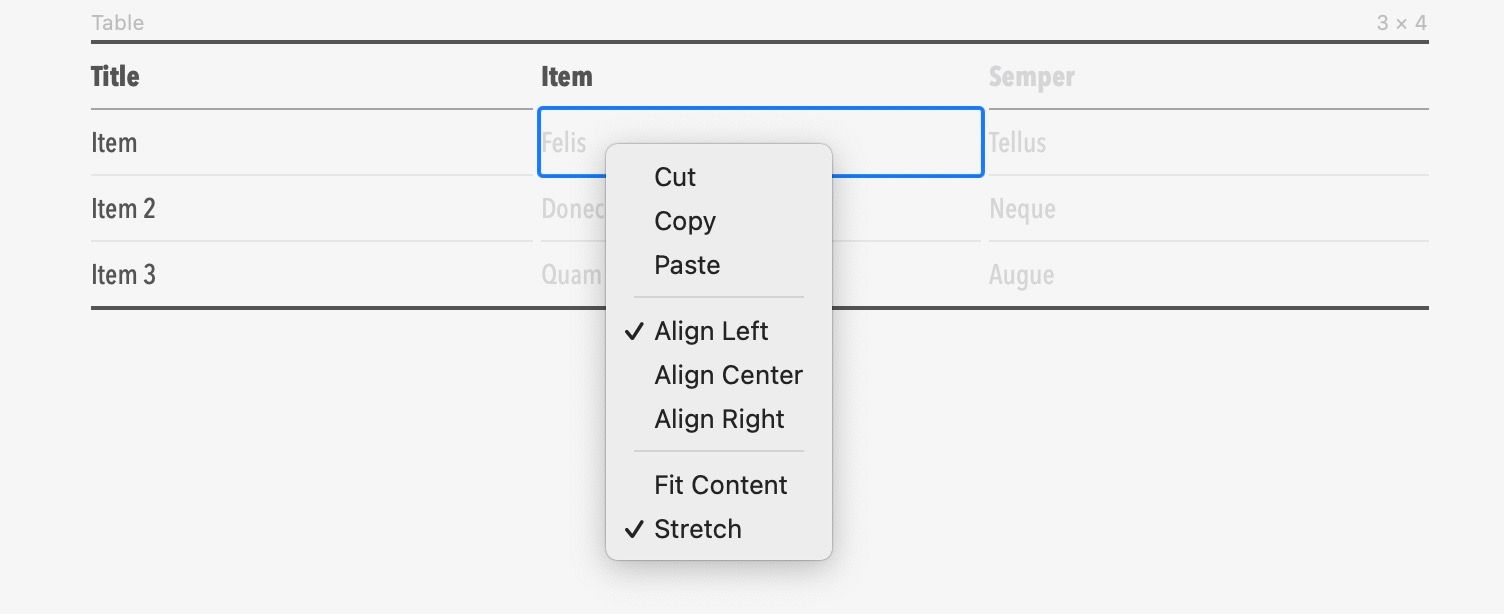
Ulysses: working with tables
Working with tables in a markdown writing app has always been a pain, and it was the same with Ulysses. But that’s a thing of the past. With the Ulysses version 27 update, Ulysses has added full support for tables and allows users to create and edit tabular content right inside the editor.
To create a table, all you need to do is to use the table function. Hit enter to create a new paragraph and type (tbl) to insert a table. Here’s how it looks in action. Not only can you effortlessly create tables, but you can also easily edit them. To add rows and columns, all you need to do is to click on the row-and-column indicator at the top of the table.
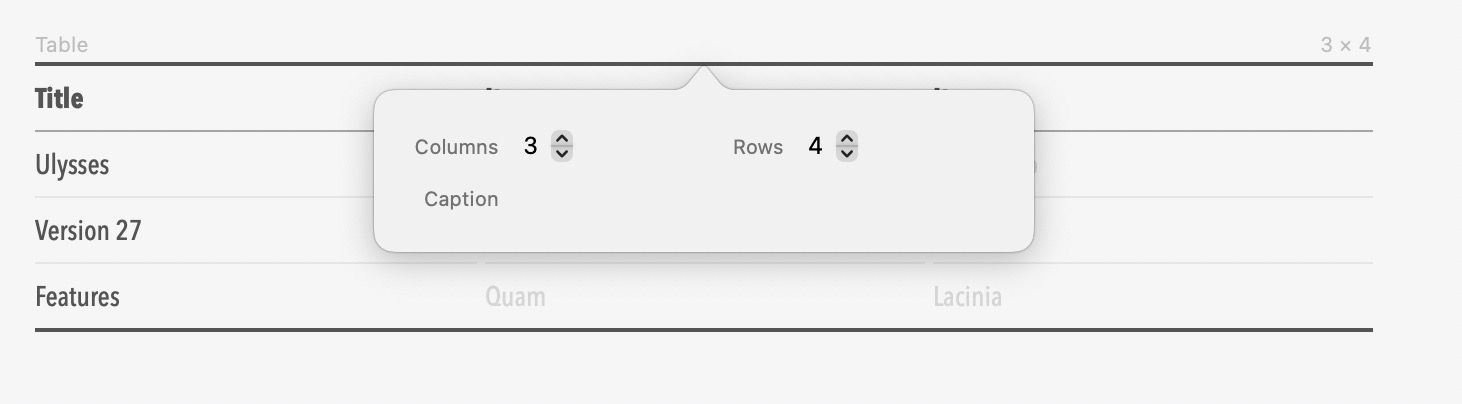
You can access features, including text alignment, fitting the content inside a table cell, and more, using the right-Click (Ctrl+Click) menu. You can also click and drag to select tables and rows to apply formatting to multiple cells at the same time, rearrange tables and rows, import tables from Word, and do so much more.
Ulysses: check grammar
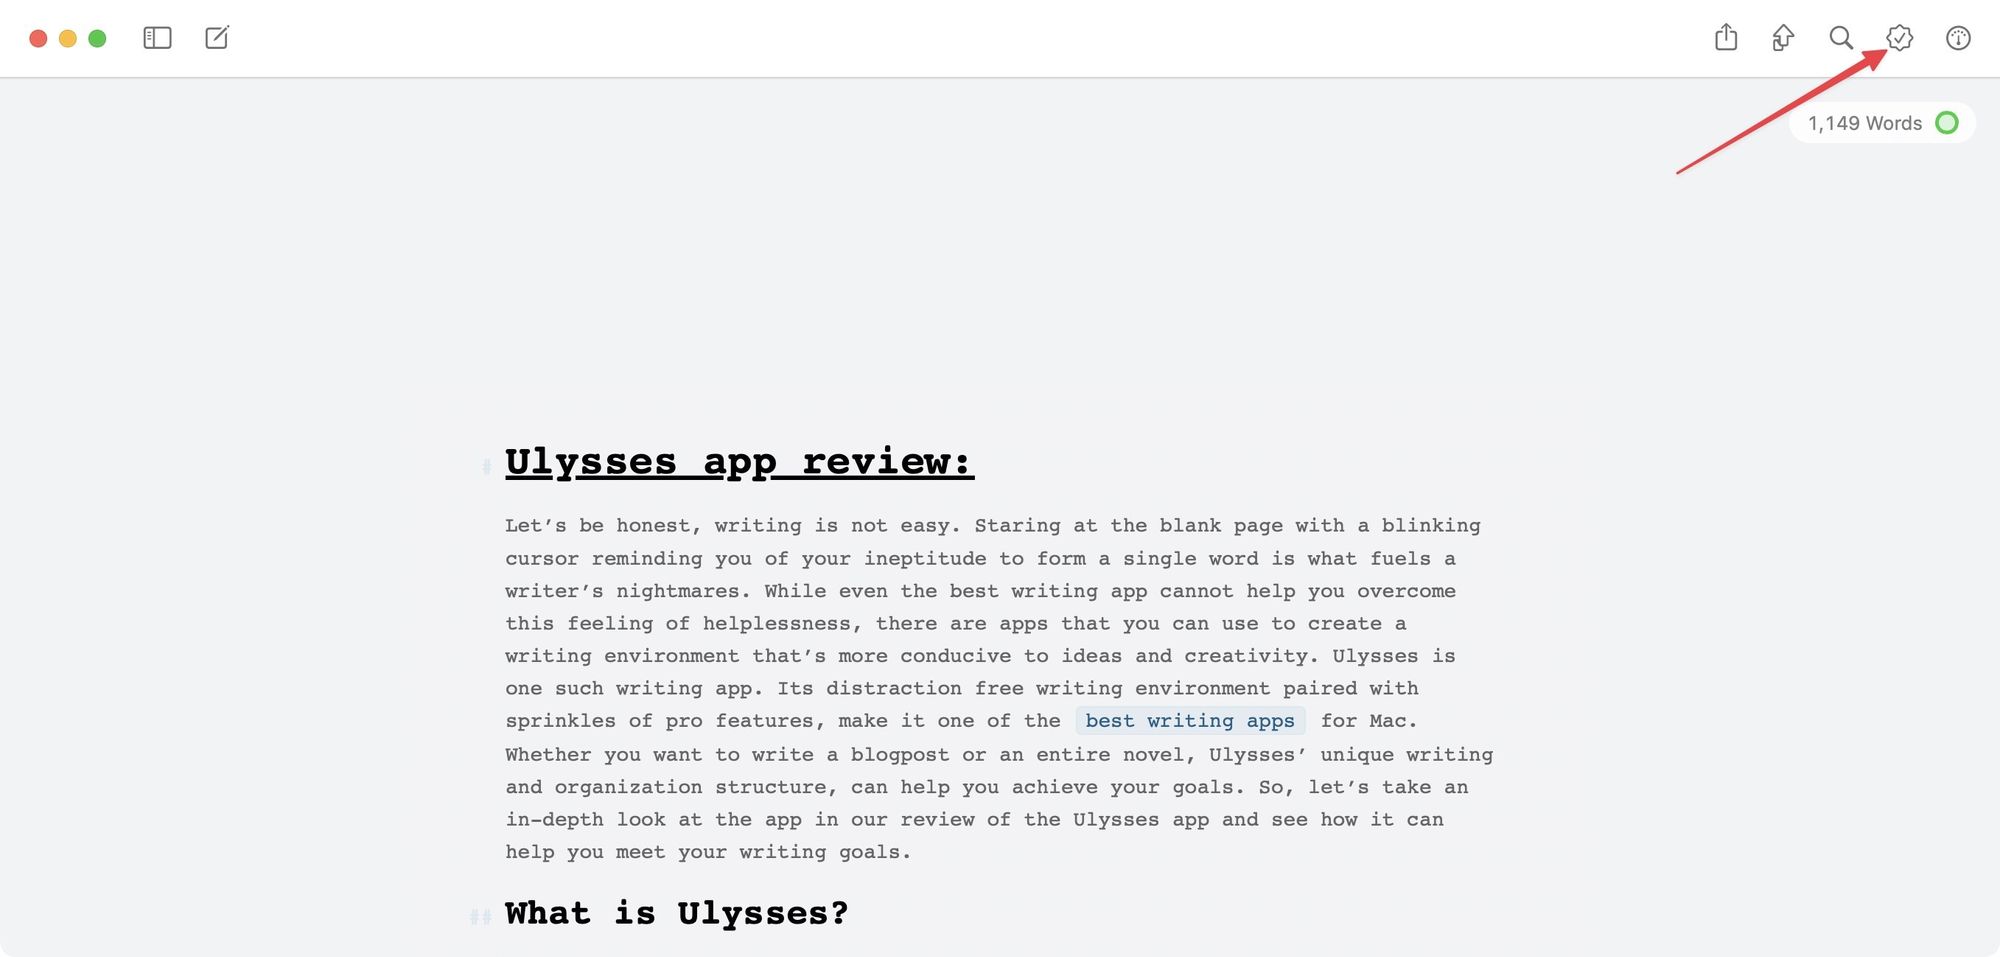
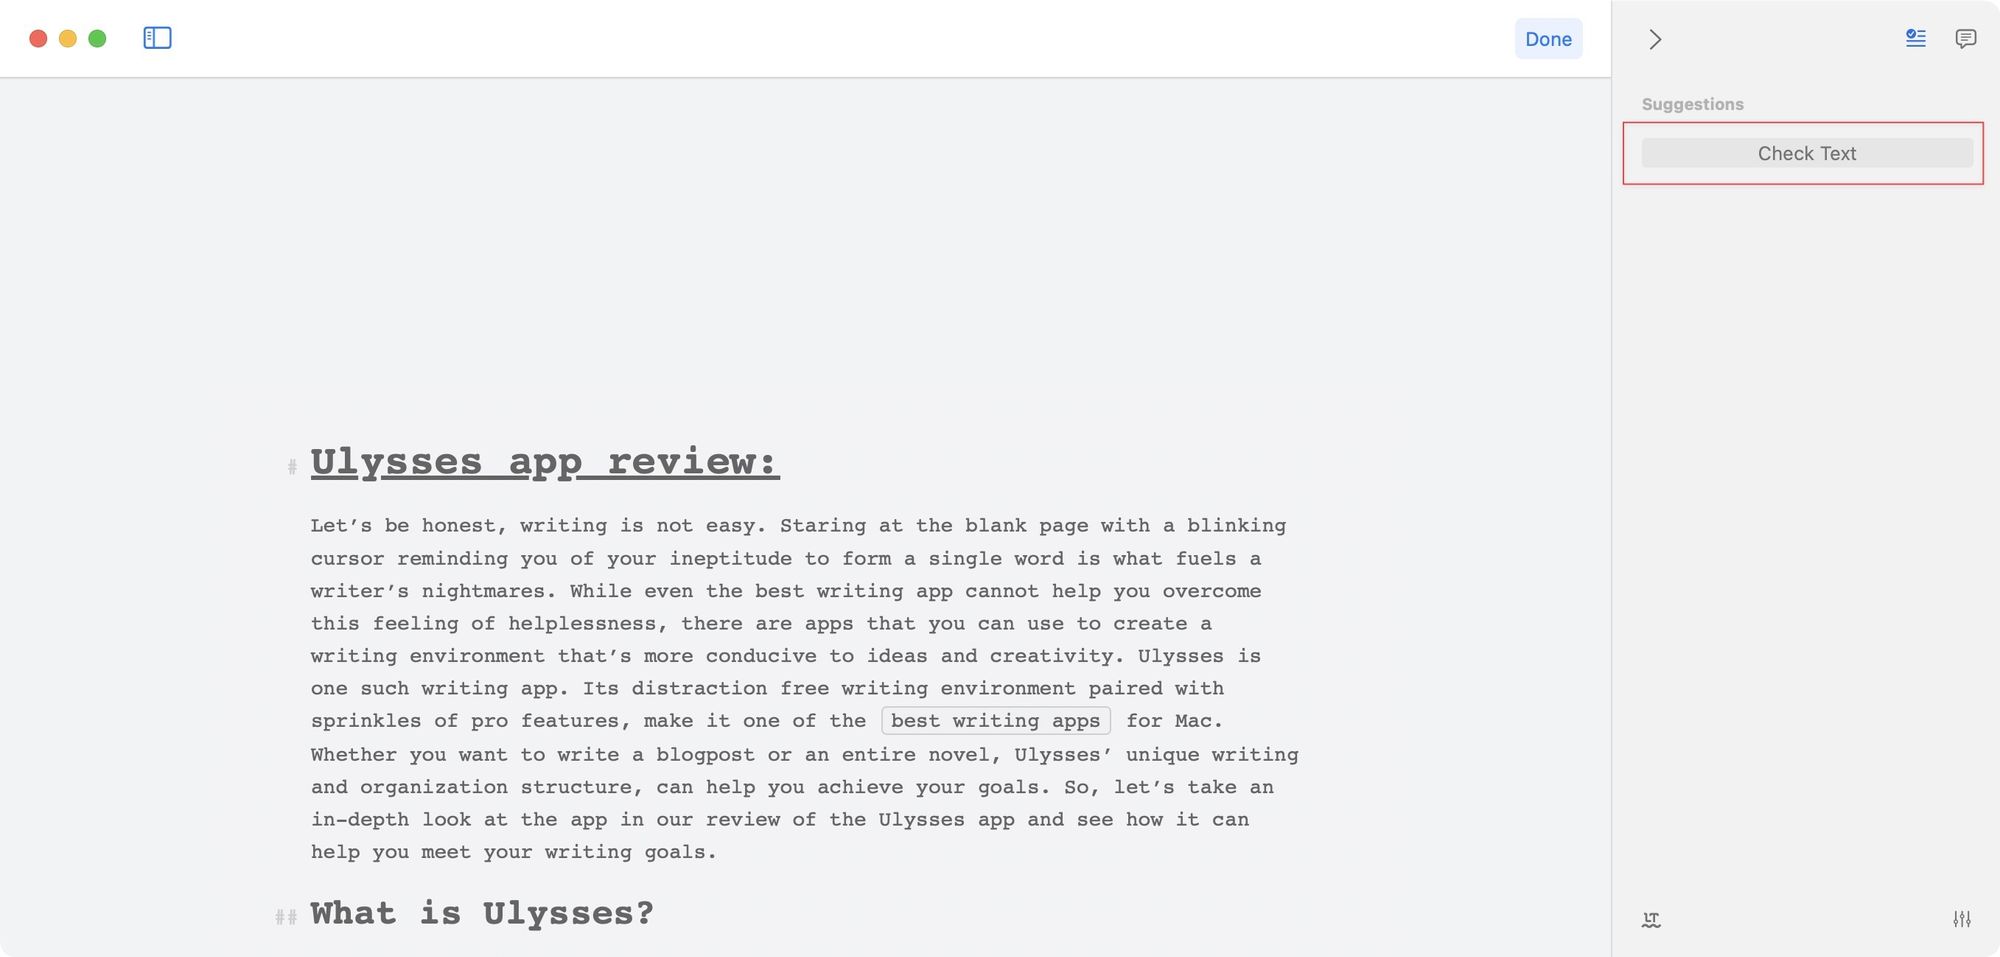
Ulysses comes with a built-in grammar checker service that analyzes your writing and lets you fix common grammatical errors. You can use this feature by clicking on the Revision tool in the navigation bar.
When you click on the Revision tool, it will open the right-hand side pane with an option to check your text. Click on the Check Text button to allow Ulysses to analyze your text.
In a few moments, Ulysses will show you a list of grammatical errors it finds in your sheet.
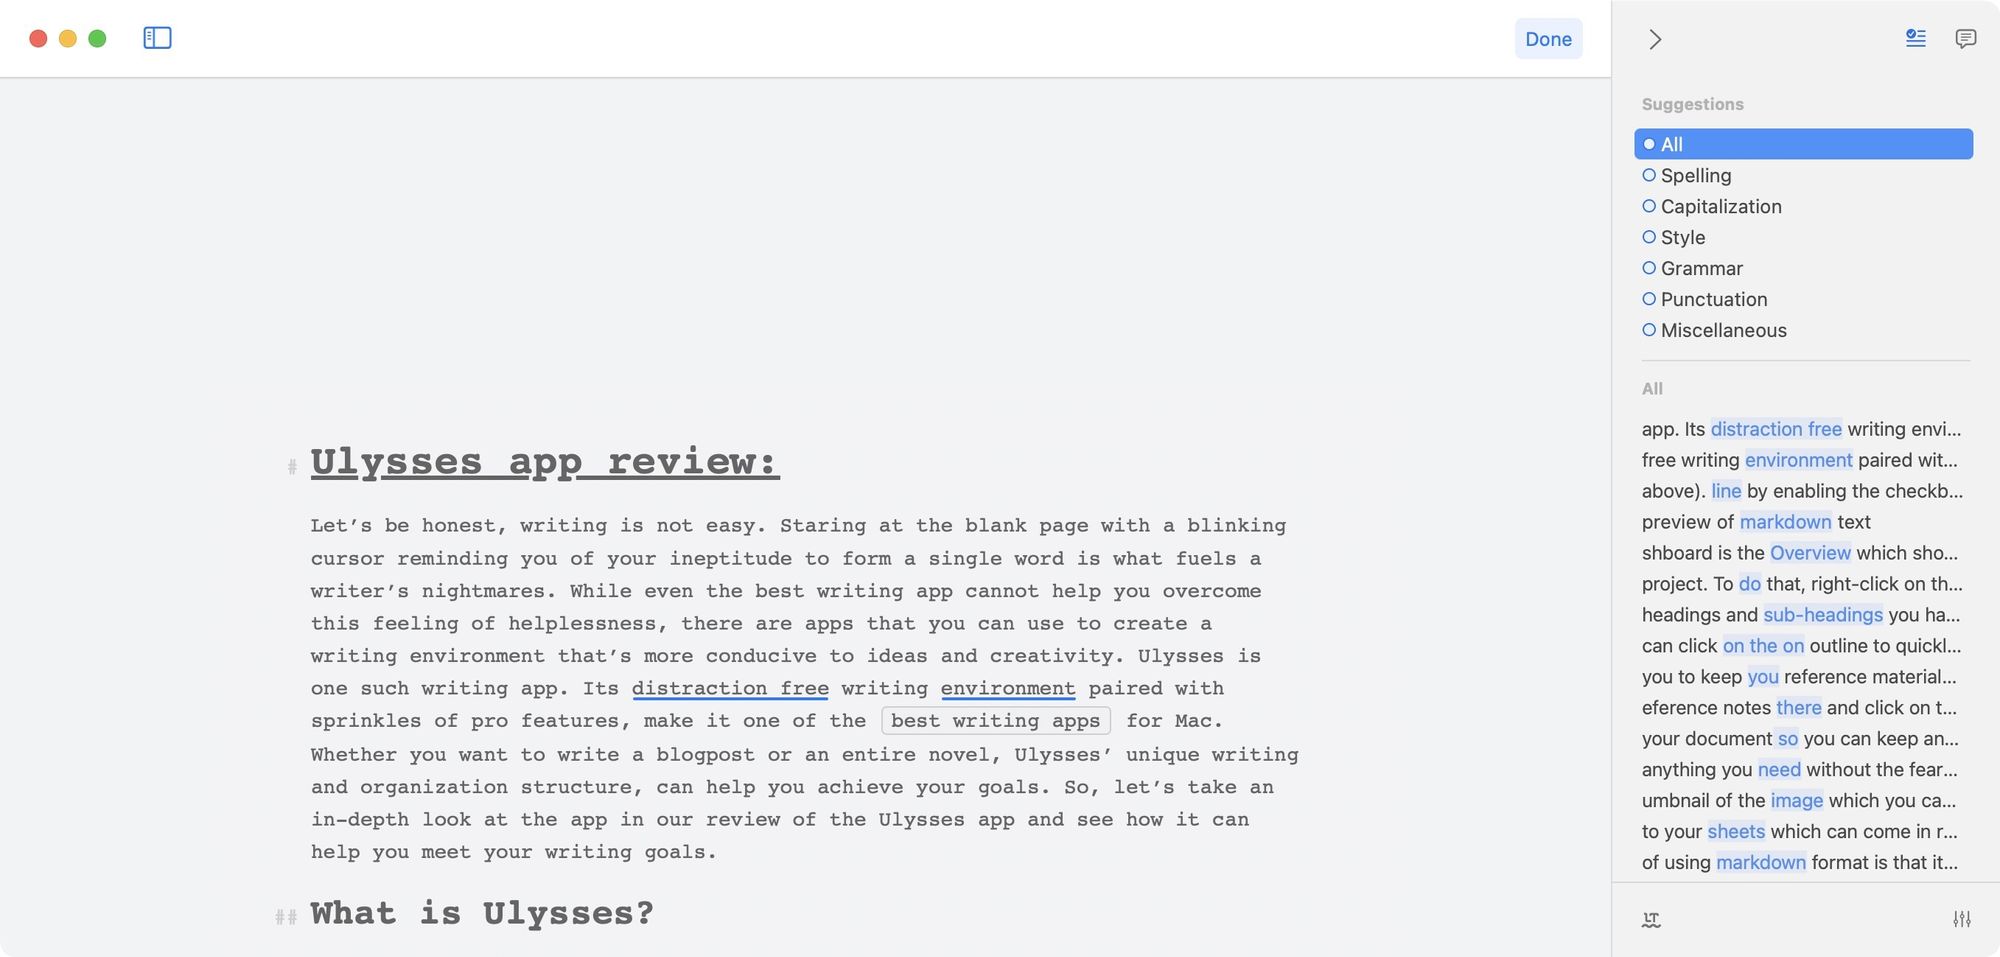
You can click on the suggestions to open their position in the sheet. Here you can double-click on the suggestion to see the fix that Ulysses is suggesting. You can choose to accept or deny the changes as you see fit.
While the grammar checking ability of Ulysses is still not as good as apps like Linguix, it's good enough to weed out common errors and makes your writeup feel more refined.
A brief discussion about Ulysses’s iOS and iPadOS prowess
Before we end this article, I would like to also talk a little about Ulysses’s iOS and iPadOS prowess. Now, I cannot discuss all of Ulysses’s iPhone and iPad app's features in details here as the article has already become too long, however, I can give you a brief intro. Just like on Macs, Ulysses on iOS is probably the most powerful writing app present on the platform. It is especially powerful on the iPad as the app brings almost all the Mac features that we discussed to the iPad.
After going the subscription route, Ulysses has introduced a ton of features for its iPad app including multi-pane view, drag and drop support, multiple libraries and much more. In short, Ulysses' iOS prowess allows you to keep working even when you are on-the-go and you don’t have your Mac with you.
iPad’s portability when combined with its long battery life and Ulysses, makes it a perfect writing companion. Even Ulysses's iPhone app is powerful enough to support your writing needs in times when you are away from your Mac and iPad. For me, Ulysses’s iOS apps help keep the service always in my reach, so I have a peace of mind that my favorite writing app is just a click or tap away.
Ulysses: is it worth the price?
Ulysses costs $5.99/month or $49.99/year. For one subscription, you can use the app on all your devices, including your Mac, iPhone, and iPad. If you use Ulysses to write for a living, the app is definitely worth the price. Since going the subscription route, the company has been releasing new features regularly, which makes it one of the few apps that justify its subscription pricing.
However, for users who don’t need to use Ulysses on a daily basis, the pricing might seem a little out of the reach. If that’s the case, you should probably look at other writing softwares which still offer one-time payment. I would suggest iA Writer. It’s the app which kept my attention for the longest time before I started using Ulysses. iA Writer is available only for $49.99 and you can own it forever. However, you will have to buy the iPhone and iPad apps separately.
If what you do requires you to write daily and if you will be spending a couple of hours everyday on a writing app, I don’t think there’s any other writing software out there which is better than Ulysses. For me, paying for Ulysses doesn’t bother me at all as I know I am receiving much more value than what I am paying for.
Ulysses review and in-depth tutorial: final thoughts
The biggest power of Ulysses is that it makes writing enjoyable.
I have already talked a lot about the app and you already know how I feel about it. That said, If you skipped the article (because it’s so long), here is the condensed version of it.
The biggest power of Ulysses is that it makes writing enjoyable. It provides a clean interface which keeps the distractions away and helps you focus only on writing. It has great organizational features and all my previous works are just a few clicks away. We also love the fact that we don’t have to organize and find files on Mac as Ulysses keeps everything in its library and allows you to search for it.
There are a ton of other pro features of Ulysses that we didn’t even got the time to discuss, but the thing is, features are not everything. In fact, we love the little things which come with Ulysses more than its best features. The choosing of icons for groups, setting up goals and seeing the circle fill up, and using the typewriter mode are a few of those little things that we love. You might feel this article is biased as we have been praising this software since the start of this article. However, if we are biased, its because we have tested tens of writing apps and none of them made our writers more productive than Ulysses.
At the end of the day Ulysses is just a tool and whether you get your work done or not depends solely upon your willpower, however, once you sit down and open the app, Ulysses will not give you any reason to close it before your work is done.
Install: Ulysses ($5.99/month or $49.99/year - special student pricing available) / Get it for free on SetApp

Comments ()