How to Scan Documents on iPhone Without Using the Notes app
Here is how you can scan documents on iPhone without using the Notes or any third-party document scanning app.

Whether you want to scan your invoices for tax purposes or just want to keep a digital record of all your expenses, keeping a scanned digital copy of important documents is a good idea. Most of us know that we can scan documents on iPhone inside the Apple Notes app. But that’s not the right place to save your scanned documents. In this article, we will show you how to scan documents on iPhone without using the Notes or any third-party document scanning app.
Scan documents on iPhone without using the Notes app
Your iPhone has so many hidden features that it’s hard to keep track of them all. We have published articles on several tips and tricks for iPhone, such as holding calls on iPhone, pasting phone numbers in Phone app, and more. If you want to check them out, click on the links to do so.
One of the apps on iPhone that has multitude of hidden features is the Files app. The Files app gives you a traditional files and folder structure where you can save documents, images, videos, audio files, and more. You can choose the app to save files on device or in your iCloud folder.
We recommend using the iCloud folder option for saving your scanned documents as it ensures that you don’t lose the files even if you lose your iPhone. With all that said, let’s get to our guide.
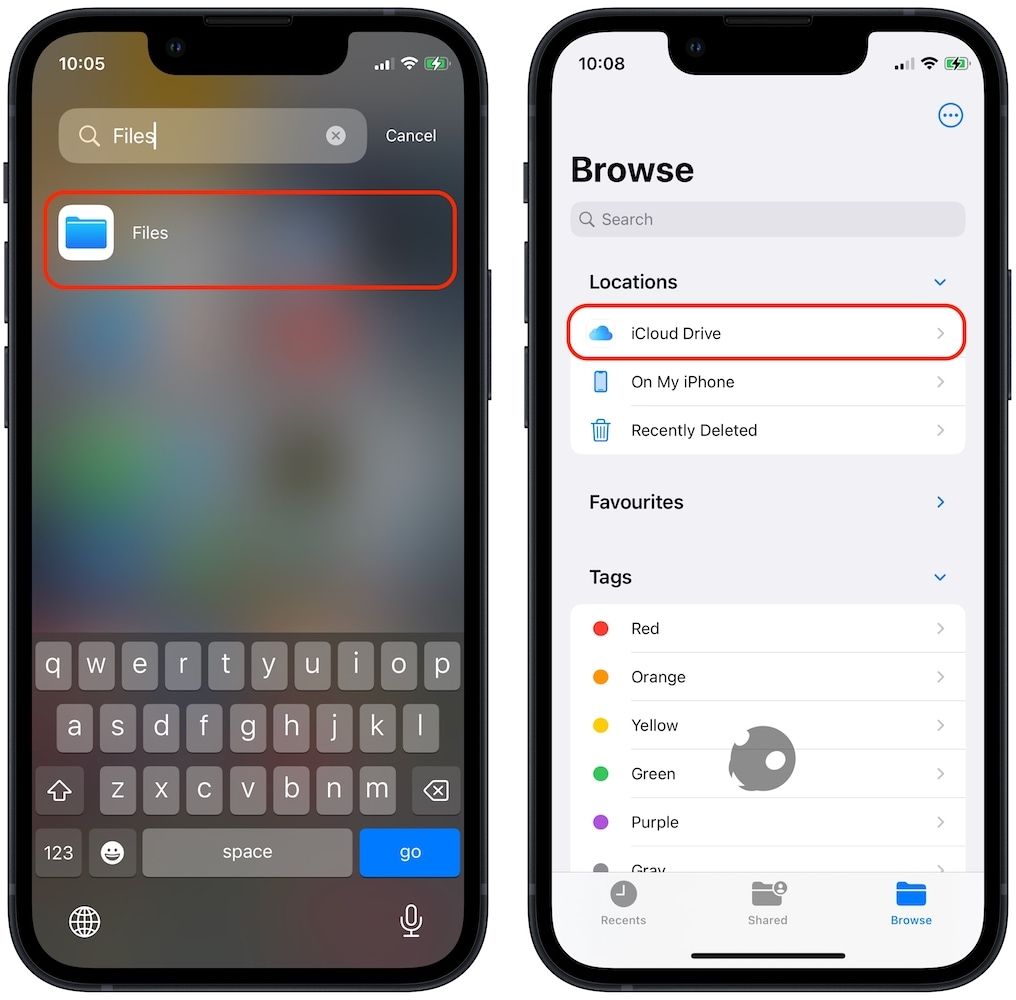
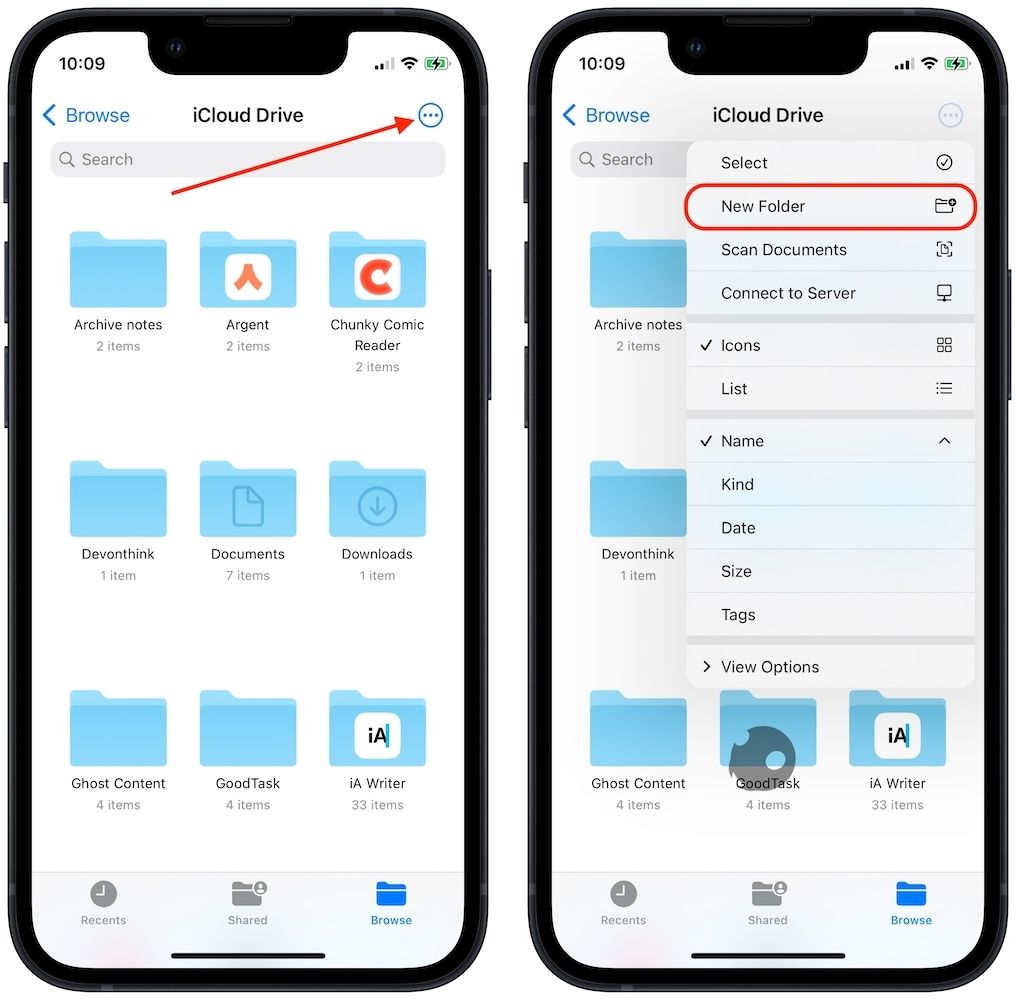
1. Launch the Files app on your iPhone and tap on the iCloud Drive option.
2. We recommend that you create a folder where you can save your scanned documents in one place. Tap on the three-dot menu in the top-right and choose the New Folder option.
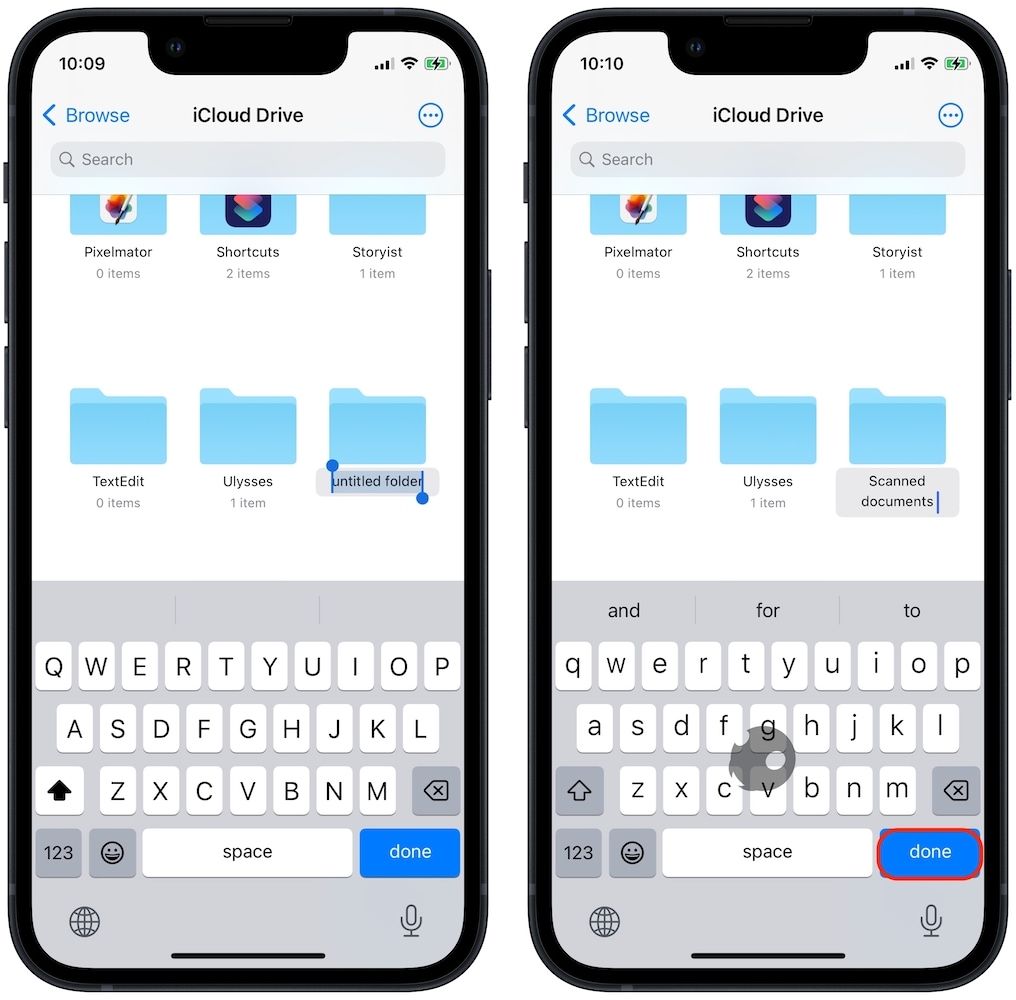
3. Name the folder and then tap on the Done button to save changes.
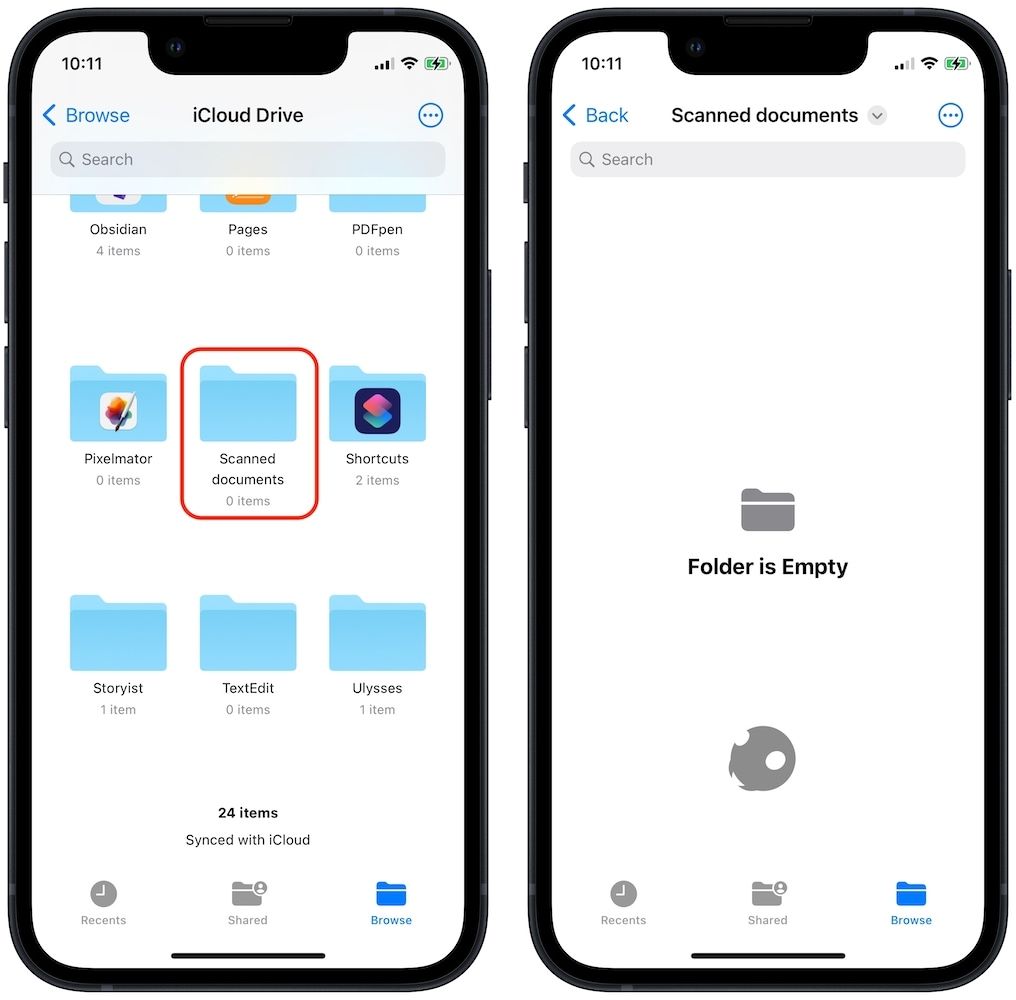
4. Tap on the folder you created to open it. Now, you have two options. You can either create sub-folders inside this folder for better organization or directly scan the documents inside this folder. Use the same steps as above to create sub-folders.
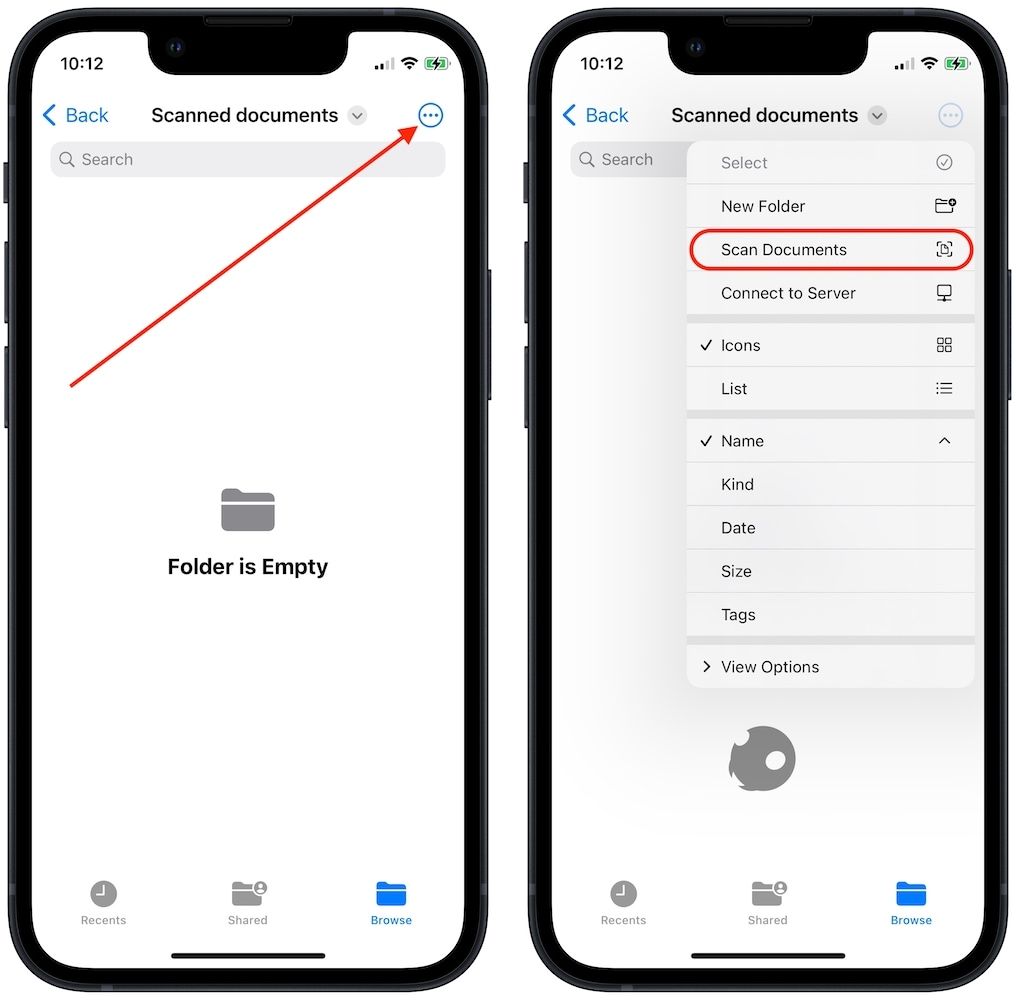
5. To scan a documents inside the folder, tap on the three-dot menu in the top-right and choose the Scan Documents option.
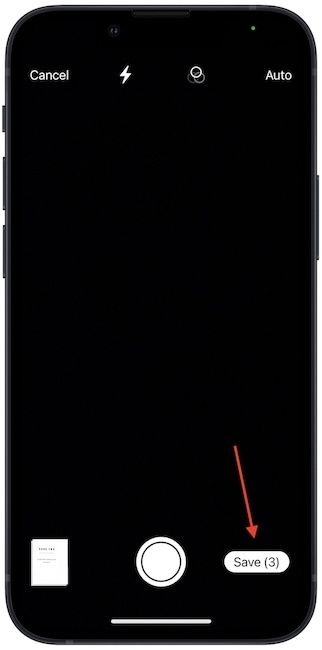
6. Your iPhone will now open the camera to scan documents. Just place the documents and adjust the view finder so it captures the entire document. Your iPhone will automatically scan and save documents.

7. Do this for as many documents as you want and then tap on the Save button when you have scanned all the documents.
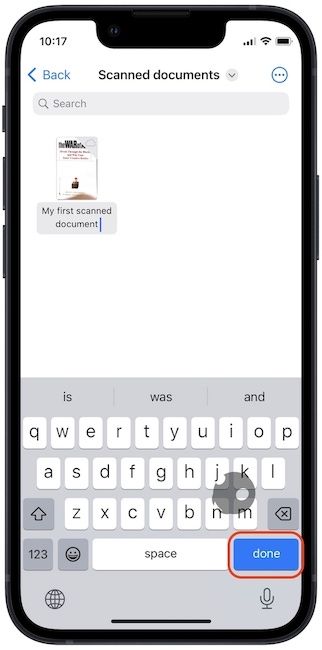
8. iPhone will merge all the scanned documents in a single PDF and save it in the folder. You will get an option to rename the document. Tap on Done after naming the document.
9. You can now tap on the document to view it.
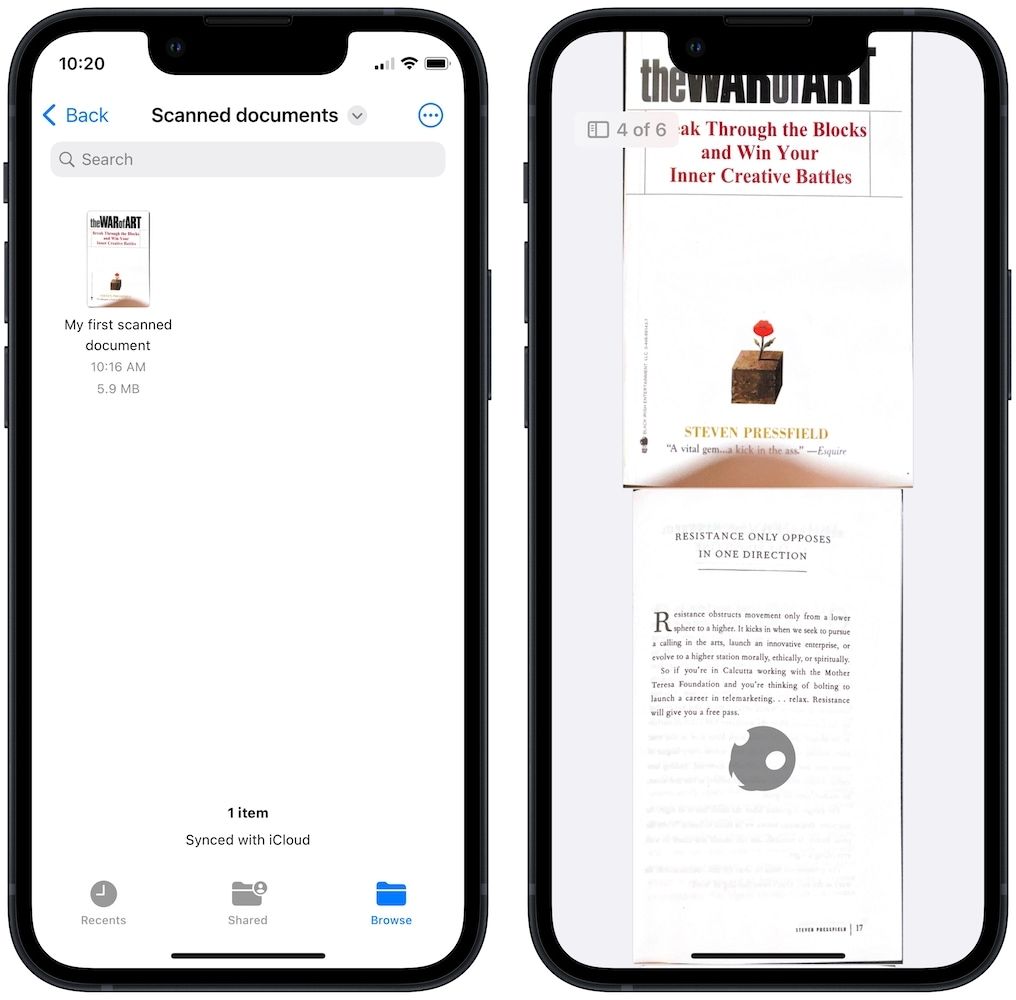
Scan documents on iPhone using Files app
As you can see, you can directly scan documents inside the Files app on iPhone. The best part is that you get a PDF file of all the scans you take in one go, making it easier for organization. That’s all from us for this guide. If you liked this tip, do not forget to follow us on Twitter to get appraised whenever we publish new articles.