
Three Ways to Record Audio on a Mac
Here are three ways you can use to record audio on Mac. Learn to record audio using Voice Memos, QuickTime Player, and GarageBand.
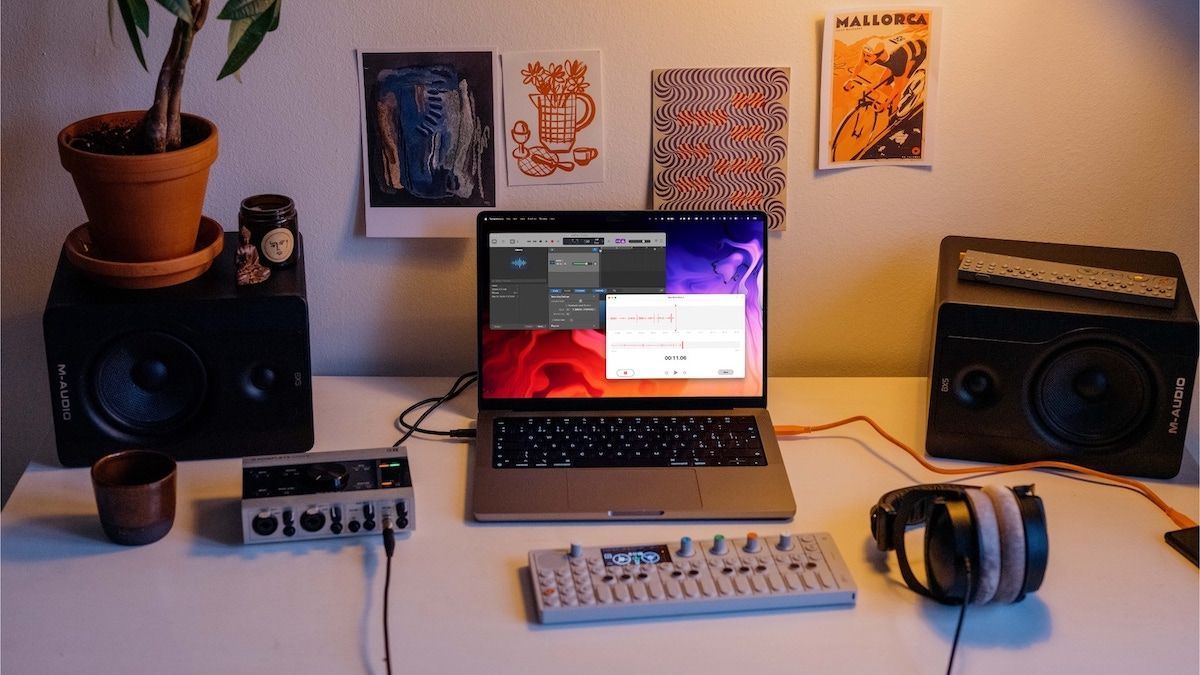
One of the best things about macOS is that it comes with excellent built-in tools. You don’t need to install third-party apps to perform tasks like editing PDFs, taking notes, unarchiving zip files, or even recording audio. There are several ways you can record audio on your Mac, and in this article, we will show you three easy ways that you can use to record audio on your Mac.
Three easy ways to record audio on your Mac
macOS has several built-in tools that let you record your audio with ease. Depending on what you need to do with your audio file, you can use any of these methods.
- How to record audio on Mac using Voice Memos
- How to record audio on Mac using QuickTime Player
- How to record audio on Mac using GarageBand
How to record audio on Mac using Voice Memos
The easiest way to record audio on your Mac is by using the Voice Memos app. Voice Memos app is available on your Mac, iPad, and iPhone, and recordings are synced across devices. It’s best for recording quick ideas and thoughts that you can flesh out later.
- First, launch Spotlight using the CMD+Space keyboard shortcut and then search for Voice Memos. Select and hit enter to launch the app.

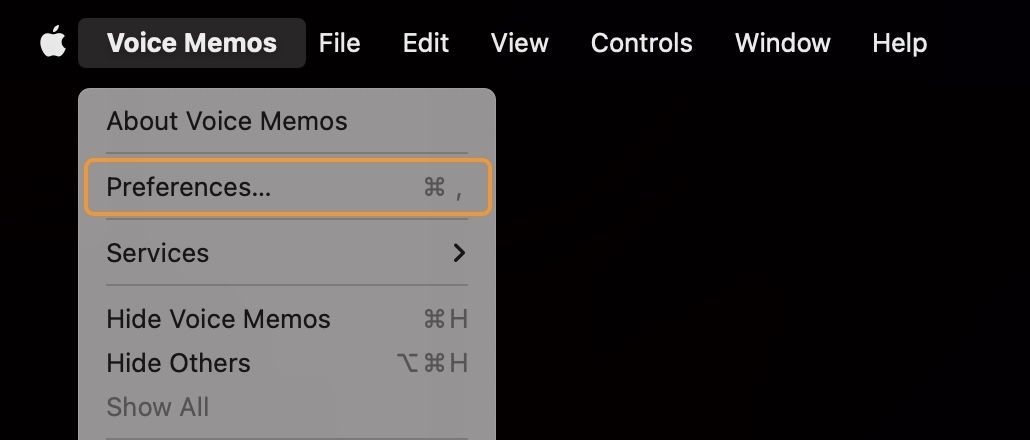
2. Before you start recording, hit CMD+, keyboard shortcut, or click on Voice Memos in Menu Bar and open Preferences.
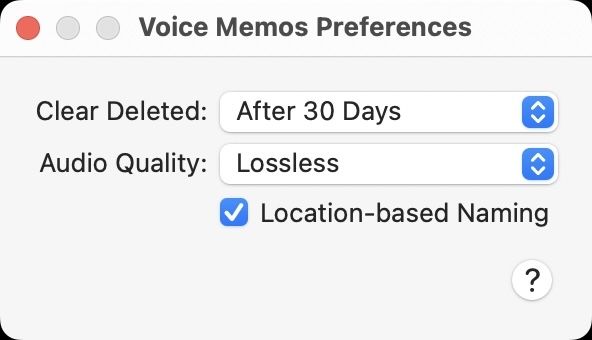
3. Set the audio quality to Lossless to get the best possible recording.
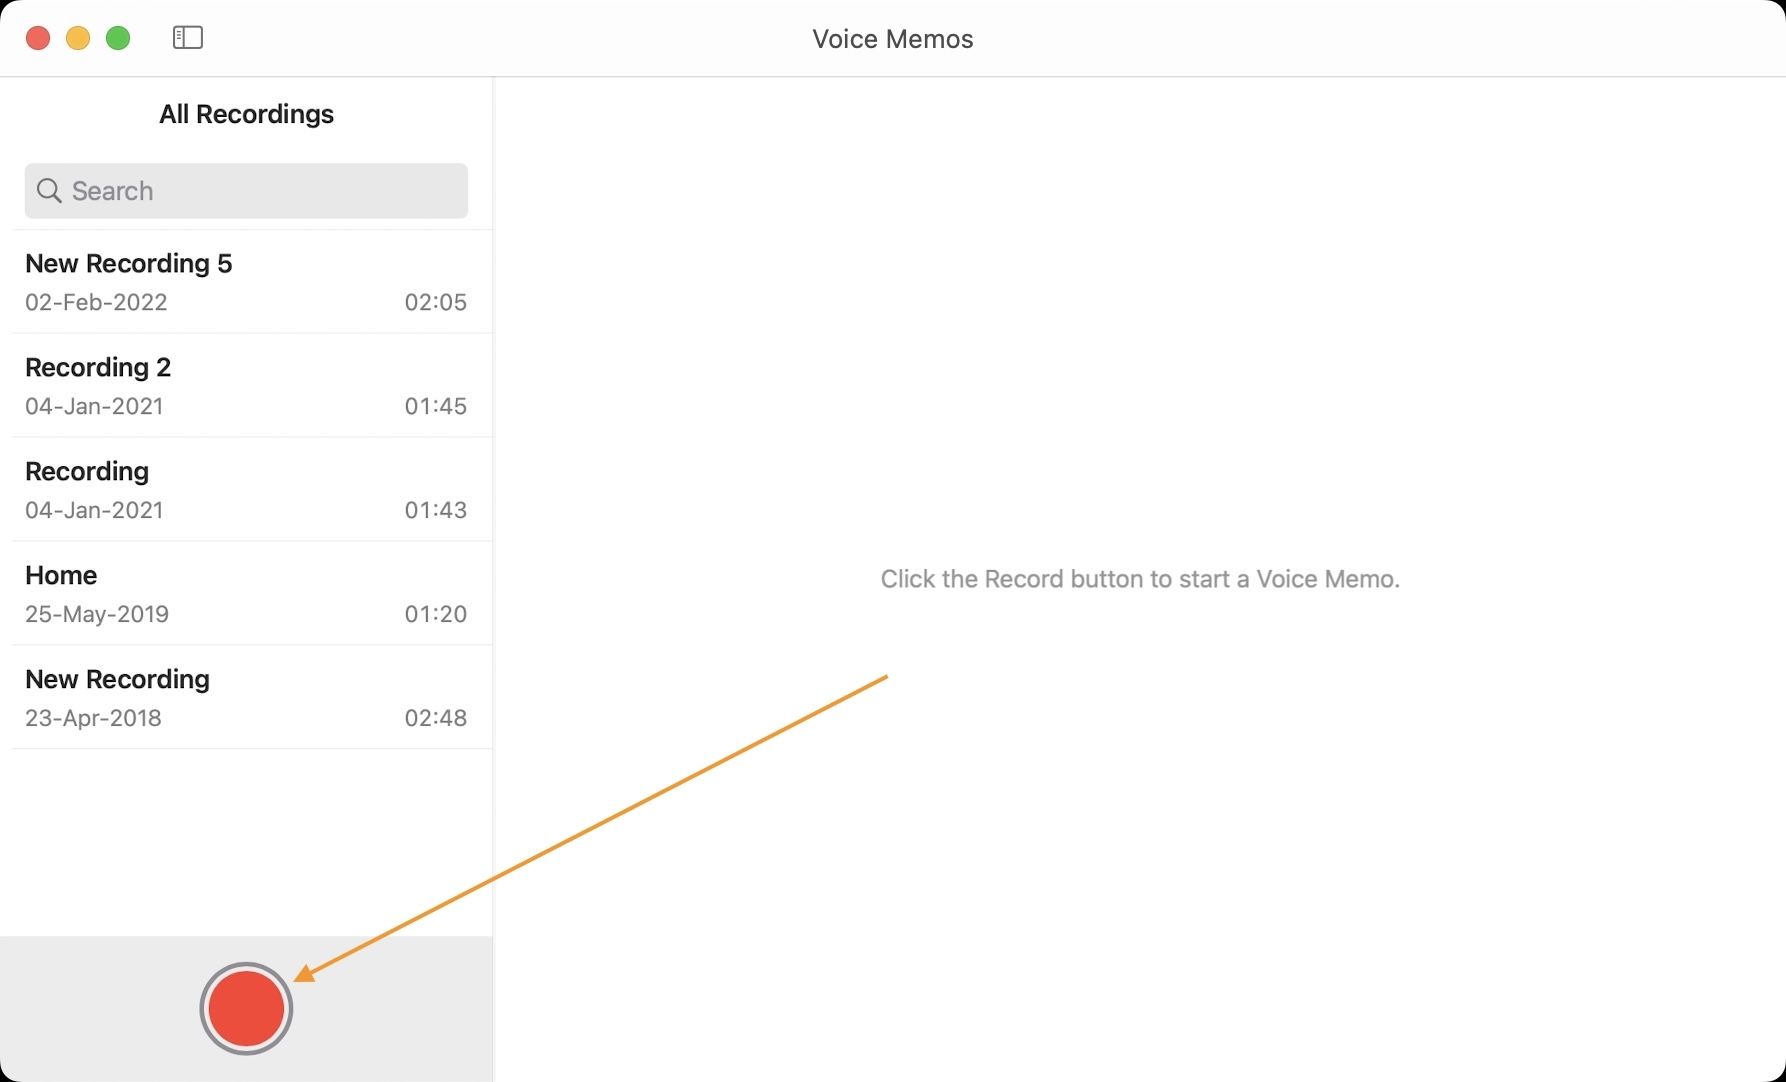
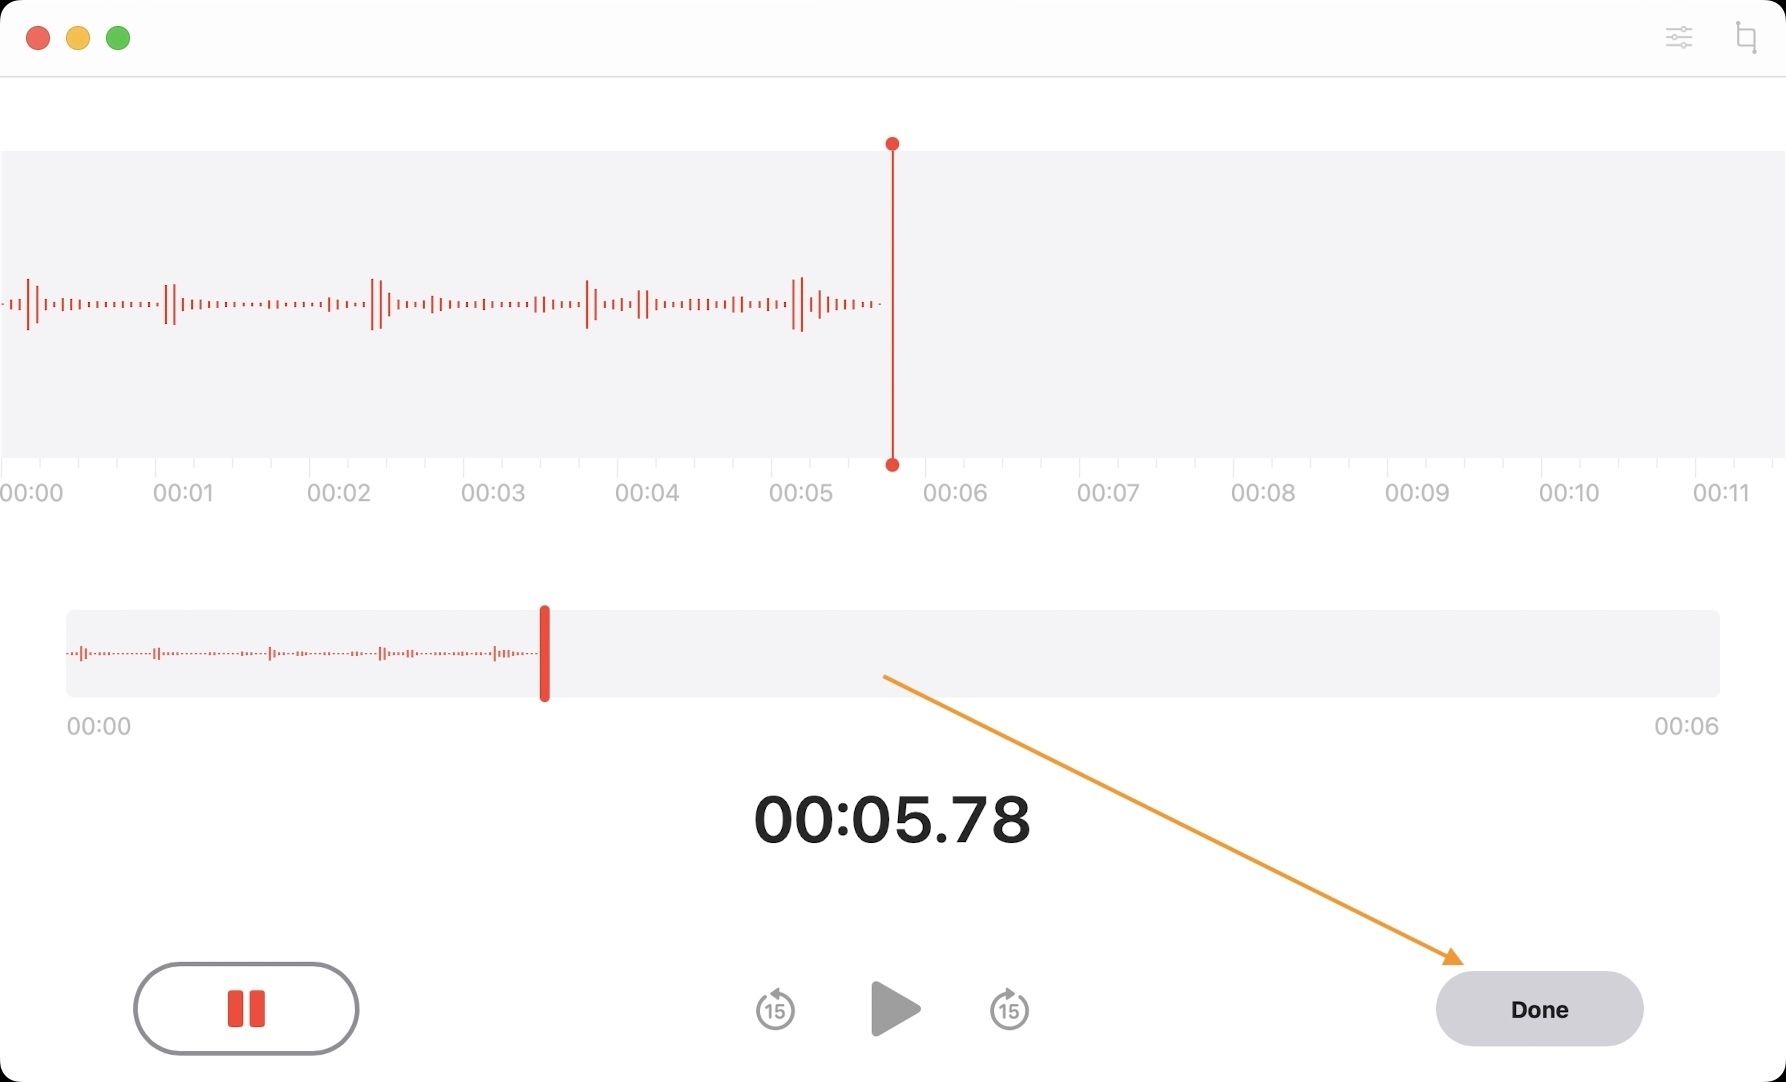
4. Now, click on the big Red record button to start recording your audio.
5. Once you are done with your recording, click on the Done button to stop recording.
How to record audio on Mac using QuickTime Player
If you want to record audio for voiceovers or your podcast, it’s better to use the QuickTime Player, as it gives you more control over your recording.
- Use Spotlight to launch the QuickTime Player app.

2. Click on the File Menu in the Menu Bar and select New Audio Recording. Alternatively, hit the keyboard shortcut CMD+Shift+N.

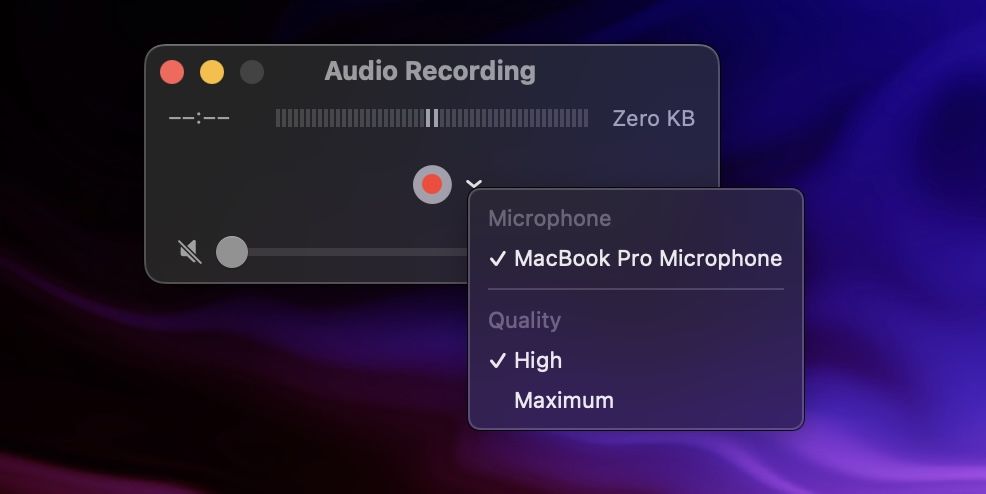
3. Now, you should see the recording window as shown below. You can click on the downward arrow button to select an external microphone if you are using one and choose the quality of your recording.
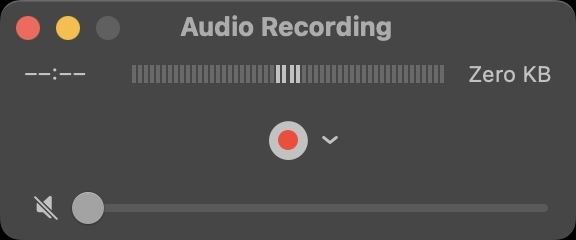
4. When you are happy with the settings, click on the record button to start recording.
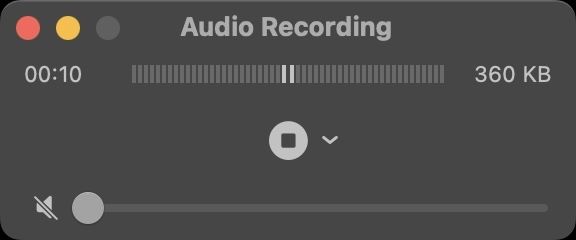
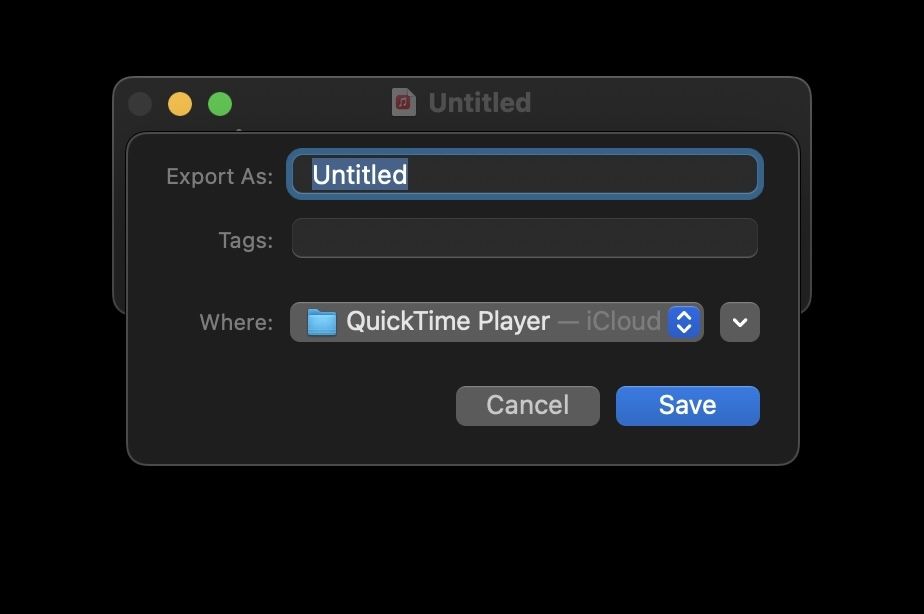
5. You will see that the recording window shows you both the recording length in time and the file size of the recording. Click on the stop recording button when you have recorded your piece.
6. Hit the CMD+S keyboard shortcut to change the name of the recording name, add tags, and choose where to save the recording.
How to record audio on Mac using GarageBand
If you also want to edit your audio after recording it, you can do so by using GarageBand.
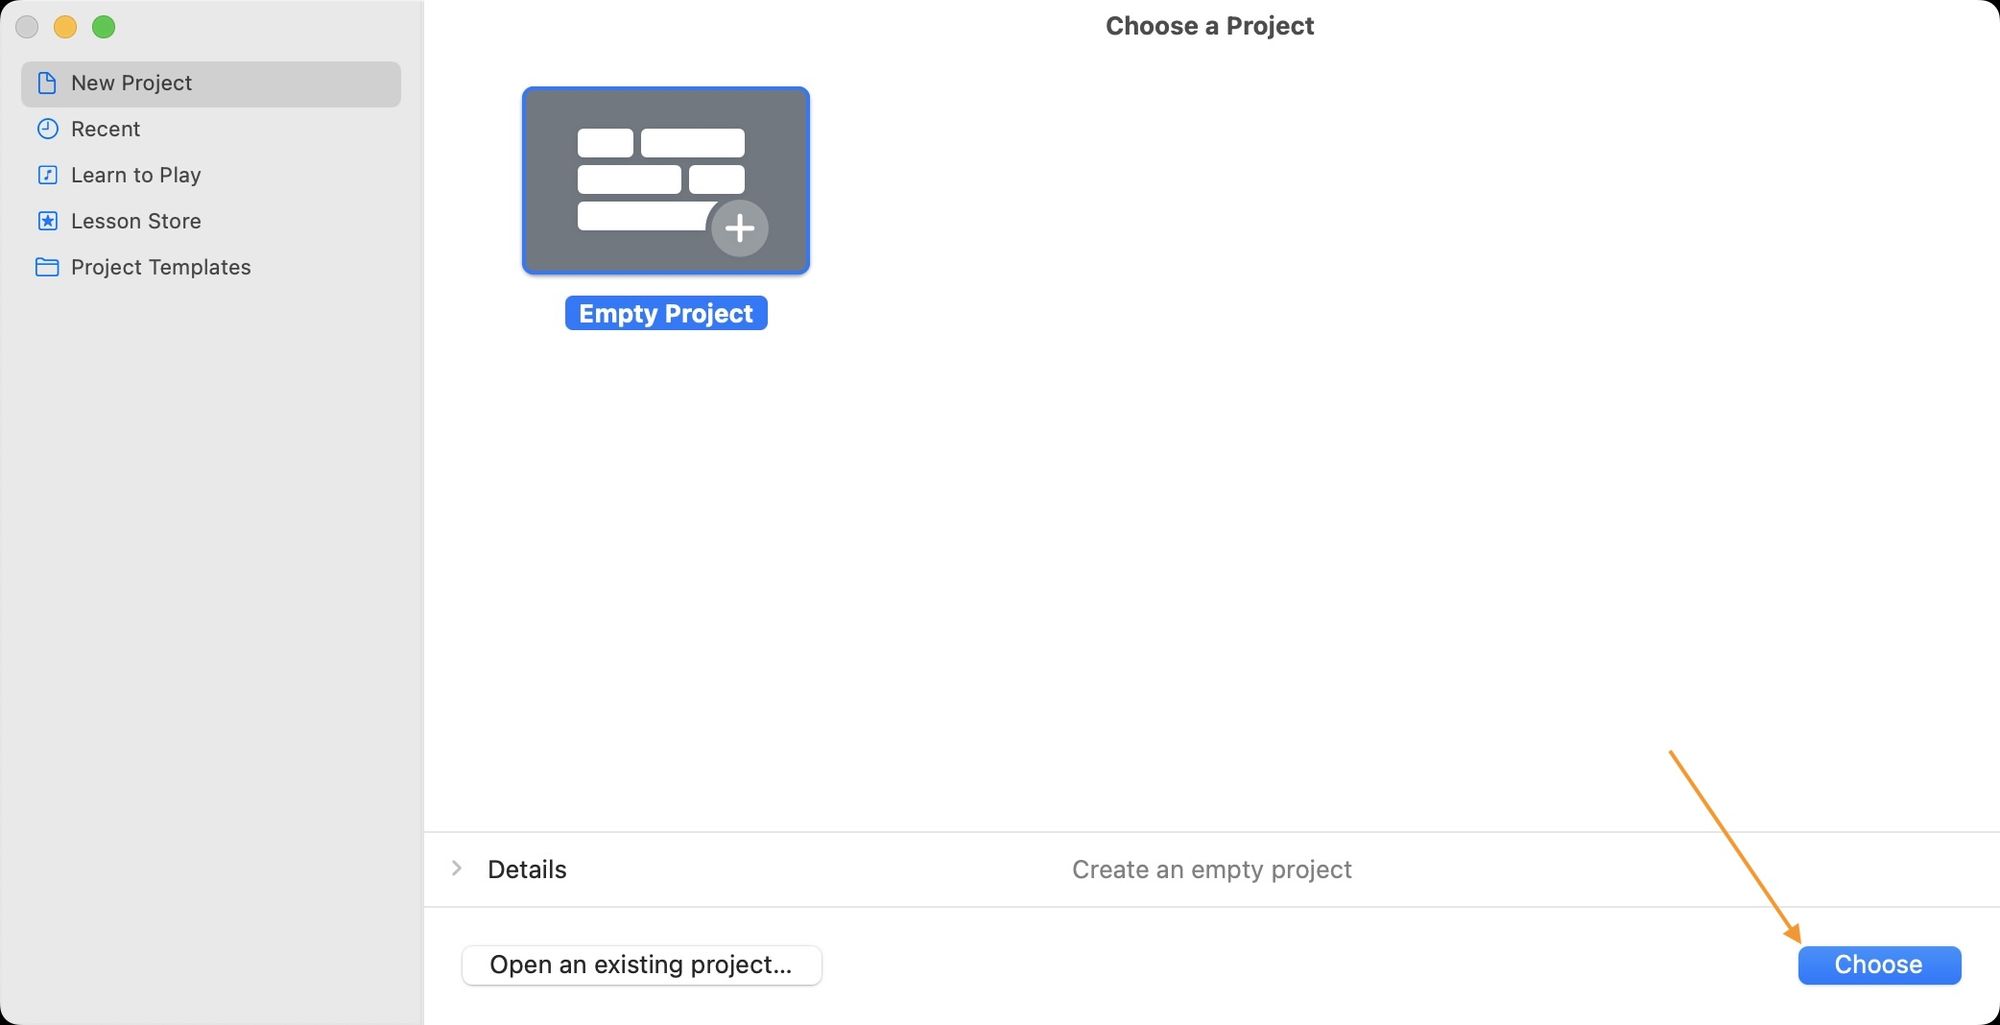
- Use Spotlight to launch GarageBand on your Mac. If you have uninstalled the app for some reason, you can install it for free by downloading it from the Mac App Store.

2. Click on Choose to create a new project.
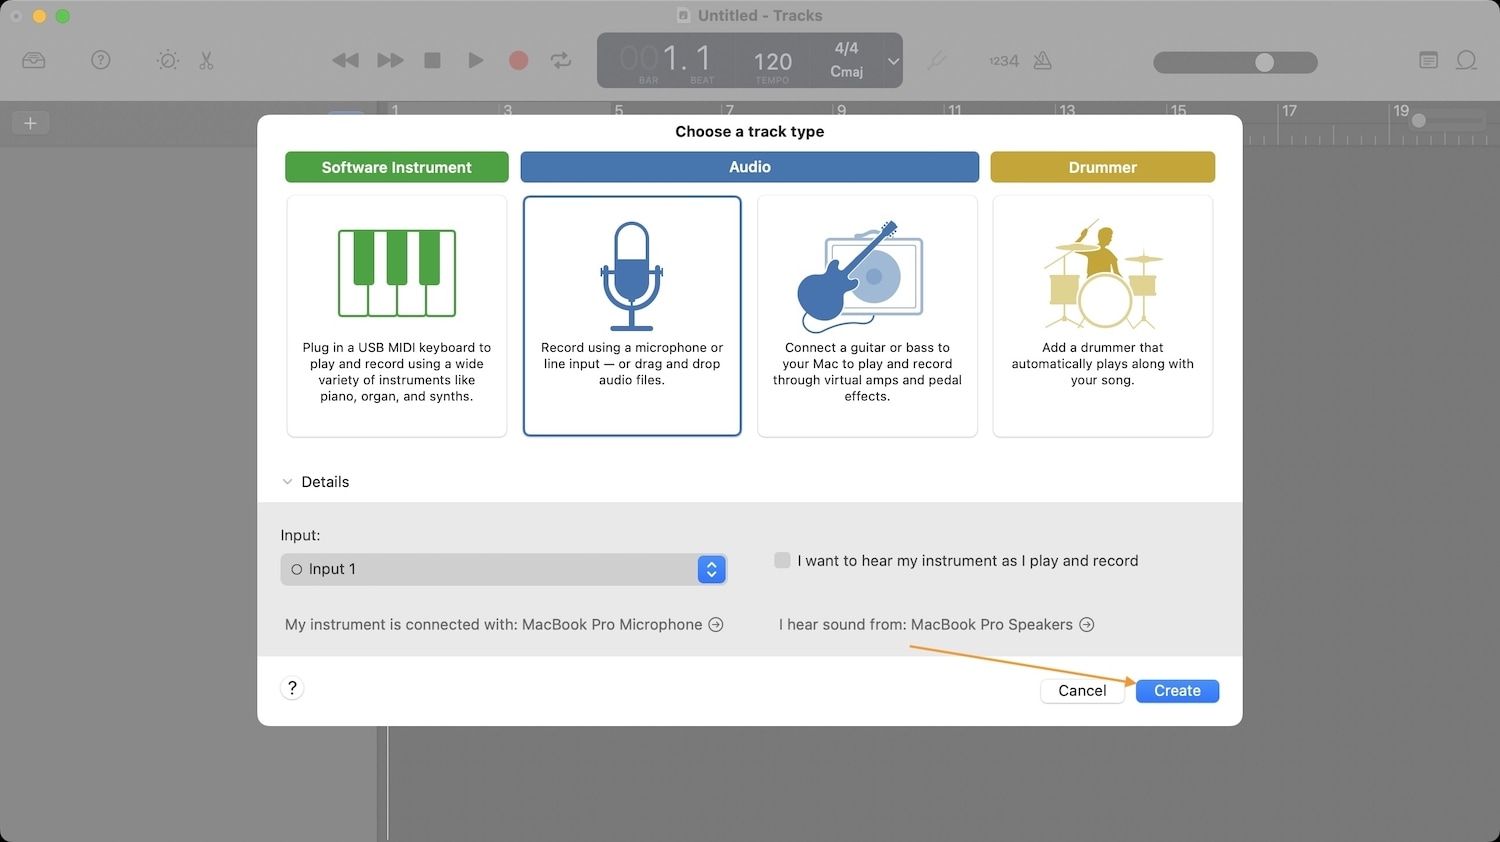
3. Select the Record Using a Microphone option and then click on the My instrument is connected with option mark in the screenshot below.
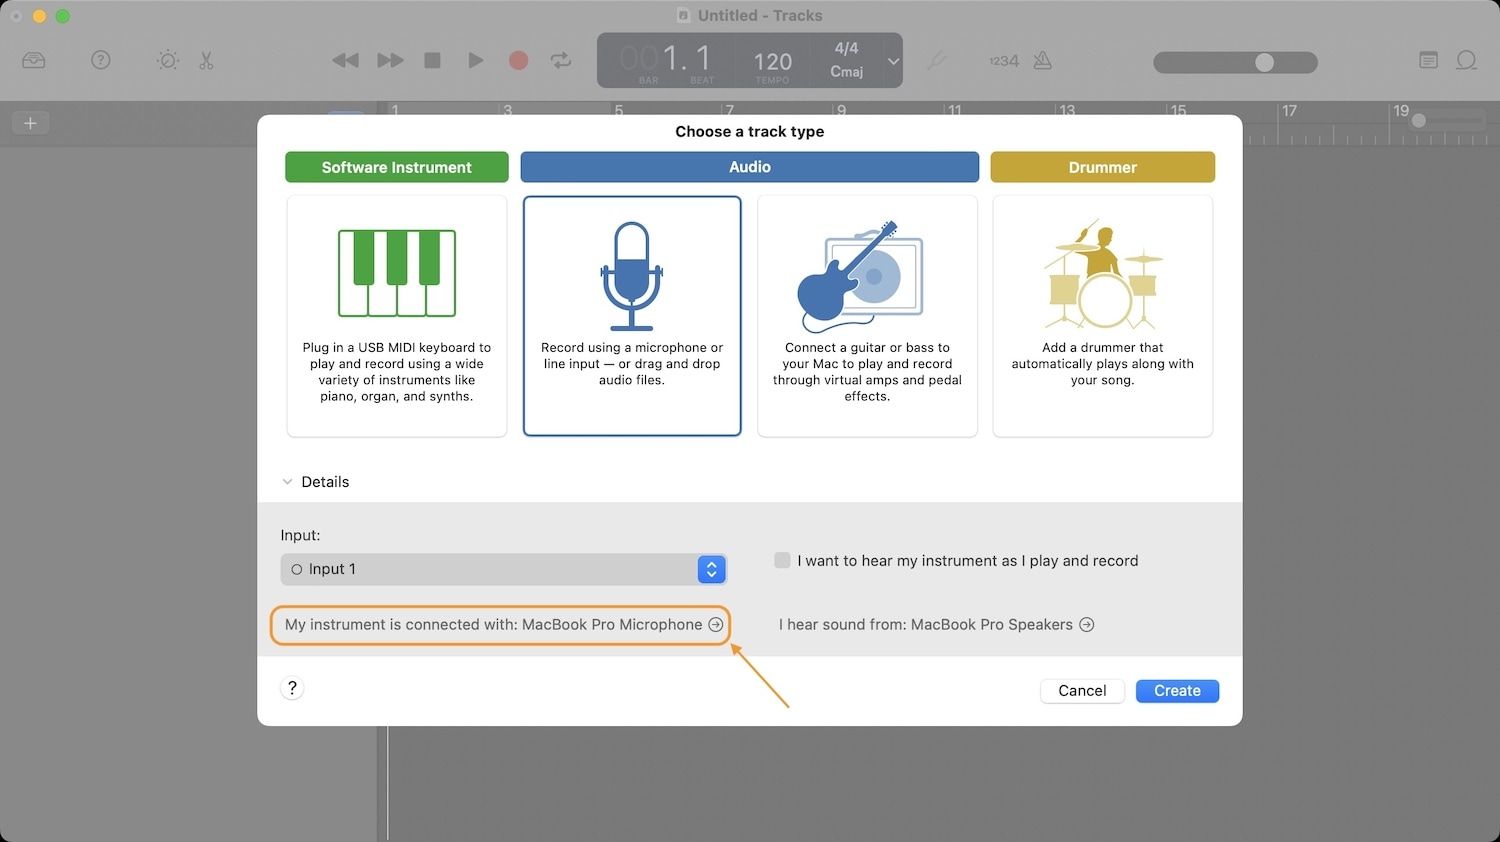
4. Click on the dropdown menu next to Input Devices to select your microphone. After selecting the right microphone, click on the Red button to close the settings window.
5. Now, click on Create to start a new project.
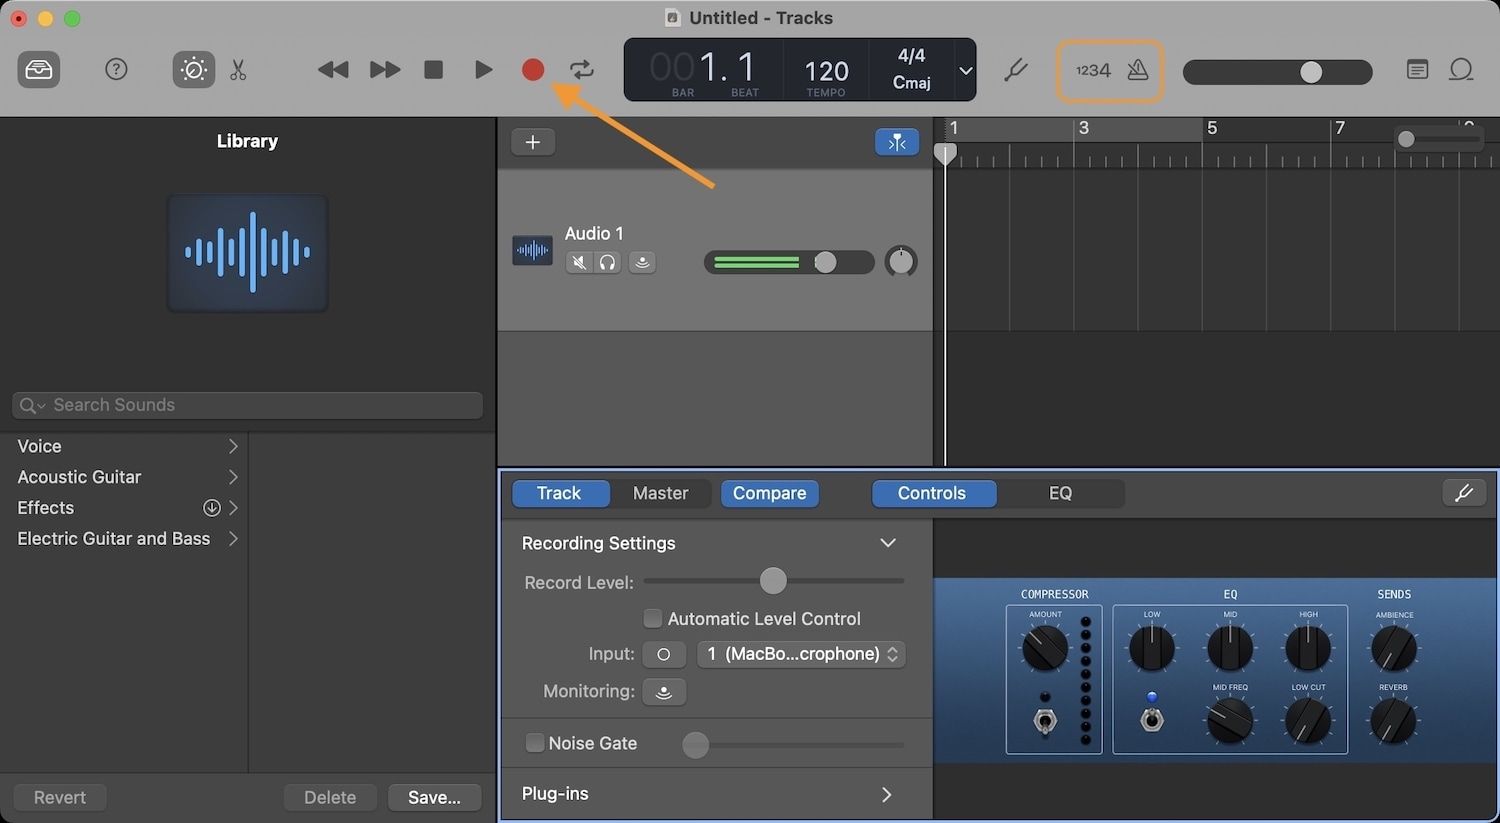
6. Deselect the Metronome and Count in button and hit the Red record button to start your recording.
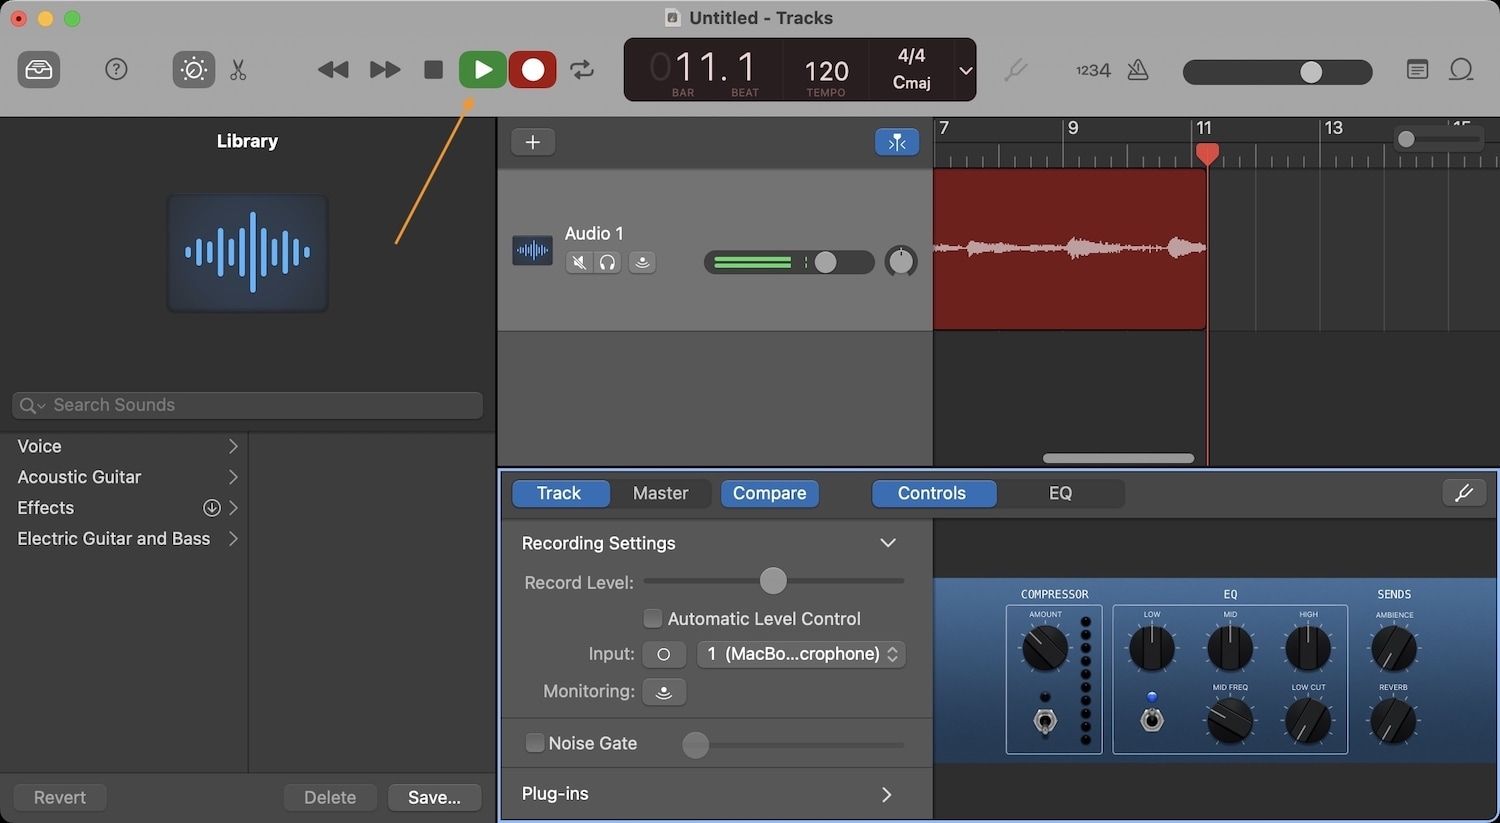
7. Hit the Green button again to stop the recording when you finish. Now, you can use the built-in tools in GarageBand to edit your voice recording as you see fit.
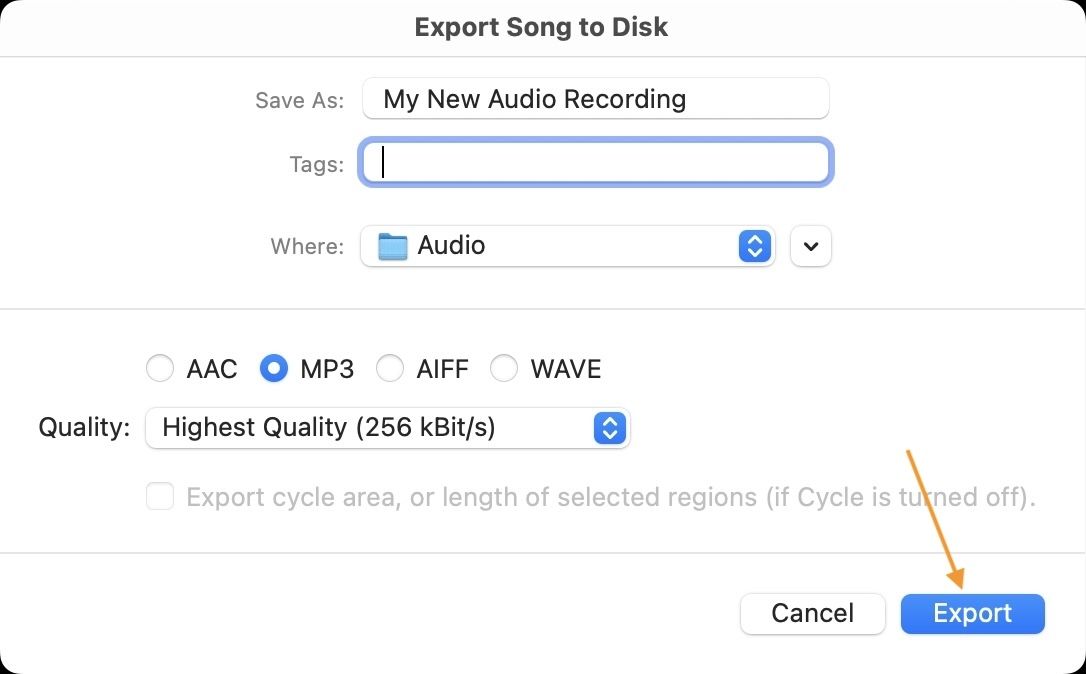
8. To save the file, go to Share → Export Song to Disk.
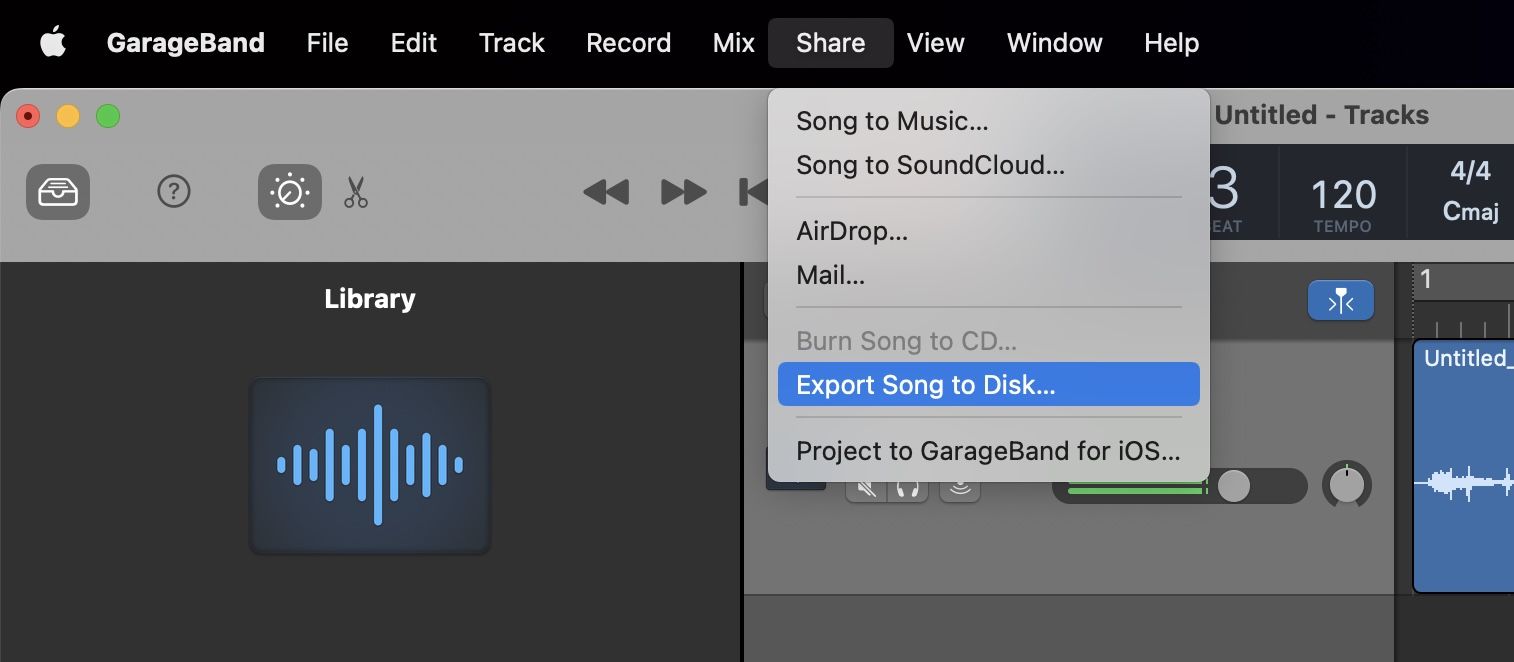
9. From here, you can rename the file, add tags, and select where you want to save the file and the file format. Once you have set these dimensions, click on the Export button to export your file.
Recording audio on Mac: Final thoughts
As you can see, macOS gives you multiple ways and makes it very easy to record audio on your Mac. If you want to quickly record ideas, Voice Memos is the best option. QuickTime Player gives you a little control over your recording parameter, while GarageBand gives you total control. Depending on your needs, you can use any of these recording solutions. If you have any questions regarding this, reach us on Twitter, and we will help you out.


