
How to Set Page Banners in Logseq
Here’s how to set page banners in Logseq to personalize and beautify your Logseq pages using the Banners for Logseq Plugin.
Logseq is not only one of the best note-taking apps for personal knowledge management, but it’s also one of the most pleasing ones to use. What we love about this app is that it lets you customize its look with the help of themes and plugins. One of our favorite Logseq plugins is the Banners for Logseq plugin which lets you set page banners in Logseq. If you love the page banners feature in Notion, you can enable the same in your Logseq directory using this plugin. Here’s how to set page banners in Logseq to personalize and beautify your Logseq pages.
Personalize your Logseq pages with beautiful banners and widgets
The Banners for Logseq plugin is extremely powerful. It lets you set page banners for the journal and individual notes pages. You can even set different page banners for different pages. You can also add calendar widgets, weather widgets, and banner icons to customize the image banners.
In this guide, we will first show you how to install the Banners for the Logseq plugin and use it to add banners to your daily notes. We will then show you how to add banners to individual notes pages and customize page banners and icons for each page. Finally, we will cover how to add calendar and weather widgets to your page banners in Logseq.
This is going to be a fun guide, so buckle up, and let’s get started!
Click to reveal table of content
Install Banners for Logseq plugin
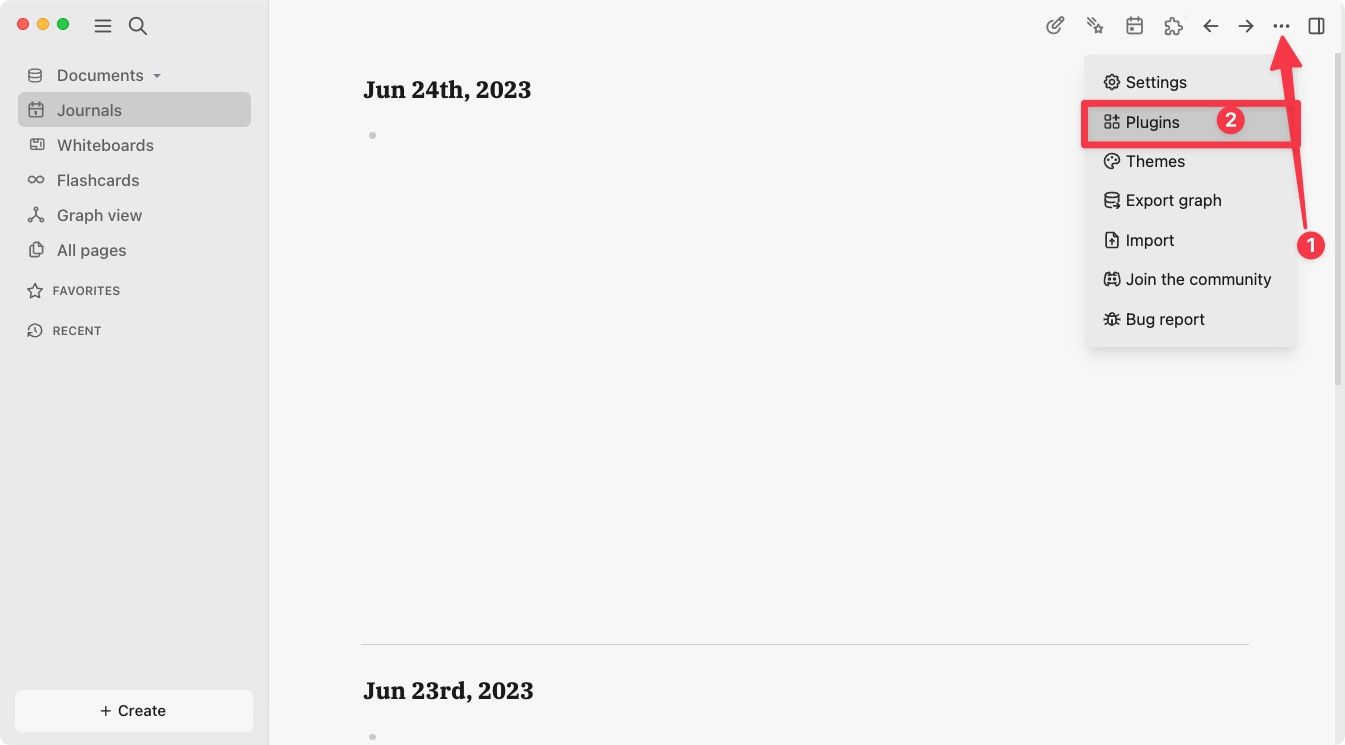
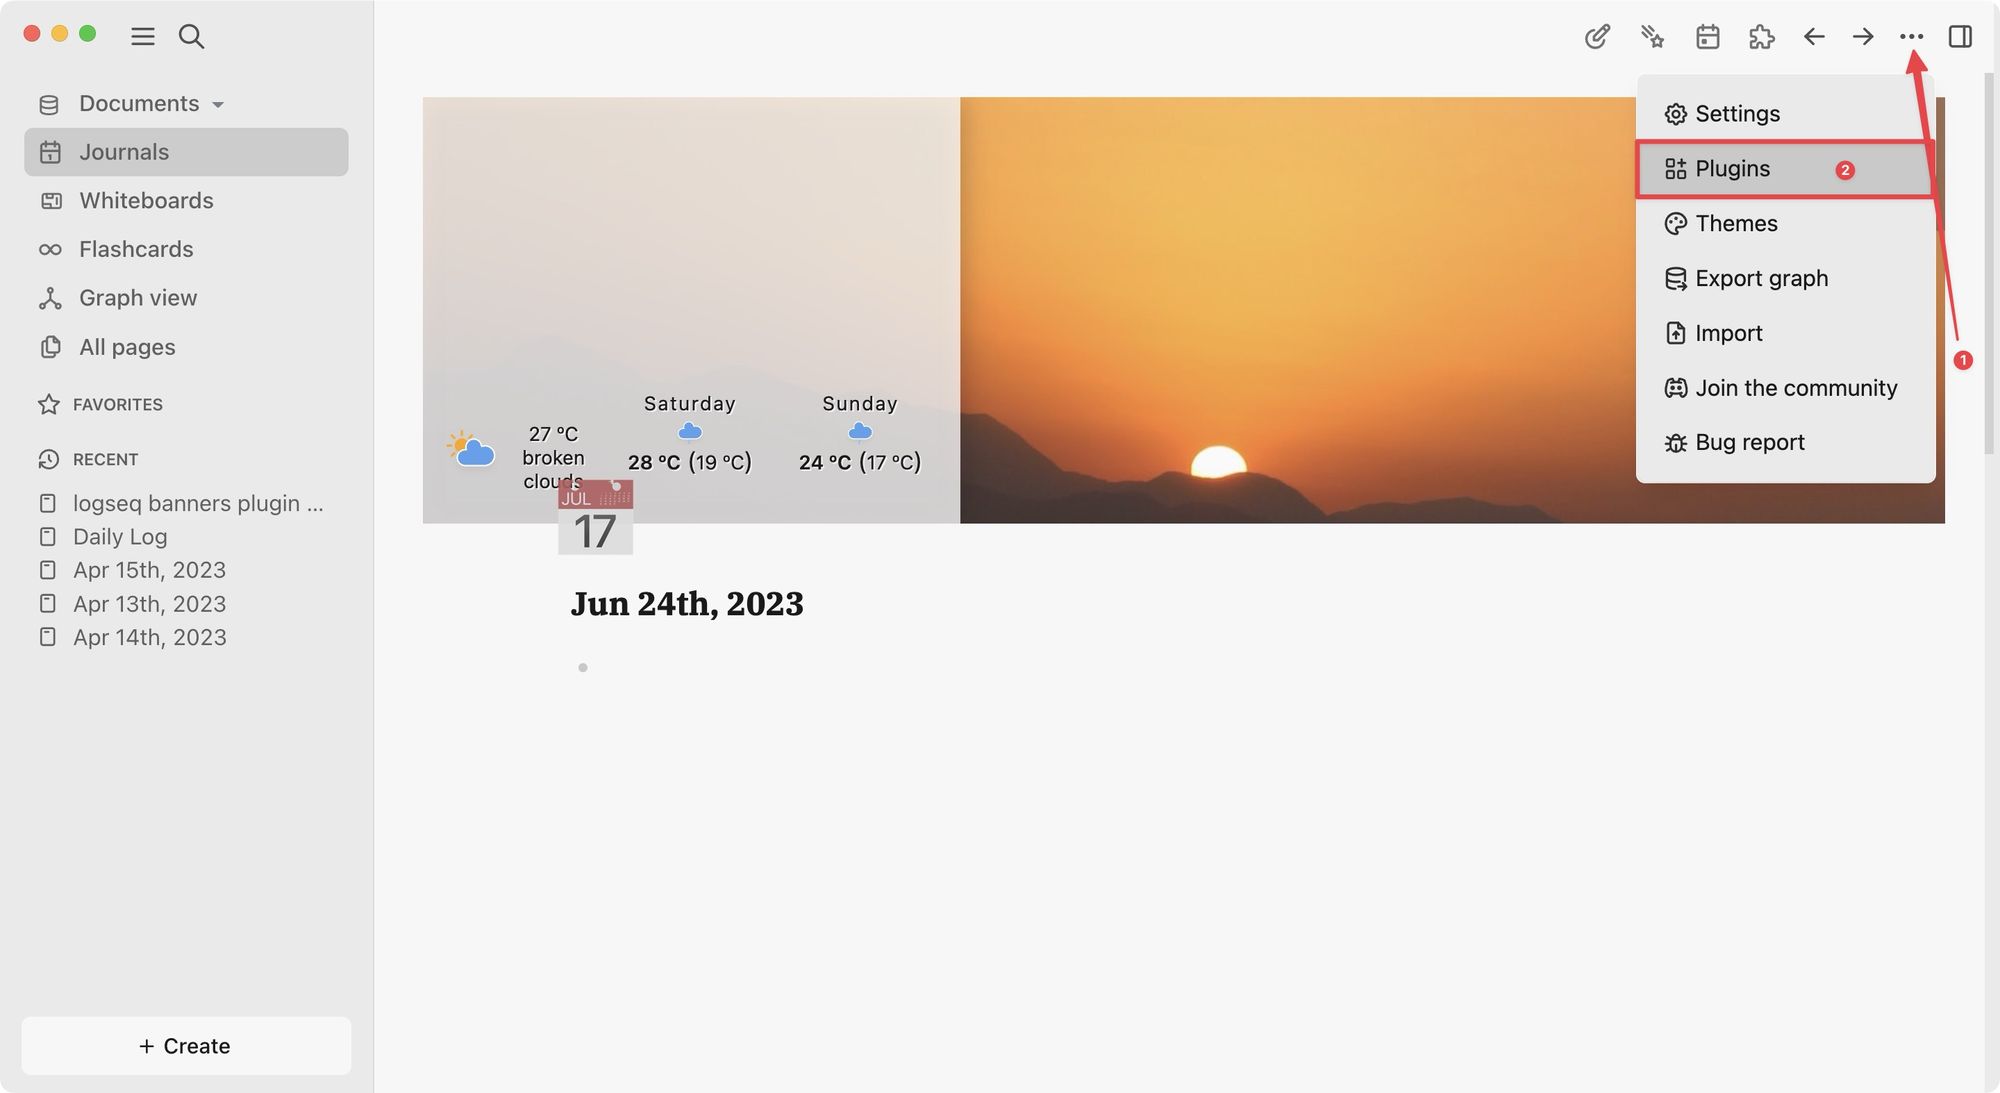
1. To install the Banners for Logseq plugin, click the three-dot menu in the top-right corner and choose the Plugins option.
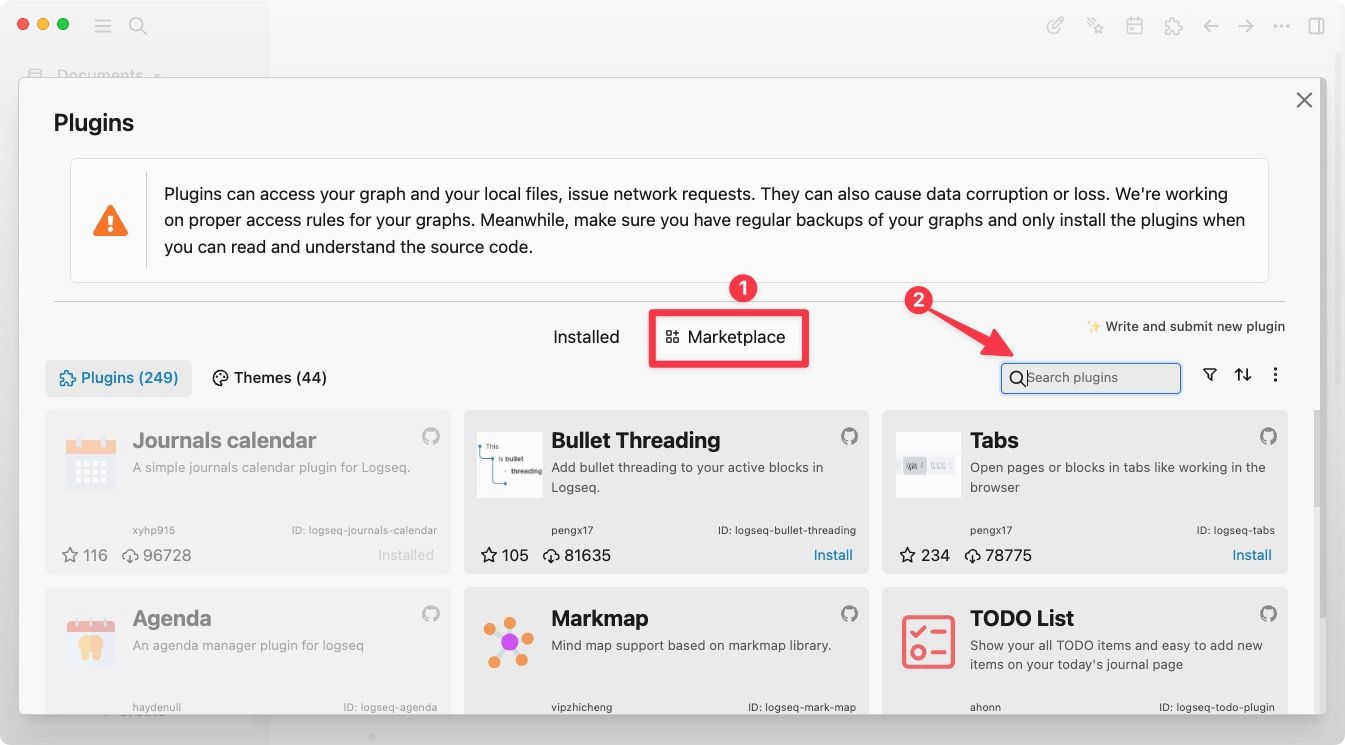
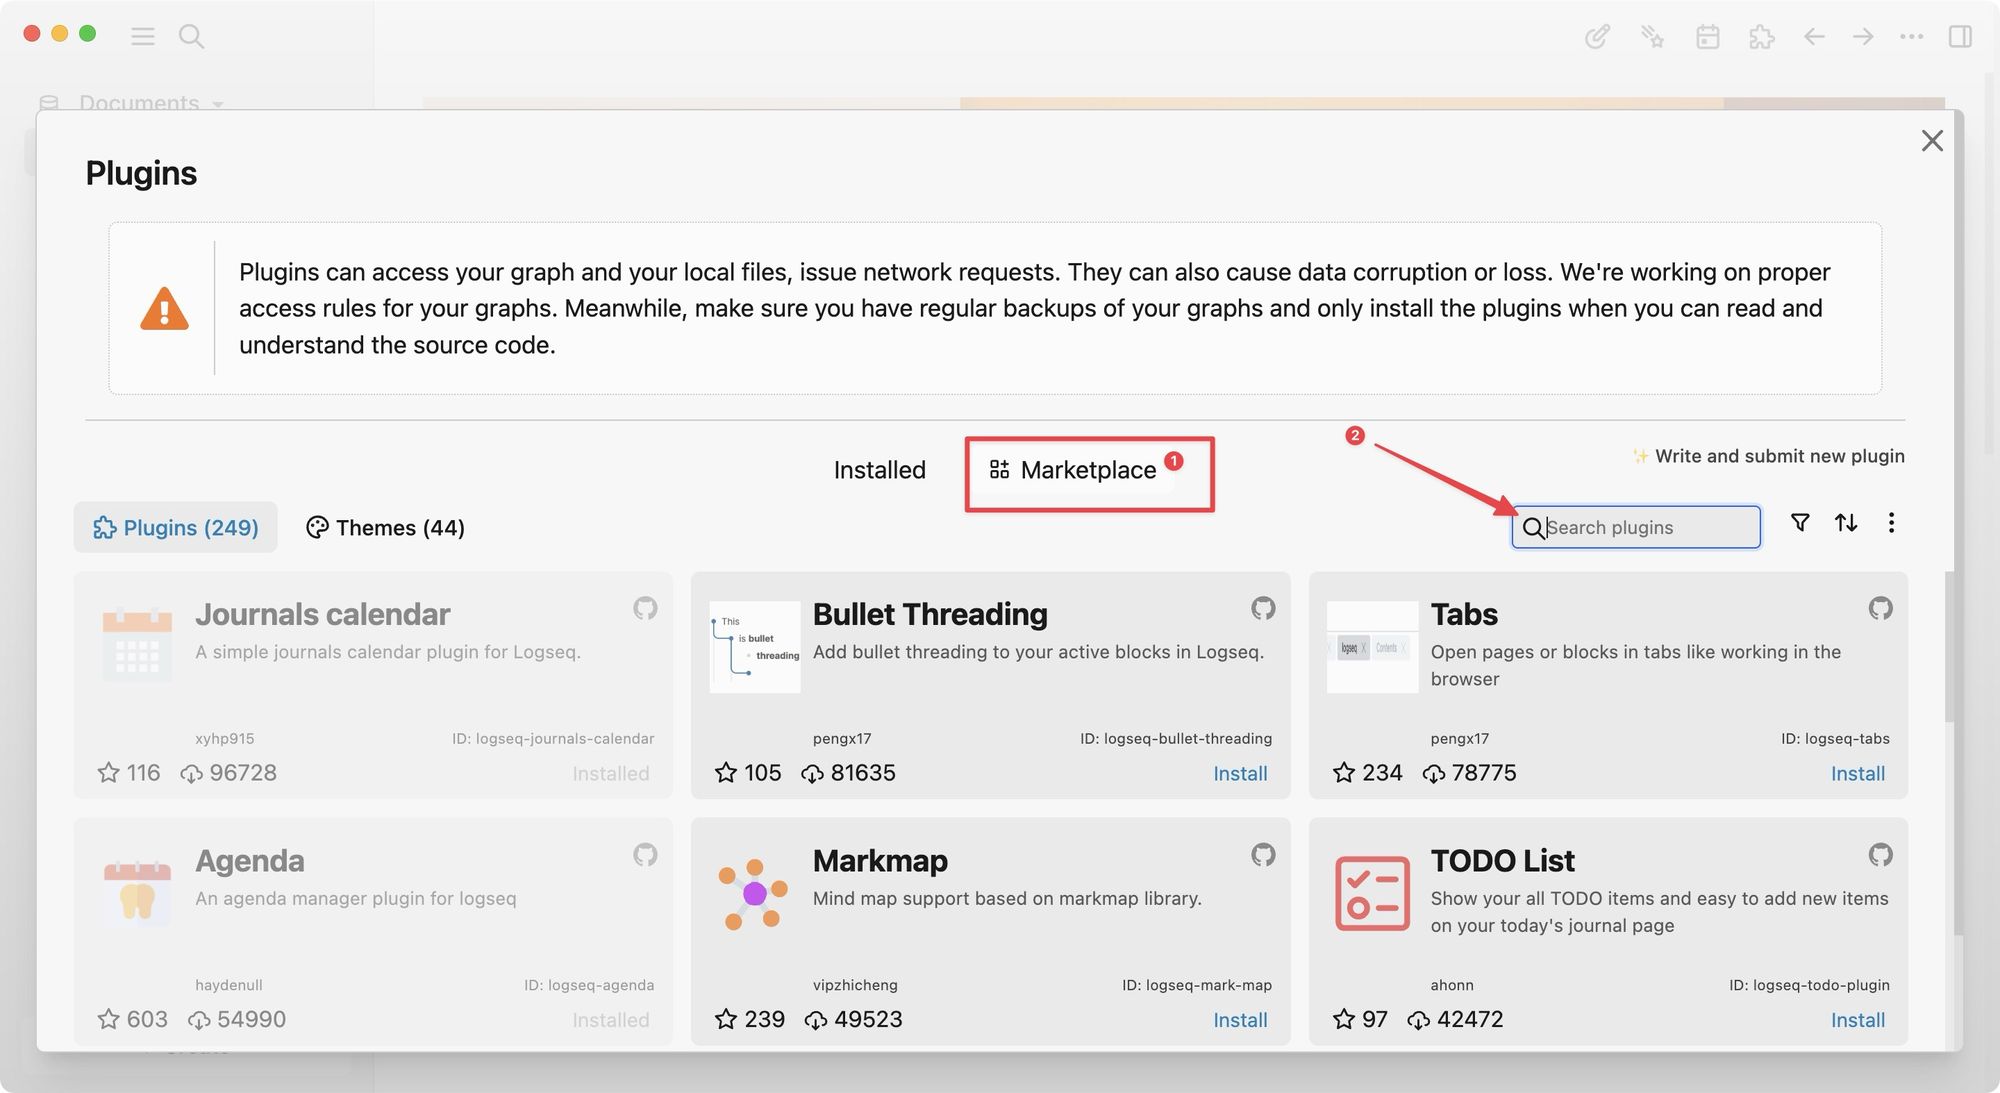
2. Select Marketplace and use the search field to search for Banners for Logseq.
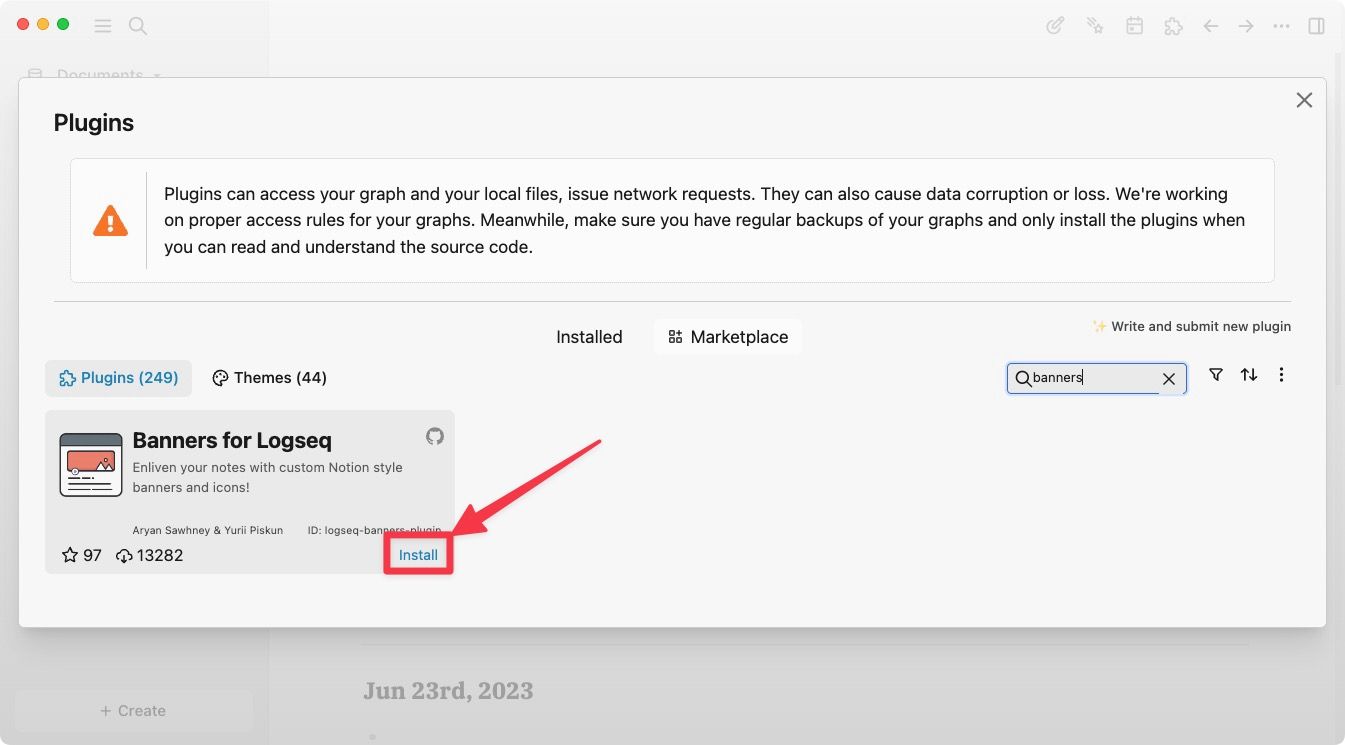
3. Now, click the Install button to install the plugin to your directory.
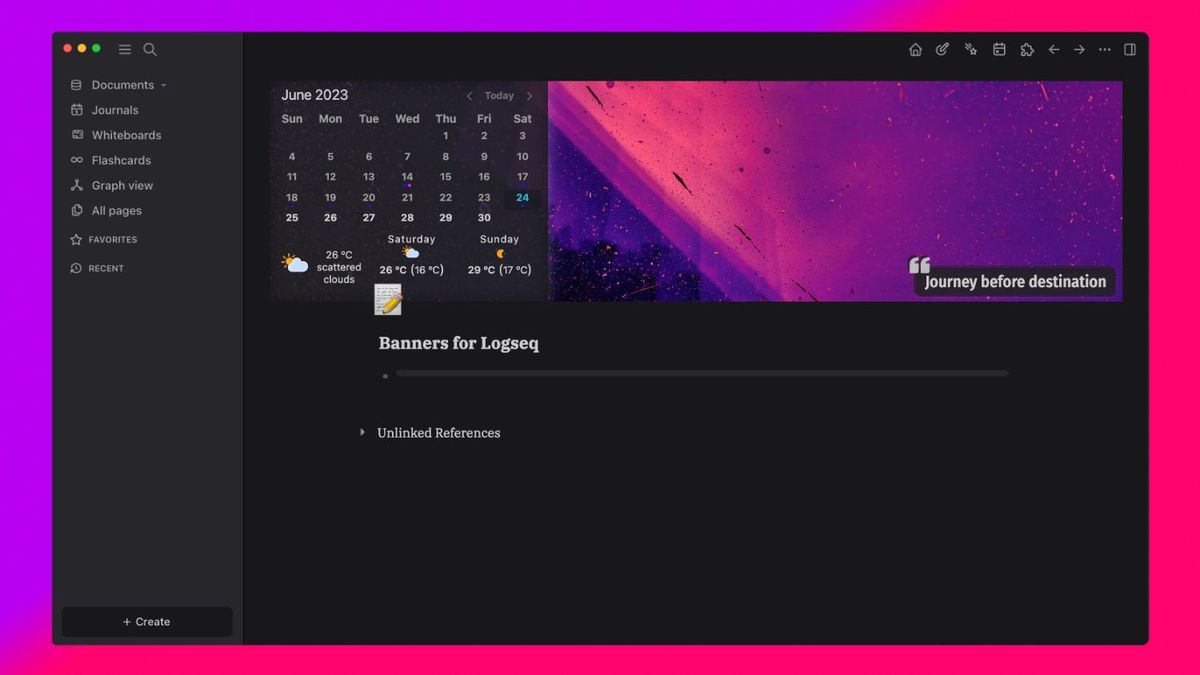
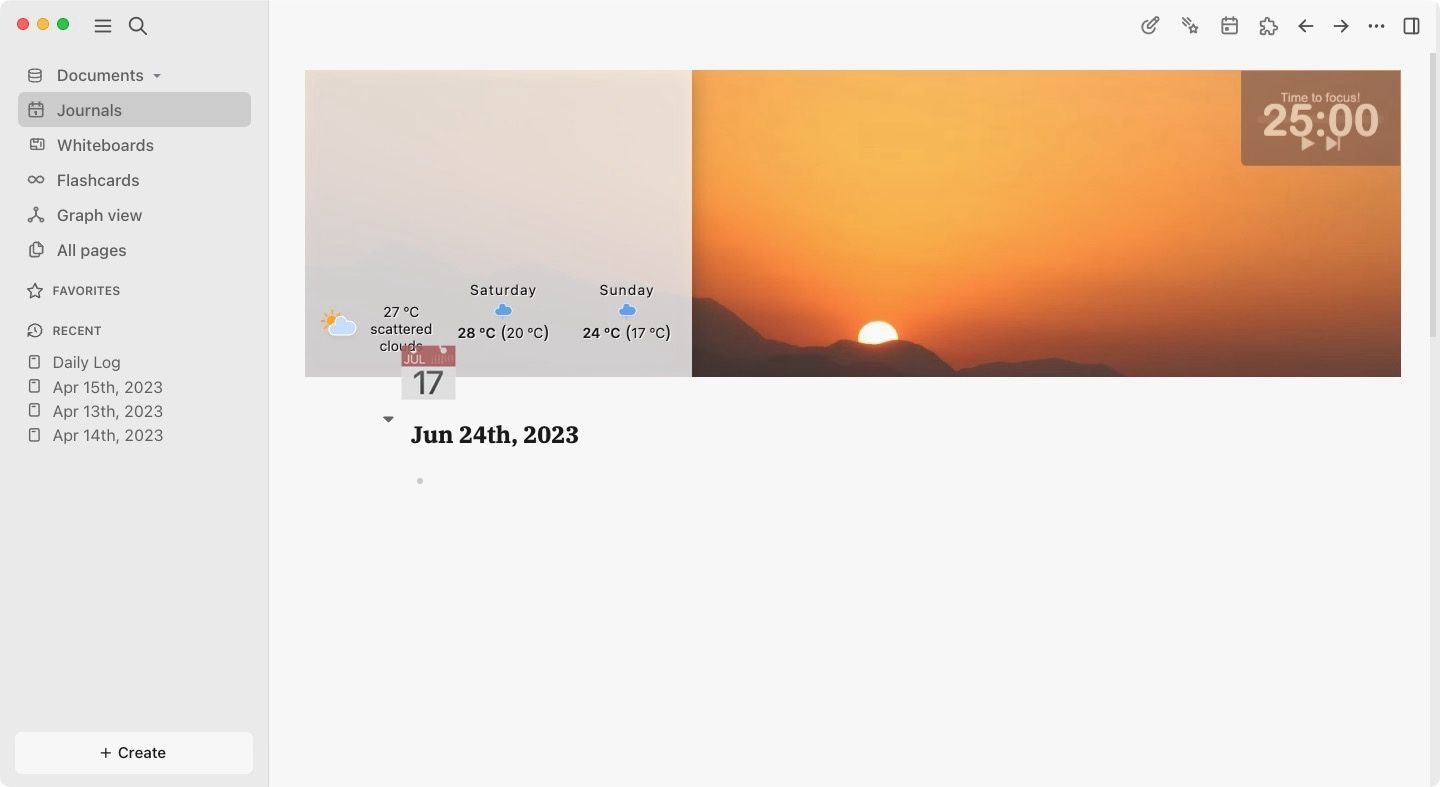
Now, when you go back to your journal or daily notes page, you will notice that it’s already showing a page banner with weather and Pomodoro widgets. Similarly, opening any note in your directory will show you a page banner.
For now, all pages in your Logseq database will have the same image banner. In the next sections, we will show you how to customize the default page banners for daily and other notes pages.
Customize the default banner images for pages
To customize the default banner images for daily notes and other notes pages in your Logseq directory, you will first need the link of the image you want to use. You can use both online images and the ones uploaded into your Logseq directory.
For this guide, we will use Unsplash as our image source as it’s the most popular and has one of the biggest galleries of free images. The only thing you need to remember is to copy the URL of the image and not the profile of the person uploading the image.
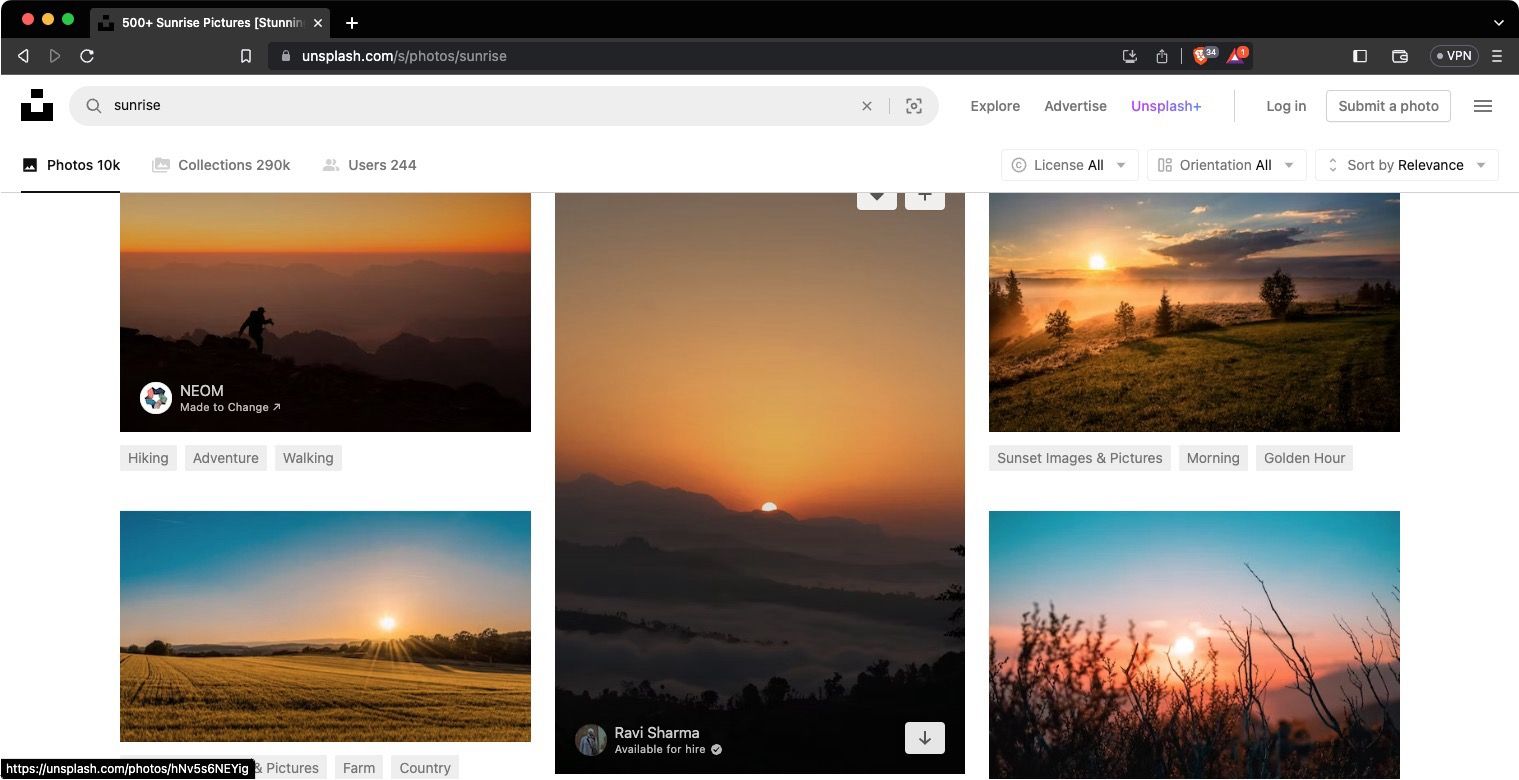
1. Launch a browser and visit the Unsplash website.
2. Click on the image you want to set as the banner to open it.
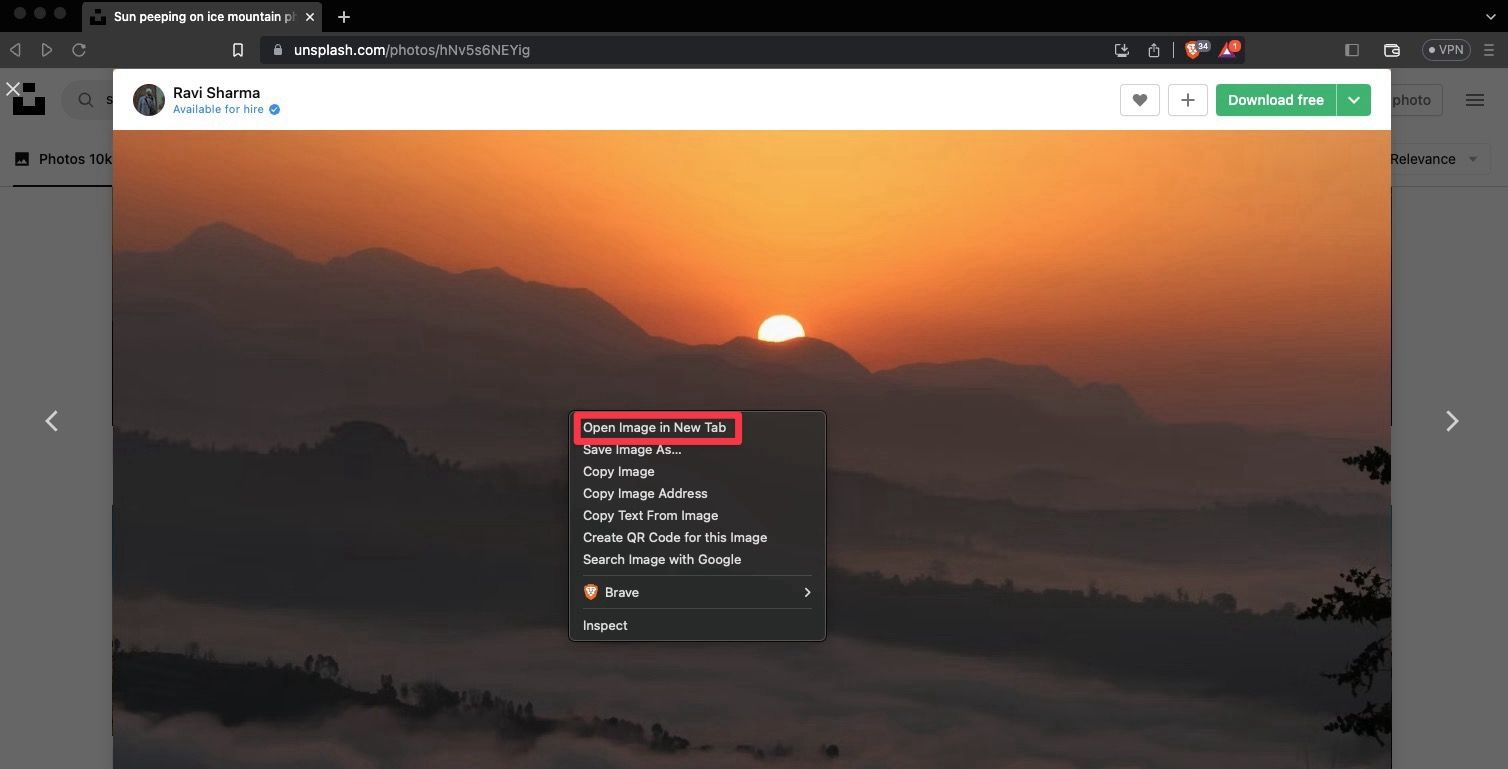
3. Right-click on the image and choose the Open Image in New Tab option.
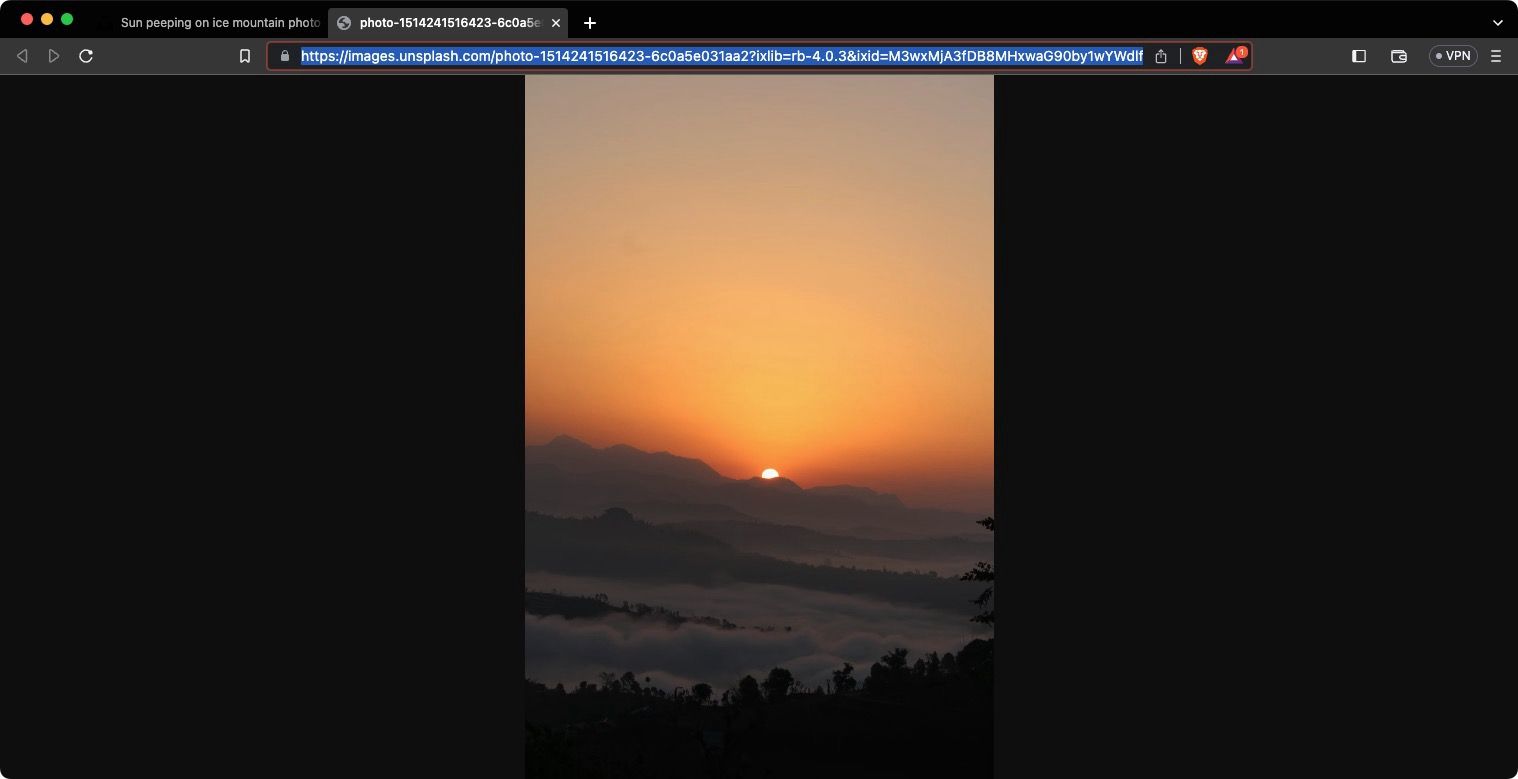
4. Now, copy the URL link of the image.
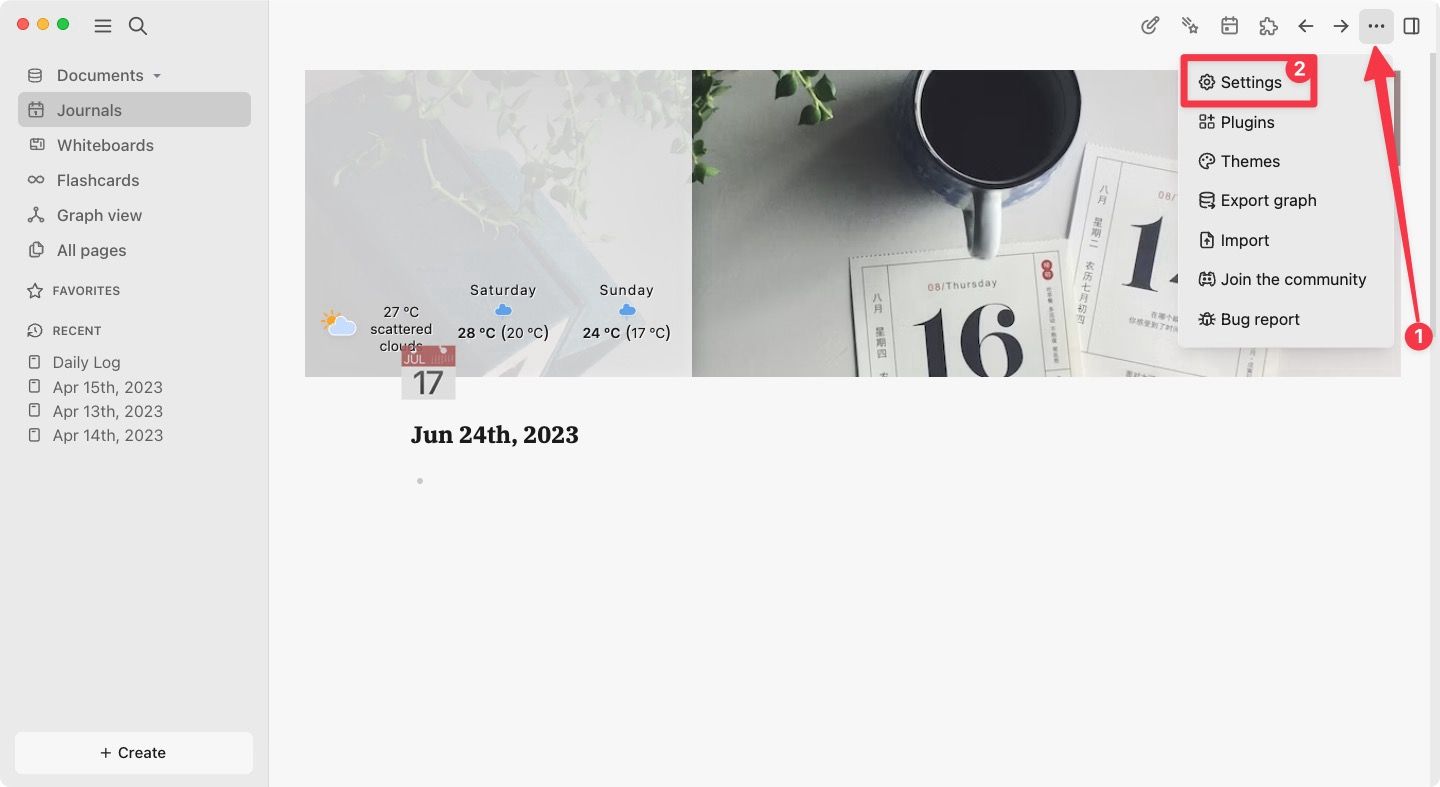
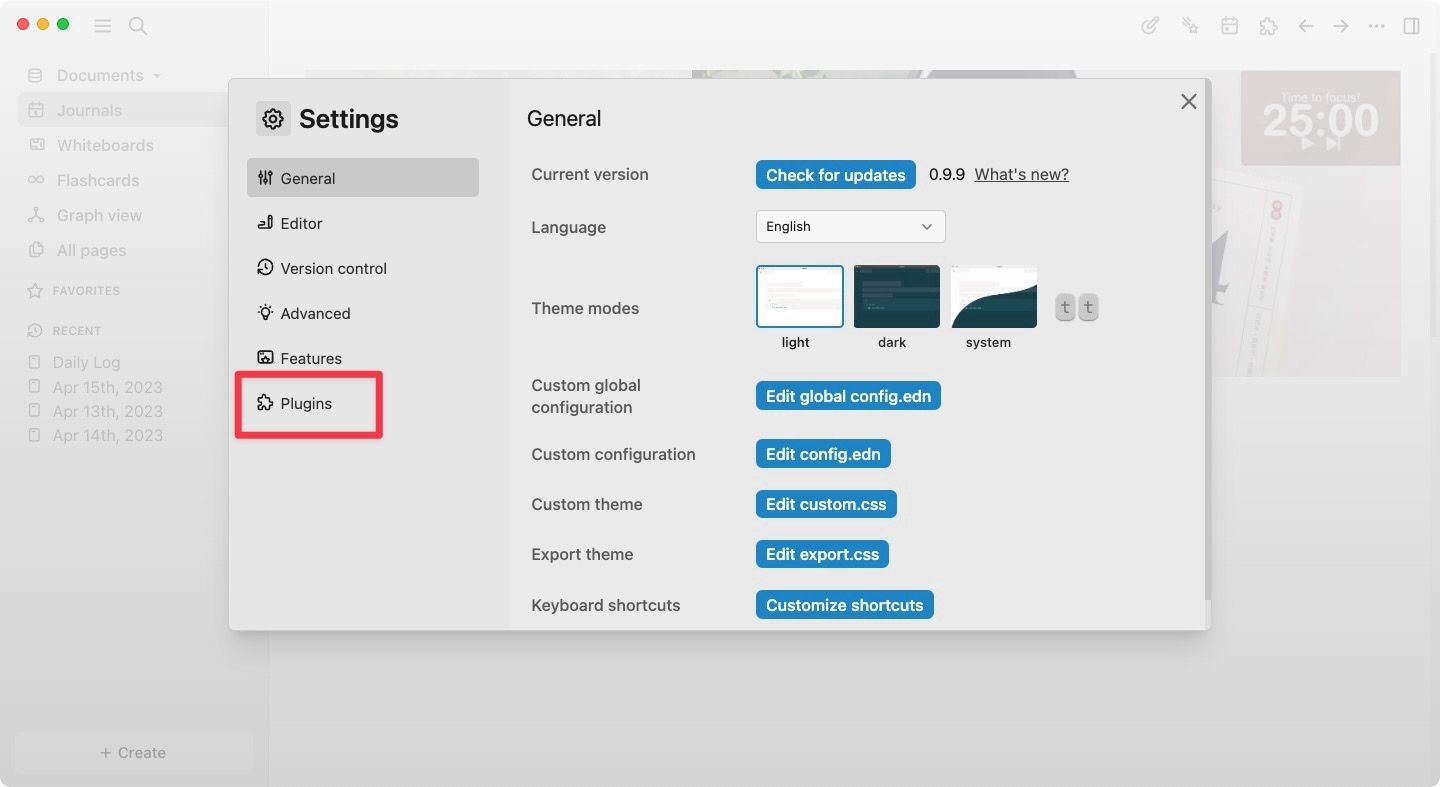
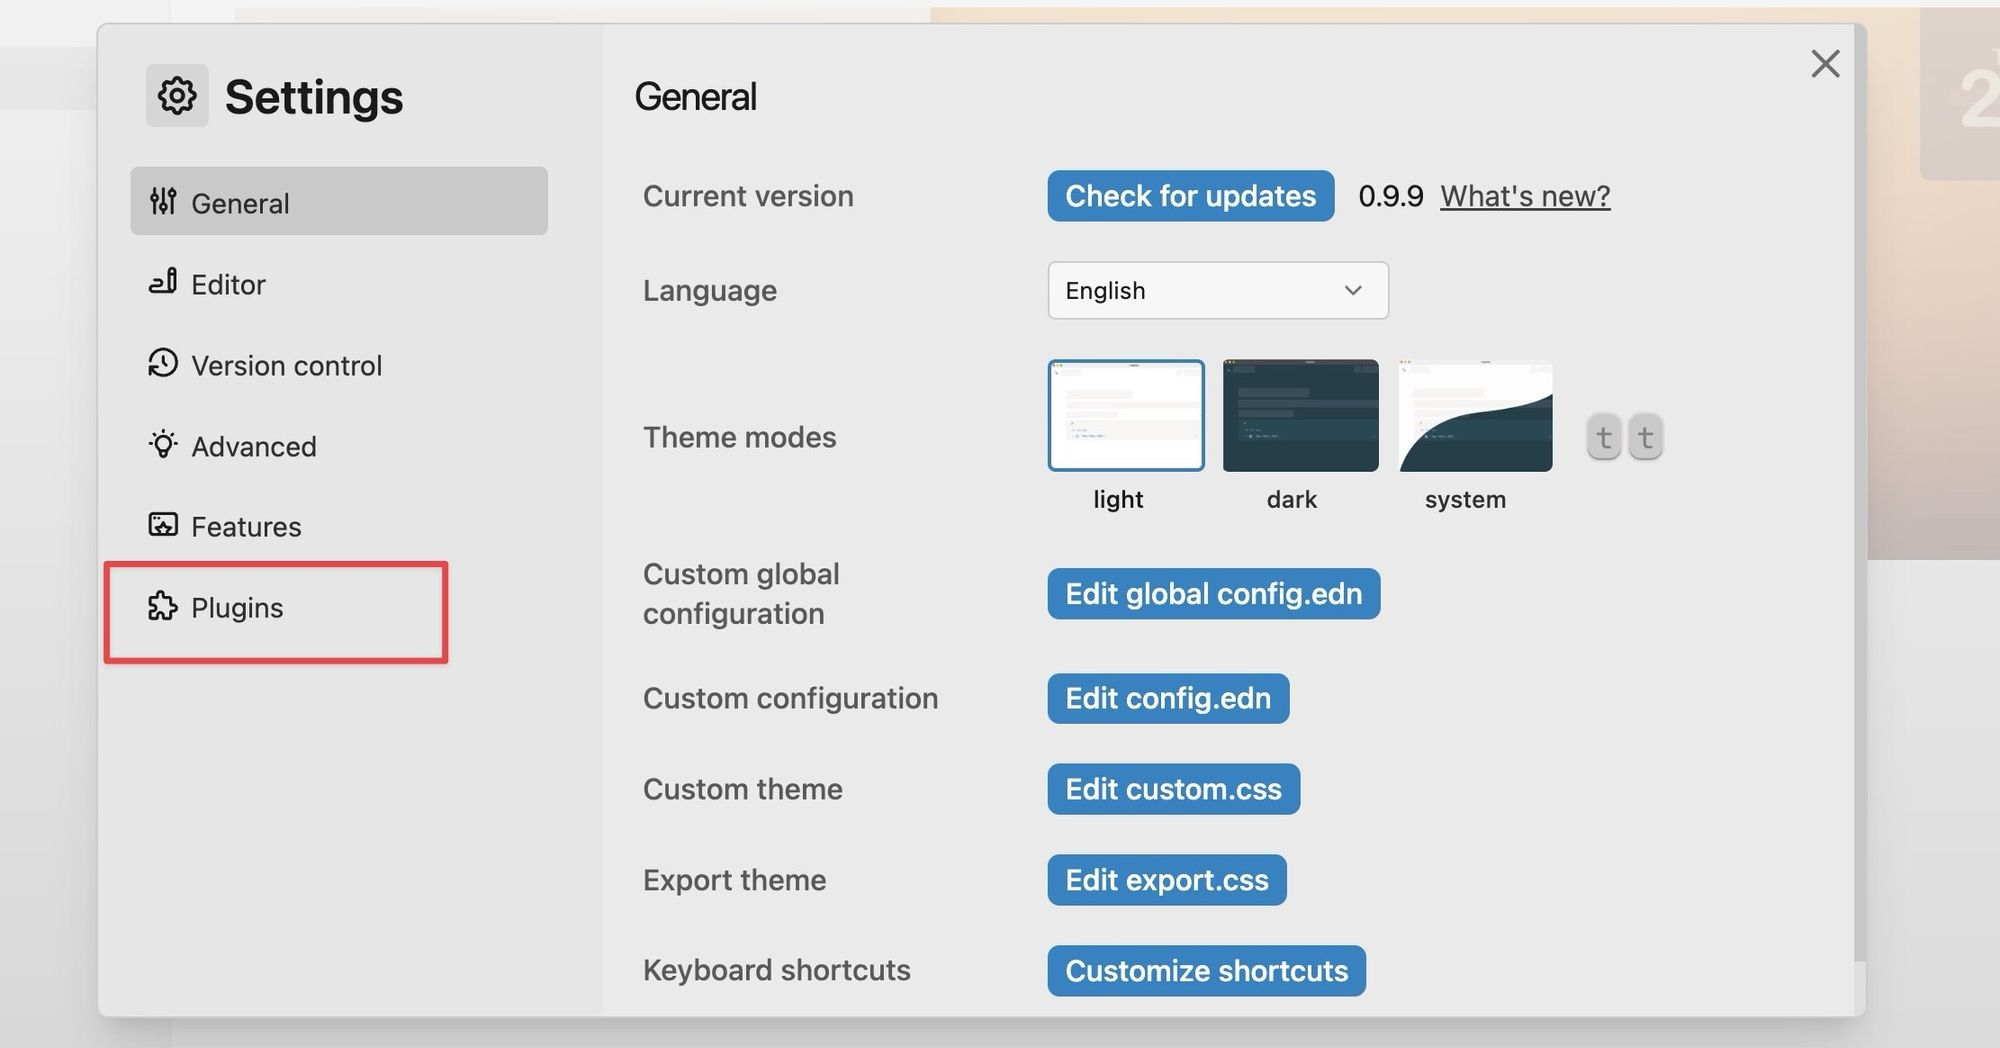
5. Open Logseq and use the three-dot menu to open Settings.
6. Select the Plugins option.
7. Choose Banners and scroll down to find the Journal and home settings.
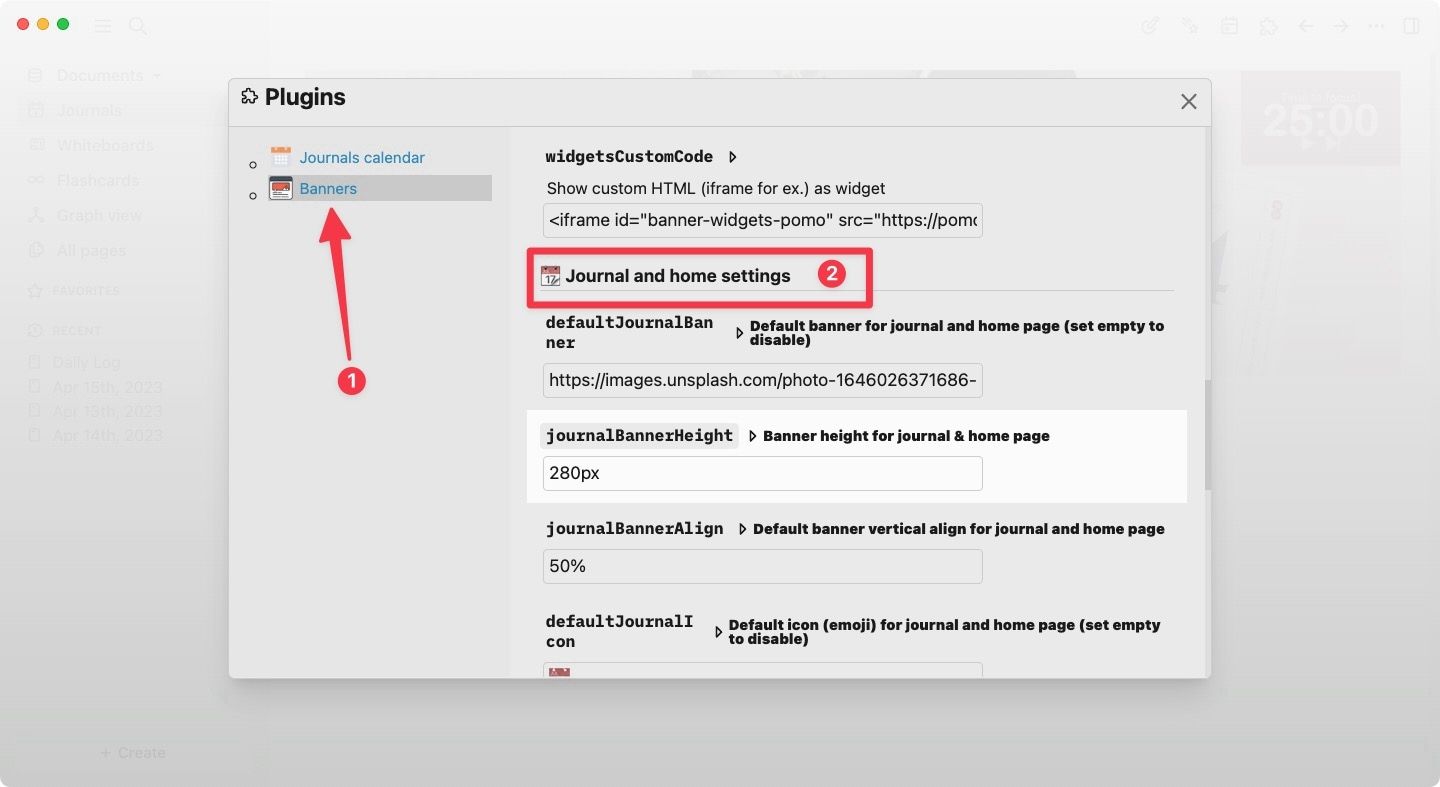
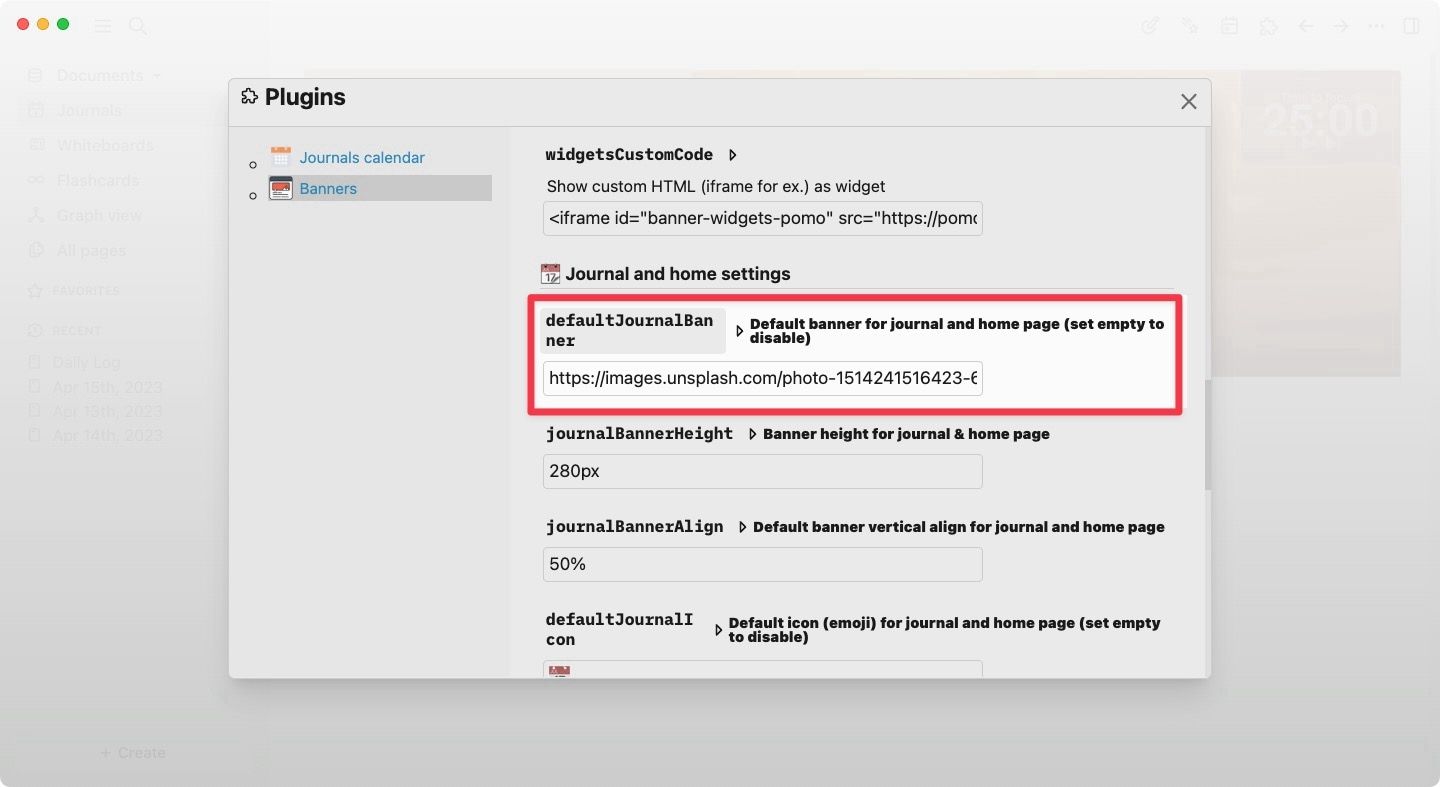
8. Now, paste the link you copied in the defaultJournalBanner field to change the banner image for your daily notes page.
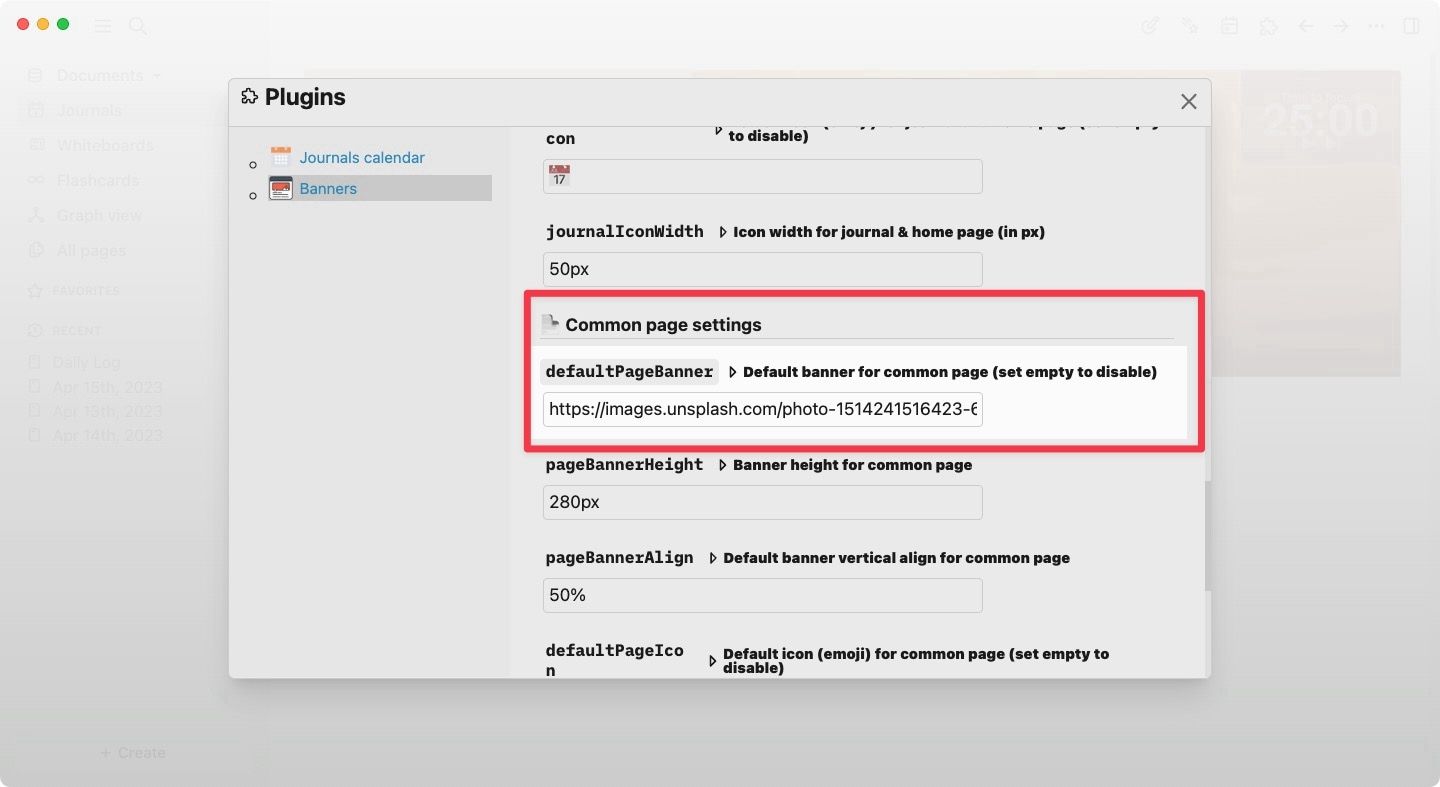
9. Similarly, scroll down to the Common Page Settings section and paste the image link under the defaultPageBanner field to change the default banner of your notes.
10. Now, go back to the journal or any notes page, and you will see the new image as a page banner.
Changing the default banner is excellent for customizing your entire Logseq directory. However, if you want to add different banners for individual pages, follow the instructions in the sections below.
- For random featured images: https://source.unsplash.com/featured/1600x900
- For Unsplash photo of the day: https://source.unsplash.com/1600x900/daily
Customize default banner icons
You can also customize the default page icons that you see in the bottom-left corner of the image banners. Here’s how you can do it.
1. Launch Logseq and use the three-dot menu to open Settings.
2. Open the Plugins settings.
3. Choose Banners and scroll down to find the defaultJournalIcon setting and change the icon for journal pages.
4. Similarly, change the icon under the defaultPageIcon option to change the default icon for other pages.
Set different page banners and icons for individual Logseq pages
The Logseq Banners plugin also allows users to set individual page banners for Logseq pages. You can set different banner images for different notes if you so desire. To use different page banners and icons for Logseq pages, we will use the properties feature in Logseq. While you don’t need to know about Logseq properties, if you want to learn more, you can check out our guide on creating Logseq templates, where we have talked more on this subject.
Before you proceed, remember to copy the link of the image you want to set as the page banner.
1. Open the Logseq page where you want to customize the banner.
2. In the first bullet node, add a new property called banner::. Add a space and paste the image link.
3. Now, let’s add a custom icon for the page. Hit the enter/return key to add a new line and type the page-icon:: property.
4. On your Mac, hit the keyboard shortcut Command+Control+Space (⌘+⌥+Space) to bring up the emoji keyboard.
5. Now choose an icon and click out of the properties filed to apply the changes.
6. It might take a few seconds for the changes to apply. If you don’t see the change, open another Logseq page and come back, and it will work. Here’s how our page looks after adding the custom image and icon.
How to add and customize widgets in Logseq banners
The Banners for Logseq plugin not only allows you to add page banners but also enables you to add calendar and weather widgets along with a Pomodoro timer and daily quotes. In this section, we will show you how you can add and customize these Logseq banner widgets.
How to add calendar widgets in Logseq banners
The most useful widget for the daily notes page banner is the calendar widget. Adding this widget will allow you to showcase the monthly calendar in the banner area. Here’s how you do it.
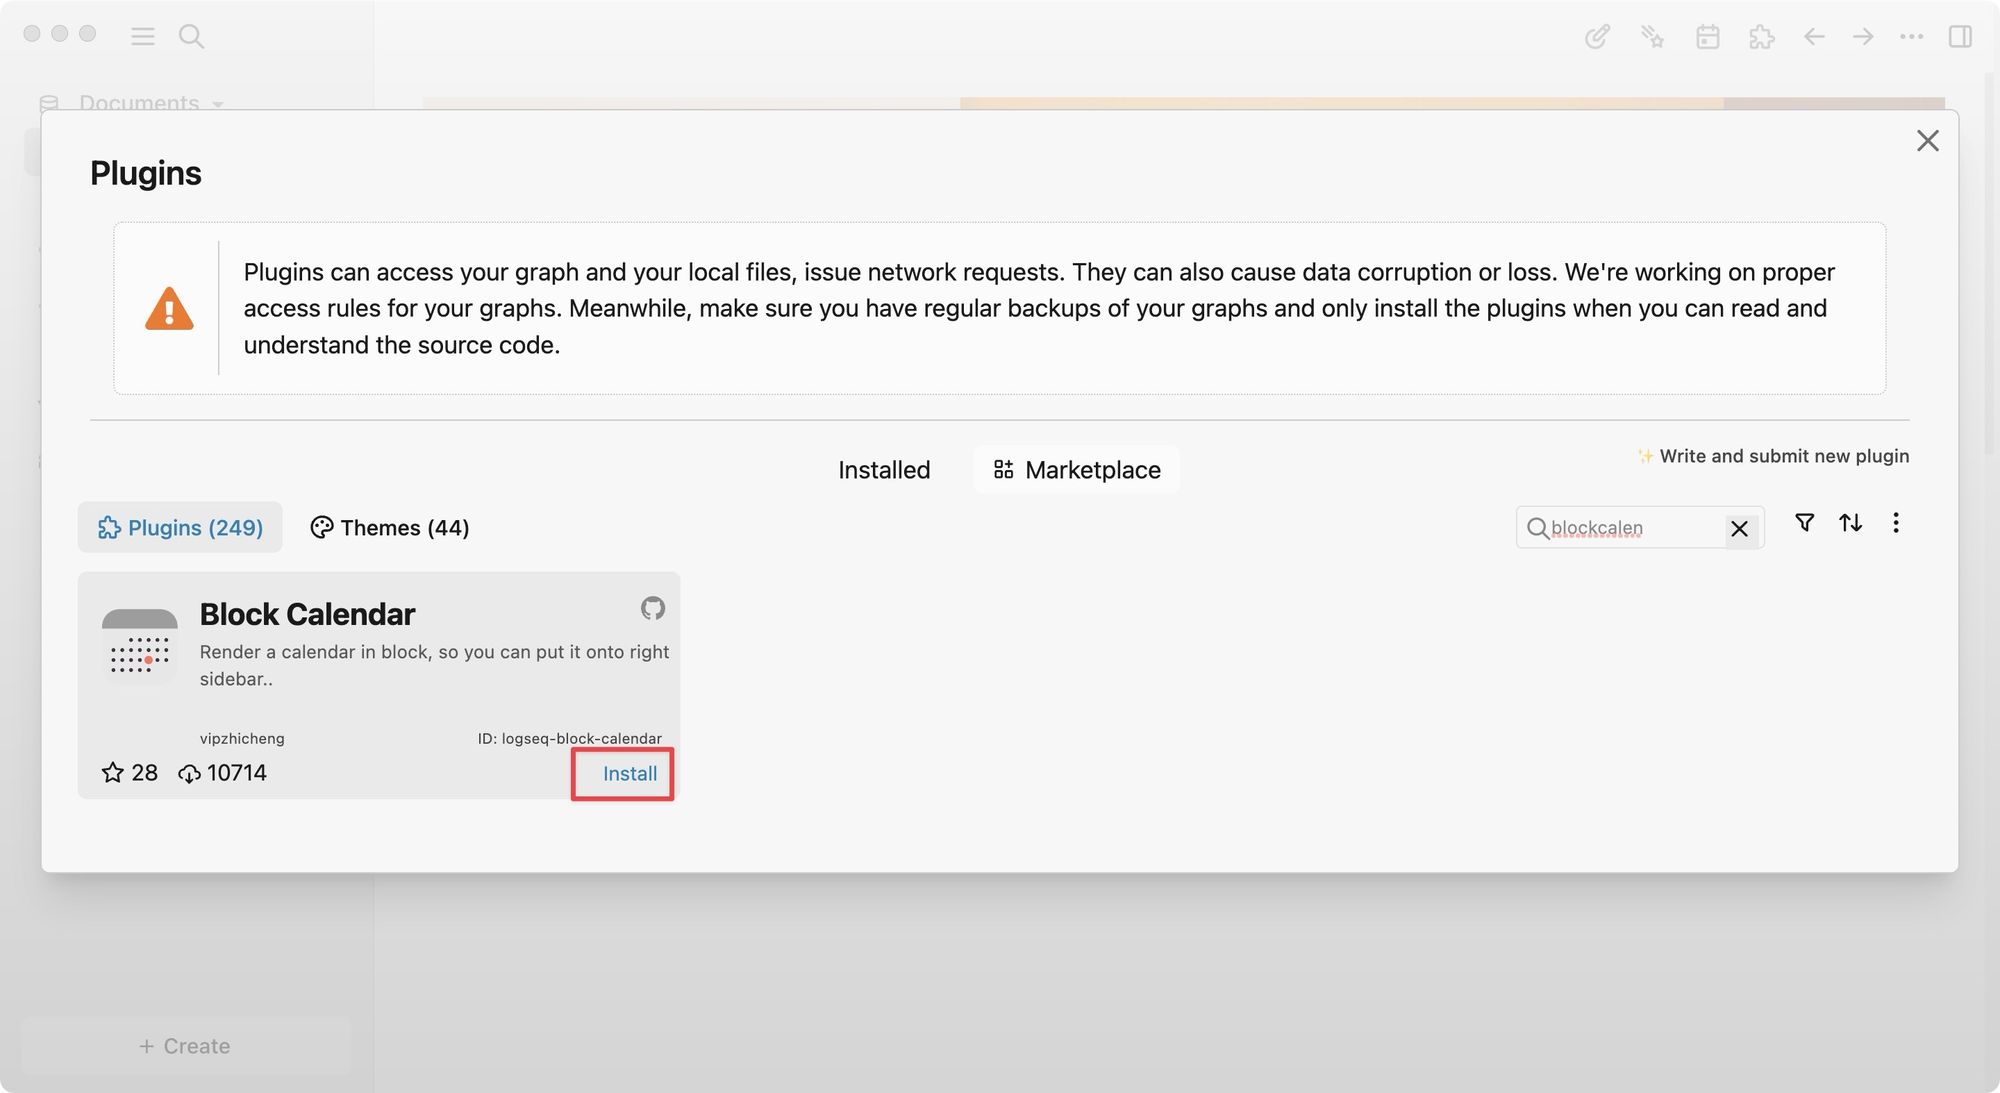
1. To add a calendar widget to our banner image, we will install the Block Calendar plugin. Click the three-dot menu and choose the Plugins option.
2. Now, choose the Marketplace option and search for Block Calendar.
3. Click the Install button to install the plugin.
4. To open plugin settings, use the three-dot menu to open Settings.
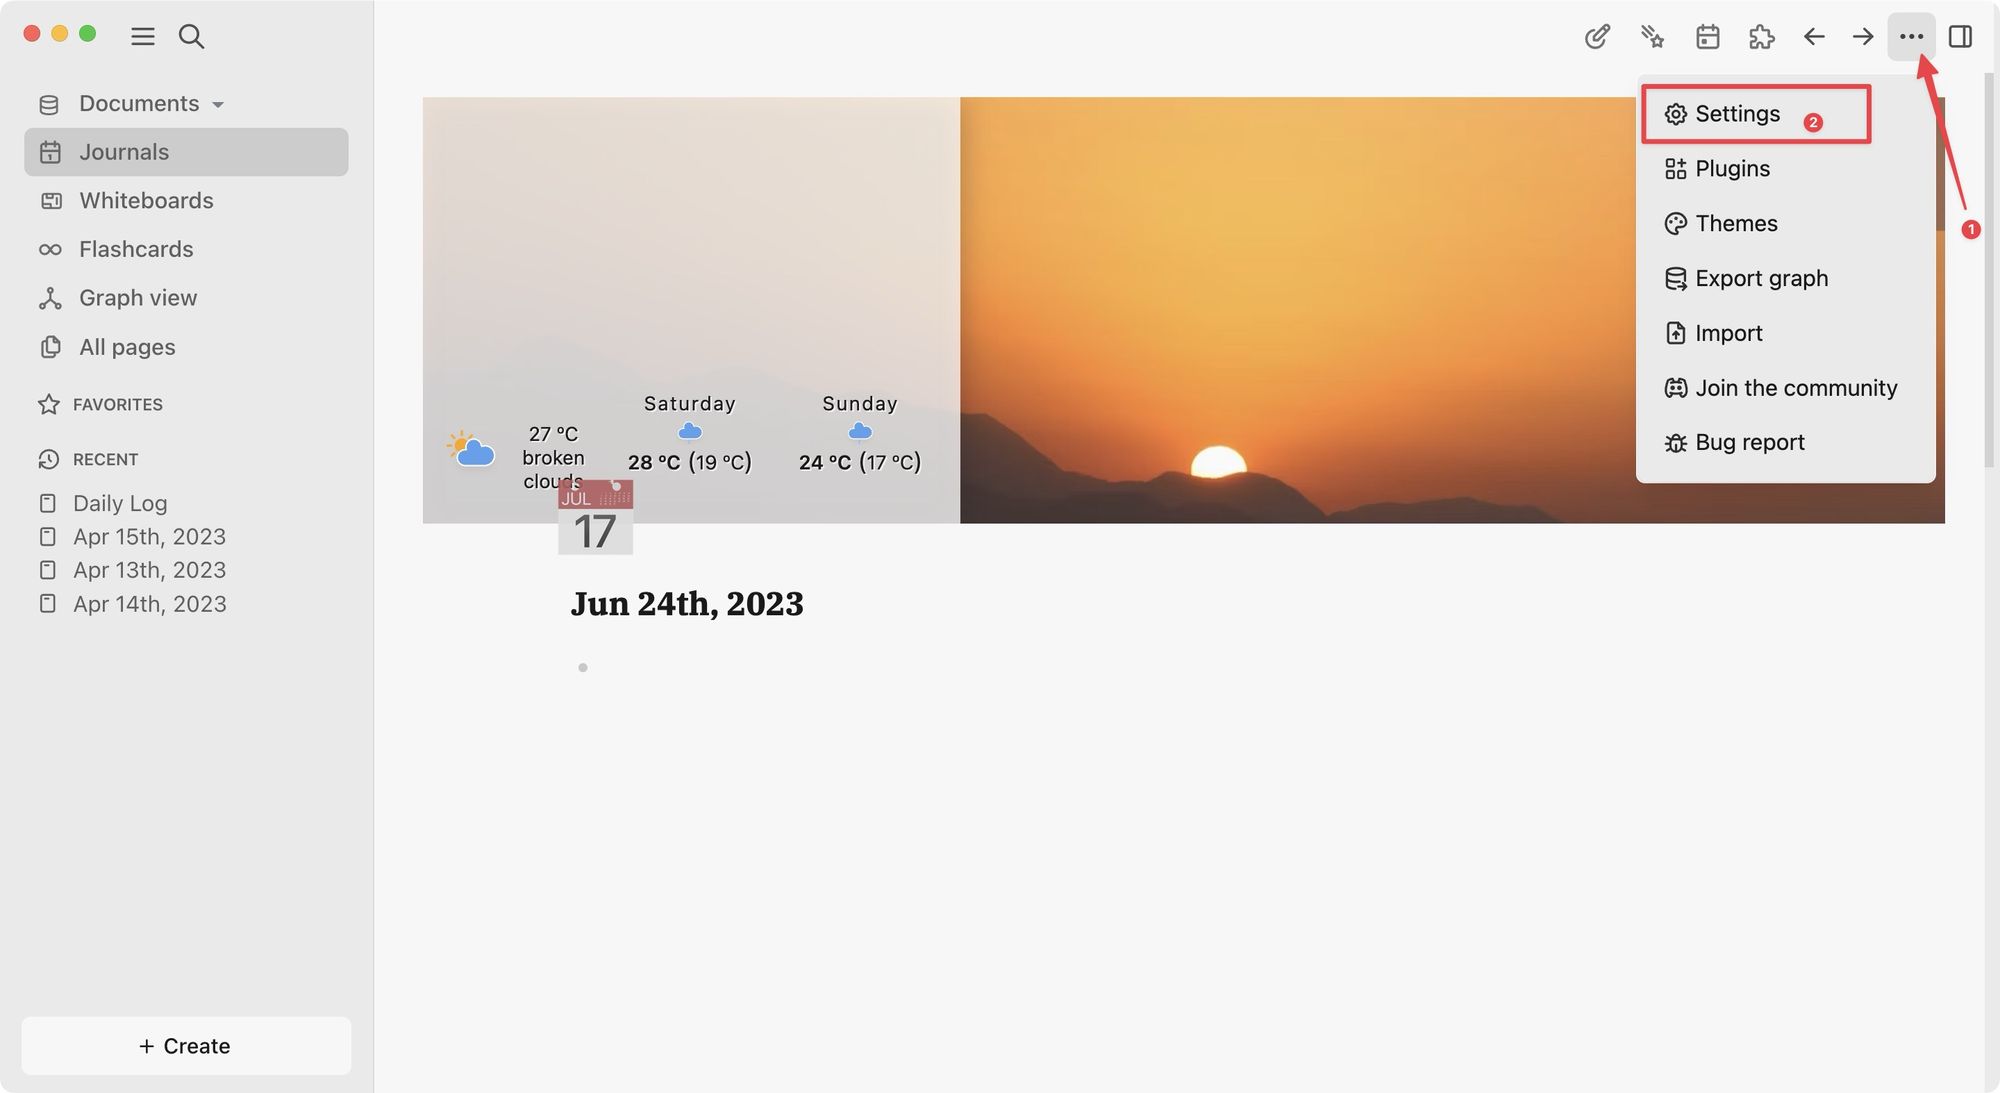
5. Choose the Plugins option.
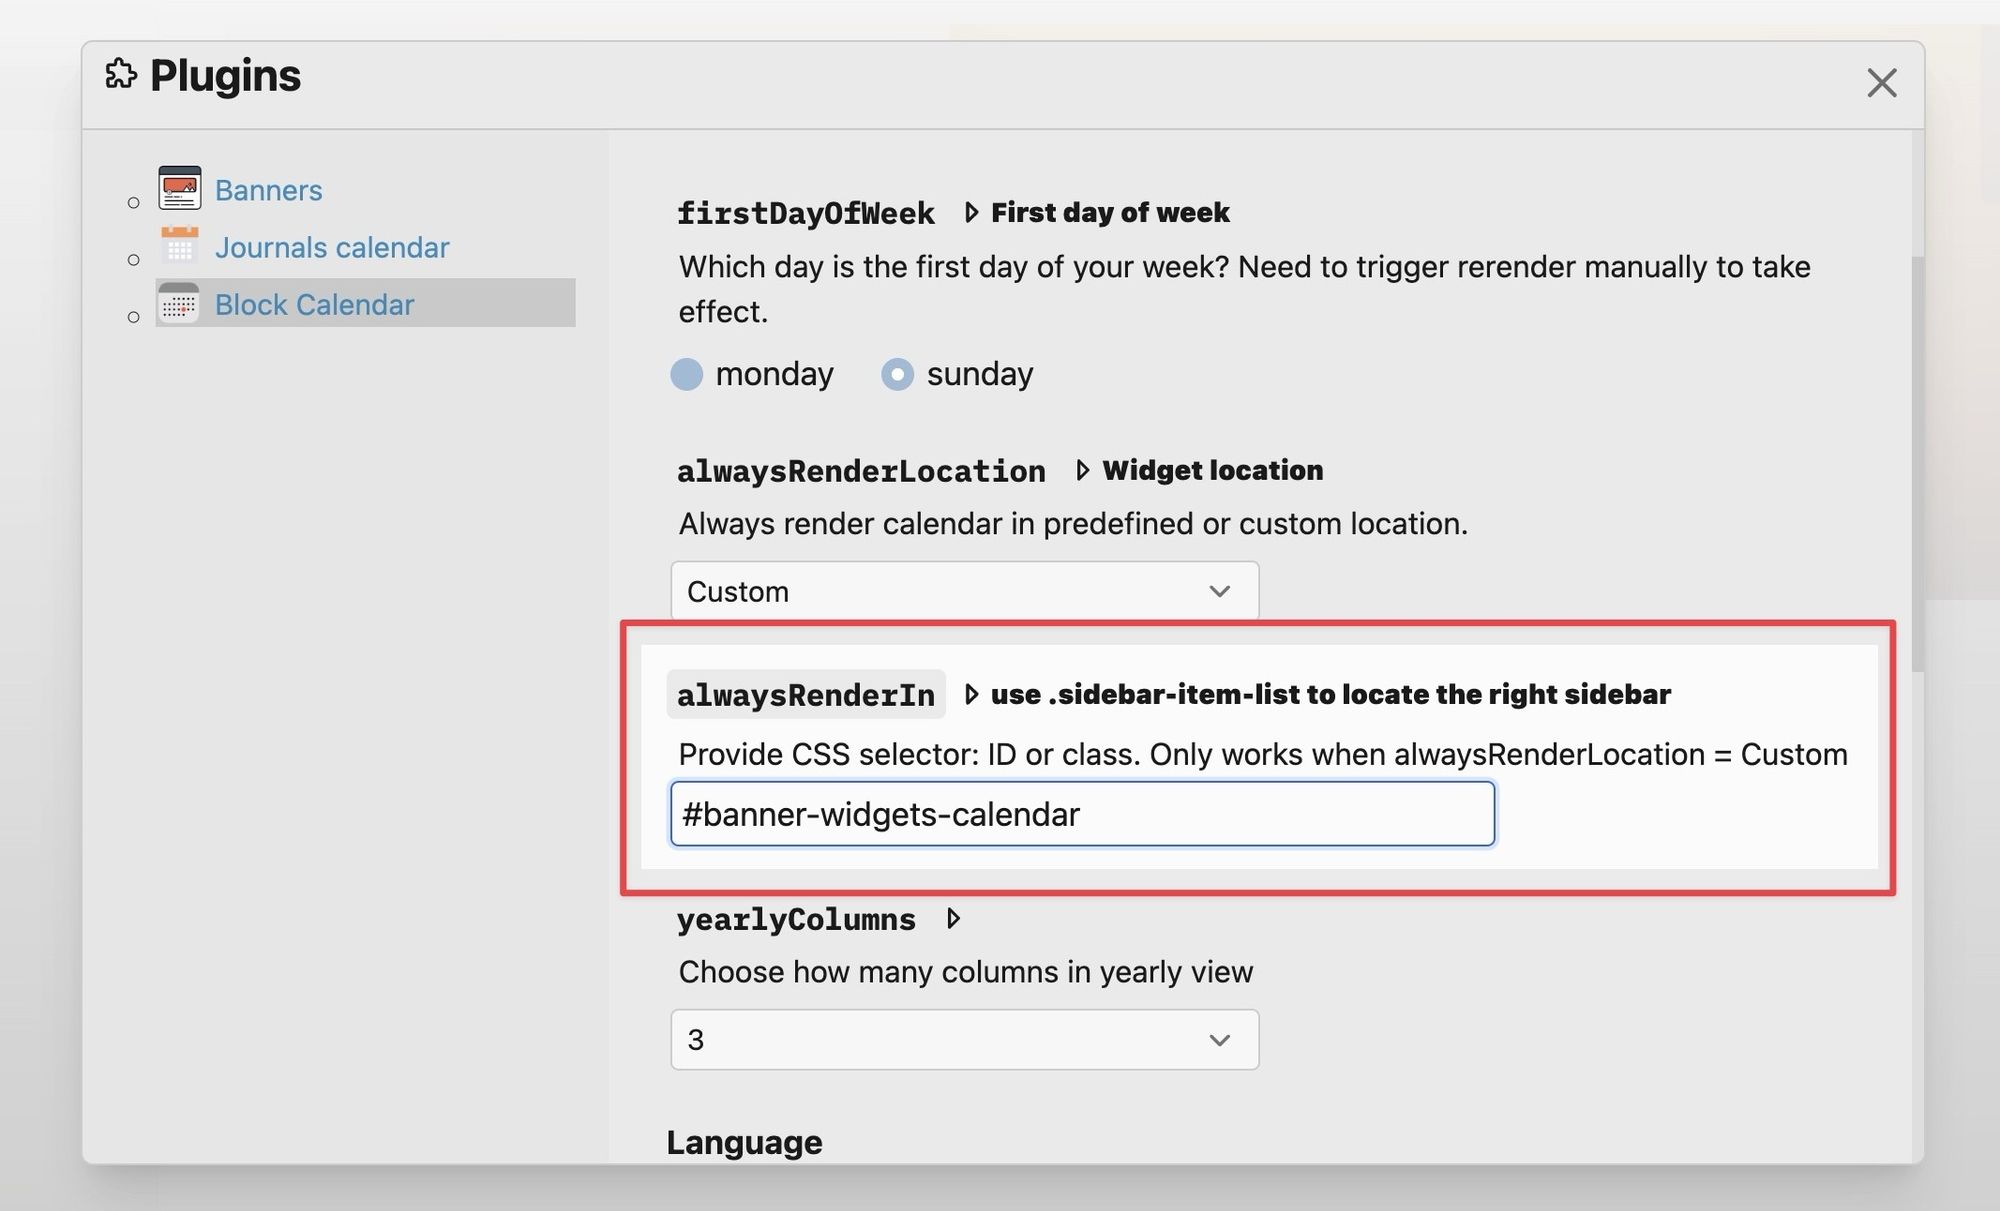
6. Select Block Calendar and click the dropdown menu under alwaysRenderLocation option.
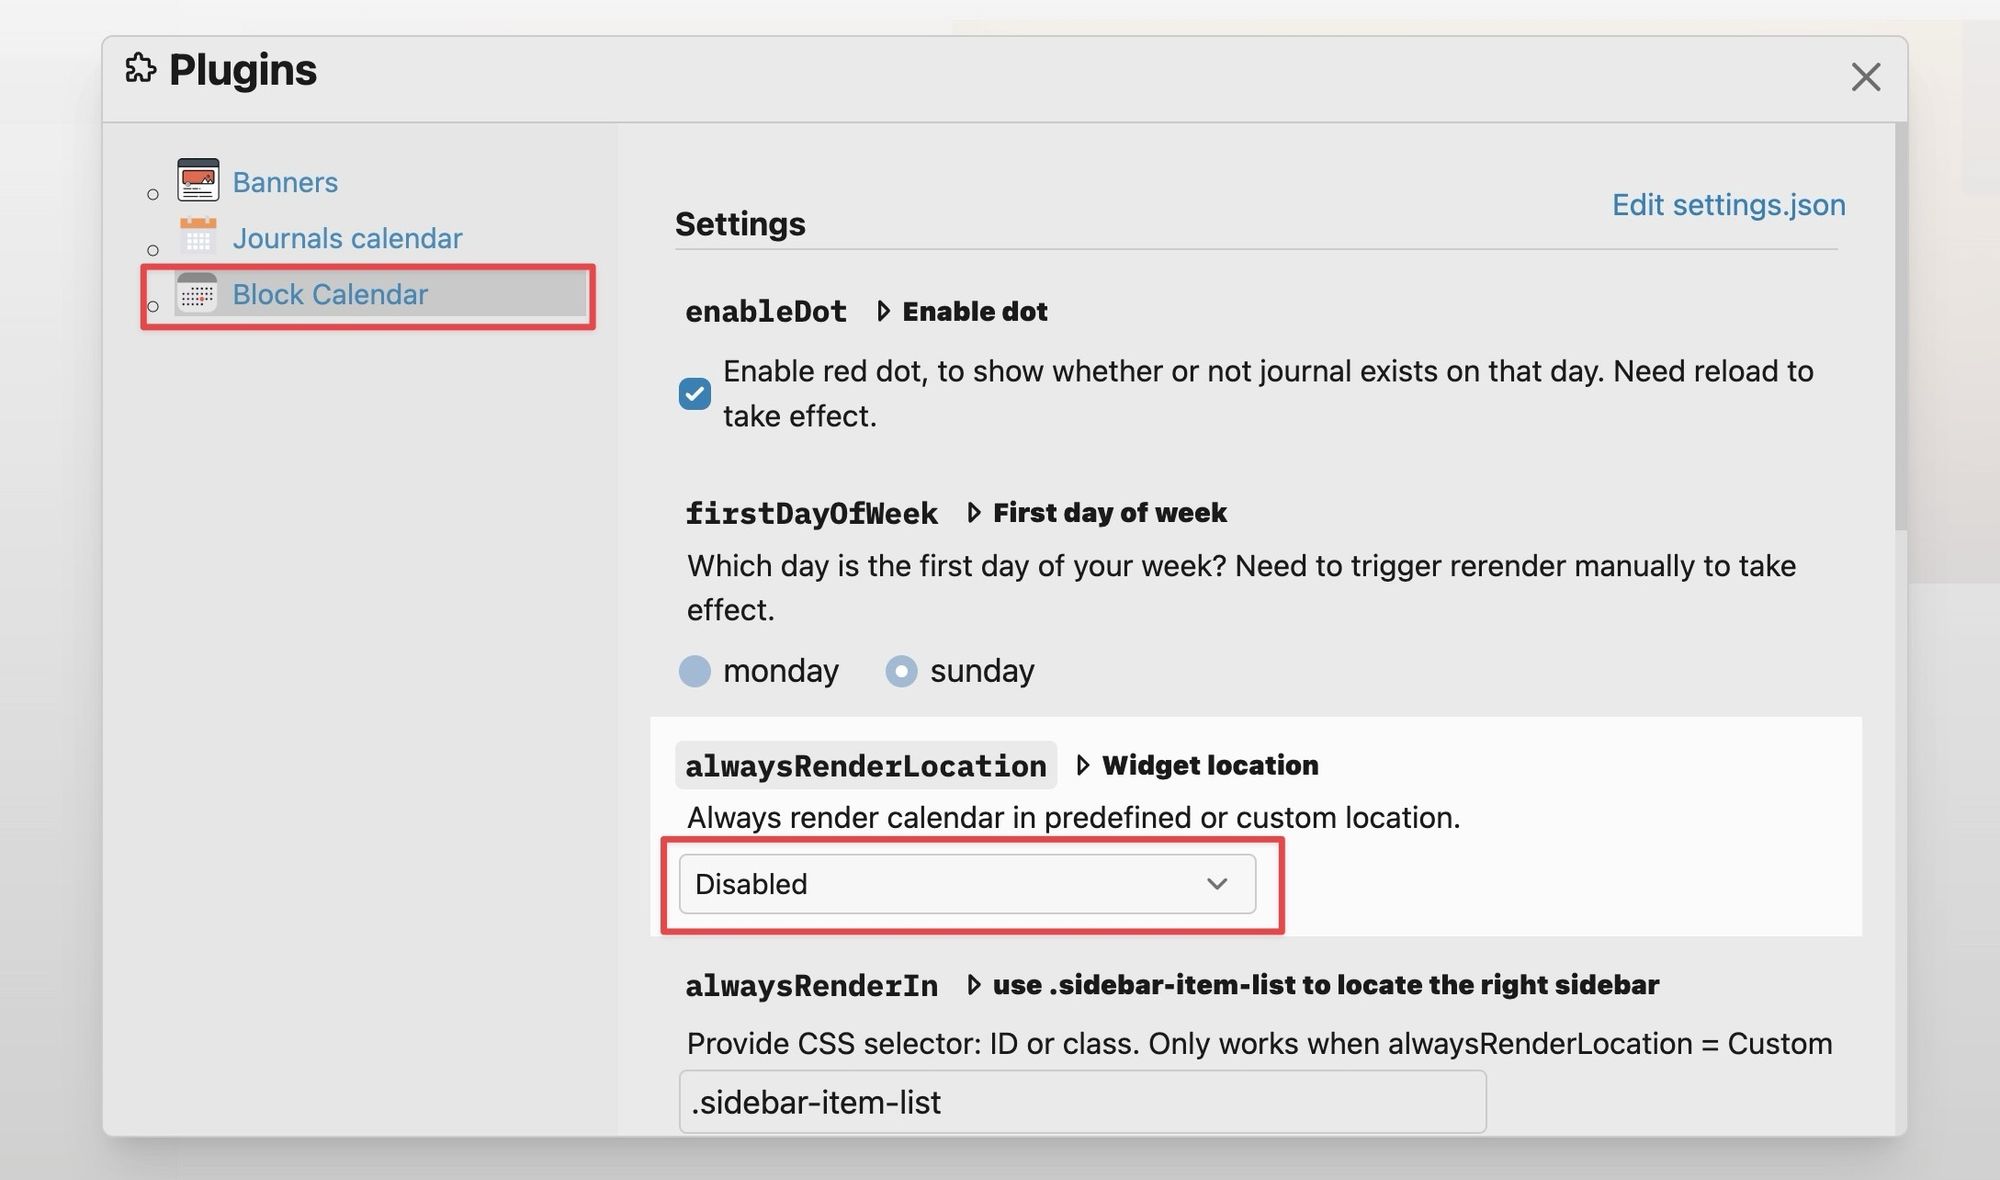
7. Set it to Custom.

8. In the alwaysRenderIn field, paste #banner-widgets-calendar.
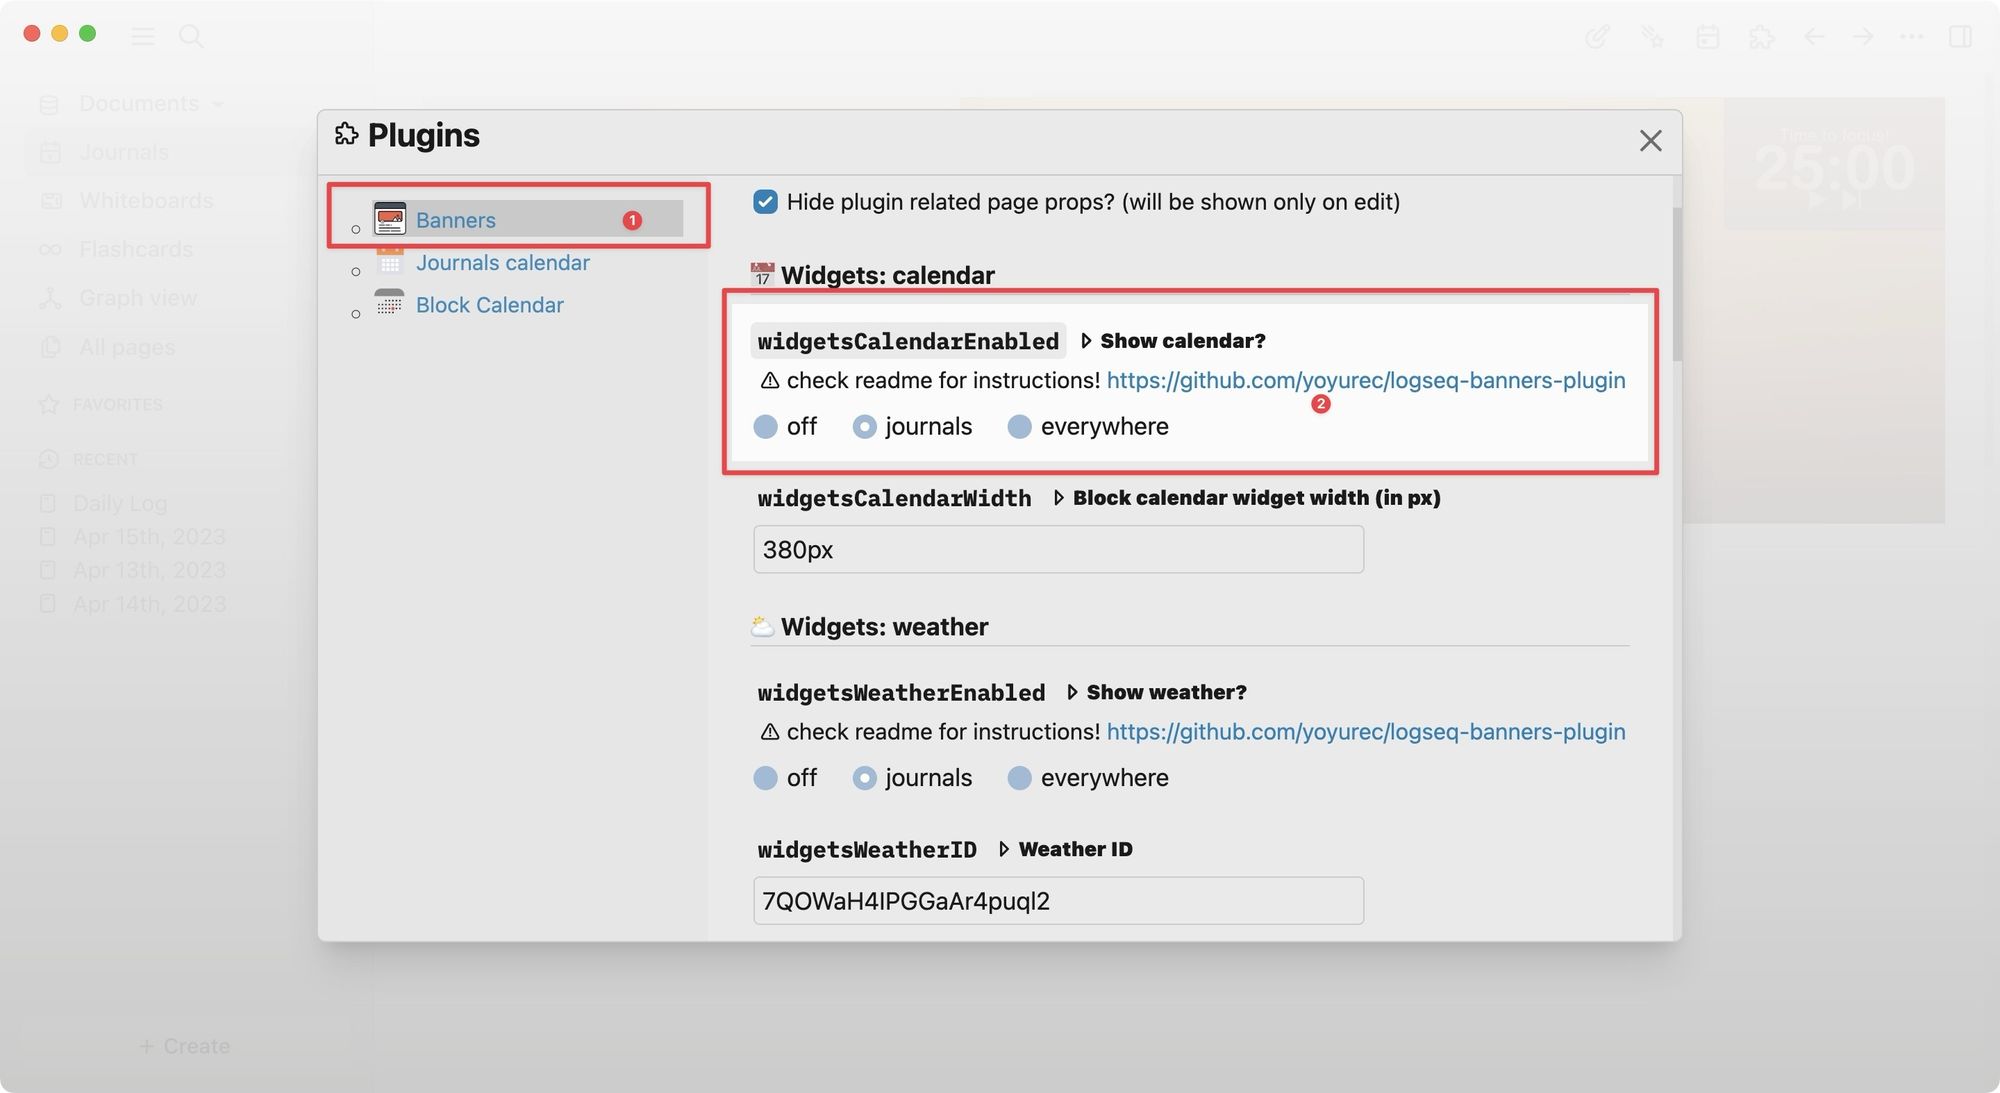
9. Now, select the Banners plugin. Under the Widgets: calendar section, select whether you want to show the calendar widget only on journal pages or all pages. You can also set the widget’s width in pixels here.
10. After you customize the settings, go back to your Logseq journal page to see the calendar widget.

How to add, remove, and edit the weather widget in the Logseq banner
By default, all the banner images show weather information. However, you have to customize the widgets to show the weather from your area. In this section, we will show you how to add, remove, and customize weather widgets in Logseq banners.
1. To customize the weather widget so it displays weather information of your area, we will have to use a third-party service called Indify Notion Widgets. Click here to open its website on your Mac.
2. Now, sign up with an email address or your Google account. You can also create a temporary email ID on your Mac if you don’t want to share your email.
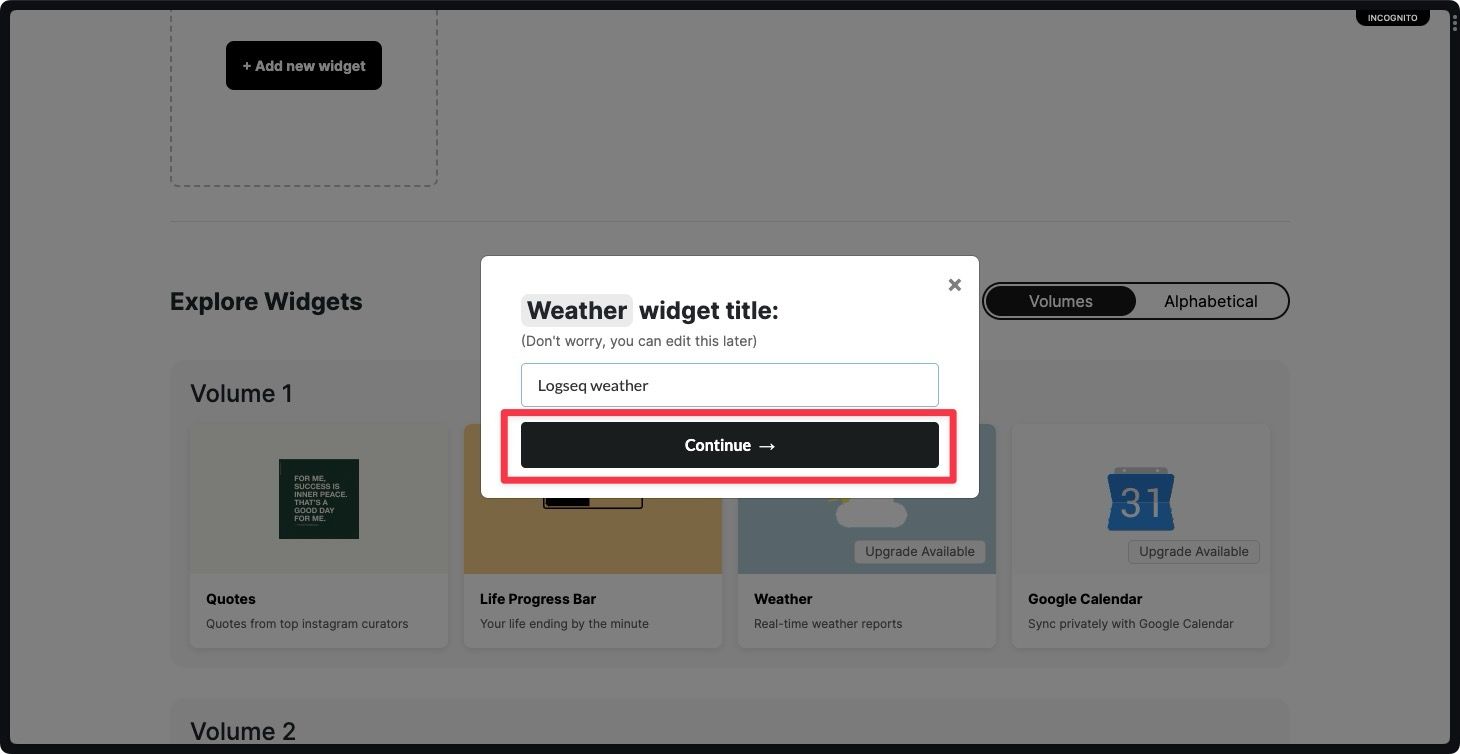
3. After signing in, click on the Weather widget option.
4. Give it any title and click the Continue button.
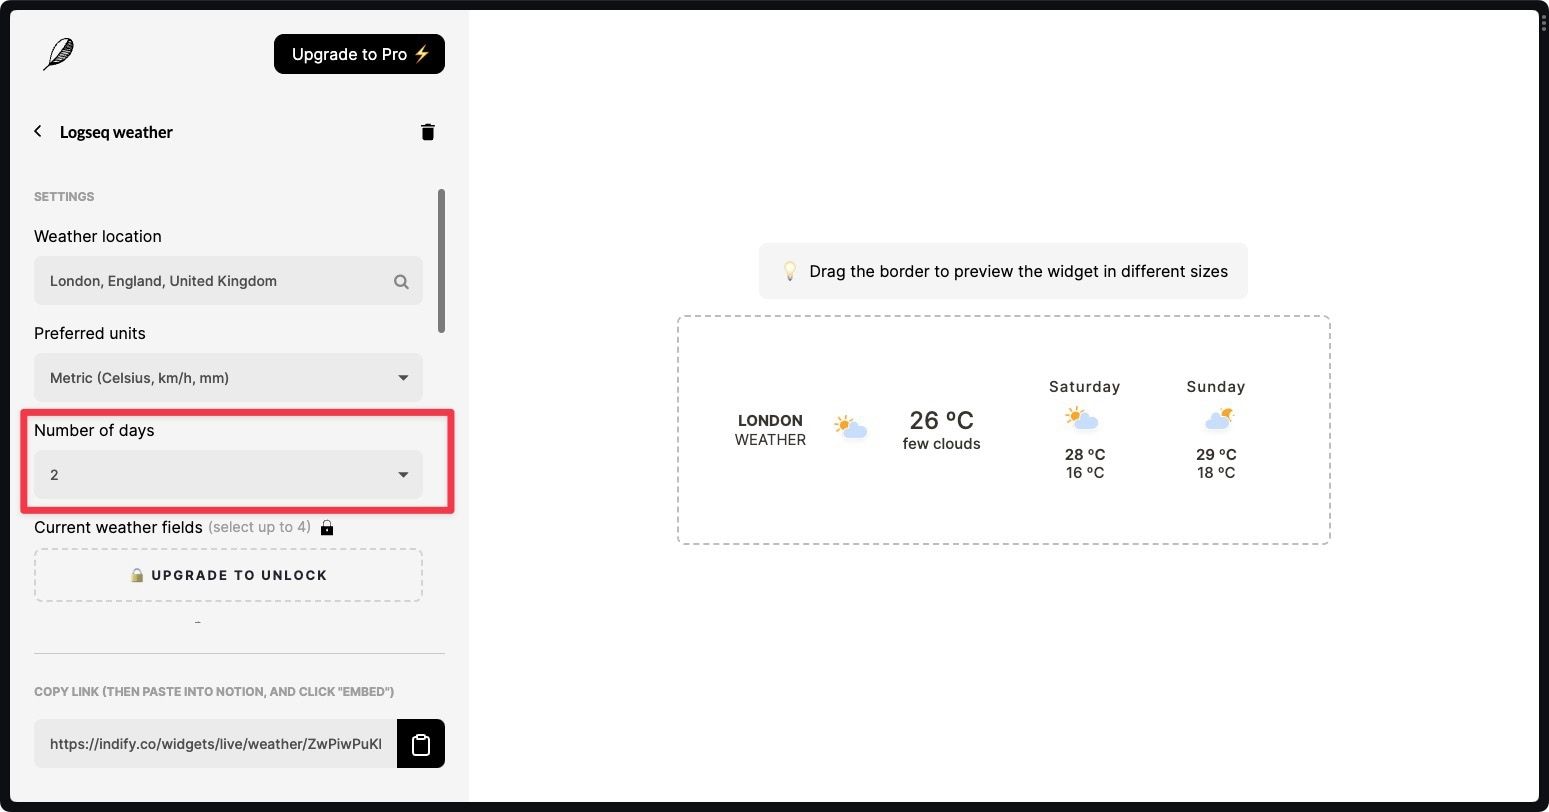
5. On this page, use the customization tools to customize your weather widget. You can change its size, location, preferred units, and more.

6. To ensure the widget doesn’t take the entire banner width, set the number of days to 2. Now click on the copy button to copy the widget link.
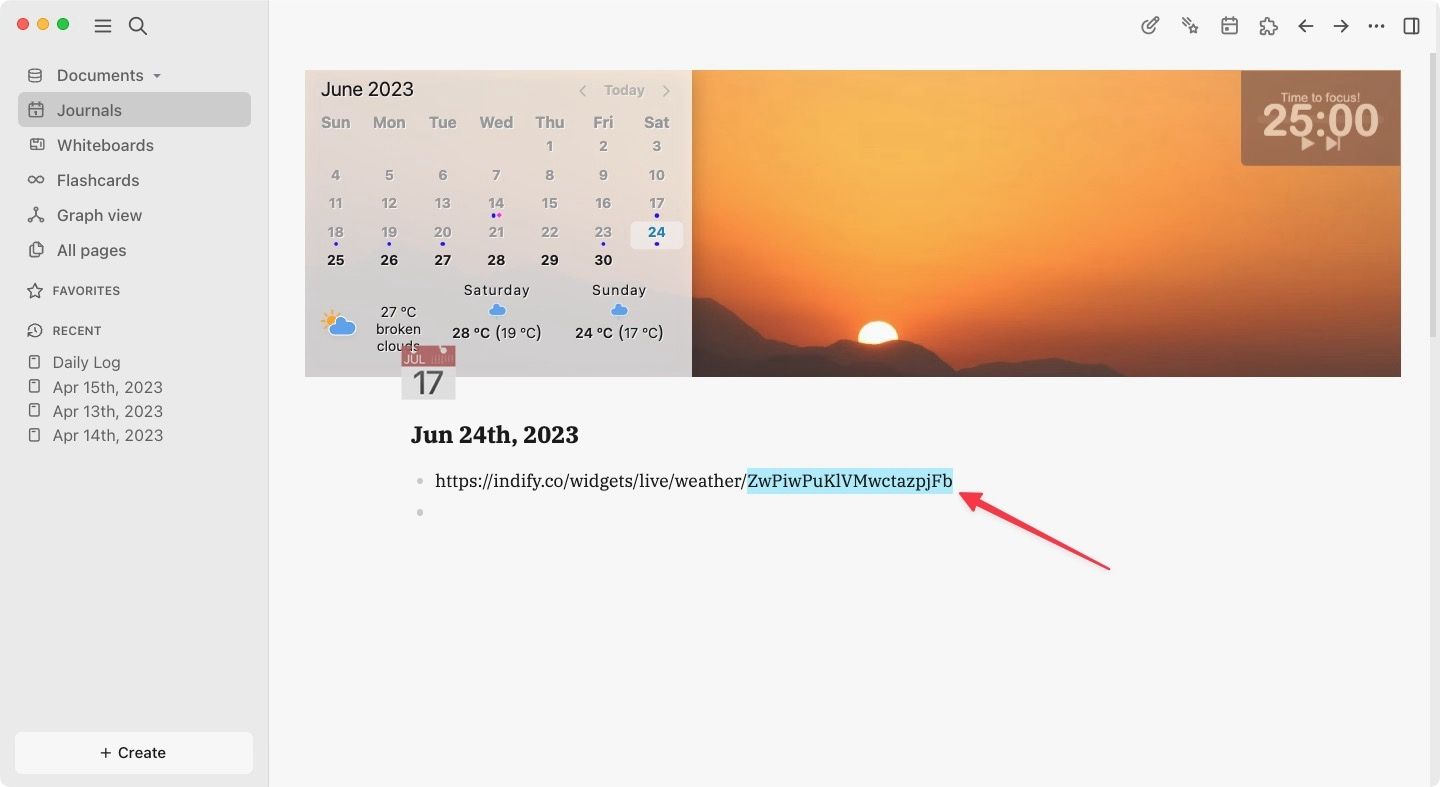
7. Now, launch Logseq and paste the link anywhere. Copy the highlighted part of the link and delete the rest of it.
8. Open banners plugin settings by going to Settings → Plugins → Banners.
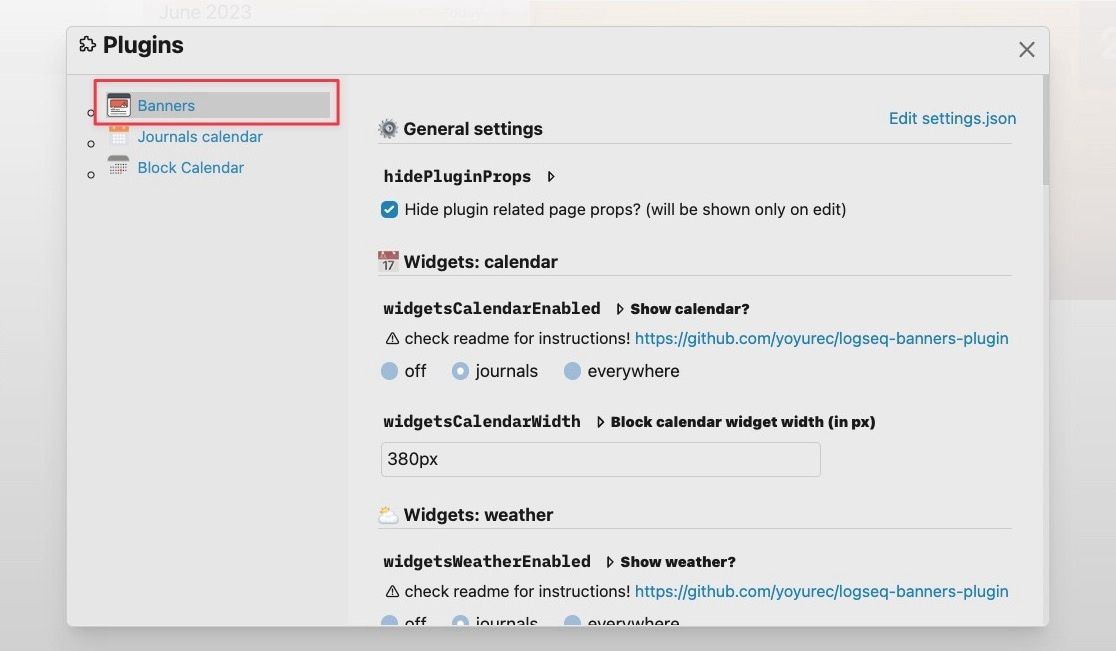
9. Scroll down to find the Widgets: weather section and replace the Weather ID with the ID you copied.
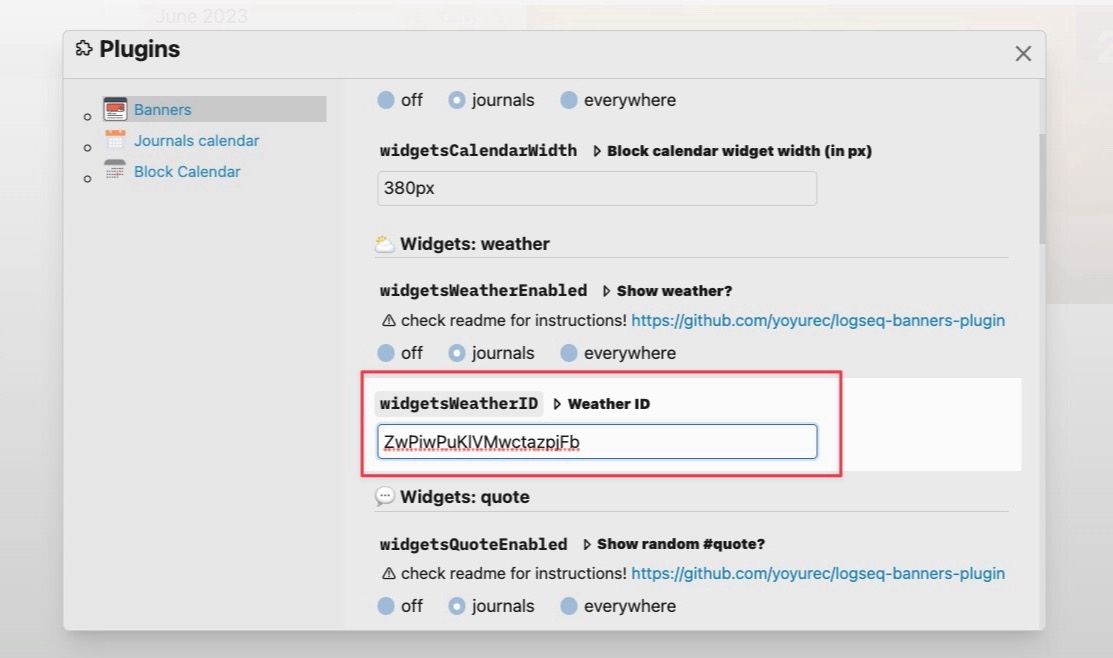
10. To show the weather on all pages, choose the everywhere option. From here, you can also disable the weather widget altogether if you want.

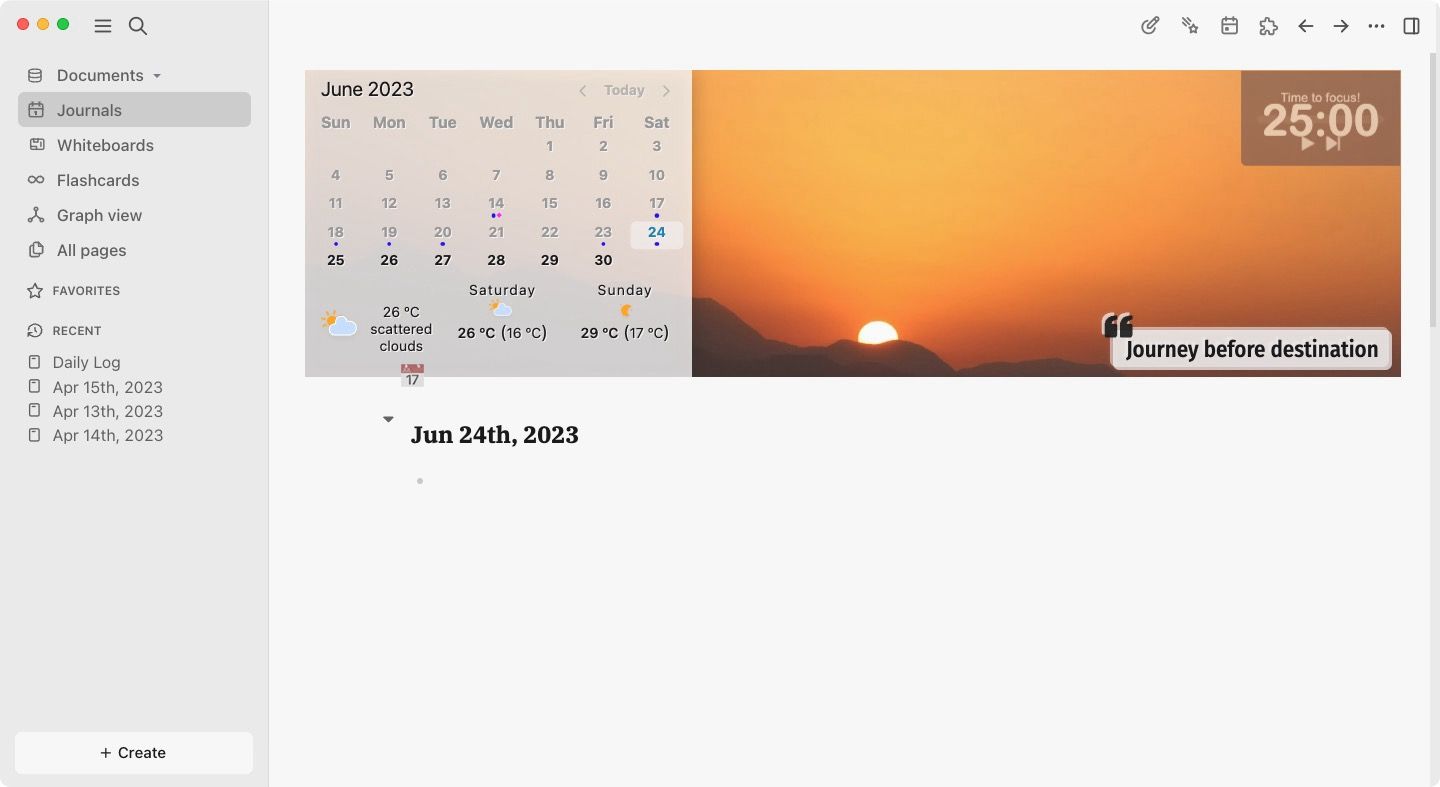
11. Here’s how our page looks after enabling the weather widget.

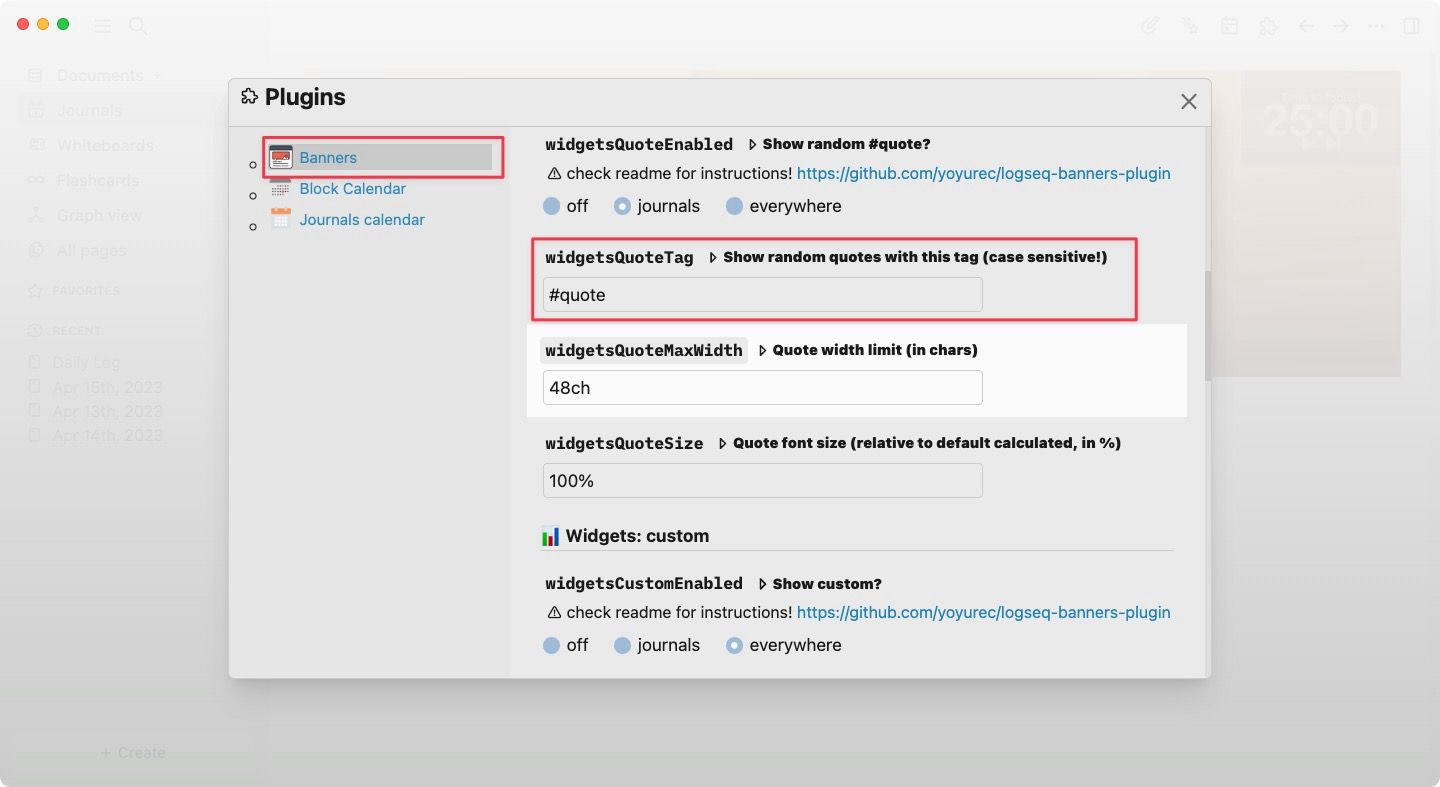
How to show quotes on Logseq banner images
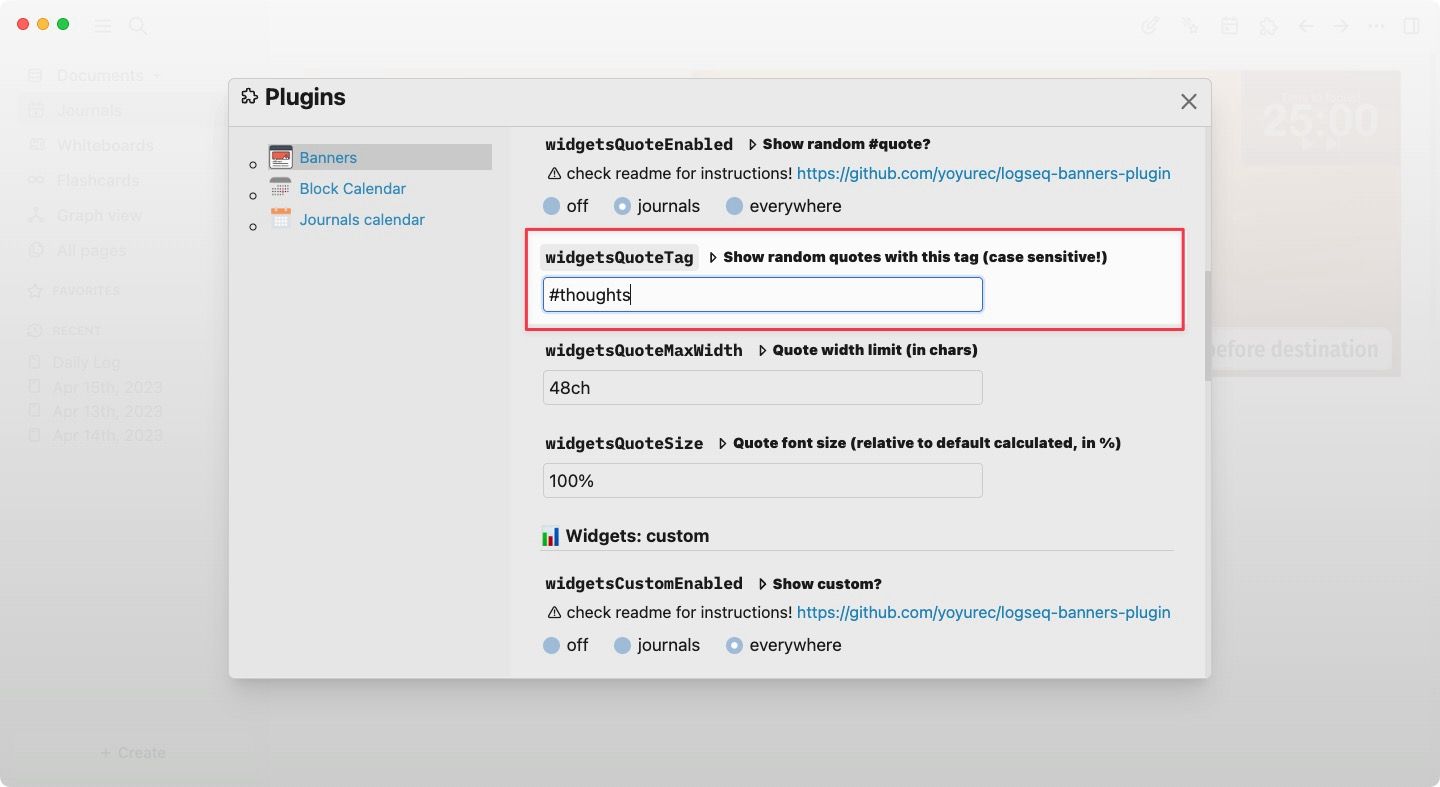
You can also show quotes in the banner image on your Logseq pages. The plugin displays quotes that you have already added to your Logseq directory. To show quotes, open the plugin settings by going to Settings → Plugins → Banners and scroll down to locate the Widgets: quote section. Now change the quotes tag with the tag you use for quotes in your directory.
For example, say I use #thoughts for quotes in my Logseq directory. I can add that hashtag to show the quotes in the banner. Like other widgets, you can choose whether you want to display these quotes only on the journal pages or all pages.
You can see how my journal page looks after enabling the quotes widget.
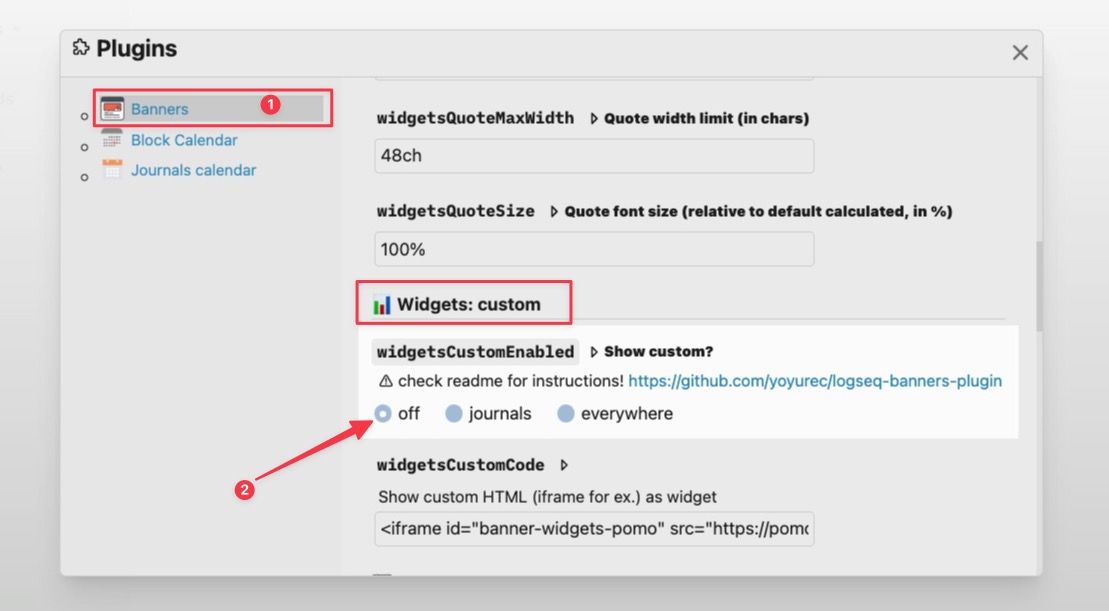
How to remove the Pomodoro timer widget
The Pomodoro timer widget can help you become more productive. But if you are already using the Pomodoro technique via the Logseq Agenda plugin or don’t want to use the timer at all, you can disable it by going to Settings → Plugins → Banners. Scroll down to the Widgets: custom section and turn it off.
How to hide banners on Logseq pages
There are two ways you can go about hiding banners on Logseq pages. The first step is to delete the default banner image for Logseq pages and only apply banners to the pages you want. The second way is to keep the default banner visible on all pages and remove it from individual Logseq pages where you don’t want to see a banner. We have explained both of these methods below.
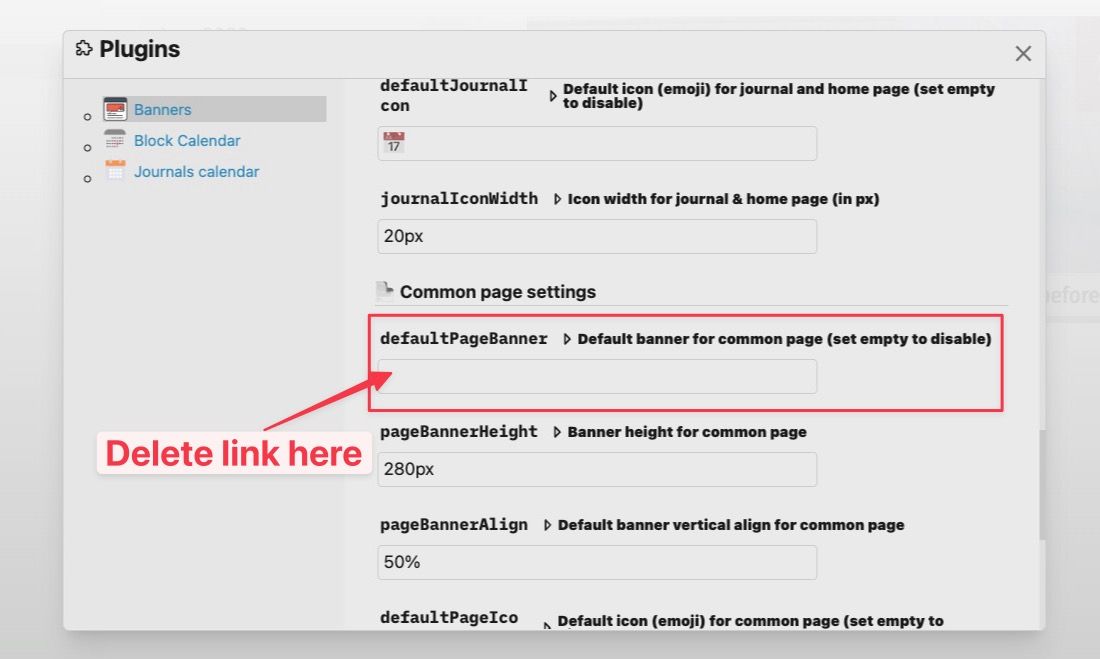
Hide default banner image for Logseq pages
To hide the default banner images for all Logseq pages (other than daily notes or journal pages), go to Settings → Plugins → Banners. Scroll down to the Common page settings section and remove the image URL from the defualtPageBanner section.
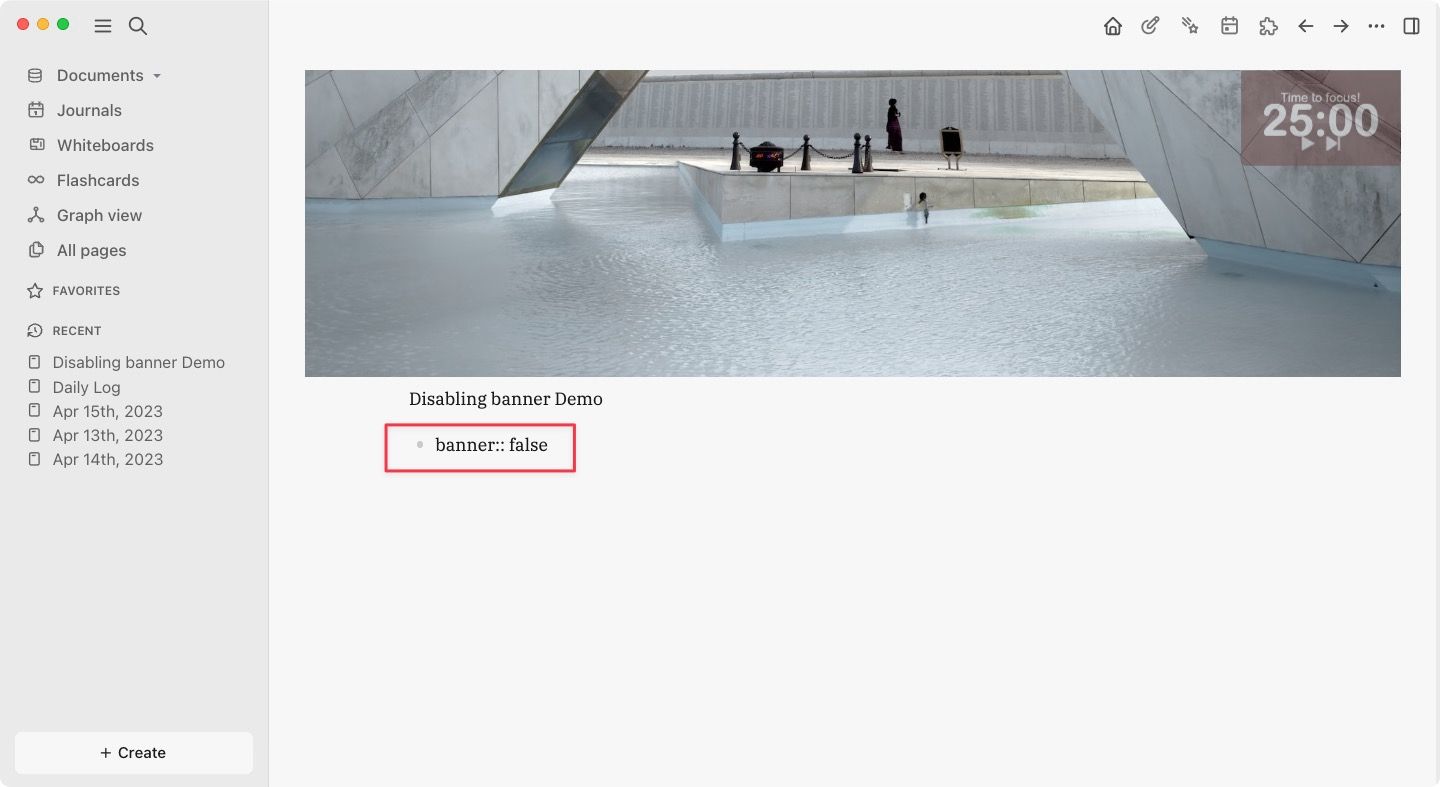
Hide banner image for individual pages in Logseq
If you want the default banner to display everywhere and remove banners only from specific pages, you can do it using the properties attribute. In the screenshot, you can see that the default banner image is present on our demo page.
1. To remove it, add the banner:: false property in the first bullet to remove it.
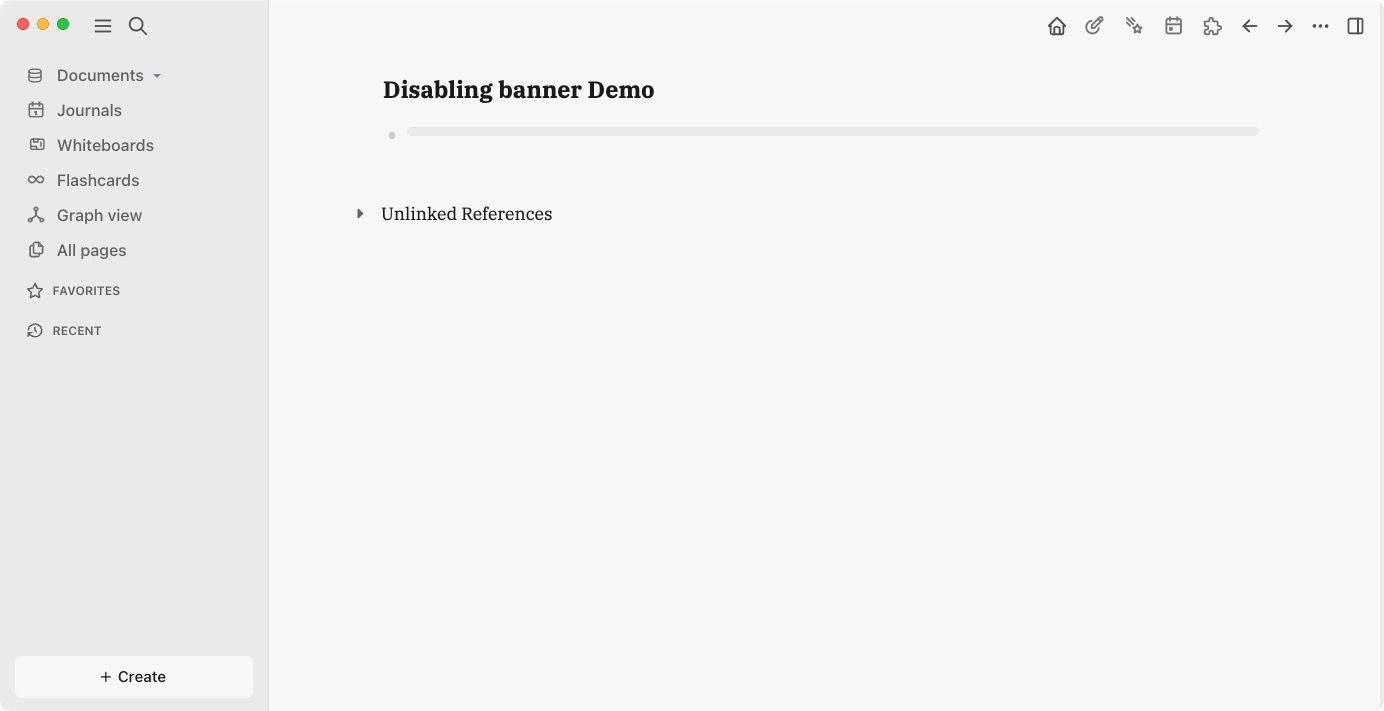
2. Now, click out of the property bullet, and the banner image will disappear.
Beautify your Logseq notes with banner images
That ends our guide on how to set page banners in Logseq. We have covered all the salient features of the plugins. However, if you want to fine tune things like banner and icon size, spacing, and more, you can dive into the plugin settings to make those changes. If you have any questions, you can ask in the comments below, and we will get to them as soon as possible. Before you go, don’t forget to check out our guide on creating a book tracker inside Logseq.


