
Top 8 Tips to Get the Most Out of Apple Reminders
Here are the top 8 tips that you can use to get the most out of Apple Reminders app.
Apple Reminders is a powerful task management app that many users ignore even before using it. I am managing all my personal and professional tasks using Reminders and I love doing it. In this article, I will tell you some cool tips and tricks for Reminders that can help you do the same. Here are the top 8 tips you should use to get the most out of Reminders.
Note: I published this as a part of our Apple Reminders guide. If you want to learn everything about Apple reminders, click on the link to read it.
1. Create sub-tasks to break up bigger tasks
Sometimes a single task that we add is comprised of multiple smaller tasks. It’s recommended to break the big task into smaller tasks to make them more manageable and executable. Thankfully, reminders lets you add sub-tasks that you can use to break up bigger tasks into smaller tasks.
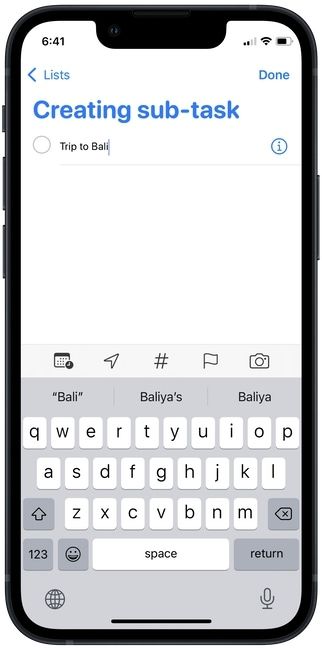
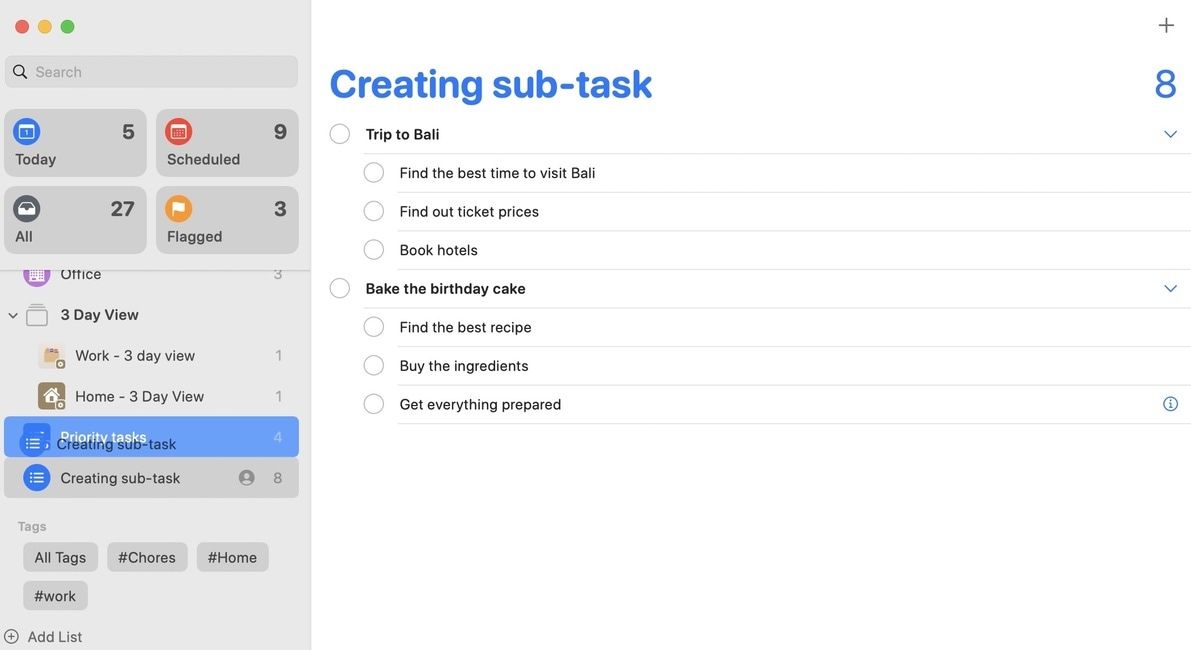
- Create the first reminder that you want to act as the main task. Let’s say we are planning a trip to Bali, so that will be our primary task.
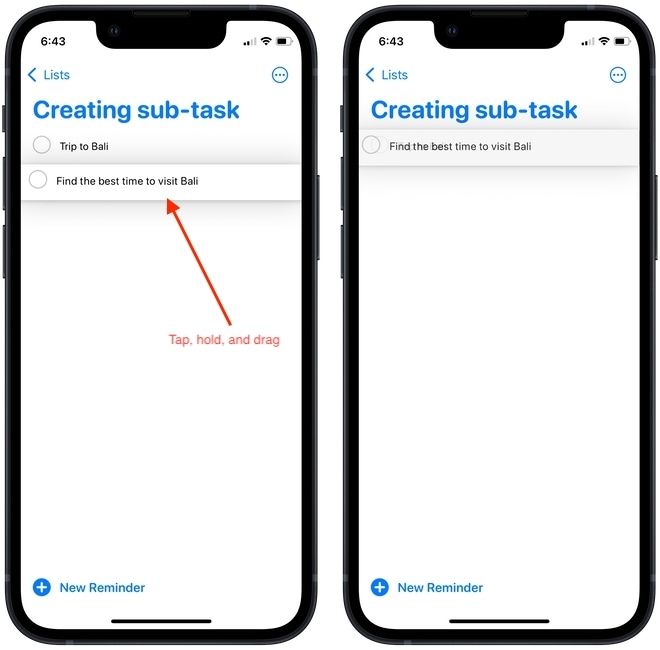
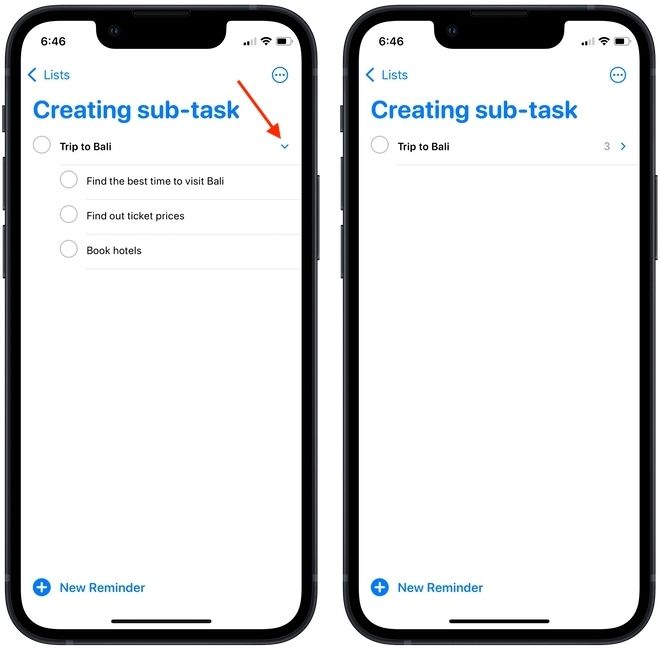
- Now, create a second reminder that will be its sub-task. For example, I will add a task to find the best time to visit Bali. To make this a sub-task, tap and hold on the second reminder and drag it on top of the first one.
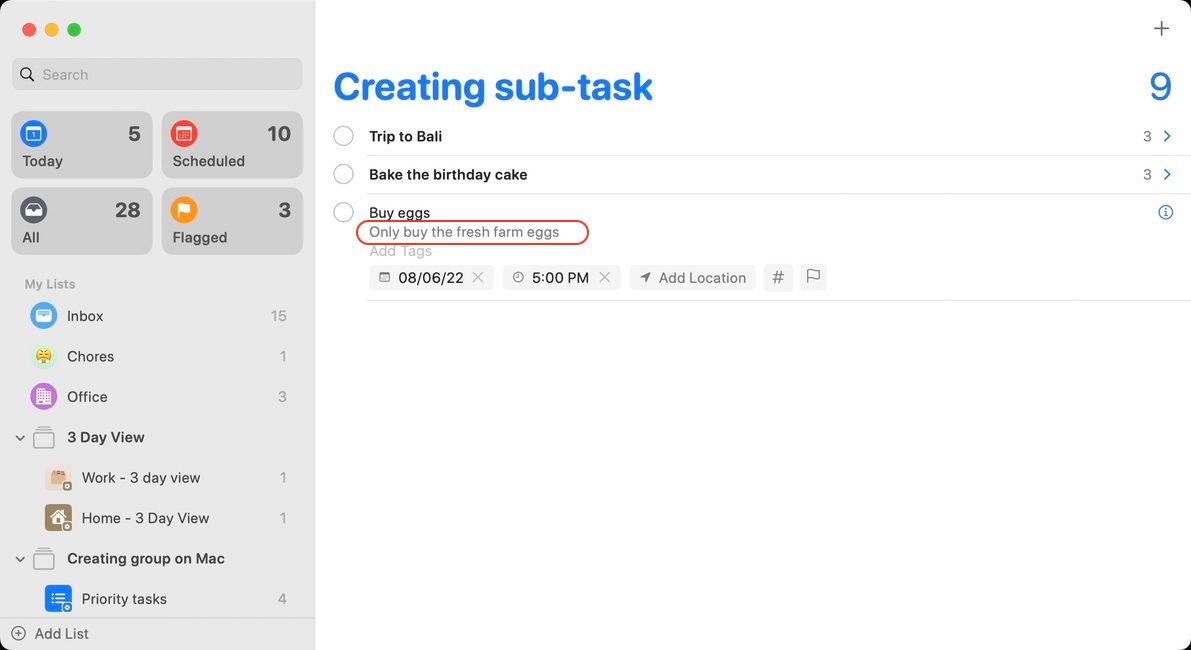
- As you can see, our Trip to Bali has a sub-task. To create more sub-task, tap inside a sub-task and hit the return key on the keyboard.
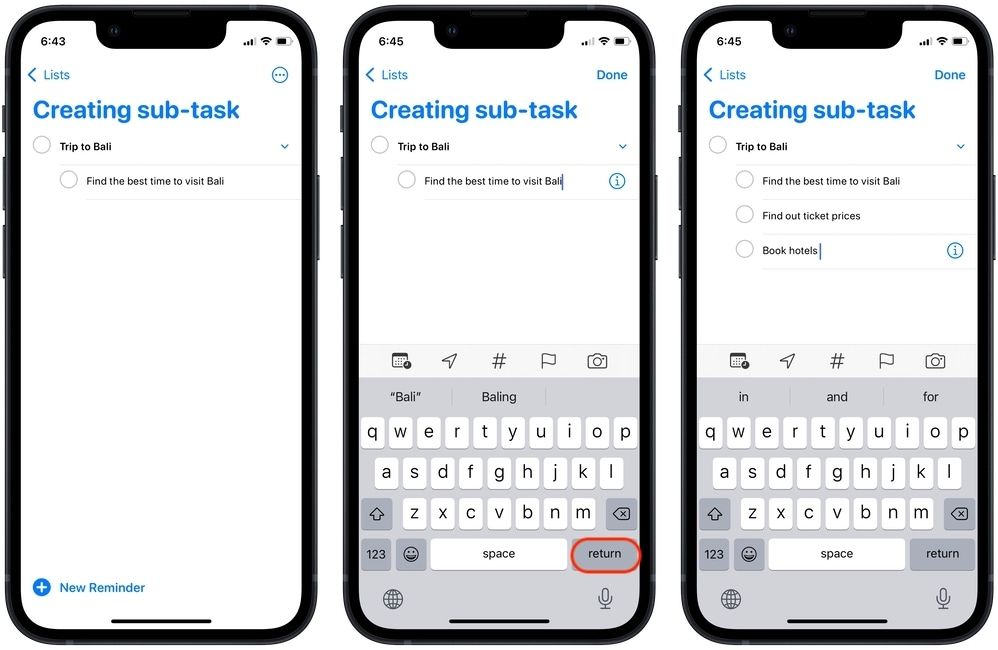
- The main task is shown in bold and there’s a drop-down arrow next to it that you can use to fold the task list.
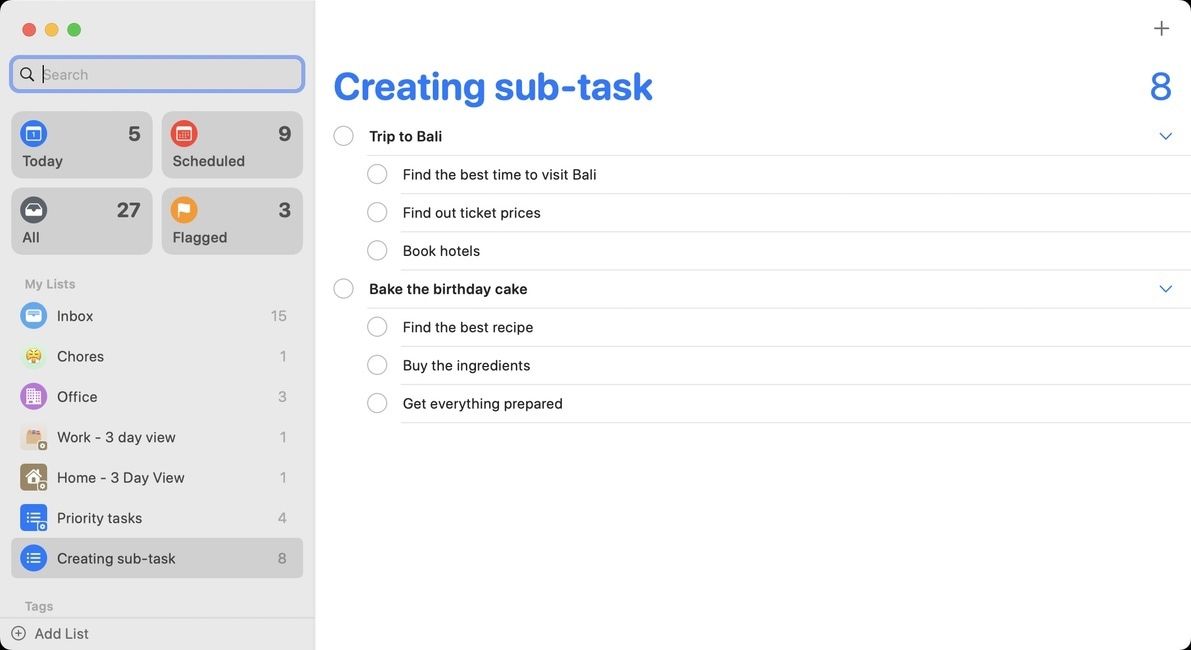
- Similarly, on Mac, you can click and drag a reminder on top of the other to create a sub-task.
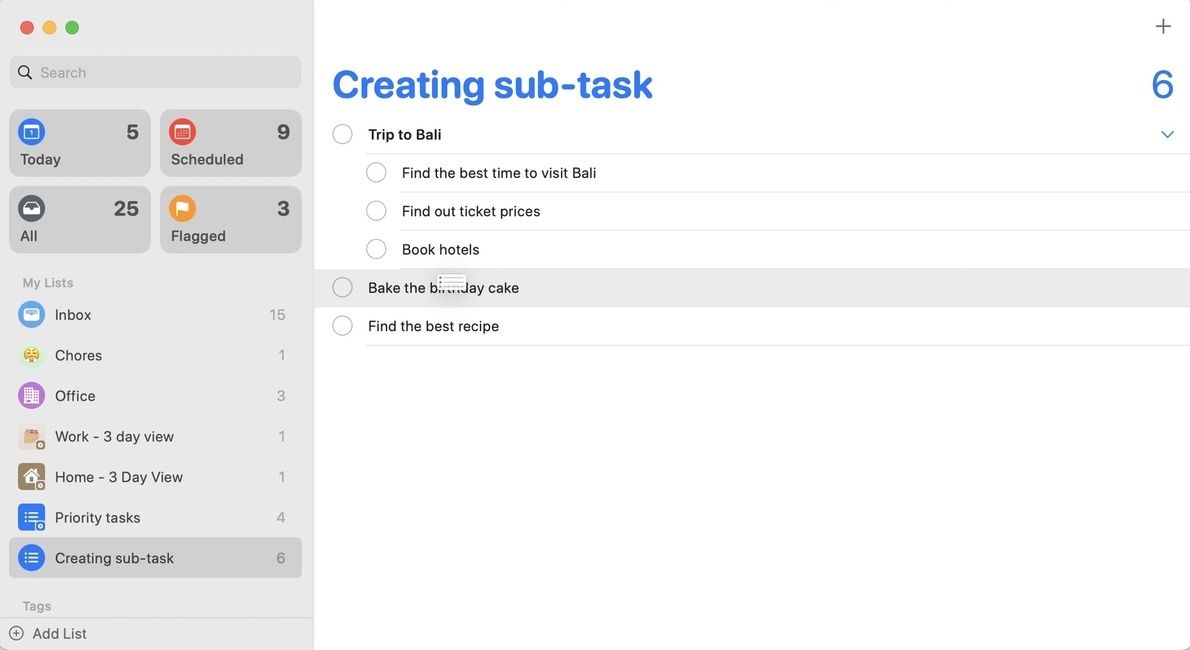
- You can then hit the enter/return key on your keyboard to create more sub-task.
2. Group lists to break up big projects
If you are handling a big project, you can create list groups to organize multiple lists inside a group. The steps of creating a group are similar to that of creating sub-tasks. The only difference is that instead of nesting the second list under the first list, it gives you an option to create a group that will house the two lists.
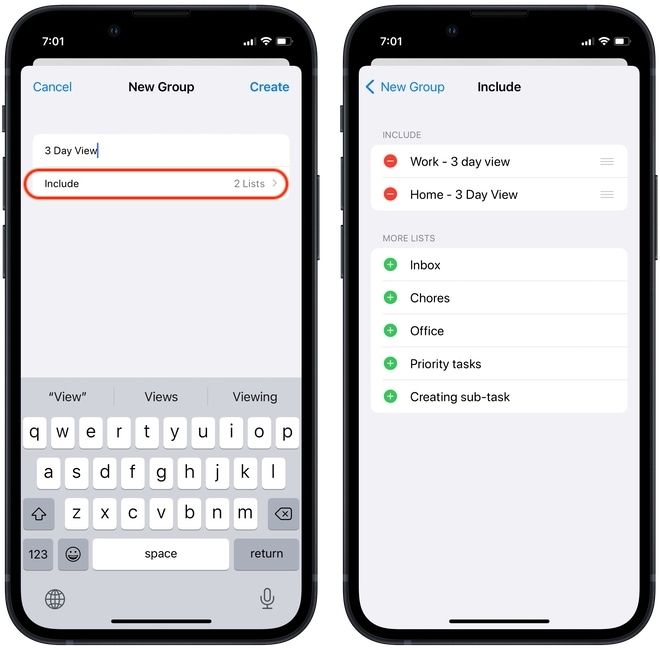
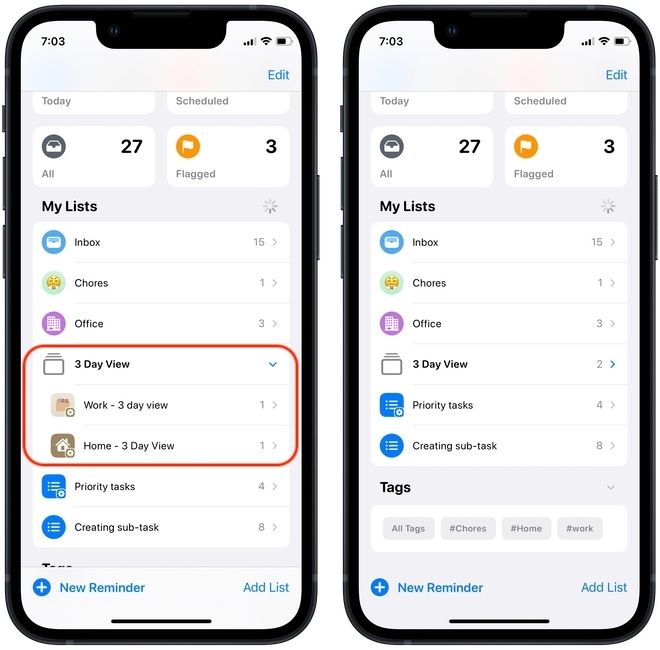
Here’s an example to make it more understandable. Suppose I want to group the Work and Home 3 Day view smart lists under a parent 3 Day View List. I will tap and hold on a list name (doesn’t matter which), and drop it on top of the second list.

Now, you will see the top to create a new group. You can name the group and tap on Create button in the top-right to create the group. To add more lists to the group, tap on the Include option and select the list you want to add. Since I don’t want to add more lists to the group, I will just save the original group.
As you can see, now I have a 3 Day View group that holds both my work and home lists. I can tap on the group name to expand or collapse the list view.
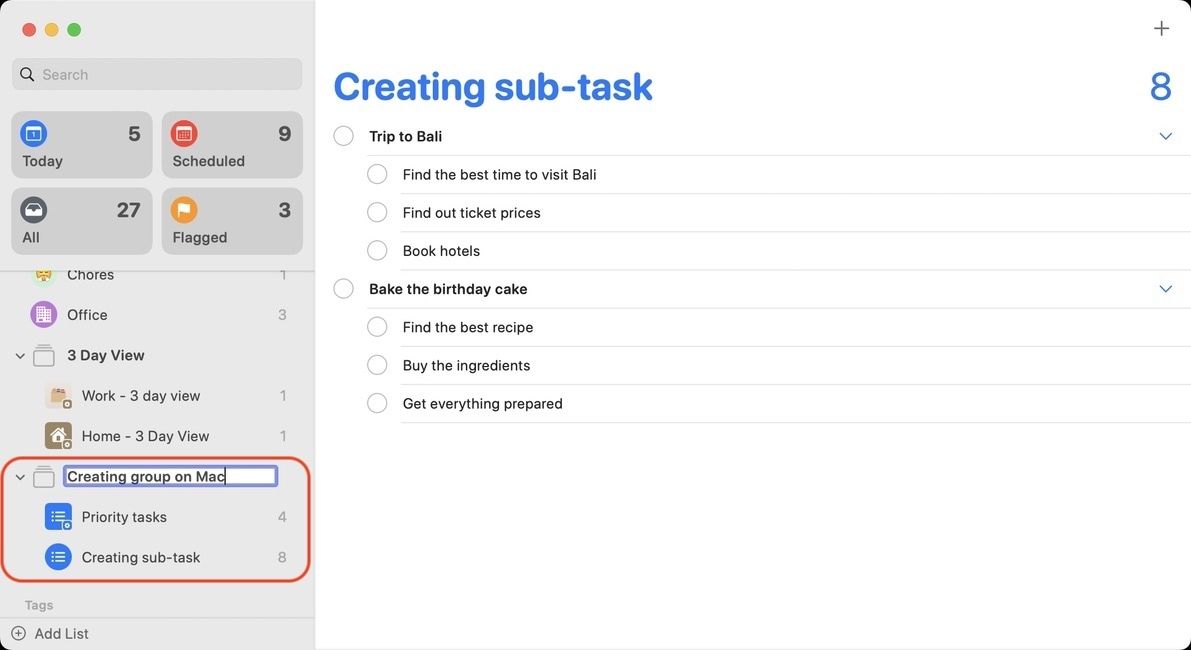
The steps are the same on the Mac. All you need to do is click and drag a list on the top of the other, and you will get the option to create a group.
3. Use natural language processing
The Reminders app also support basic natural language processing for recognizing dates and time. So, you can type something like, buy eggs at 5 PM tomorrow, and the app will recognize the time and date.
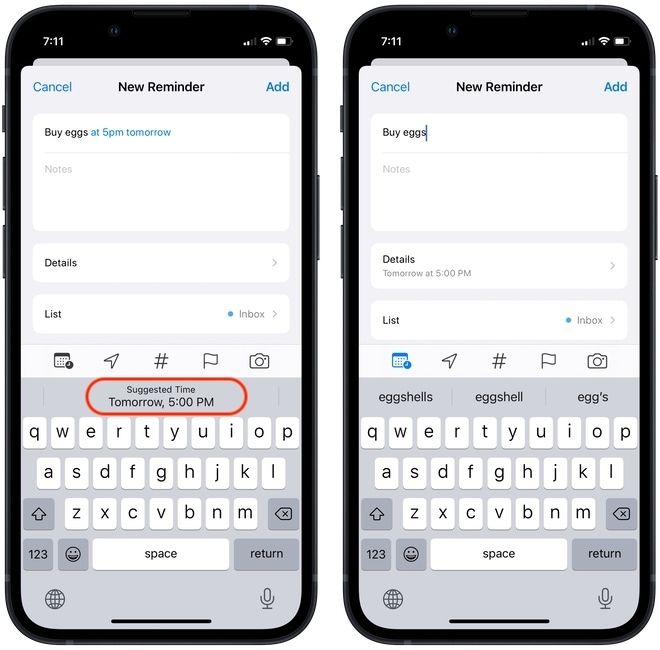
The natural language processing is nowhere as good as the one on Fantastical calendar app, but it works for simple reminders and saves a ton of time. Also, you can use this on both iPhone and Mac.

4. Add notes to reminders
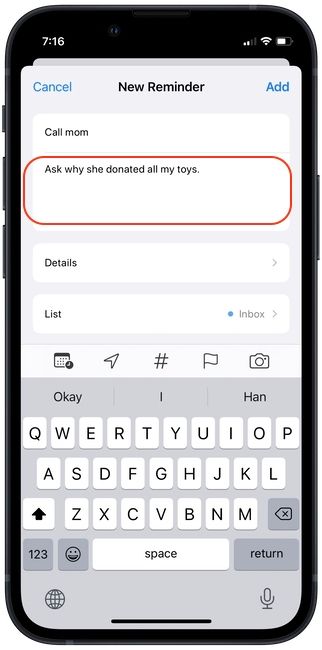
I love that you can add notes inside reminders to add extra information for a task. For example, you can add context for a call you want to make or a message you want to write, etc. When creating a reminder on iPhone or Mac, tap in the notes filed and type the extra information you want.
5. Attach photos and documents to reminders
Apart from adding text notes, you can also attach photos and documents to a reminder. Again, this is helpful for adding context to the tasks you are adding. To add an image or document, tap on the camera icon when creating a new reminder.
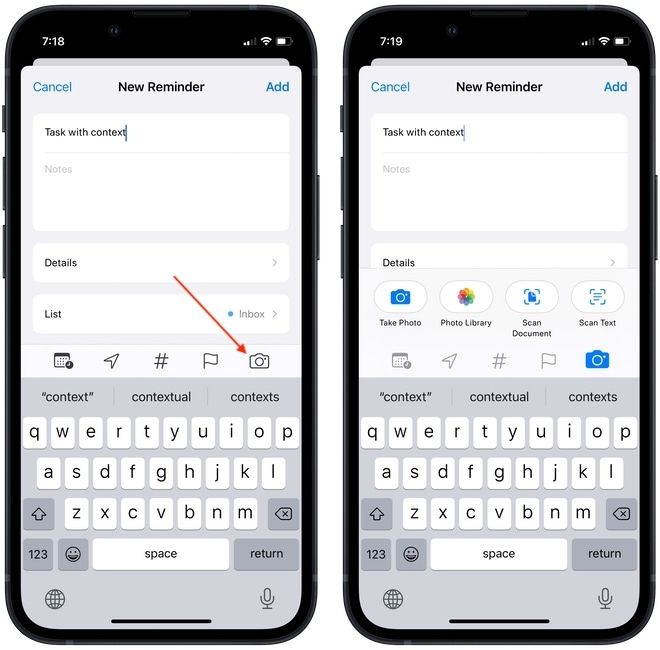
You can choose to take a photo, select a photo from your Photos library, scan a document, and even use iOS’s scan to text function to scan written text.
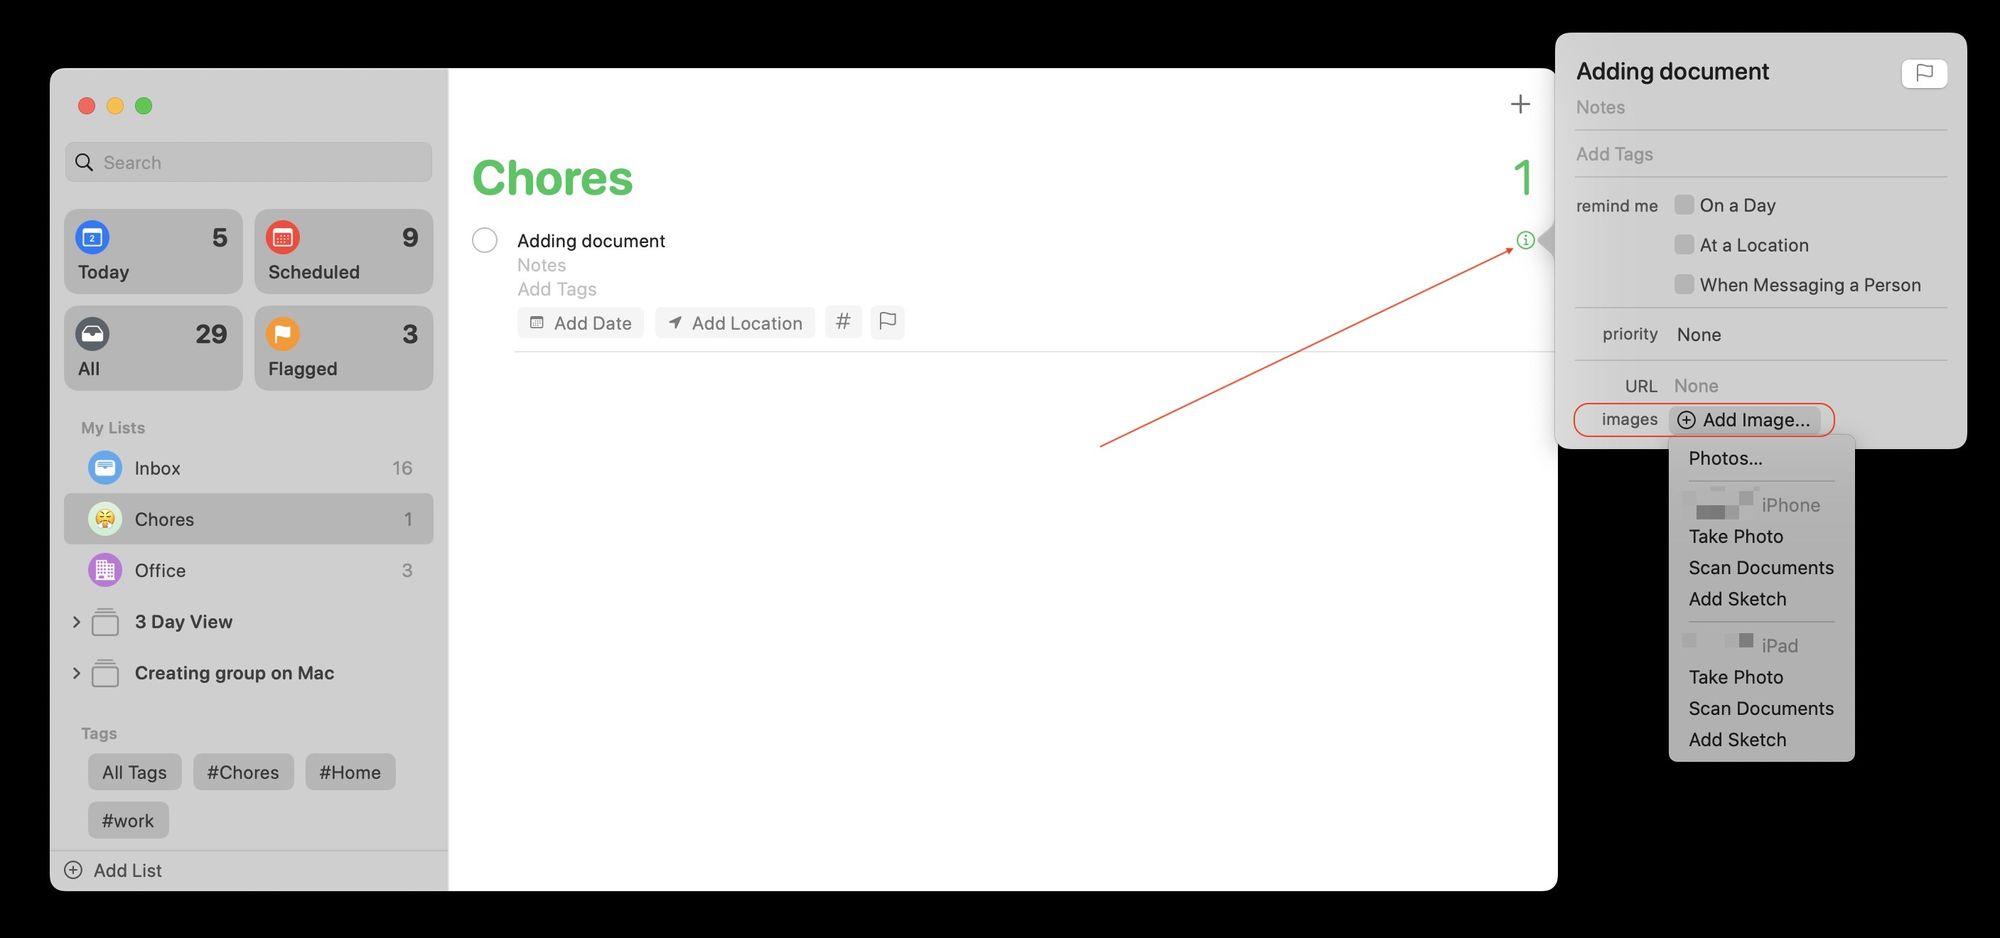
On your Mac, you will need to click on the (i) button and then Add image button. However, note that you won’t be able to add a document without an iPhone or iPad. The Mac will only let you add images from your Photos library or scan documents using iPhone or iPad.
6. Use app integrations
This is one of my favorite features of Reminders. I am still surprised as to how many people are unaware of this feature. Reminders integrate with most of the Apple apps along with several third-party apps.
When using an app, you can ask Siri to “Remind me about this,” and it will add a reminder with a backlink to the specific app. For example, with the notes app open, I can say ‘Hey Siri, remind me about this”, and Siri will create a reminder with a link to that specific app. You can do the same in Safari, Apple Pages, and more.

My favorite writing app, Ulysses also supports this feature. So when I want to check back on a specific sheet in Ulysses in the future, I ask Siri, and it adds a reminder with the link back to that sheet in Ulysses.
I love this feature, and once you start using it, you will see how much easier your life will become.
7. Use shortcut to quickly add reminders on Mac
The Shortcut app is powerful, and my workflow essentially revolves around this. From launching apps to combining images to performing complex automation, the app never seems to amaze me. If you have not used the app before, I highly recommend going through our best Siri shortcuts guide to see what amazing things you can achieve with this app.
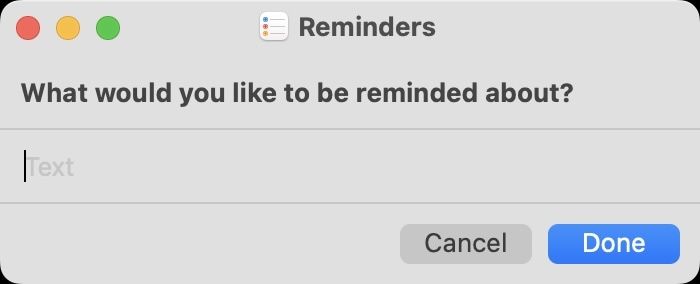
Anyway, coming to the point, one thing I missed about using Things 3 was its quick add window that I could activate with a keyboard shortcut on Mac and quickly add tasks. Since this is not possible in the Reminders app, I created a quick shortcut that lets me do exactly that.
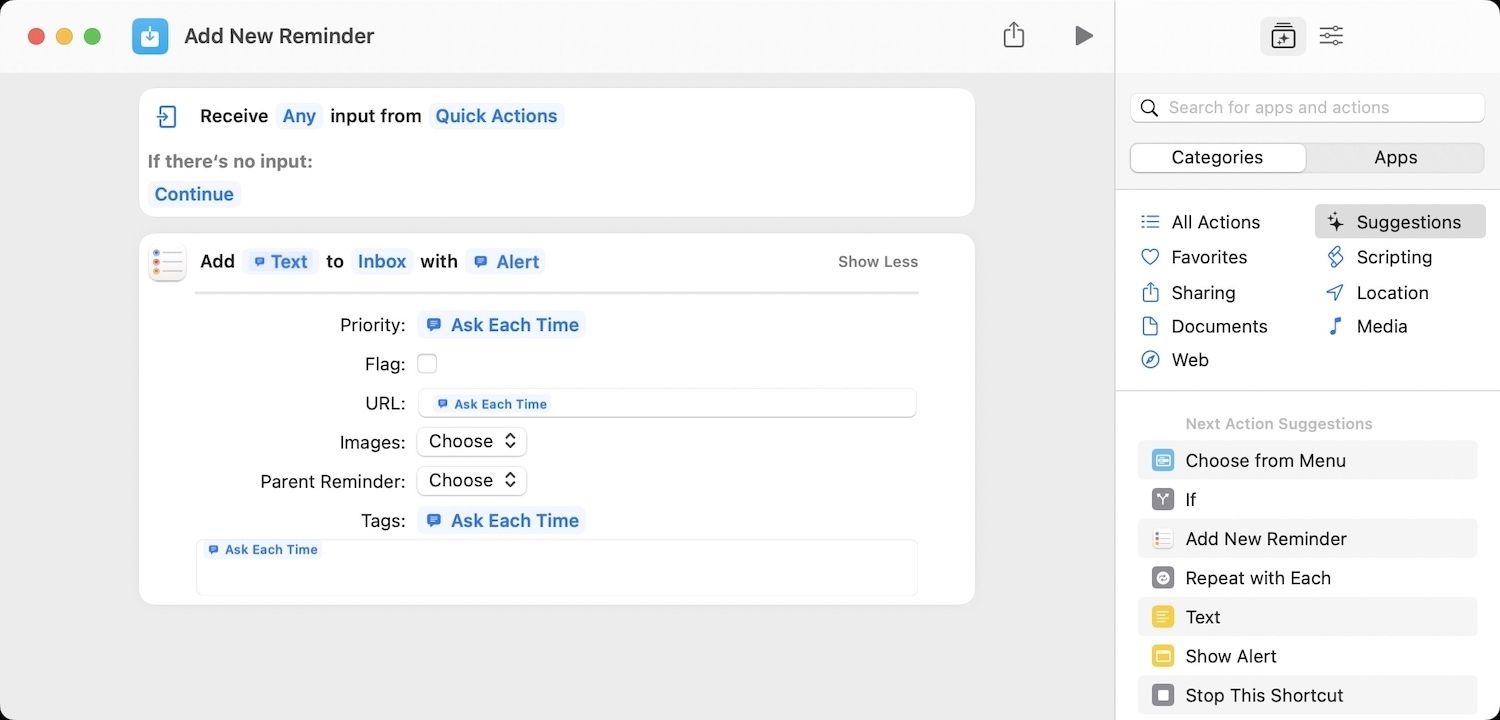
I will publish another article on how to create this quick entry shortcut and link it here when it goes live. For now, you can click on this link to download this shortcut and assign your own keyboard hotkey. When you use the hotkey, it will open a quick add window for reminders as shown below. Since I started using this shortcut, I no longer miss the quick add feature of Things 3.
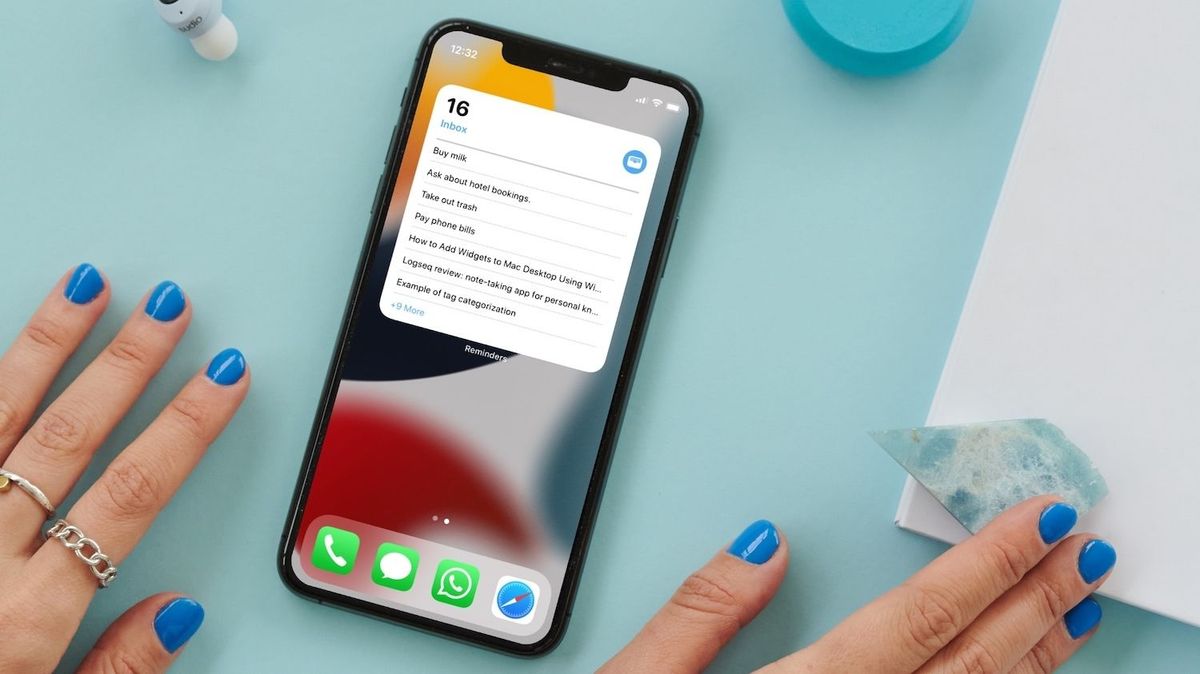
8. Use widgets
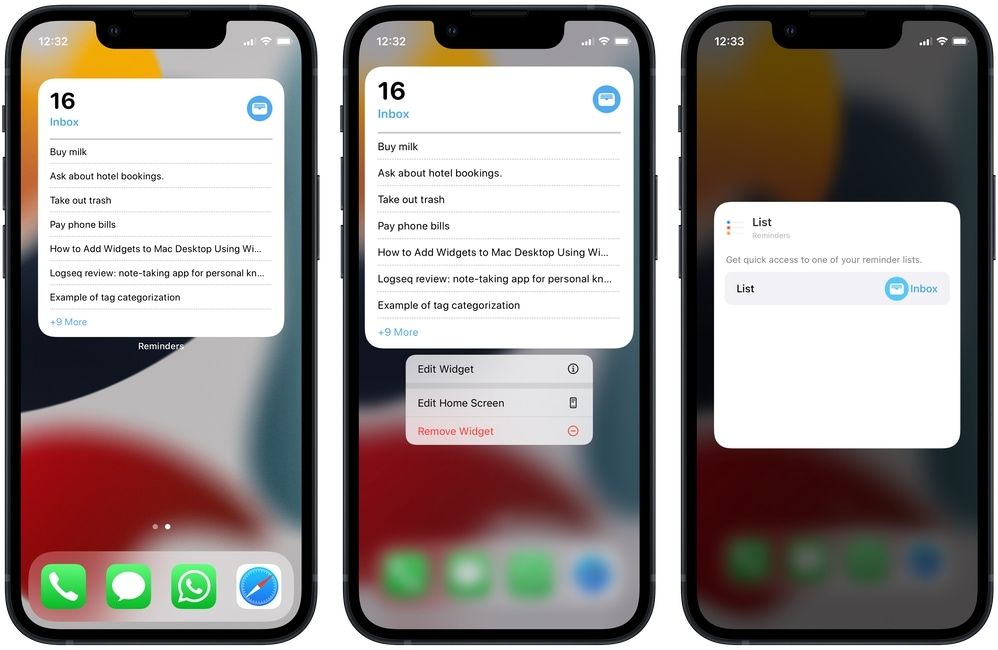
The final Reminder tip that I want to share is to use iPhone widgets. iPhone widgets are a great way to check your tasks in reminders, and I use widgets to quickly look at my upcoming tasks. You can edit the widgets to show any list you want. Sadly, you can’t add desktop widgets on Mac for reminders, but you can add them to the widgets panel, which can be accessed by swiping from the right edge of the trackpad.
Top Apple Reminders tips: final thoughts
I hope that you found at least one tip that will help you enhance your Apple Reminders journey. It's one of the best free apps that you can use to manage your tasks. My only recommendation is that you use the app for your tasks before moving onto something shinier as it works well and doesn't cost a penny.


